Loop of Life Abyss Puzzle Solution
☆ Best: Side Quests | Weapons | Armor | Skills
★ Controls | Best Items | What to Do First
☆ Characters: Damiane | Oongka | Kliff
★ Trending: Excavatron | Hornsplitter | Blix
┣ Dragon's Chamber | Azure Moon Labyrinth
┗ Bianca | Strongbox | How to Steal | Pets
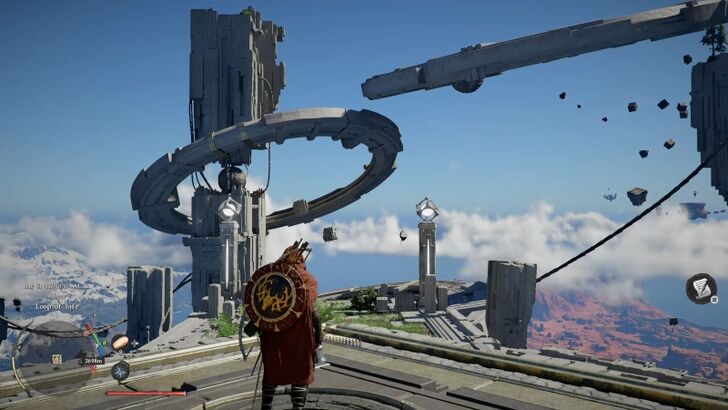
Solve the Loop of Life abyss puzzle in Crimson Desert! Learn the puzzle solution and where to find the abyss location here.
List of Contents
Loop of Life Puzzle Solution
Power the Rings with the Panels
| Step | How to Solve |
|---|---|
| 1 | 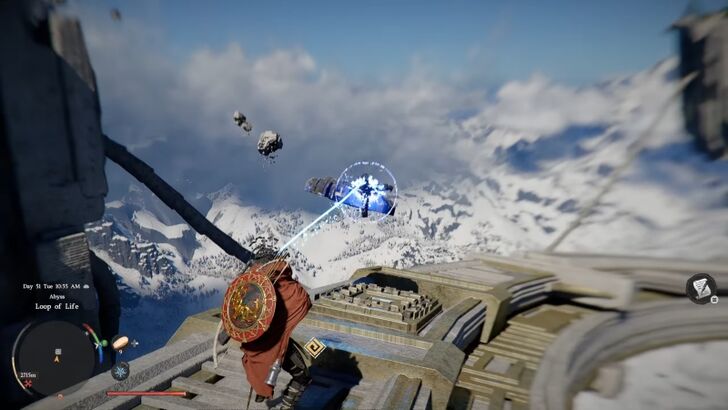 Drop down to the first ring. Grab the first panel with Axiom Force and insert it on its slot. You may need to use jump + Force Palm to nudge it in. |
| 2 | The second panel is floating by the debris. Grab it towards the taller platform to access it easily on the next step. Tip: You can activate the first ring later if you have trouble walking on the rotating ring. |
| 3 | Jump or grapple over to the taller platform and grab the second panel. Place it into the slot to deactivate the door barrier. Then, grab the third panel floating inside. |
| 4 | You need the second panel for later. To dislodge it, use Axiom Force and drag the right joystick or middle-mouse to a direction until it dislodges. Do not use the push/pull function as this will not remove the panel. |
| 5 | Move the two panels closer to the next ring above to access them on the next steps. Then, slot a panel onto the second ring. |
| 6 | 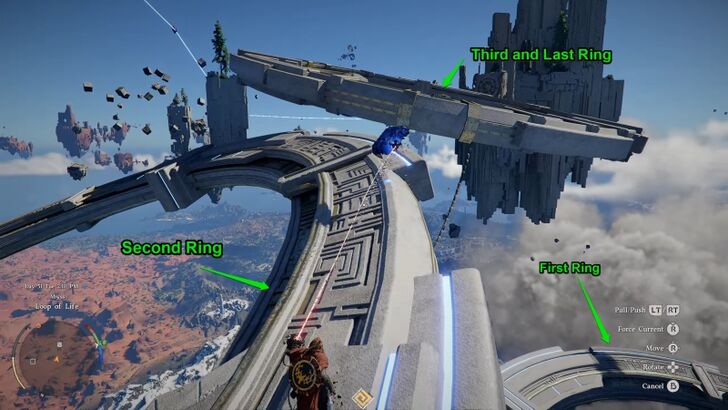 Grab the remaining panel and move it over to the third and last ring and slot it in to activate the circular generator. |
| 7 |  Cling onto the circular generator and use Force Palm to restore the abyss. |
| 8 | 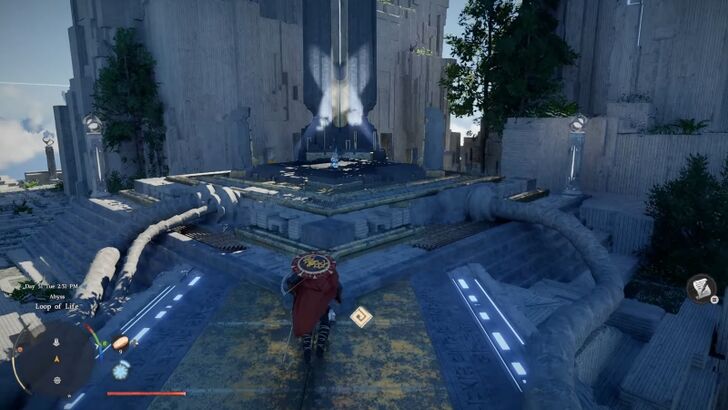 Climb to the platform on top to obtain the artifact and complete the challenge. |
Finding the panels around Loop of Life and slotting them into the rings will activate the generator to restore the abyss.
Loop of Life Puzzle Location
Use the teleporter in Sanctorum of Darkness
| Location | Map |
|---|---|
 |
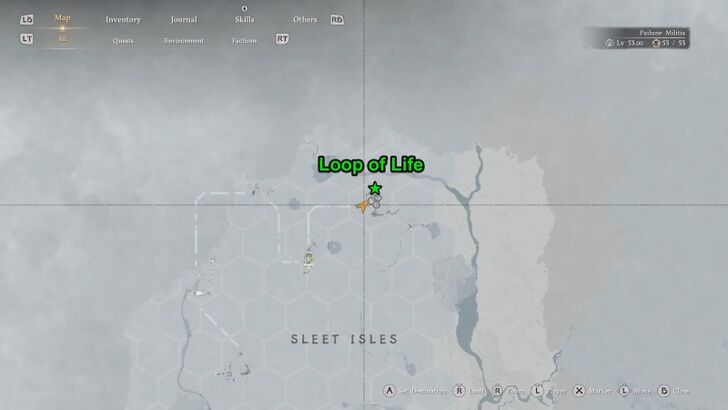 |
Reach the topmost platform in Sanctorum of Darkness beyond its artifact spot, and follow the path to find the teleporter for Loop of Life.
Sanctorum of Darkness Abyss Challenge Solution
Loop of Life Puzzle and Challenge Rewards
Puzzle and Completion Rewards
| Rewards |
|---|
| ・ Abyss Artifact x1 |
Crimson Desert Related Guides
Exploration Challenges
| Abyss | Secret Places | Ancient Ruins | |||
| Sanctums | Spires |
Mastery Challenges
| Sword | Shield | ||||
| Bow | Spear | ||||
| Two-Handed Weapon | Rapier and Shield | Gun | |||
Combat Challenges
| Training | Operation |
Life Challenges
| Hunting | Life | ||
| Above the Law | Challenges and Changes |
Minigame Challenges
| Duel | Mind Games |
Other Abyss Puzzles
Comment
Author

Loop of Life Abyss Puzzle Solution
Rankings
- We could not find the message board you were looking for.
Gaming News

![Star Savior Review [First Impressions] | Engaging, Entertaining, and Expensive](https://img.game8.co/4447603/8f500e9bf666bdb8adb1af478e9dfdbd.png/show)


Popular Games

Genshin Impact Walkthrough & Guides Wiki
Umamusume: Pretty Derby Walkthrough & Guides Wiki
Crimson Desert Walkthrough & Guides Wiki
Monster Hunter Stories 3: Twisted Reflection Walkthrough & Guides Wiki
Honkai: Star Rail Walkthrough & Guides Wiki
Pokemon Pokopia Walkthrough & Guides Wiki
The Seven Deadly Sins: Origin Walkthrough & Guides Wiki
Wuthering Waves Walkthrough & Guides Wiki
Zenless Zone Zero Walkthrough & Guides Wiki
Arknights: Endfield Walkthrough & Guides Wiki


Recommended Games
Fire Emblem Heroes (FEH) Walkthrough & Guides Wiki
Diablo 4: Vessel of Hatred Walkthrough & Guides Wiki
Cyberpunk 2077: Ultimate Edition Walkthrough & Guides Wiki
Yu-Gi-Oh! Master Duel Walkthrough & Guides Wiki
Super Smash Bros. Ultimate Walkthrough & Guides Wiki
Pokemon Brilliant Diamond and Shining Pearl (BDSP) Walkthrough & Guides Wiki
Elden Ring Shadow of the Erdtree Walkthrough & Guides Wiki
Monster Hunter World Walkthrough & Guides Wiki
The Legend of Zelda: Tears of the Kingdom Walkthrough & Guides Wiki
Persona 3 Reload Walkthrough & Guides Wiki


All rights reserved
© Pearl Abyss Corp. All Rights Reserved.
The copyrights of videos of games used in our content and other intellectual property rights belong to the provider of the game.
The contents we provide on this site were created personally by members of the Game8 editorial department.
We refuse the right to reuse or repost content taken without our permission such as data or images to other sites.