 under the page's title to be notified of any updates!
This survey will take about 1 minute.
Your answers will help us to improve our website.
Crimson Desert
Hernand Region Guide
☆ Best: Side Quests | Weapons | Armor | Skills
★ Controls | Best Items | What to Do First
☆ Characters: Damiane | Oongka | Kliff
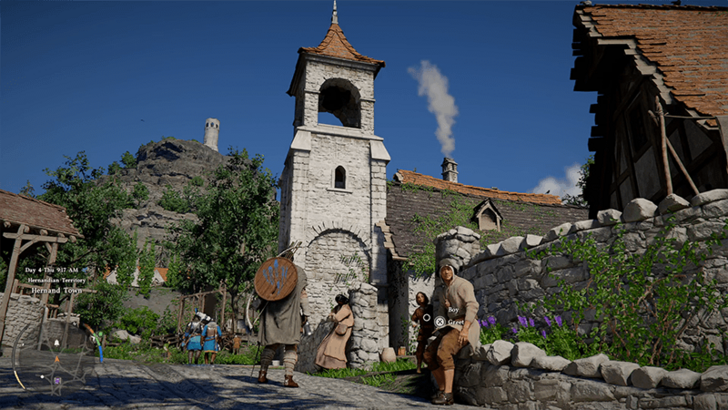
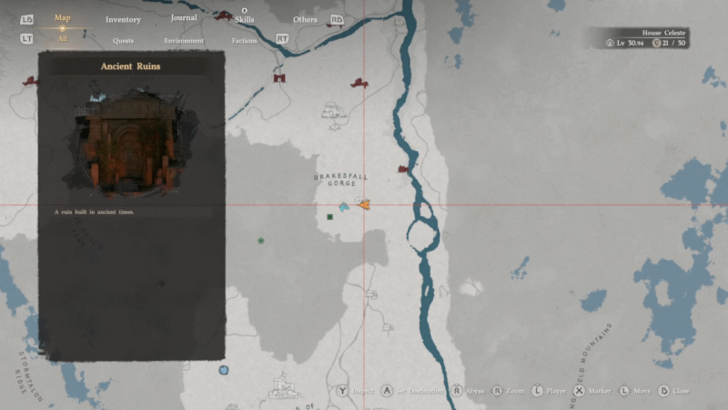
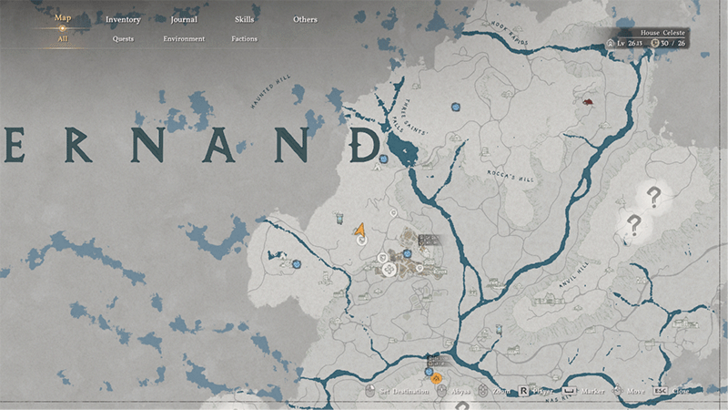
Hernand is the starting region when you begin your adventure in Crimson Desert. See a map of Hernand as well as the known factions operating in this area!
 Attention! |
We are still rushing to add more pins to help with your exploration and collection progress! |
|---|
List of Contents
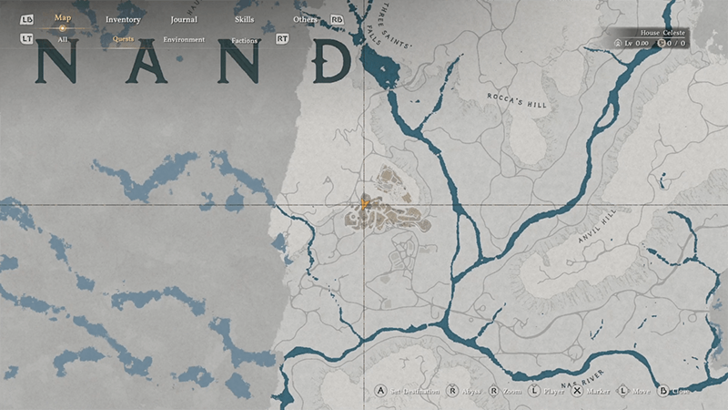
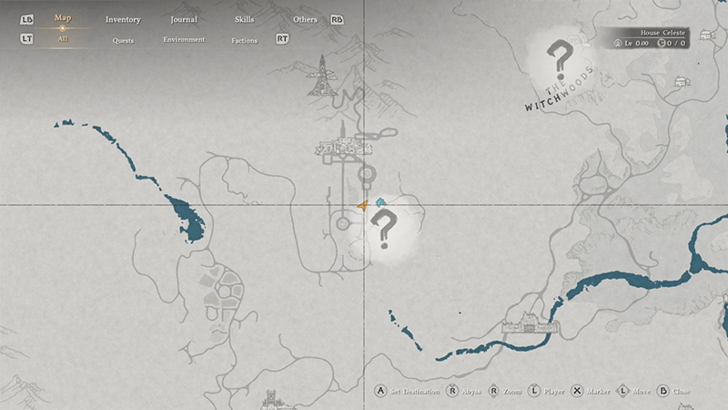
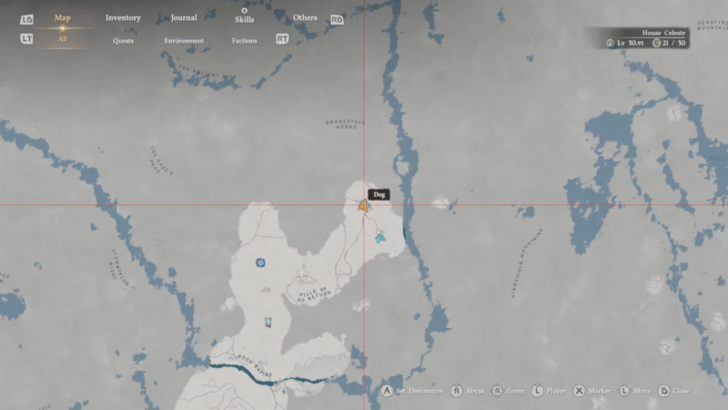
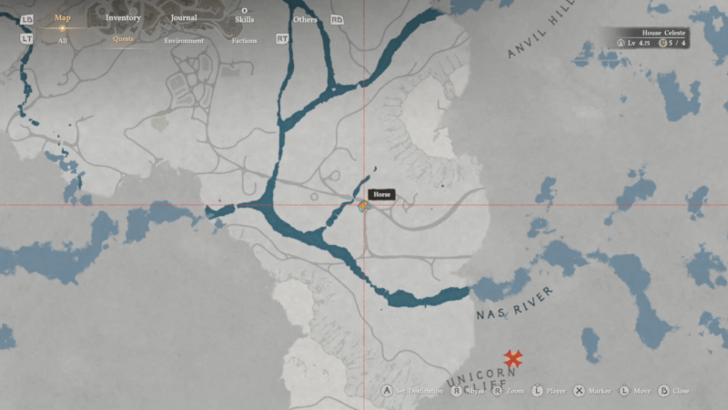
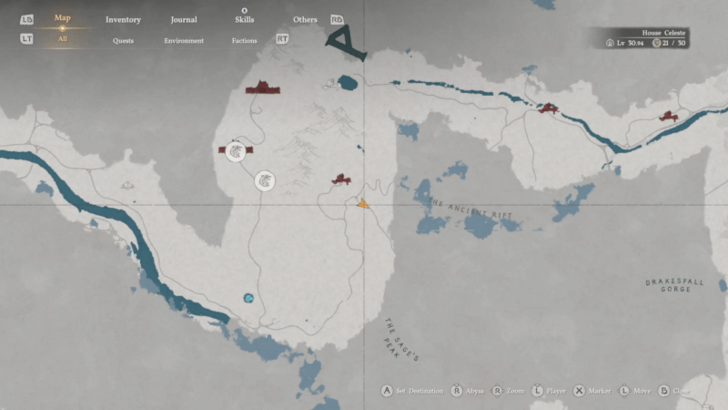
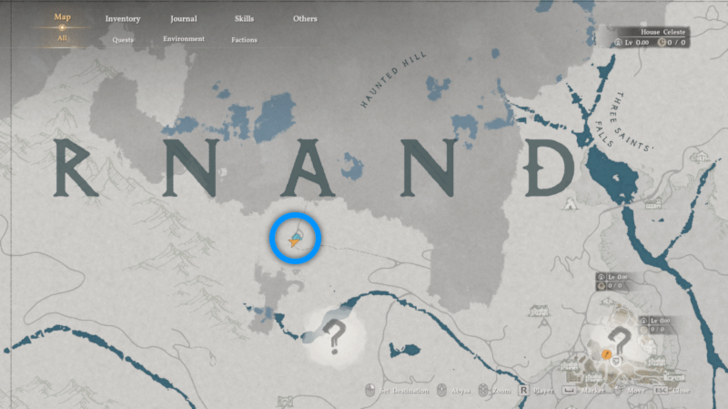
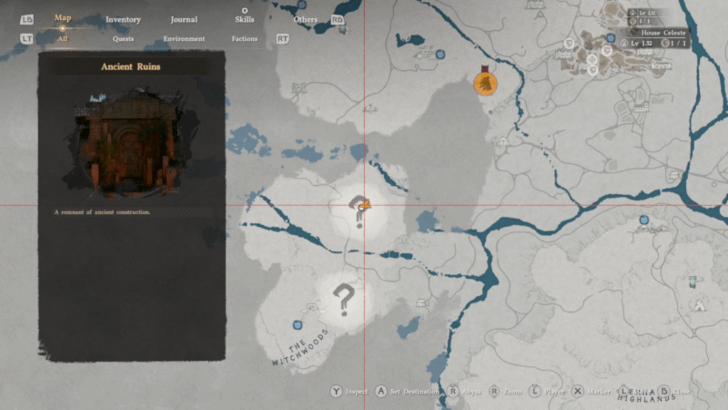
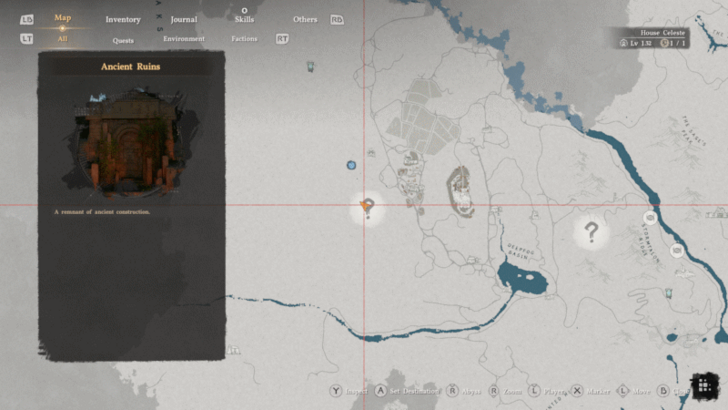
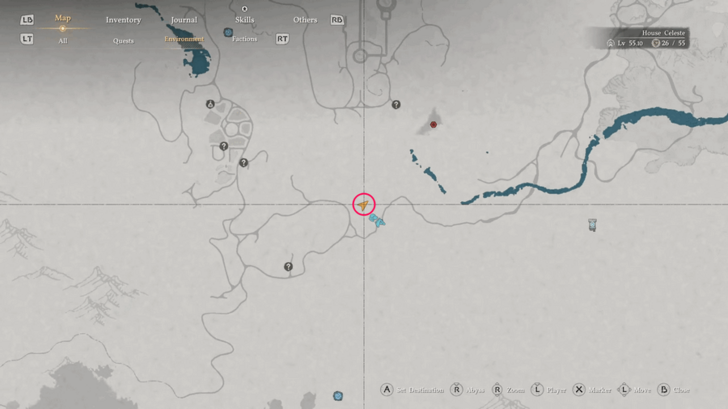
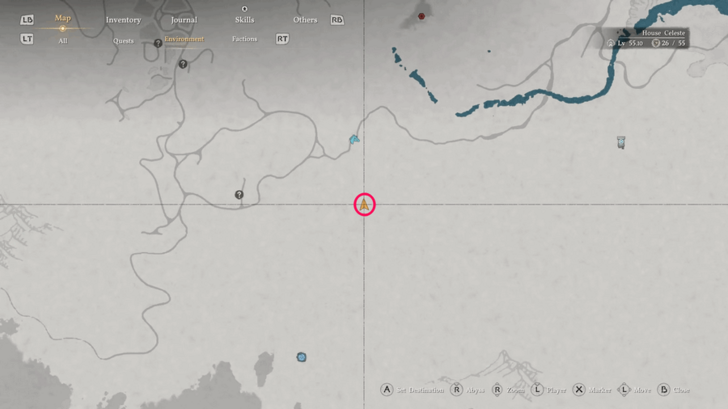
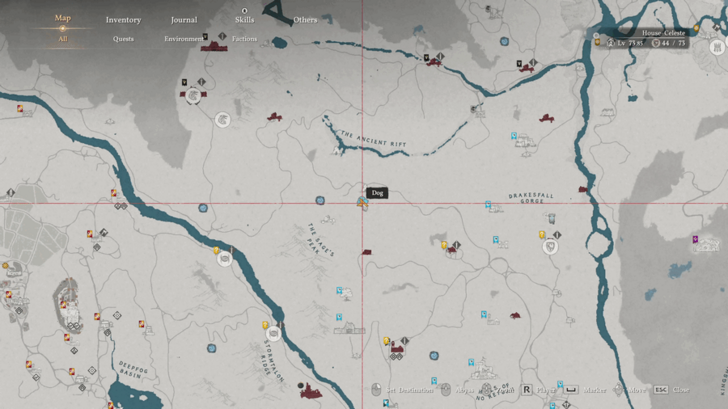
Hernand Regional Map
| ・Use the dropdown menu on the map sidebar to change regional maps.
・To suggest map pins, simply click anywhere on the map. Please list down as much information as you can including map name, reward data or acquisition methods. For images, uploading a full rectangular screenshot with a resolution of at least 728 x 410 pixels will be highly appreciated. We encourage users to Sign Up and Log In to save your progress with the map. |
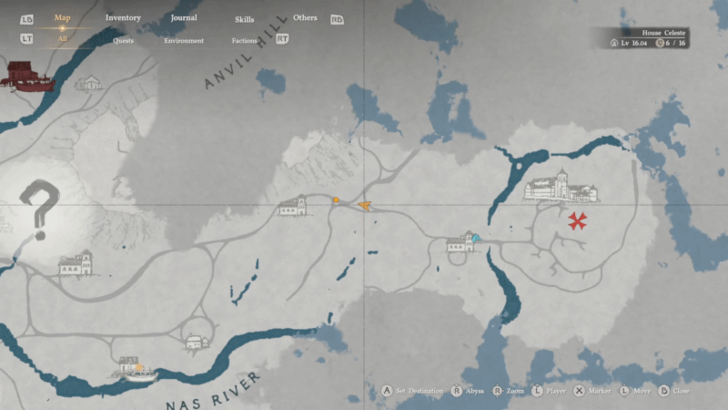
How to Unlock Hernand Map
| Details | Map Location | |
|---|---|---|
|
Toll of Hernand
|
This bell can be found on the northern part of town. Find the clocktower to ring it. Ringing the bell will uncover the fog that covers the map. |
  |
|
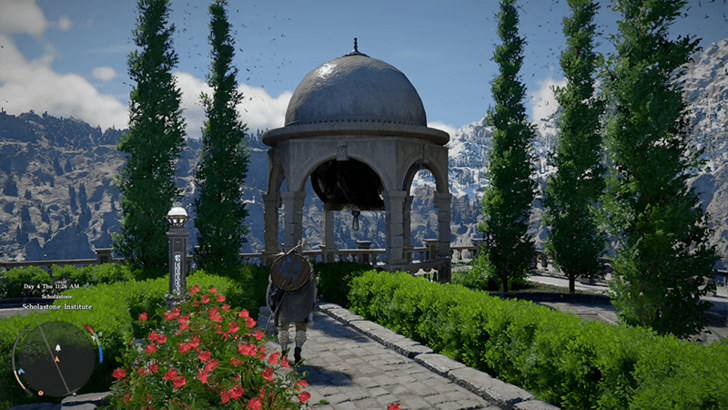
Toll of Scholastone
|
This bell can be found inside a pagod in the plaza at the top of the institute. Ringing the bell will uncover the fog that covers the map. |
  |
|
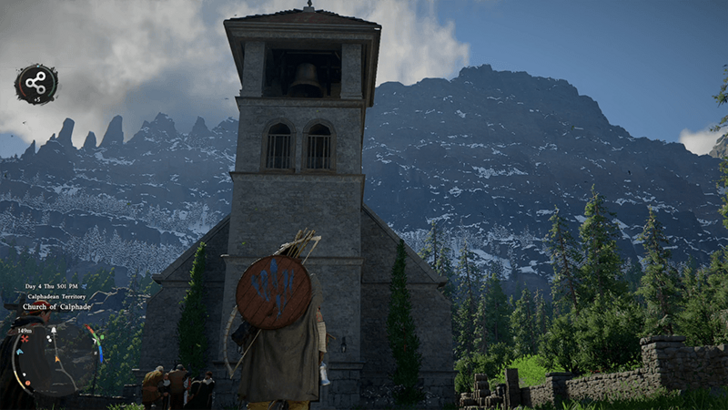
Toll of Calphade
|
This bell can be found in a church in the northern region of Hernand. Ringing the bell will uncover the fog that covers the map. |
 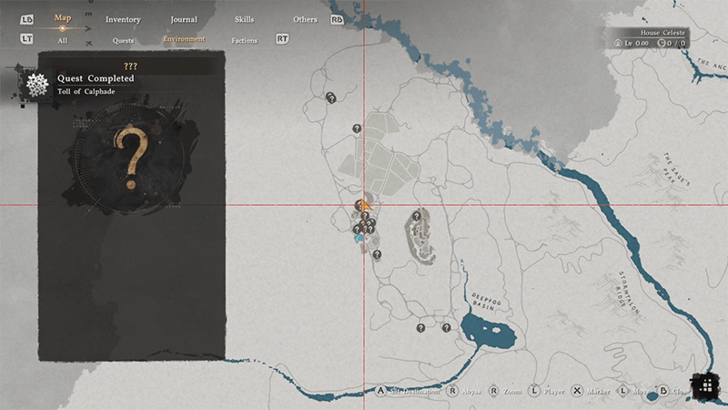 |
You can remove the fog off the map as you normally explore, however the more efficient method is to ring the three bells in Hernand, Scholastone Institute, and Calphade. These will uncover vast areas of Hernand making it easier for you to navigate.
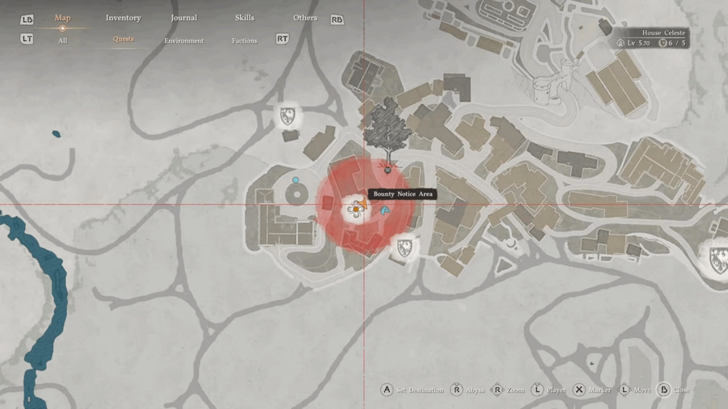
Hernand Points of Interest
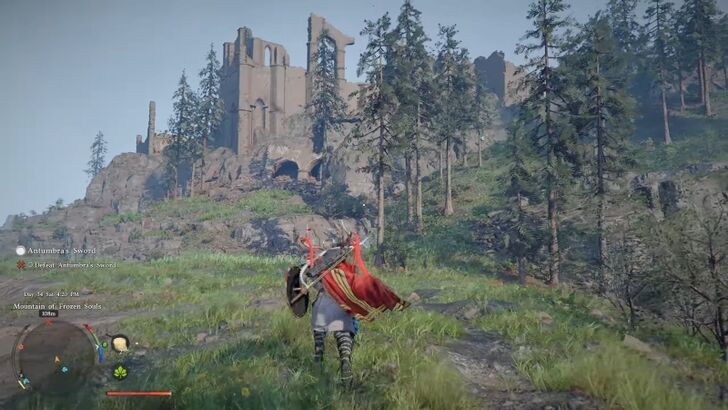
Sealed Abyss Artifacts
| Details | Map Location | |
|---|---|---|
|
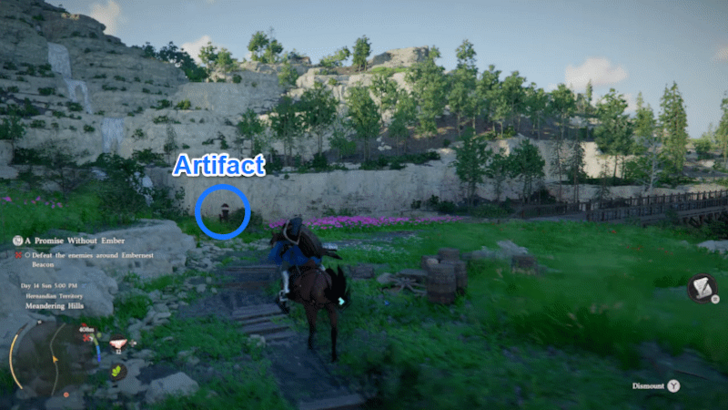
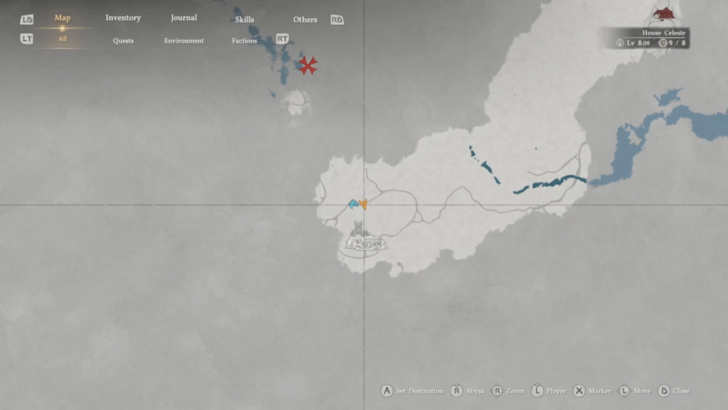
Sword of Trials I
|
Following the road north from Hernand Castle to Meandering Hills, you'll find this artifact just before crossing the great bridge in Three Saints' Falls. |
  |
|
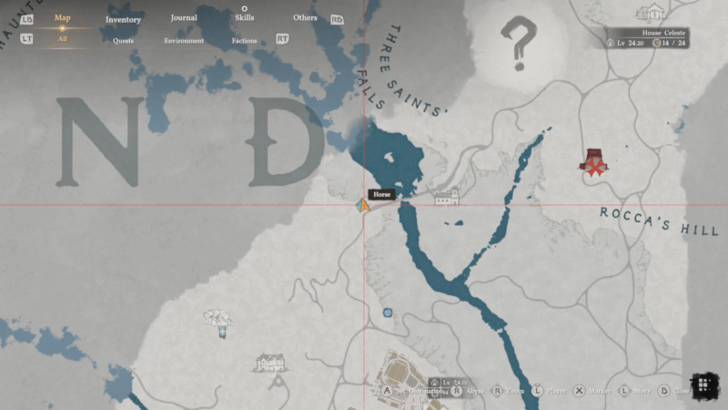
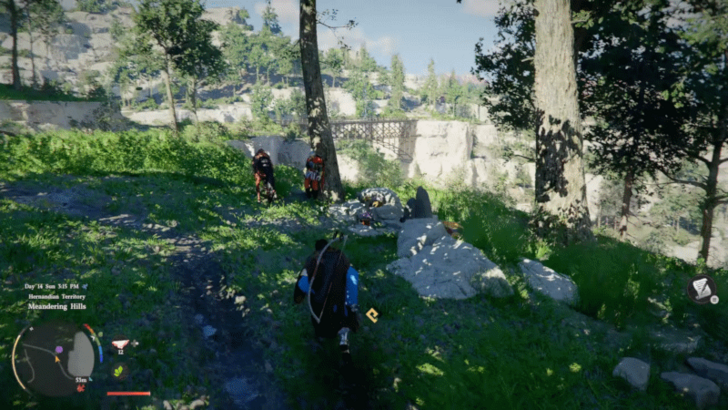
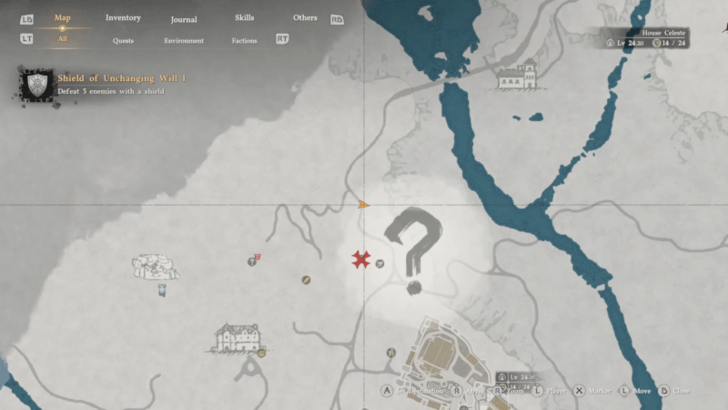
Shield of Unchanging Will I
|
Unlock this challenge by getting the Sealed Abyss Artifact beside the road in Meandering Hills, north of Hernand Castle. |
  |
|
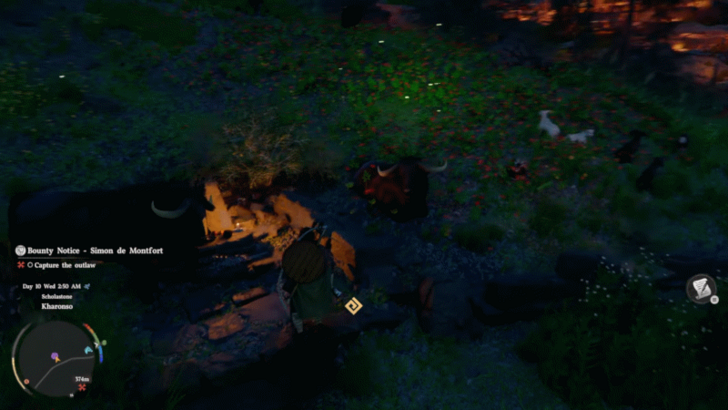
Shield of Unchanging Will II
|
You'll find this Sealed Abyss Artifact surrounded by goats and oxen by the roads of Kharonso in Scholastone. |
  |
|
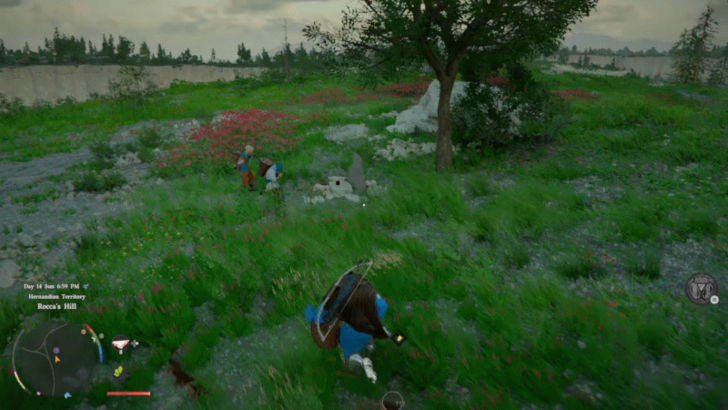
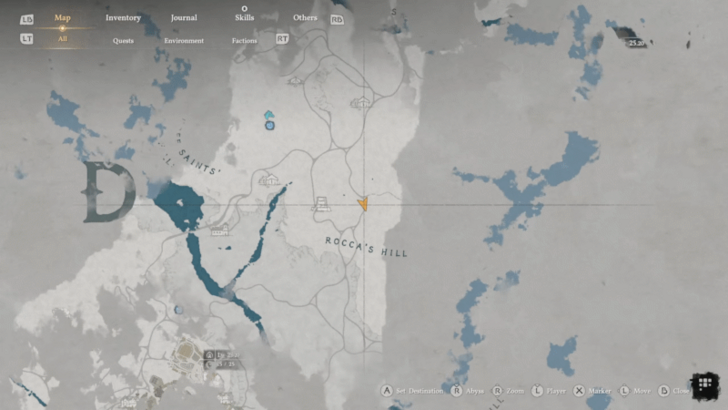
Shield of Unchanging Will IV
|
Grab the Sealed Abyss Artifact from the altar beside the tree near the 3-point crossing in Rocca's Hill to unlock this challenge. |
  |
|
Sharpened Spear II
|
Head southeast from Hernand Castle and cross the Nas River to reach the red Greymane Shrine. You'll find the Sealed Abyss Artifact that unlocks this challenge there. |
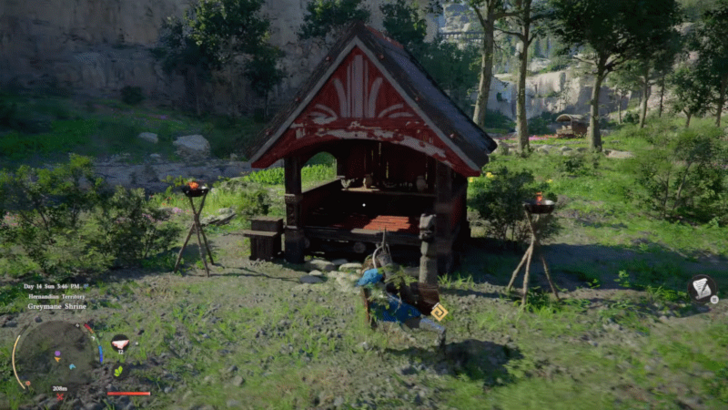  |
|
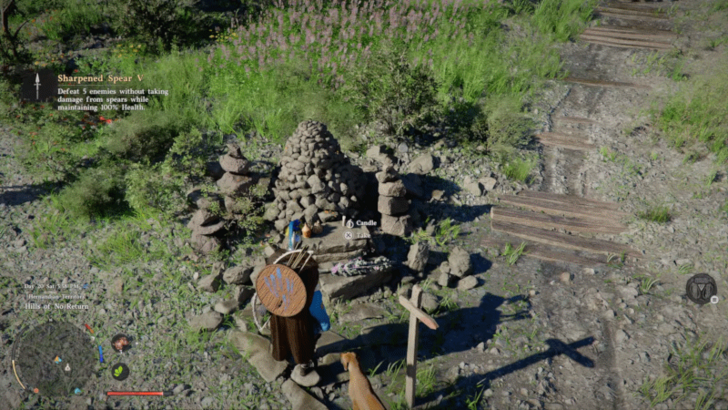
Sharpened Spear V
|
Obtain the Sealed Abyss Artifact along the northeast path in the Hills of No Return. |
  |
|
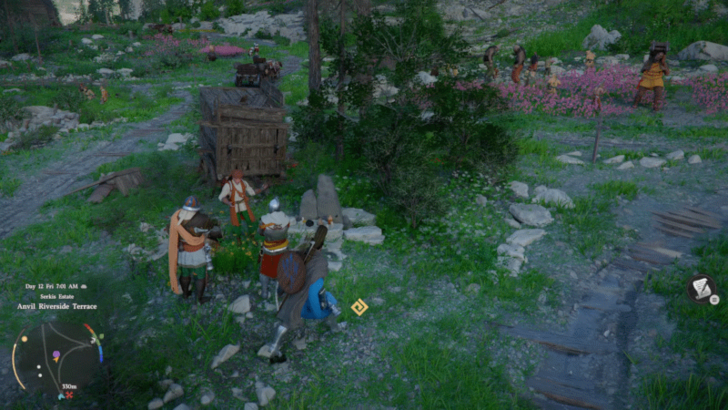
Sliding Down the Slope
|
Unlock the Sliding Down the Slope Challenge by obtaining the Sealed Abyss Artifact at the junction in Anvil Riverside Terrace. |
 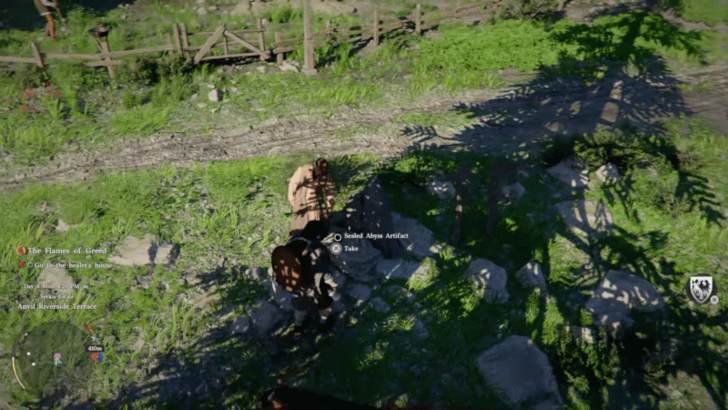 |
|
Feather of the Earth
|
Along the road in Karin Quarry, you'll find an altar made of rocks. Grab the Sealed Abyss Artifact at the altar to unlock this challenge. |
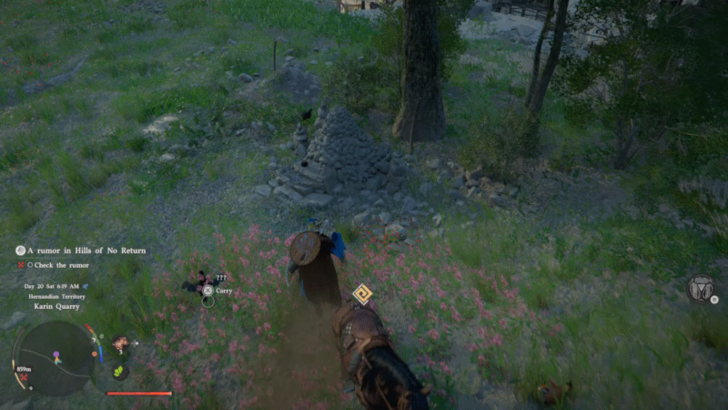  |
|
Animal Meat
|
The Sealed Artifact can be found along the northern main path of The Sage's Peak. |
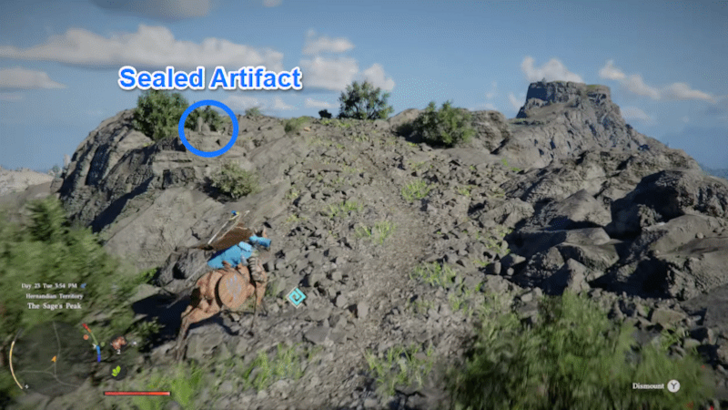  |
|
Night of the Silent Banner Pike
|
You'll find the Sealed Abyss Artifact for this challenge at a crossing in Anvil Riverside Terrace. This spot will be west of the Halssius Trading Post and St. Halssius's House of Healing. |
  |
|
Under a Starlit Sky
|
Found along the path in the farmlands of the Deepfog Basin. |
 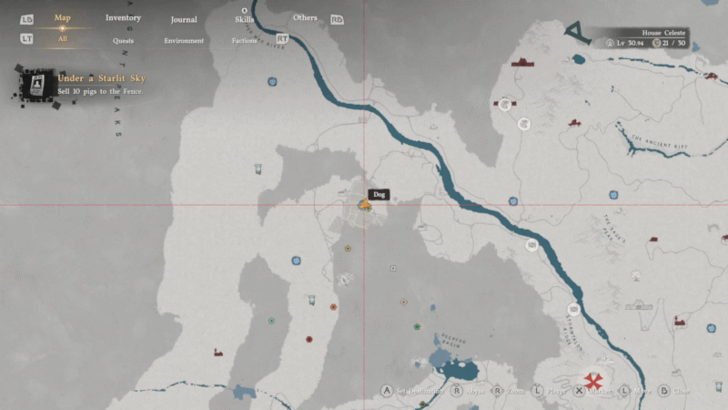 |
|
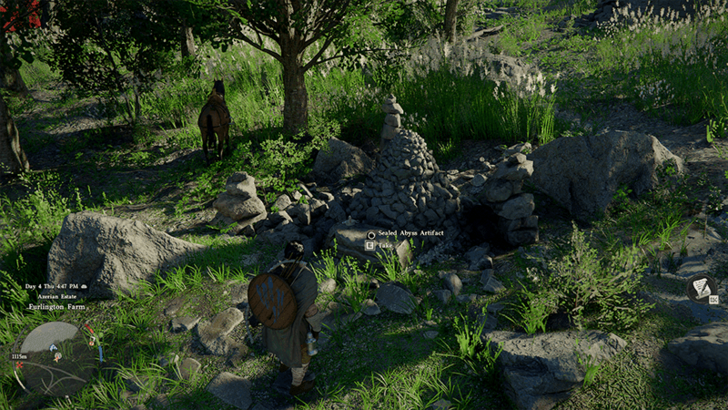
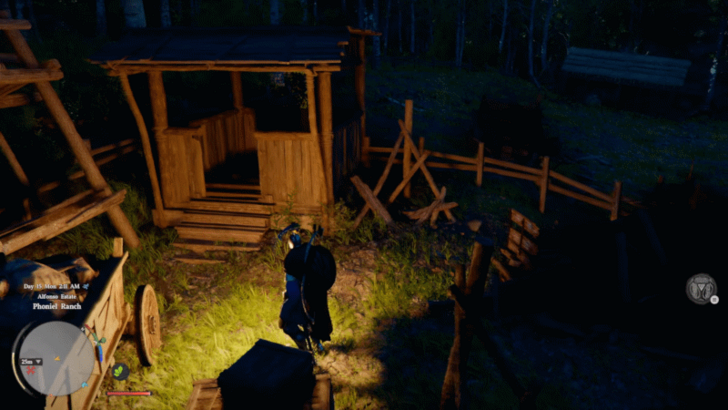
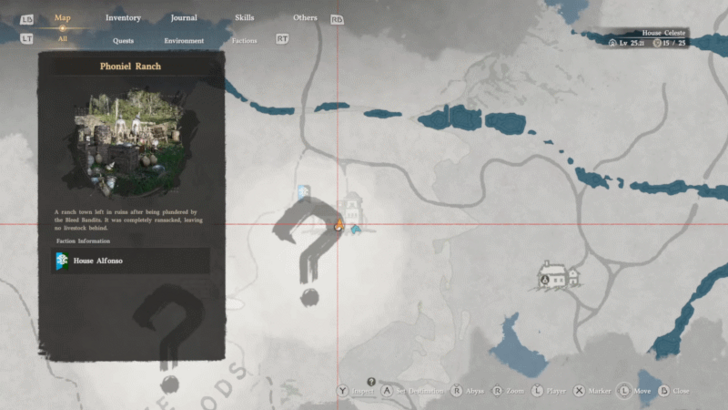
Under the Ashen Banner Pike
|
Obtain the Sealed Abyss Artifact for this challenge on an altar found at the crossing in Phoniel Ranch in the Alfonso Estate. |
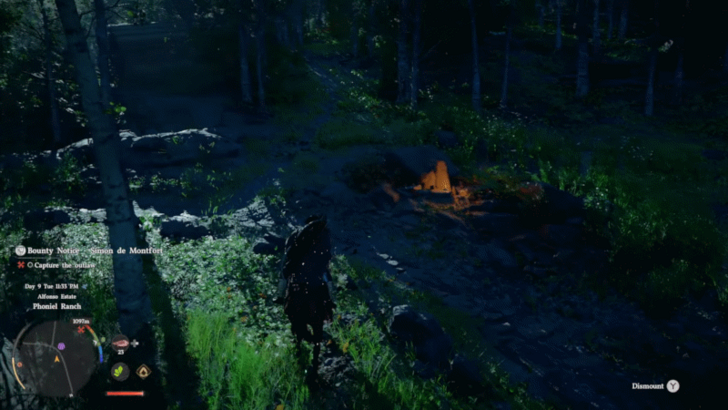  |
|
Abyssal Star That Cleaves the Heavens
|
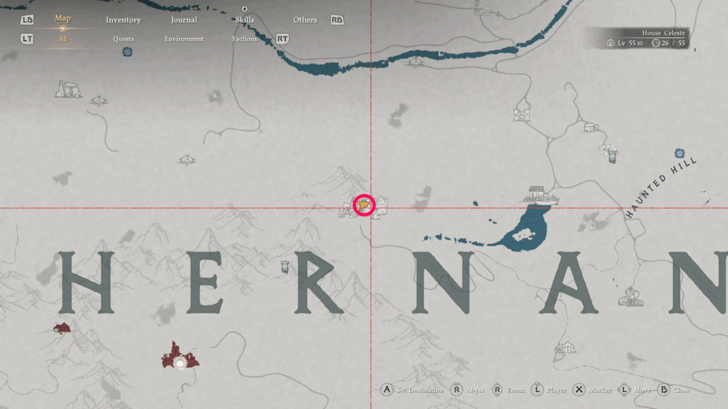
Found on a stone altar at the crossroads along the main path, directly south of Haunted Hill. |
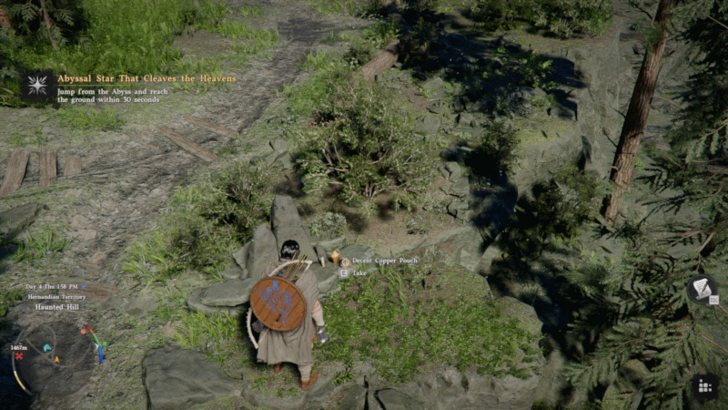  |
|
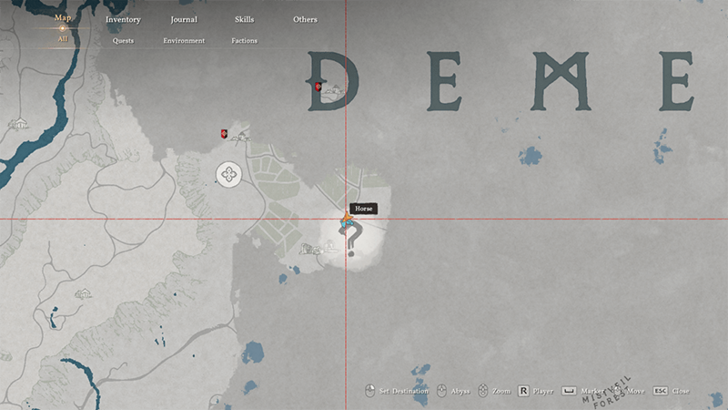
Shield of Unchanging Will V
|
This artifact can be found on a roadside near the Abandoned Ruins in Demeniss near Rustleleaf Farm. |
  |
Puzzles
| Details | Map Location | |
|---|---|---|
|
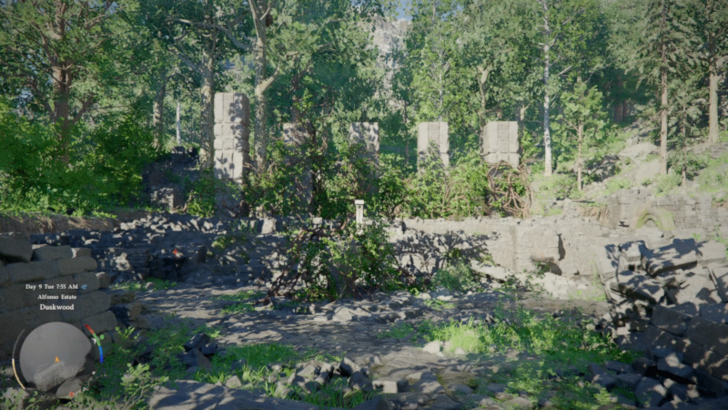
Duskwood Hill Ruins Puzzle
|
Match the height of the pillars to solve this puzzle. Use Blinding Flash to burn off the vines and Stab to interact with the pedestal in the middle. Insert your sword in the different pedestal slots and rotate it to change the height of the pillars. |
  |
|
Duskwood Waterside Ruins Puzzle
|
Align any five stones of the same color on the grid to complete the challenge. The line may be vertical, horizontal, or diagonal. White or Black Stones can be moved anywhere. |
  |
|
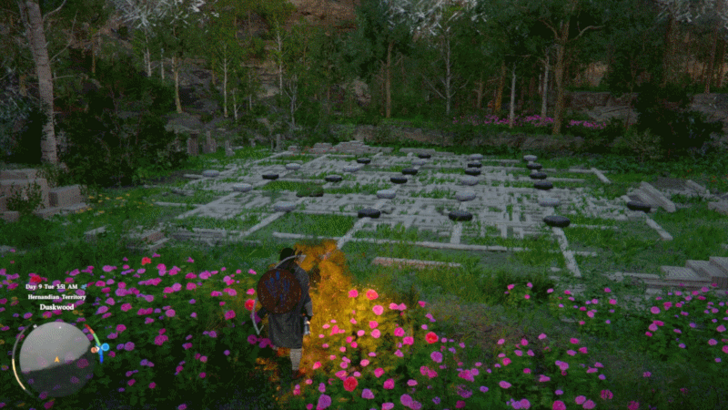
Dragon’s Stone Chamber Puzzle
|
There are four total clues required to solve the Dragon's Stone Chamber. You must investigate the locations depicted in the main mural to find the symbols required for the dials. The rest of the clues are located on the southern cliffs of Anvil Hill, in the Anvill Hillside Terrace. |
  |
|
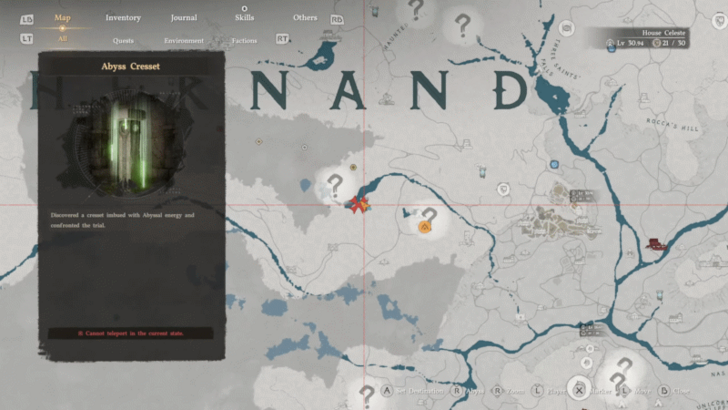
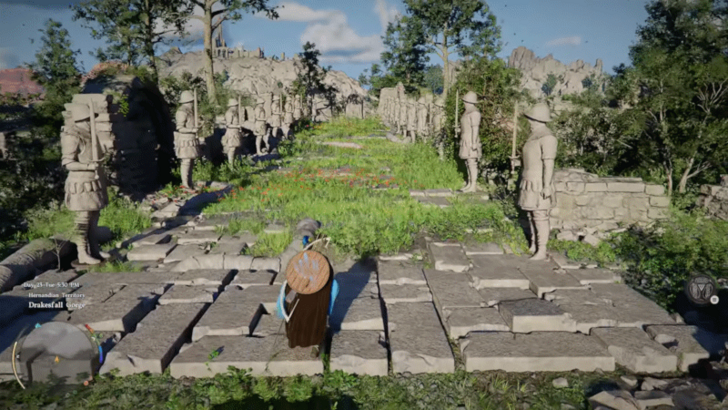
Drakesfall Gorge Ruins Puzzle
|
Stand on the stone floor at the opposite side of the large statue and the Abyss Cresset to start a minigame of “Green Light, Red Light.” Get to the Abyss Cresset without getting spotted to complete the puzzle. |
  |
|
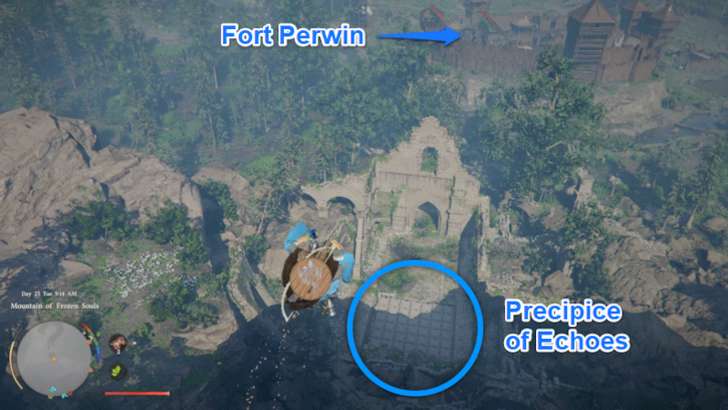
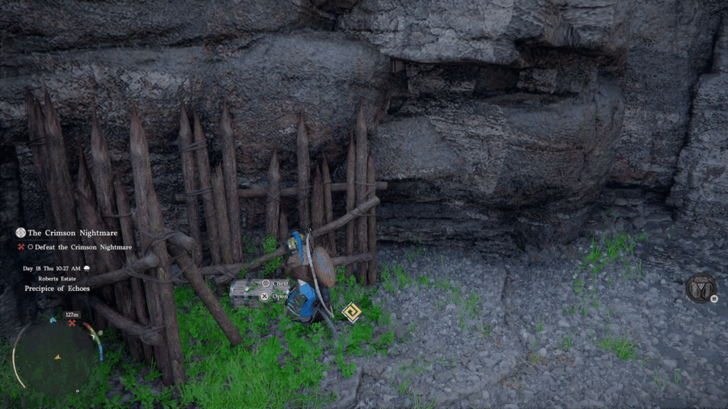
Precipice of Echoes Ruins Puzzle
|
Complete the grid by stepping on a sequence of tiles that links two identical icons. You must reach the second icon of a pair without stepping on any other symbols, ensuring you leave enough space for the remaining paths. |
  |
|
Azure Moon Labyrinth Puzzle
|
Climb the ladder in the Phoniel Ranch to reach this puzzzle. Activate the correct buttons at the end of the labyrinth. A mural within the labyrinth shows the location of five trees in Pororin showing the right buttons to press. |
  |
|
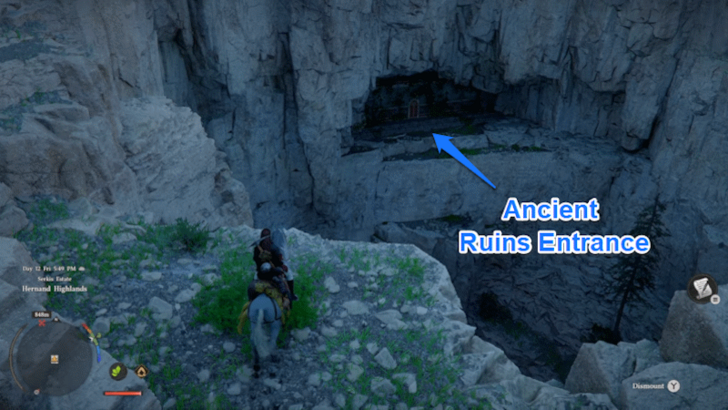
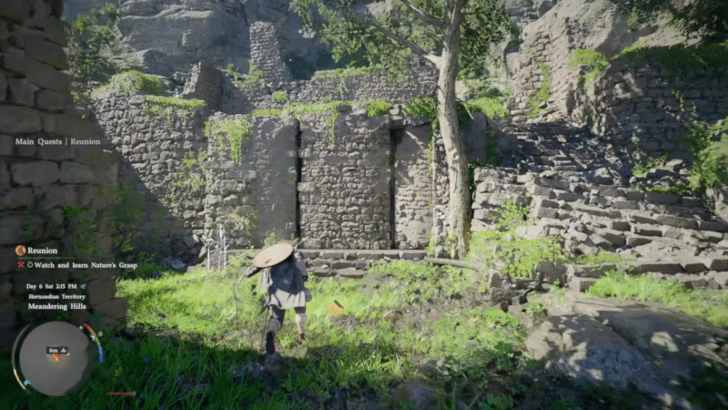
Meandering Hills Ruins
|
You'll find these closed-off ruins within the Meandering Hills northwest of the City of Hernand. Use Nature's Grasp to lift the stone gate that blocks the entrance to the ruins. Then, use Focus Palm on the giant buttons inside to have each of them pressed at the same time to unlock the Abyss Cresset. |
  |
|
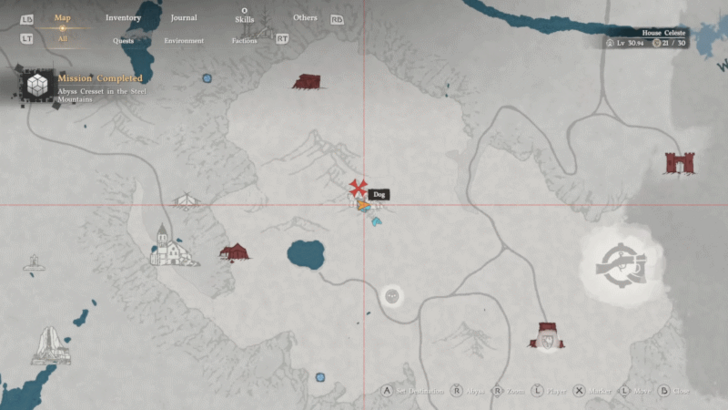
Steel Mountain Ruins Puzzle
|
Beside the locked door are a set of bells and notes stuck on the board. Follow the note symbols and hit the bell with the corresponding symbol to complete the puzzle and unlock the Abyss Cresset. |
  |
|
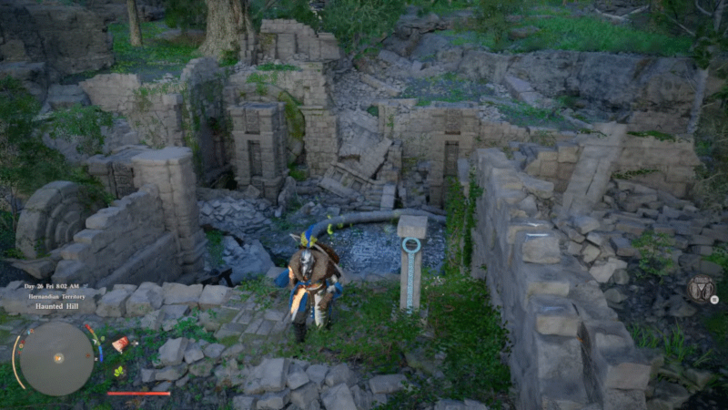
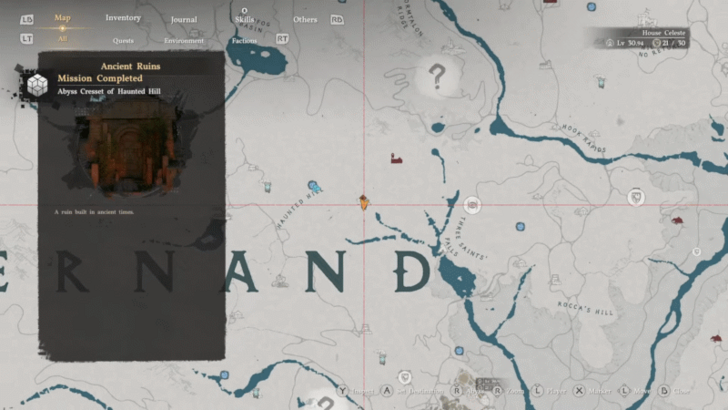
Haunted Hills Ruins Puzzle
|
Drain the water from this location by using Focus on the mechanism underwater mechanism to unlock the Abyss Cresset. |
  |
|
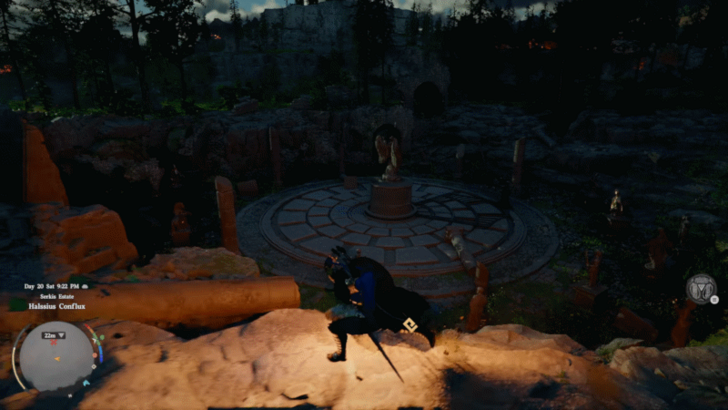
Halssius Conflux Ruins Puzzle
|
To complete the Hallsius Conflux Puzzle, rotate the central dial to match the symbols of the illuminated statues. |
  |
|
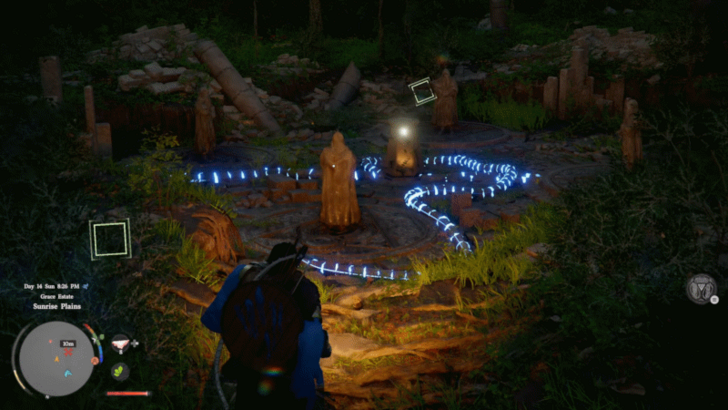
Sunrise Plains Ruins Puzzle
|
To complete the Sunrise Plains puzzle, rotate the statues using the dials behind them until every statue is facing Abyss Cresset at the center. |
  |
|
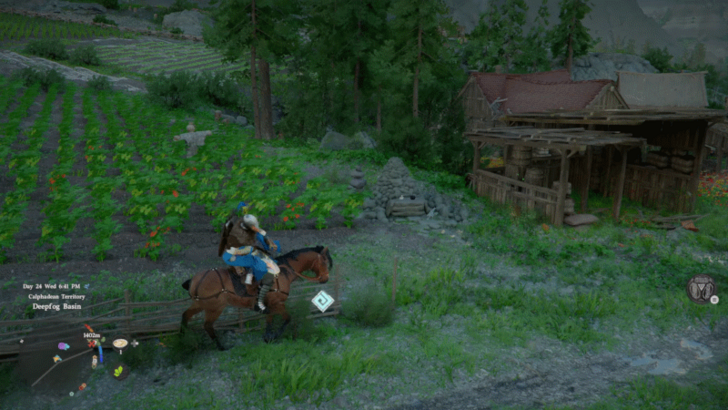
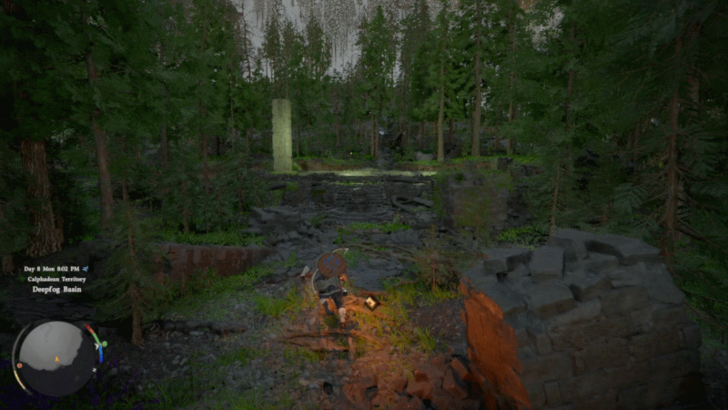
Deepfog Basin Everfrost Ruins Puzzle
|
Use the Stab skill on the pedestal to move the pillars' height. There are four slots on the pedestal and each slot will change a different set of pillars. |
  |
|
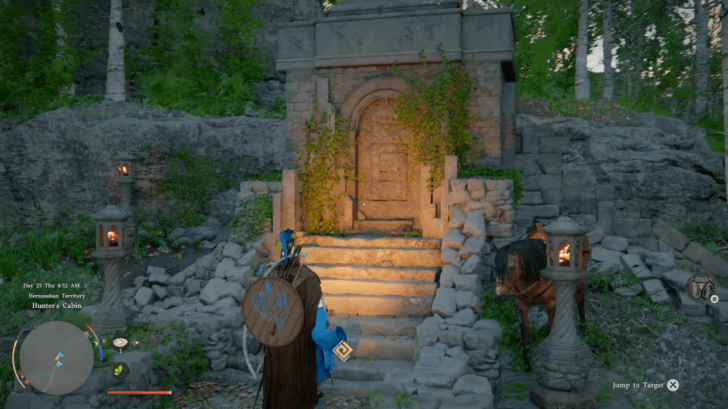
Hunter's Cabin Ruins Puzzle
|
The cemetery in the Hunter's Cabin is surrounded by lit lanterns. Use Blinding Flash to light the remaining two unlit lanterns in the area to solve the puzzle. |
  |
|
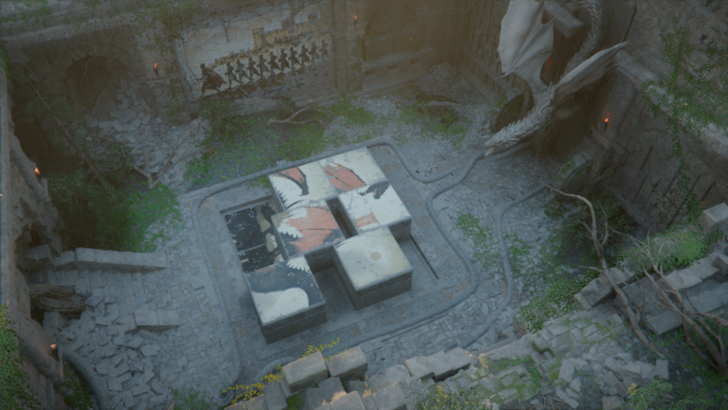
Deepfog Basin Dragon Head Ruins Puzzle
|
The goal in the Deepfog Basin Dragon Head Ruins is to complete a sliding image puzzle. Use the Stab One-Handed Skill to move each individual tile. Organize the tiles correctly to reveal the full artwork and unlock the Abyss Cresset. |
  |
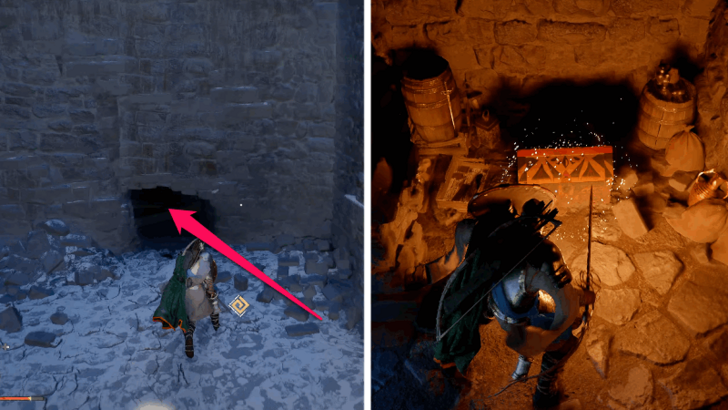
Chests
| Details | Map Location | |
|---|---|---|
|
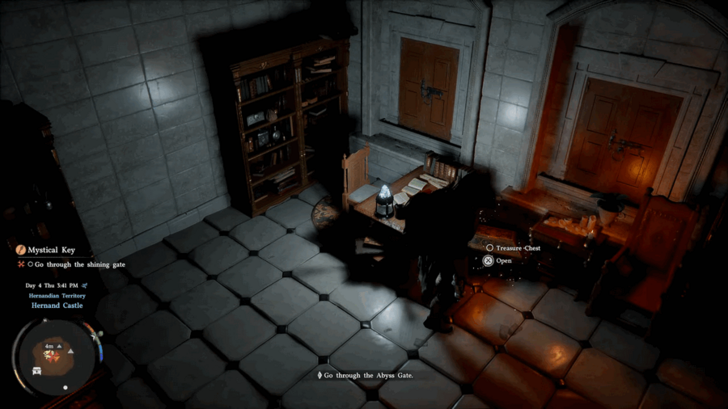
Treasure Chest
|
Arrived at during the Mystical Key main quest in Hernand Castle. Found in the room that is unlocked by the mystical key. |
  |
|
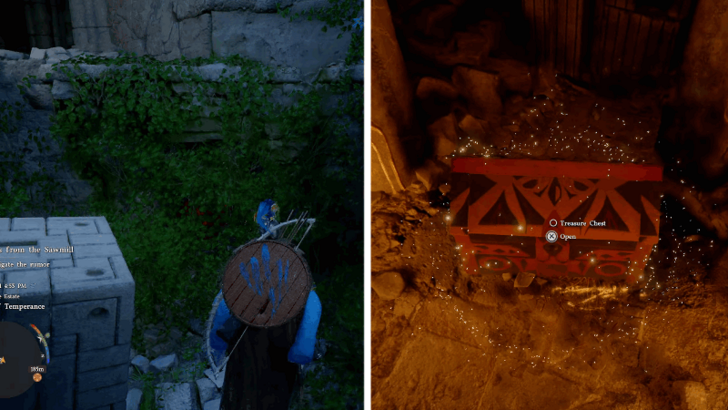
Treasure Chest
|
Found in the Sanctum of Temperance, hidden behind a wall of ivy. Enter the cave at the southwest end of Sanctum of Temperance. |
  |
|
Chest
|
Found a little northeast of Fort Perwin, down the waterfall, next to some broken wooden fences. |
  |
|
Chest
|
At the southwest part of the Hernand region, northeast of Kharonso. It is tucked away behind a tall stone formation. |
  |
|
Chest
|
At the southwest part of the Hernand region, east of Kharonso. It is hidden behind a brightly colored rock formation. |
  |
|
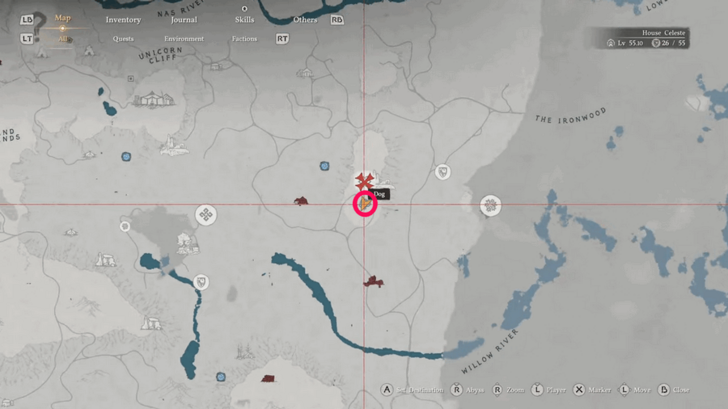
Treasure Chest
|
At Icemoor Castle Ruins, northwest of City of Hernand. It is hidden in a hole in the wall that's been boarded up. Destroy the planks to get inside. |
  |
|
Treasure Chest
|
Get on an upper floor on the southern ruins of Sanctum of Penitence. Then, jump down a hole into the floor below. |
  |
|
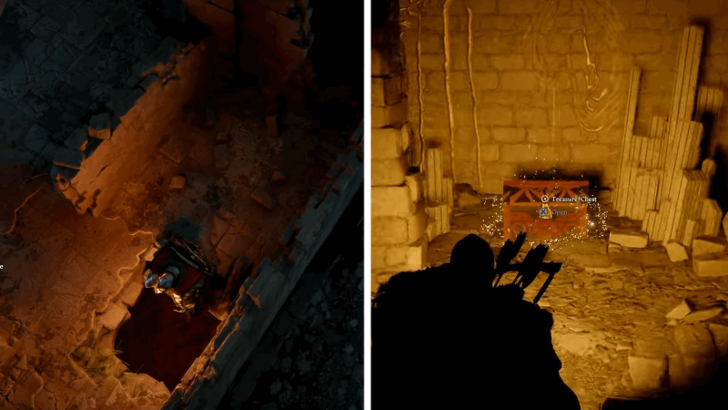
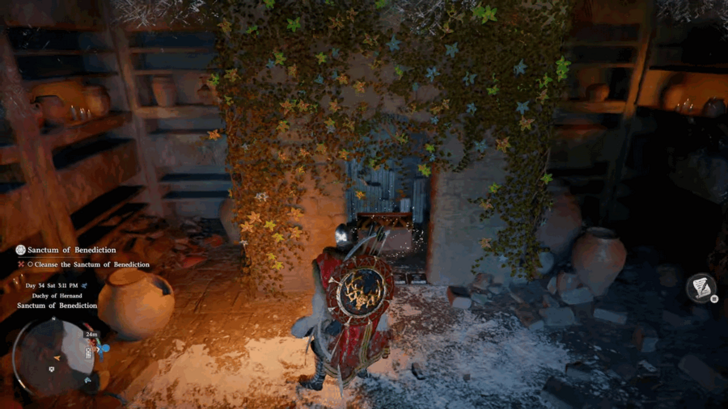
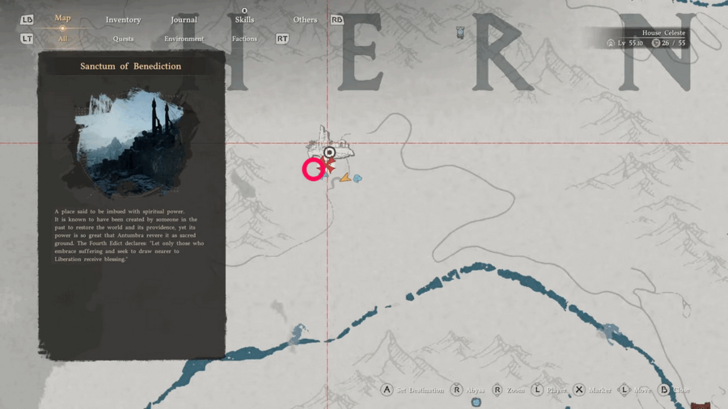
Treasure Chest
|
Found in Sanctum of Benediction, far west of the City of Hernand. Light the Lantern next to the entrance of the tall tower to unlock the entrance to the chest. |
  |
|
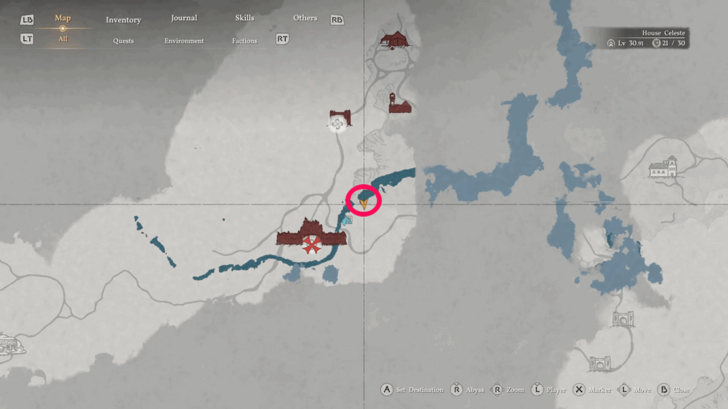
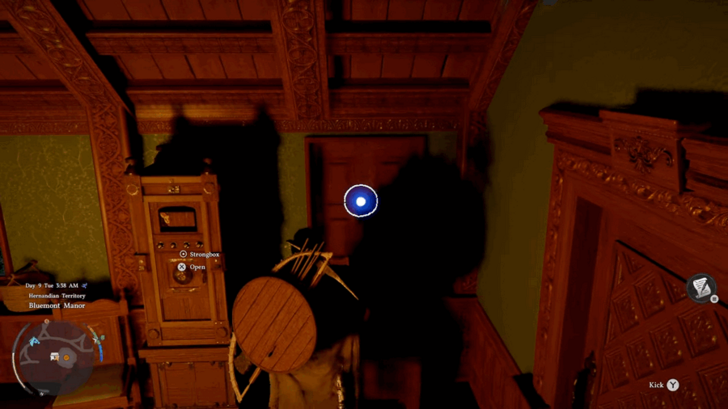
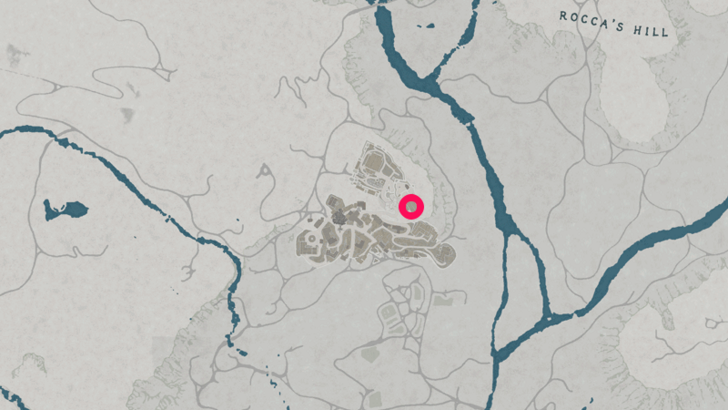
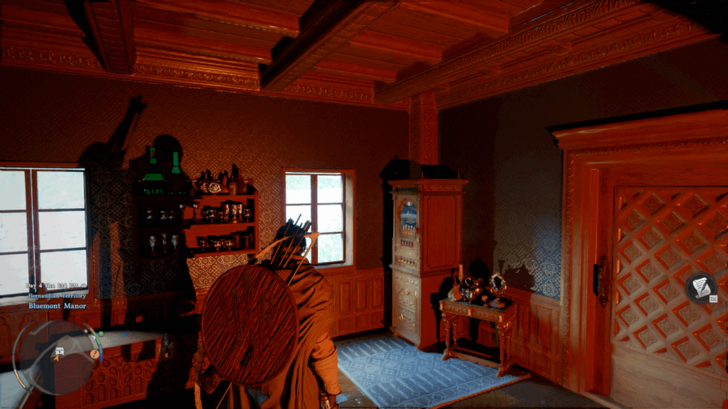
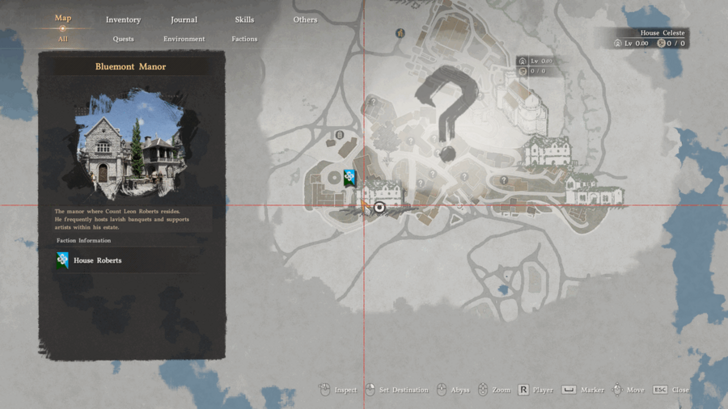
Bluemont Manor Strongbox 1
|
Found on the second floor of Bluemont Manor, in the bedroom of Leon Roberts. |
  |
|
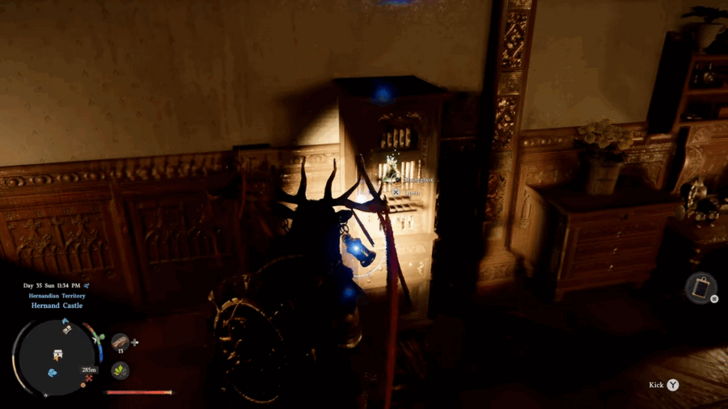
Hernand Castle Strongbox
|
Found in the locked room at the top floor of Hernand Castle. To unlock the door to this room, steal a Key or purchase it from the Back Alley Shop. |
  |
|
Bluemont Manor Strongbox 2
|
Found on the 2nd floor of the southern Bluemont Manor house in the City of Hernand. |
  |
|
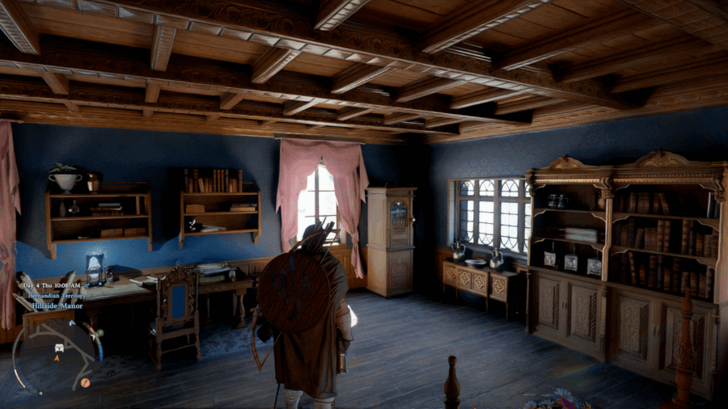
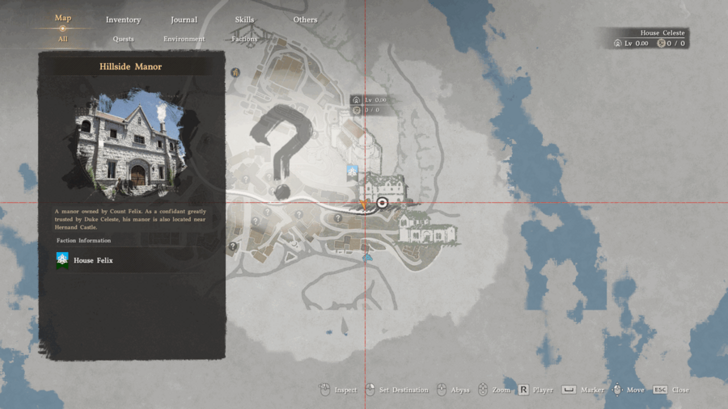
Hillside Manor Strongbox
|
Found on the 2nd floor, in the southeastern room of the Hillside Manor in the City of Hernand. |
  |
|
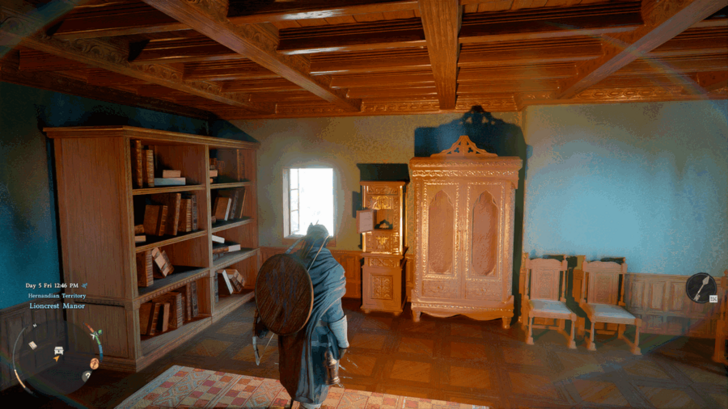
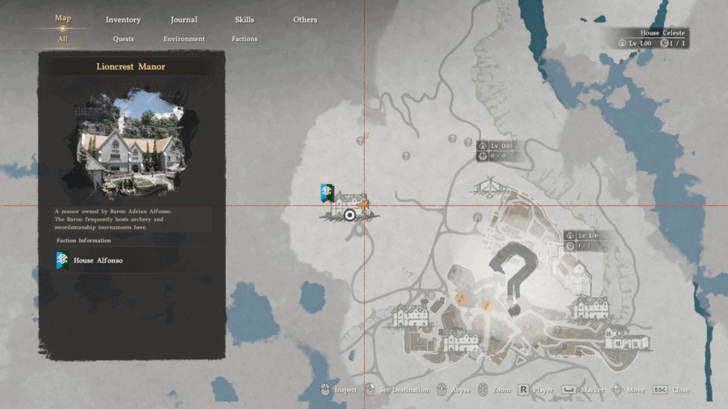
Lioncrest Manor Strongbox
|
Found on the 2nd floor of the eastern room of Lioncrest Manor. You can get up here by climbing up the side of the manor and entering through the 2nd floor window. |
  |
|
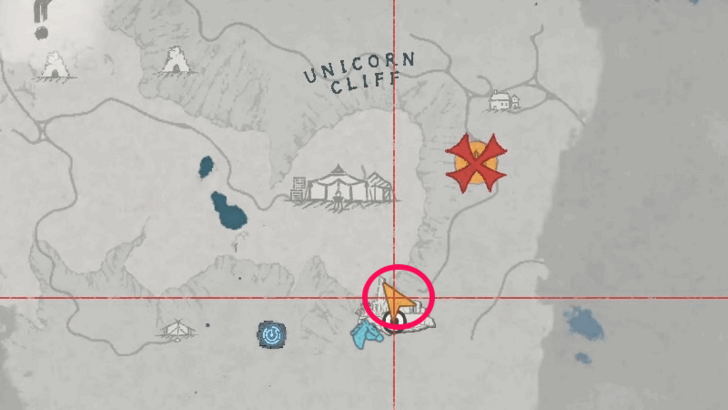
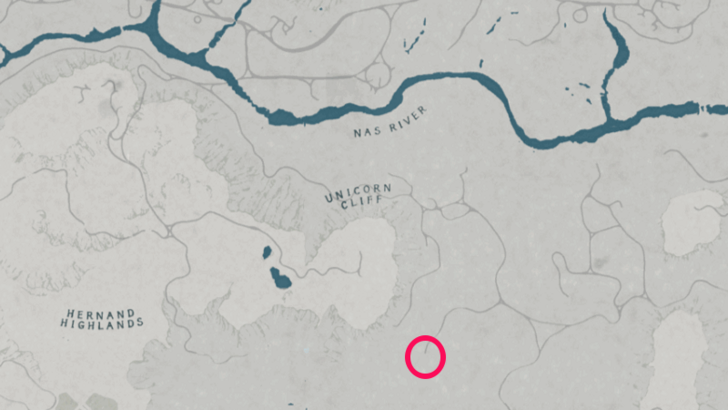
Mudridge Cabin Strongbox
|
Found in Mudridge Cabin in Pororin Forest, Hernand. Southeast of Unicorn Cliff. Climb up the posts of the cabin to get up, then defeat the bandits. The Strongbox will be in the higher cabin. |
  |
|
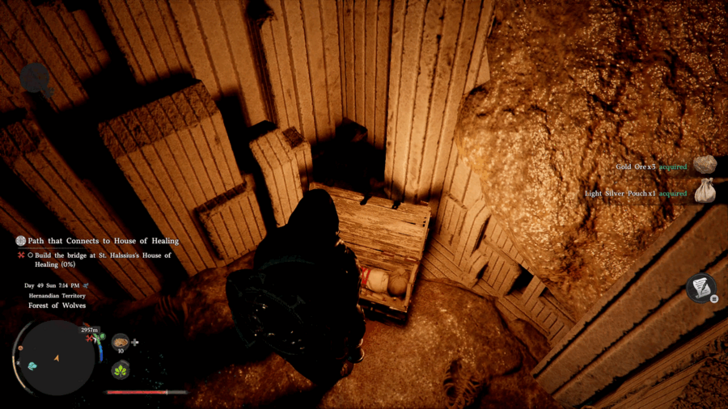
Chest
|
Found in the Forest of Wolves at the northern part of Hernand, in between the Ancient Rift and The Sage's Peak. |
  |
|
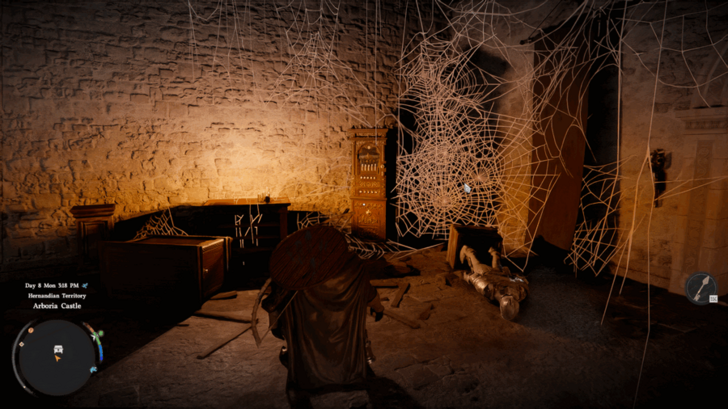
Arboria Castle Strongbox
|
This strongbox can be found at the bottom of Arboria Castle, in the basement at the center, full of spider webs. |
  |
Crafting Manuals
| Details | Map Location | |
|---|---|---|
|
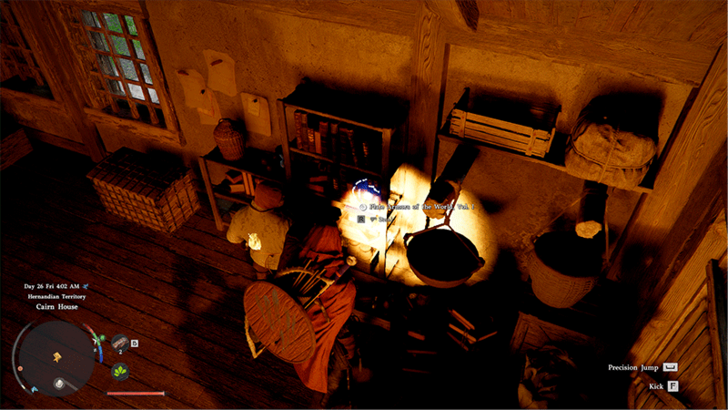
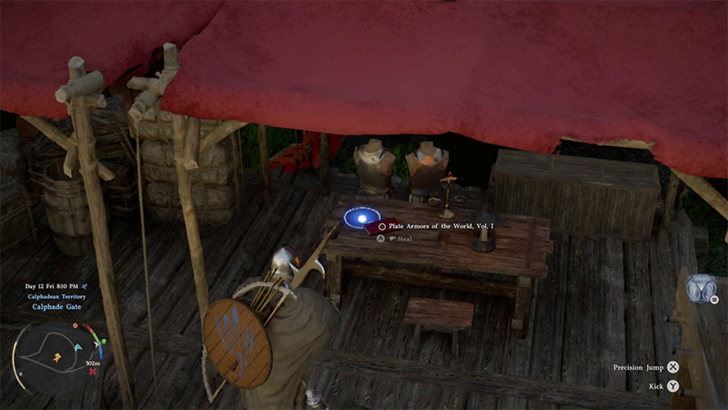
Plate Armors of the World Vol. 1
|
This crafting book can be found inside the Cairn House in Three Saints' Falls. |
  |
|
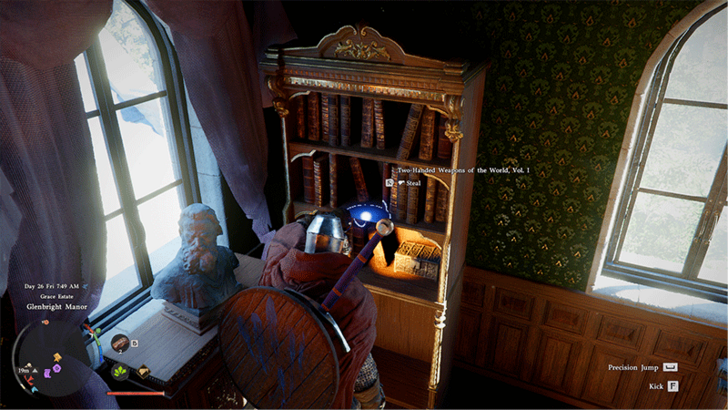
Two-Handed Weapons of the World Vol. 1
|
This crafting book can be found on a shelf ins ide the Glenbright Manor in the Grace Estate of Hernand. |
  |
|
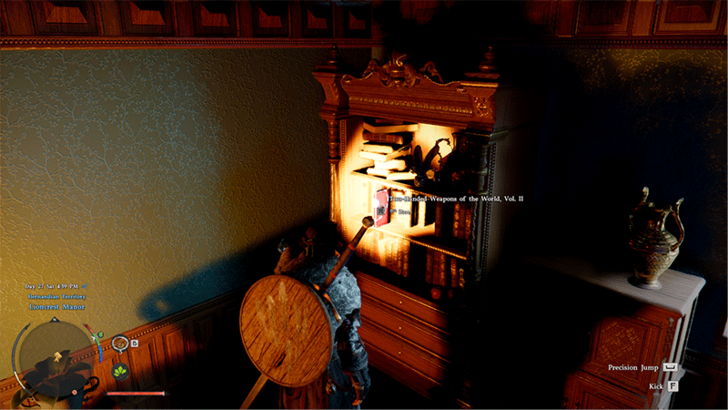
Two-Handed Weapons of the World Vol. 2
|
This crafting book can be found inside Lioncrest Manor in Hernand. |
  |
|
Plate Armors of the World Vol. 1
|
This crafting book can be stolen from a table in the Calphade Gate. |
  |
|
Shields of the World Vol. 1
|
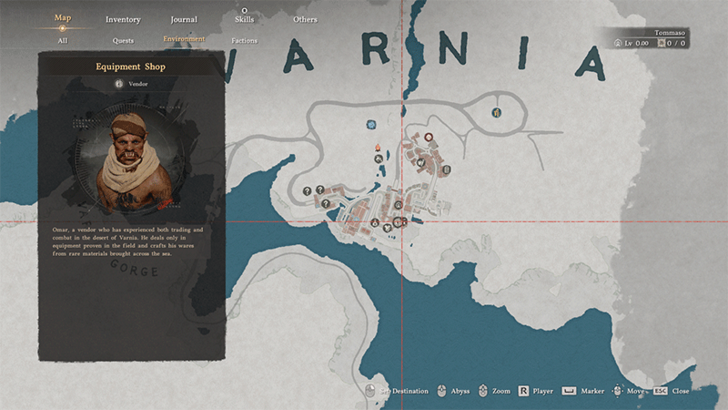
This crafting book can be bought from Temir the equipment shop vendor in Calphade for 50 Copper. |
  |
|
Shields of the World Vol. 2
|
This crafting book can be bought from Temir the equipment shop vendor in Calphade for 2 Silver. |
|
Caves
| Details | |
|---|---|
|
Hernand Highlands Cavern
|
|
|
Specter’s Hideout
|
|
|
Anvil Hill Stoneback Crab Cave
|
|
|
Anvil Hill Cave
|
|
|
Heart of the Saint
|
|
|
Duskwood Cave
|
|
|
Blade Cave
|
|
|
Shadowheart Grotto
|
|
|
Echoing Tunnel
|
|
|
Whispering Grotto
|
|
|
Cloudmist Cave
|
|
|
Dawn Cave
|
|
|
Echoing Waves Cave
|
|
|
Twilight Grotto
|
|
|
Nightstorm Cave
|
|
|
Death’s Grip Cave
|
|
|
Starlight Storm Cave
|
|
|
Ancient’s Heart Cave
|
|
|
Frozen Soul Cave
|
|
|
Frostclaw Cave
|
|
|
Everfrost Cave
|
|
Spires
| Details | |
|---|---|
|
Spire of the Stars
|
 |
|
Spire of Insight
|
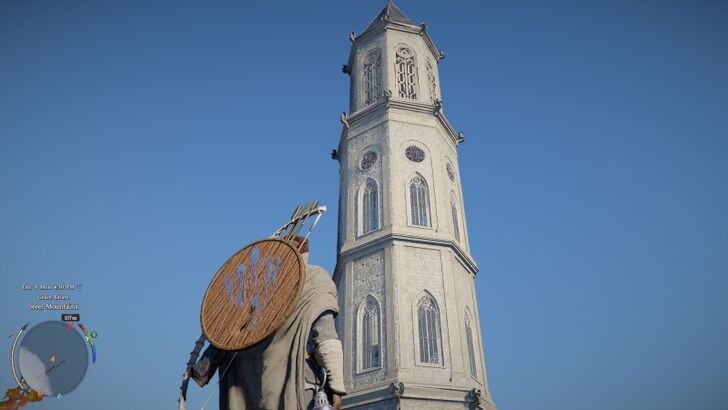 The spire is located east of a small lake, along a road in the Steel Mountains. |
Sanctums
| Details | |
|---|---|
|
Sanctum of Absolution
|
|
|
Sanctum of Temperance
|
 |
|
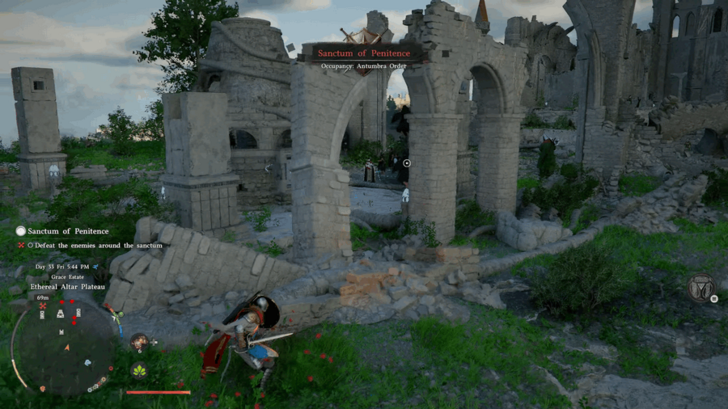
Sanctum of Penitence
|
|
|
Sanctum of Benediction
|
|
|
Sanctum of Atonement
|
|
|
Sanctum of Deliverance
|
|
Hernand Factions
Core Factions
| Faction | Details |
|---|---|
 Goldleaf Merchant Guild Goldleaf Merchant Guild |
The largest merchant guild in Hernand, run by goblins. Their influence stretches beyond Hernand across all of Pywel. If a deal is profitable, they prioritize gain over questions of right and wrong. Widely seen as the embodiment of goblin materialism, they are also rumored to be rife with fierce internal power struggles. |
 Greymanes Greymanes |
Warriors who safeguard Pailune. People of diverse backgrounds and abilities have gathered as if by fate, taking on dangerous tasks others dare not accept. Though their foremost mission is to protect Pailune's peace, they extend a helping hand to anyone in need, and their renown now spreads across all of Pywel. |
 House Celeste House Celeste |
The ducal house that governs Hernand. Distant descendants of the wandering knight Canta, they bear the heavy responsibility of defending the duchy and protecting its people. As multiple factions rise to threaten Hernand, they are now being tested to see whether they can truly uphold that duty. |
 House Grace House Grace |
The count's house of Hernand. A venerable family of southern Hernand, they are known for their keen interest in technology and their generous support of the Emberwind Workshop's hot-cloudcarts. Thanks to the fertile lands under their care, their people live in prosperity. However, persistent rumors surrounding the count's private life have begun to tarnish the family's reputation. |
 House Lanford House Lanford |
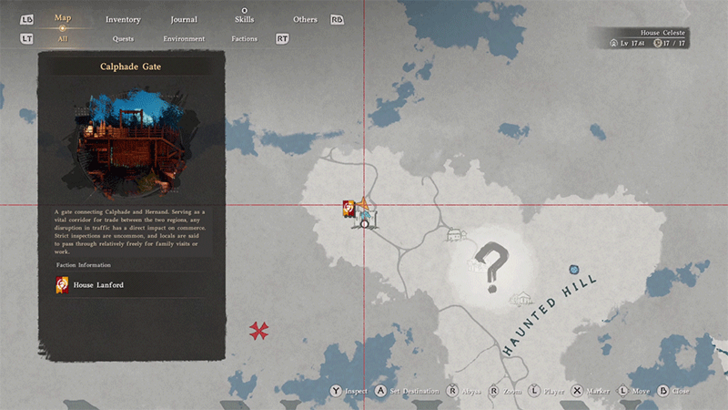
The marquis' house of Calphade. For generations, they have overseen the defense and governance of the Calphade region bordering Pailune on behalf of the Duchy of Hernand. Their unyielding conviction and courage earned them the title "Unyielding Shield," a name that has come to represent not only the family but Calphade as a whole. |
 House Serkis House Serkis |
The marquis' house of Hernand. Since the founding of Hernand, they have served as the right hand of House Celeste, managing internal affairs while Celeste focused on diplomacy. Amid relentless threats against Hernand, they devote themselves to safeguarding and reassuring its people. |
 Scholastone Institute Scholastone Institute |
An academic institution founded by troll scholars. Dedicated to studying knowledge of all things in the world, it has recently intensified its research into the Abyss, focusing on uncovering and interpreting ancient lore. While most of its members are trolls, it welcomes anyone with true scholarly curiosity, regardless of race. |
Other Factions
| Faction | Details |
|---|---|
 Beggar’s Alliance Beggar’s Alliance |
A group of vagrants in Hernand. The many troubles afflicting Hernand have driven countless people into the streets, where wanderers and refugees have formed a fragile community. Though often exposed to the temptation of crime, they are desperate individuals struggling to survive by helping one another. |
 House Alfonso House Alfonso |
The baronial house of Hernand. Renowned as a prestigious lineage of spearmasters, they preserve a family manual said to compile techniques refined by successive heads of the house. As external threats against Hernand intensify, they now hold martial tournaments more frequently and actively sponsor those skilled in arms. |
 House Felix House Felix |
The count's house of Hernand. Often overshadowed by House Roberts in wealth and scale, and by House Serkis in reputation, they are seen as lagging behind other noble families. Nevertheless, through their mapmaking workshop and bookbinding house, they strive to lead a new intellectual movement within Hernand. |
 House Roberts House Roberts |
The count's house of Hernand. A long-established merchant family, they rank among the wealthiest in Hernand. They mingle with high-ranking nobles and figures in the arts, hosting lavish banquets. Yet due to a subtle rivalry with House Felix, invitations are never extended to that family. |
 Kharonso Troll Alliance Kharonso Troll Alliance |
A troll village hidden behind the southwestern mountain range of Hernand. Though wary of outsiders, they do not turn away the kind-hearted, and a few non-trolls reside among them. Deeply devoted to tradition and strongly conservative in spirit, they frequently clash with Scholastone, which pursues knowledge and progress. |
 Pororin Forest Guardians Pororin Forest Guardians |
A village hidden deep within the forest, shielded from prying eyes. The shais and the Fadus live there in happiness among flowers that bloom throughout the year, yet sorrow marks its past. After a scholar, driven by greed upon hearing rumors of the village's mystery, attempted to abduct a shai, its people sealed their gates and closed themselves off from the outside world. |
 Vellua Fishermen’s Guild Vellua Fishermen’s Guild |
A seaside village in southern Hernand. Thanks to bountiful waters teeming with fish, fishermen have long flocked here, keeping the town vibrant and full of life. However, that same abundance made it a frequent target for pirate raids, to the point where rebuilding has become a part of daily life. Now, the residents simply long for a humble and peaceful existence. |
Hostile Factions
| Faction | Details |
|---|---|
 St. Halssius’s House of Healing St. Halssius’s House of Healing |
A House of Healing once dedicated to treating mental illness. With access strictly controlled and even family visits denied, it resembles a detention center more than a place of healing. In truth, it now confines more so-called "ideologically impure" individuals brought from places like Demeniss than genuine patients, and it no longer practices proper medicine. |
 Bleed Bandits Bleed Bandits |
An armed faction that has plunged Hernand into fear. Their influence spread all across Hernand with alarming speed. A powerful and shadowy force supports their rapid rise, making their activities difficult to suppress. They addict people to Dreamer's Bliss, a drug that induces harrowing nightmares, and enslave them in the process. |
 Wolf Trackers Wolf Trackers |
A roaming band that scours Pywel in search of prey. They are not hunters who give thanks to nature, but butchers addicted to the thrill of slaughter. They roam in search of ever more stimulating quarry, and recently they have been tearing across Pywel to track down the whereabouts of the wolf spoken of like a legend. |
 Dancing Catfish Pirates Dancing Catfish Pirates |
A ruthless pirate crew led by Sir Catfish. They revere Sir Catfish, born from human experimentation, with near-fanatical devotion. Roaming the seas in pursuit of slaughter and plunder, they have left wrecked ships and countless victims along nearly every coastline of Pywel, from Delesyia to Hernand. |
| Hornsplitter’s Guards | The personal guard of Kailok the Hornsplitter, leader of the Goldleaf Merchant Guild. Comprised solely of his most trusted elite, they handle all but his most crucial dealings, as Kailok personally oversees only the gravest transactions. They are prepared to pay any price to protect his interests. |
| Cassius Morten | The faction of Calphade's fallen hero, Cassius Morten. They are loyal to Cassius Morten, who was once radiant as sunlight glinting off armor. War after war wore down "Silver Armor," and disloyal whispers drifted in from foreign lands to reach his ears. Now they follow their captain into the final battle. |
| Reed Devil | The faction of the Demon of the Reed Fields. Those untouched by the suffering of illness may look on it with contempt, but to the patients of Sunset Valley, it is a symbol of hope. The Reed Field's foul-smelling minions do not fall, no matter how often they are stabbed or cut, because they are evil spirits inhabiting scarecrow bodies. |
| Southern Bandits | Bandits who threaten the southern reaches of Pywel. They mainly target merchants and travelers, ambushing and plundering them. They lack the notoriety of groups like the Bleed Bandits or the Fundamentalist Goblins, but they are a vicious rabble that further shakes Hernand's crumbling peace. |
| Fundamentalist Goblins | A band of goblin scholars scarcely different from common thieves. Though they see themselves as passionate seekers of knowledge, they pursue research without restraint, committing inhumane acts if it serves their goals. Established institutes condemn their brutal deeds and refuse to recognize them as true scholars. |
Crimson Desert Related Guides
Region Guides
| Hernand | Delesyia | Demeniss | |||
| Pailune | Crimson Desert | ||||
Points of Interest
| Abyss Nexus | Abyss Cresset | Sealed Abyss Artifact |
| Caves | Treasure Chests | Strongbox Puzzles |
| Banks | Jails | Vendors |
| Regions | Witches | Greymane Shrines |
Territories
| Hernand Castle | St. Halssius's House of Healing | Lioncrest Manor |
| Varnia | Pororin Forest | - |
Comment
Author

Hernand Region Guide
Please participate in our site
improvement survey
04/2026
improvement survey
04/2026
Would you assist in
improving Game8's site?
improving Game8's site?

×
We are listening to our users' valuable opinions and discussing how to act on them.
The information collected through this survey will be used for the purpose of improving our services. In addition, the information will only be disclosed a part of a statistic in a format that will not allow identification of personal information.
Begin Survey
Not Now
×
Please rate each item regarding Game8.co's Advertisements.
Amount of Ads
Very Dissatisfied
Somewhat Dissatisfied
Fine
Somewhat Satisfied
Highly Satisfied
Placement of Ads
Timing of Ad Display
Ad Loading Speed
Safeness of Ads
Content of Ads
×
Please rate each item regarding Game8.co's Quality of Articles.
Amount of information
Very Dissatisfied
Somewhat Dissatisfied
Fine
Somewhat Satisfied
Highly Satisfied
Frequency of updates
Speed of new information
Accuracy of articles
Understandibility of articles
Readability of sentences
×
Please rate each item regarding Game8.co's Usability of the Site.
Ease of finding information
Very Dissatisfied
Somewhat Dissatisfied
Fine
Somewhat Satisfied
Highly Satisfied
Loading Speed
Use of Color
Font Size
Visibility of Images
Easy to Understand Layout
×
Please rate each item regarding Game8.co's Message Boards, Comments.
Ease of Writing
Very Dissatisfied
Somewhat Dissatisfied
Fine
Somewhat Satisfied
Highly Satisfied
Readability
Ease in Finding Information
Comment Quality
Comment Quantity
Admin Response
×
Please rate each item regarding Game8.co's Site's new design.
Please rate our site's new design
Very Dissatisfied
Somewhat Dissatisfied
Fine
Somewhat Satisfied
Highly Satisfied
Do you think that the website's design change makes the site easier to use?
Has the new design made it easier for you to find information on the site?
Has the new design improved the overall visual appeal of the site?
How would you rate your overall satisfaction with the new design of the site?
×
How likely are you to recommend Game8 to someone you know?
Very Unlikely
0
1
2
3
4
5
6
7
8
9
10
Very Likely
If you have other opinions regarding potential improvement to the website, please share them with us. We would appreciate your honest opinion.
Note: This is a free response section, so you can proceed without entering anything.
Note: Please be sure not to enter any kind of personal information into your response.
Note: Please be sure not to enter any kind of personal information into your response.
×
Thank You
×
Thank you for participating in our survey! Your answers will help us to improve the quality of our website and services.
We hope you continue to make use of Game8.
We hope you continue to make use of Game8.
Close
Rankings
- We could not find the message board you were looking for.
Gaming News

![Forza Horizon 6 Review [Preview] | Beautiful Roads With a Whole Lot of Oversteer](https://img.game8.co/4460981/a7254c24945c43fbdf6ad9bea52b5ce9.png/show)


![Forza Horizon 6 Review [Preview] | Beautiful Roads With a Whole Lot of Oversteer](https://img.game8.co/4460981/a7254c24945c43fbdf6ad9bea52b5ce9.png/thumb)
Popular Games

Genshin Impact Walkthrough & Guides Wiki
Crimson Desert Walkthrough & Guides Wiki
Umamusume: Pretty Derby Walkthrough & Guides Wiki
Honkai: Star Rail Walkthrough & Guides Wiki
Monster Hunter Stories 3: Twisted Reflection Walkthrough & Guides Wiki
Wuthering Waves Walkthrough & Guides Wiki
The Seven Deadly Sins: Origin Walkthrough & Guides Wiki
Pokemon TCG Pocket (PTCGP) Strategies & Guides Wiki
Pokemon Pokopia Walkthrough & Guides Wiki
Zenless Zone Zero Walkthrough & Guides Wiki


Recommended Games
Monster Hunter World Walkthrough & Guides Wiki
Fire Emblem Heroes (FEH) Walkthrough & Guides Wiki
Pokemon Brilliant Diamond and Shining Pearl (BDSP) Walkthrough & Guides Wiki
Super Smash Bros. Ultimate Walkthrough & Guides Wiki
Diablo 4: Vessel of Hatred Walkthrough & Guides Wiki
Cyberpunk 2077: Ultimate Edition Walkthrough & Guides Wiki
Yu-Gi-Oh! Master Duel Walkthrough & Guides Wiki
Elden Ring Shadow of the Erdtree Walkthrough & Guides Wiki
The Legend of Zelda: Tears of the Kingdom Walkthrough & Guides Wiki
Persona 3 Reload Walkthrough & Guides Wiki


All rights reserved
© Pearl Abyss Corp. All Rights Reserved.
The copyrights of videos of games used in our content and other intellectual property rights belong to the provider of the game.
The contents we provide on this site were created personally by members of the Game8 editorial department.
We refuse the right to reuse or repost content taken without our permission such as data or images to other sites.