This survey will take about 1 minute.
Your answers will help us to improve our website.
Crimson Desert
All 37 Ancient Ruins Puzzle Solutions and Locations
☆ Best: Side Quests | Weapons | Armor | Skills
★ Controls | Best Items | What to Do First
☆ Characters: Damiane | Oongka | Kliff
Find and solve all Ancient Ruins puzzles in Crimson Desert to earn Abyss Artifacts. Check out walkthroughs for every puzzle solution, location, and reward right here.
List of Contents
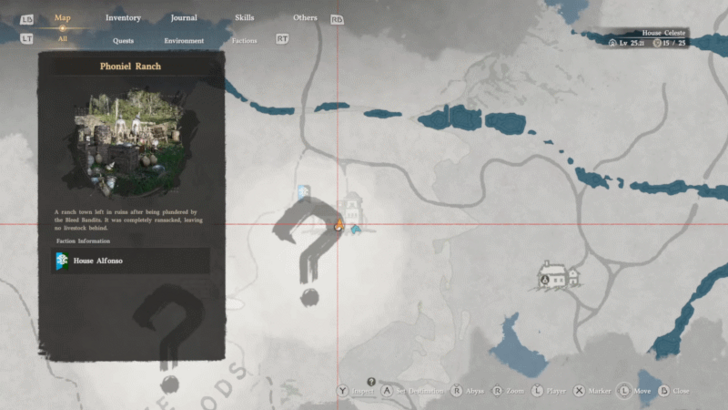
All Ancient Ruins Puzzle Locations
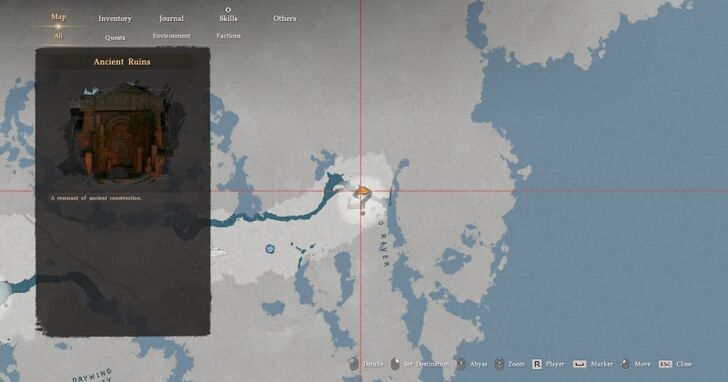
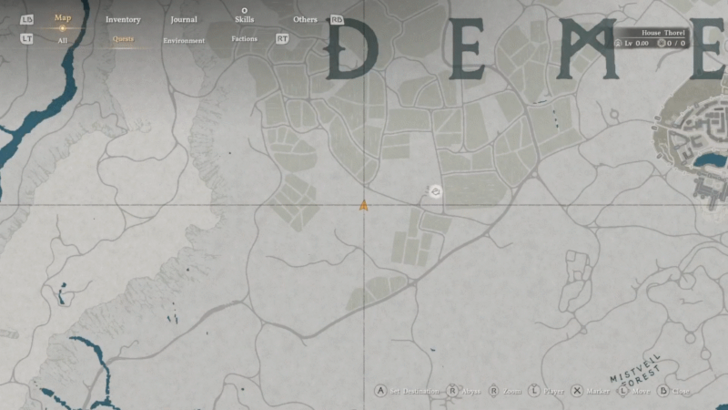
Pywel Ancient Ruins Map
| ・Use the dropdown menu on the map sidebar to change regional maps.
・To suggest map pins, simply click anywhere on the map. Please list down as much information as you can including map name, reward data or acquisition methods. For images, uploading a full rectangular screenshot with a resolution of at least 728 x 410 pixels will be highly appreciated. We encourage users to Sign Up and Log In to save your progress with the map. |
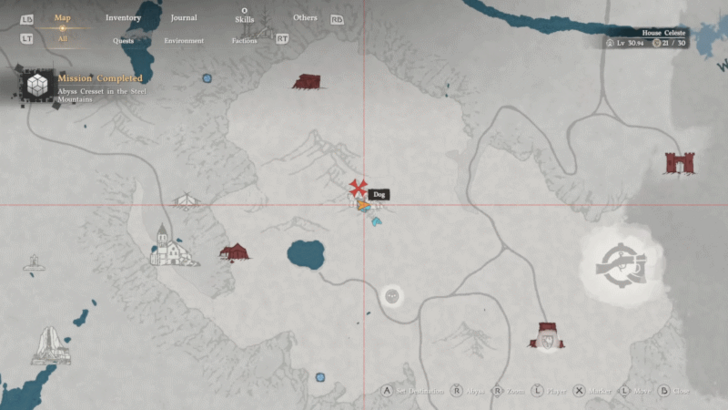
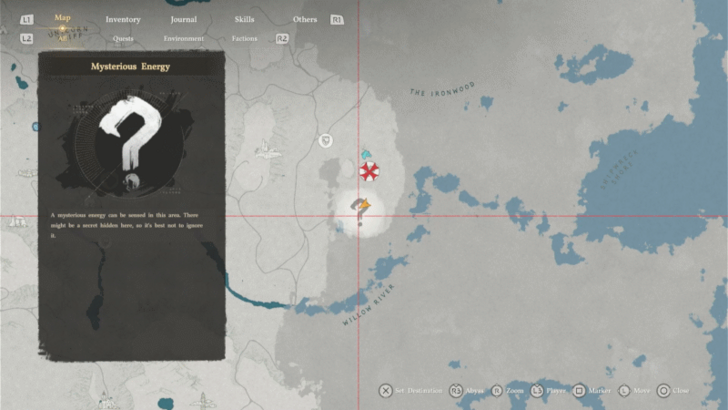
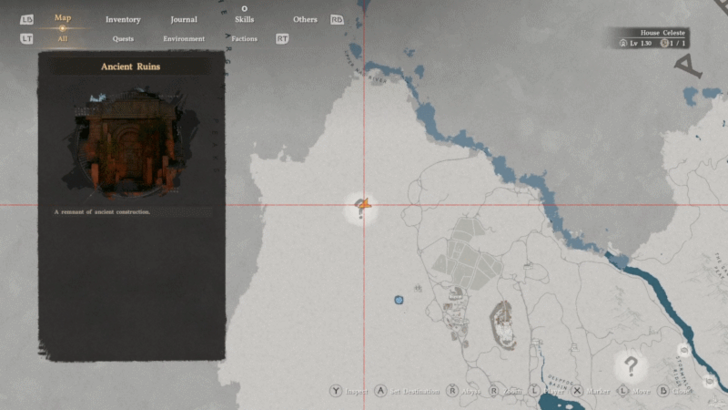
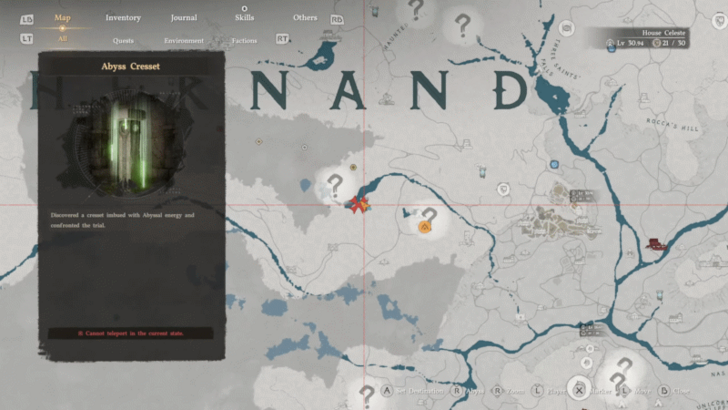
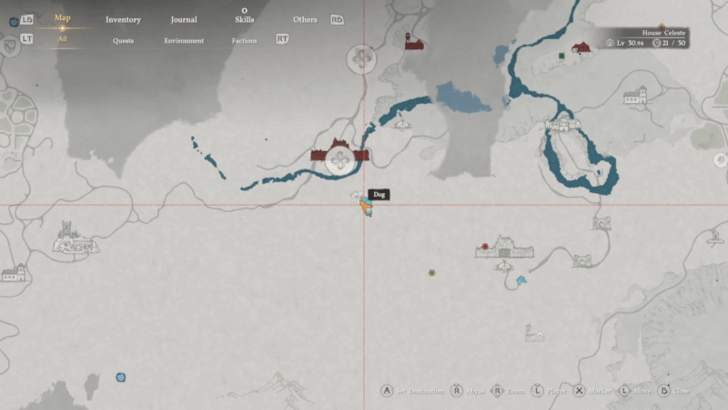
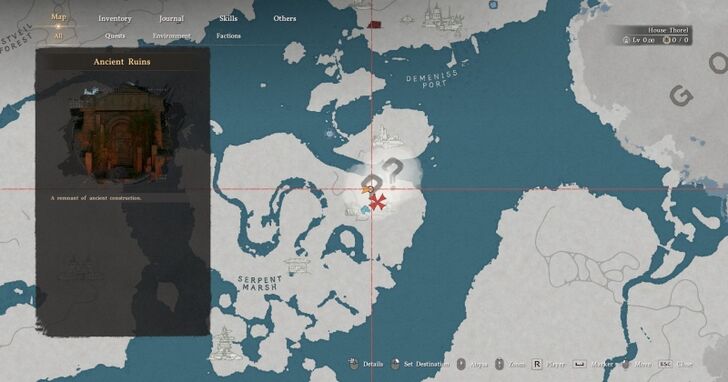
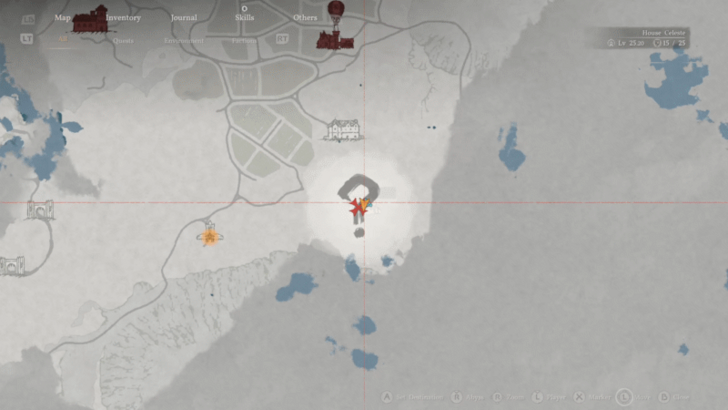
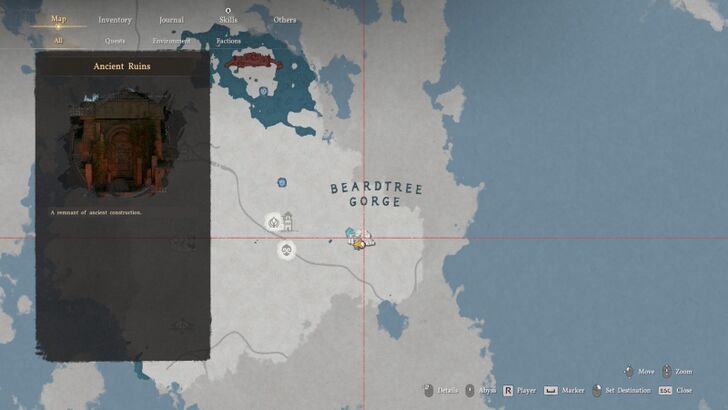
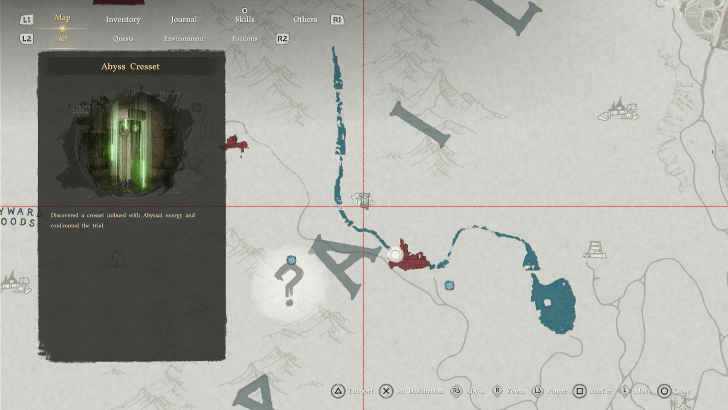
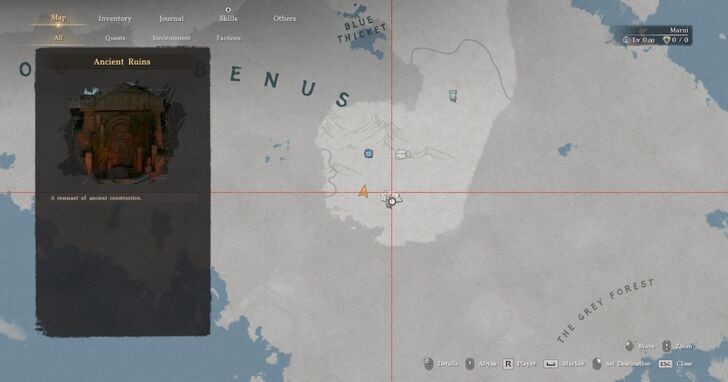
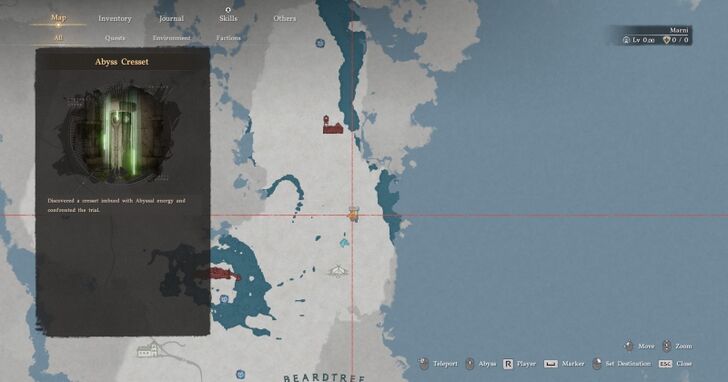
Ancient Ruins will appear on the map as Mysterious Energies once you approach the area. Solve the puzzle within each ruin to unlock them as Abyssal Cresset fast travel points.
Crimson Desert Interactive Map
All 37 Ancient Ruins Puzzle Solutions
| Location and Solution | |
|---|---|
|
Steel Mountains Ruins
|
  Beside the locked door are a set of bells and notes stuck on the board. Follow the note symbols and hit the bell with the corresponding symbol to complete the puzzle and unlock the Abyss Cresset. |
|
Trembling Woods Ruins
|
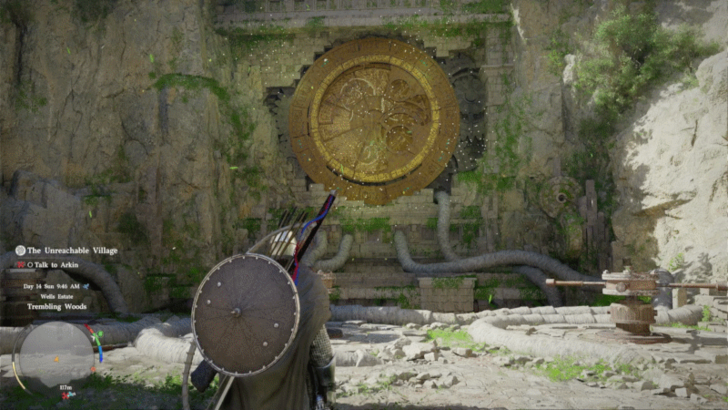  Solve the Trembling Woods mural puzzle by turning the horizontal wheels to align the images. While one wheel rotates the base mural itself, the other two wheels manipulate mechanical overlays that hide or reveal specific sections. |
|
Deepfog Basin Everfrost Ruins
|
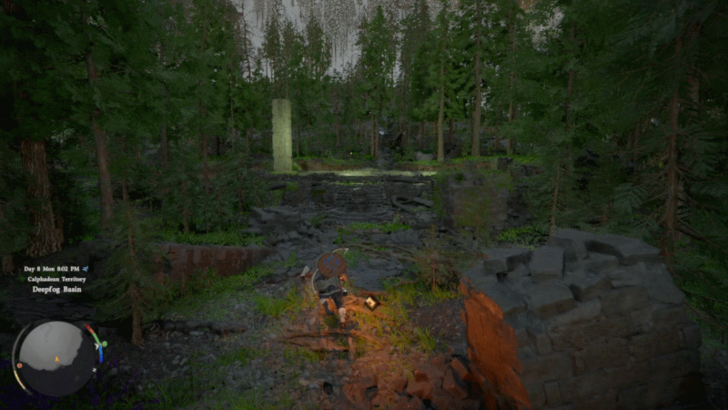  Use the Stab skill on the pedestal to move the pillars' height. There are four slots on the pedestal and each slot will change a different set of pillars. |
|
Duskwood Hill Ruins
|
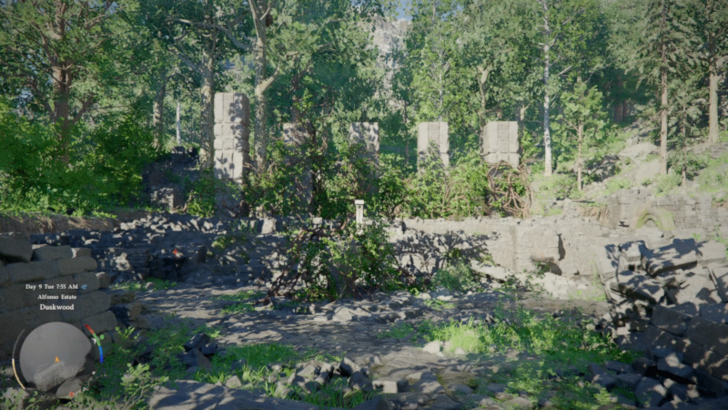  Match the height of the pillars to solve this puzzle. Use Blinding Flash to burn off the vines and Stab to interact with the pedestal in the middle. Insert your sword in the different pedestal slots and rotate it to change the height of the pillars. |
|
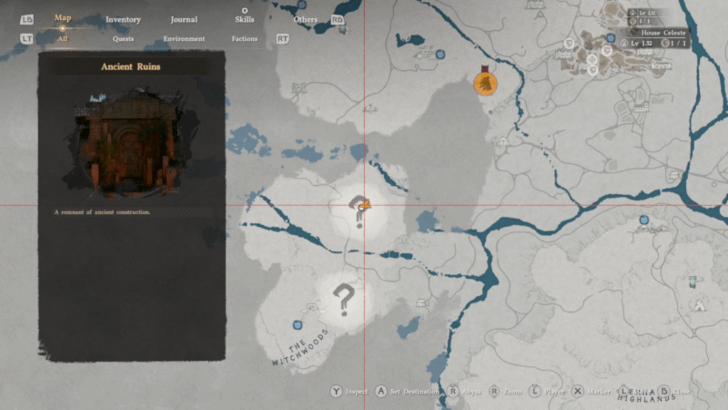
Timberdale Cliff Ruins
|
  Use Force Palm of Force Current to press the different buttons to direct the power from one end of the puzzle to the other. Solve the three puzzles to unlock the Abyss Cresset. |
|
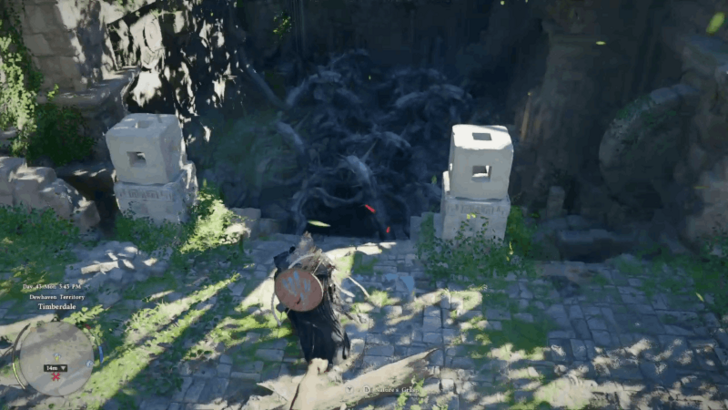
Timberdale Gorge Ruins
|
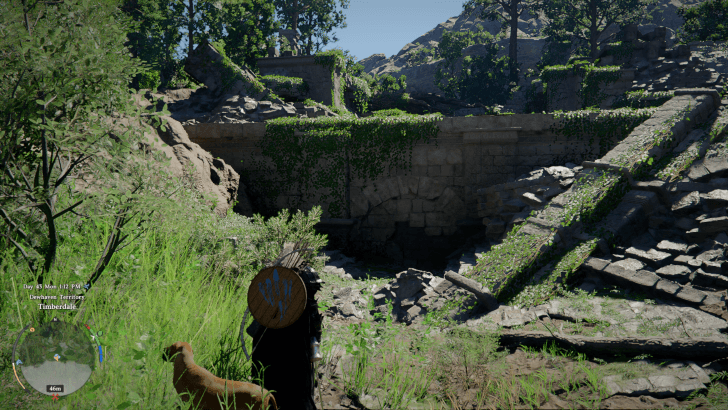  Destroy the wall in front of the stairs with Turning Slash to drain the water and access the ruins. Press the wall buttons using Force Palm to connect the power starting with the center buttons, rightside buttons, then the leftside buttons. |
|
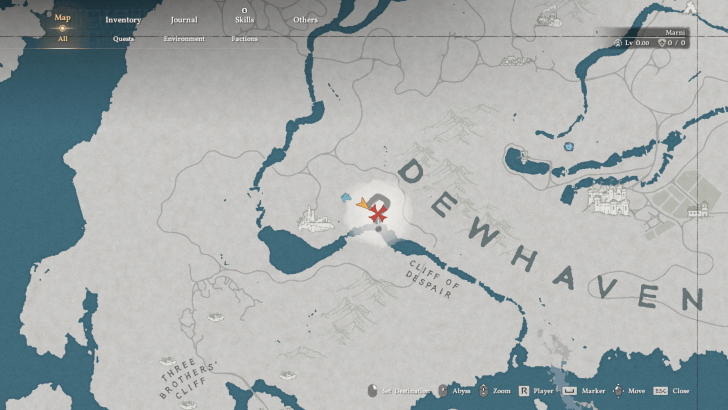
Hunter's Cabin Ruins
|
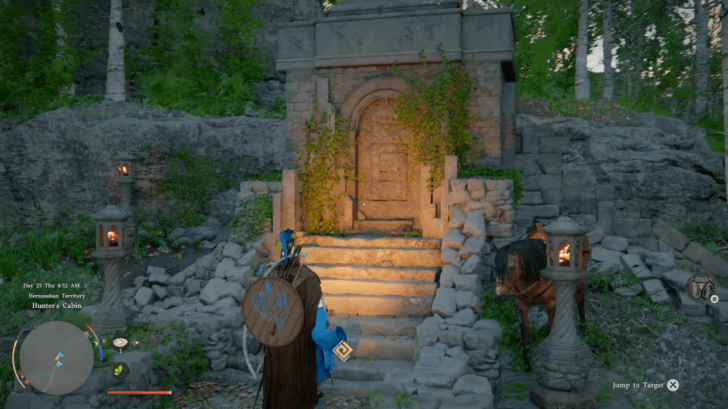  The cemetery in the Hunter's Cabin is surrounded by lit lanterns. Use Blinding Flash to light the remaining two unlit lanterns in the area to solve the puzzle. |
|
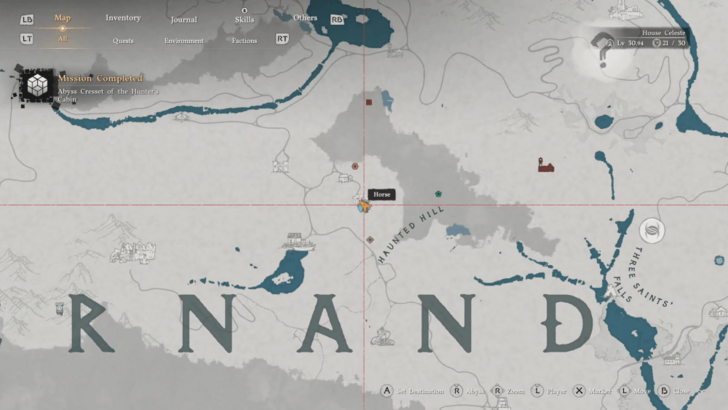
Wiggling Hill Ruins
|
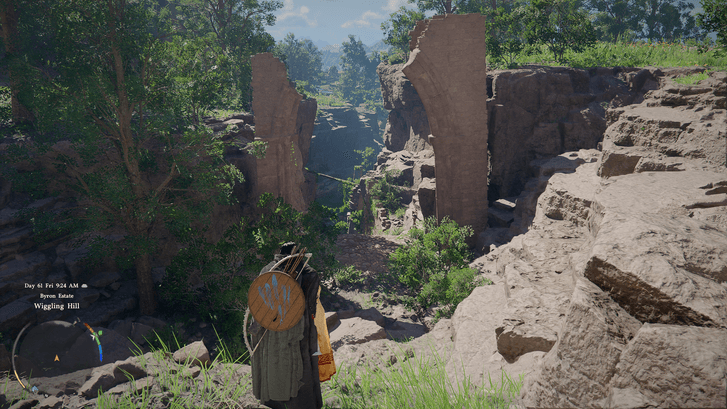 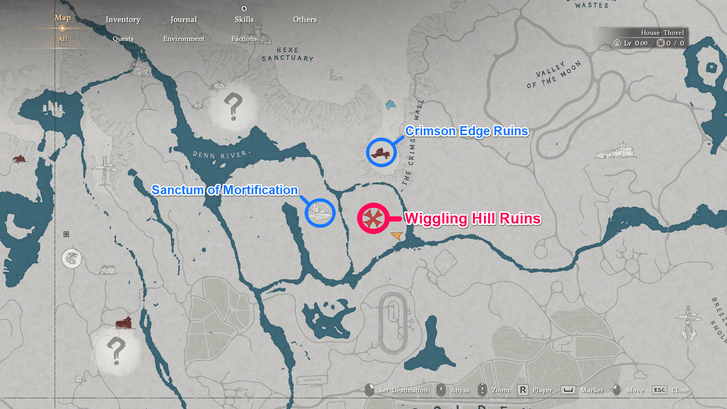 Light the lanterns around the area then use Nature's Snare to lift the Flood Device and drain the water from the ruins. |
|
Blue Thicket Ruins
|
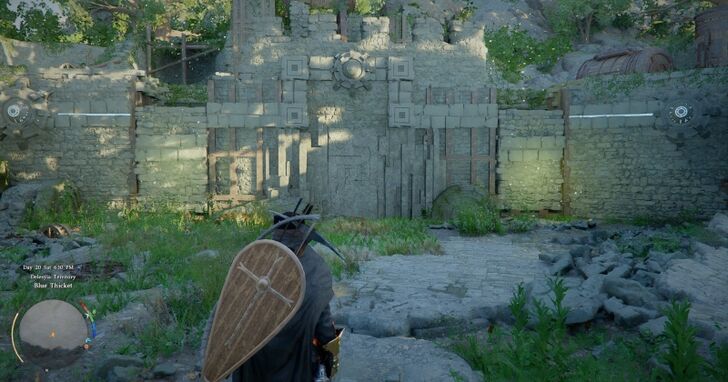 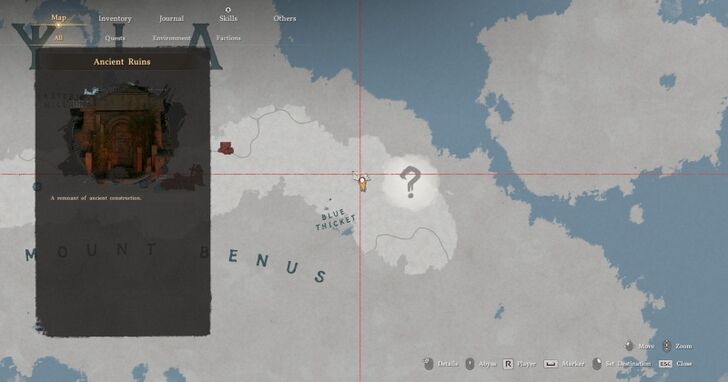 To solve Blue Thicket Ruins, use Nature's Grasp to lift the two stone walls and wait for them to drop to reveal the Abyss Cresset. |
|
Black Wall Ruins
|
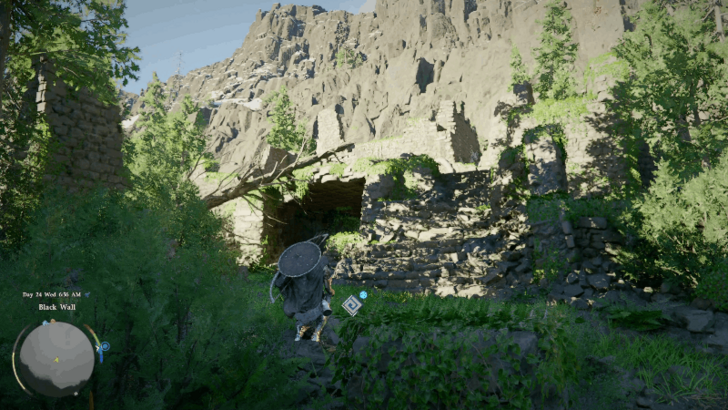 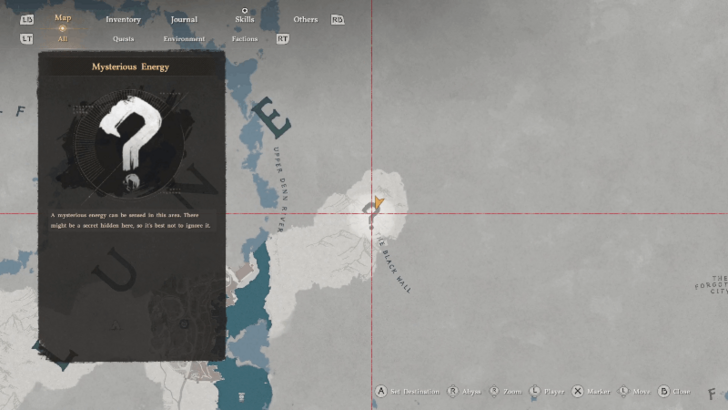 Enter the small ruins and use Nature's Grasp on the wall at the right. This activates a short cutscene showing the location of the Abyss Cresset nearby and completes the challenge, Unravel the Secret of the Ancient Ruins. |
|
Meandering Hills Ruins
|
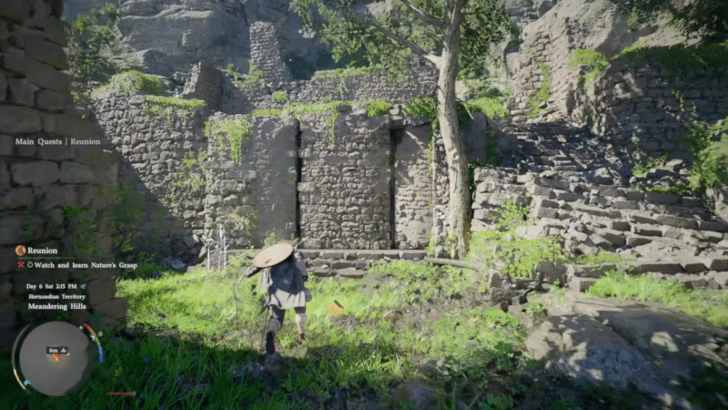  Use Nature's Grasp to lift the stone gate that blocks the entrance to the ruins. Then, use Focus Palm on the giant buttons inside to have each of them pressed at the same time to unlock the Abyss Cresset. |
|
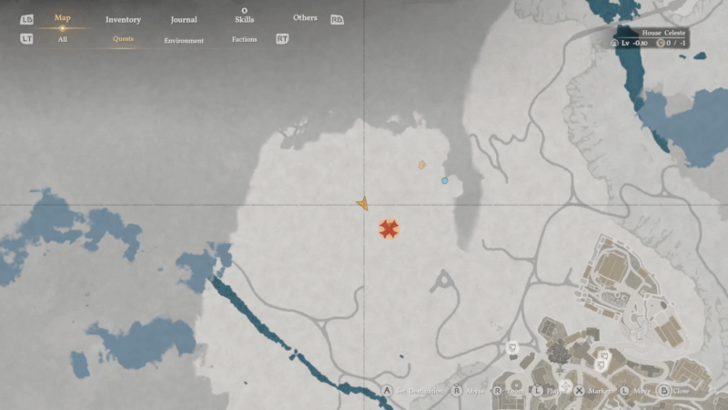
Duskwood Waterside Ruins
|
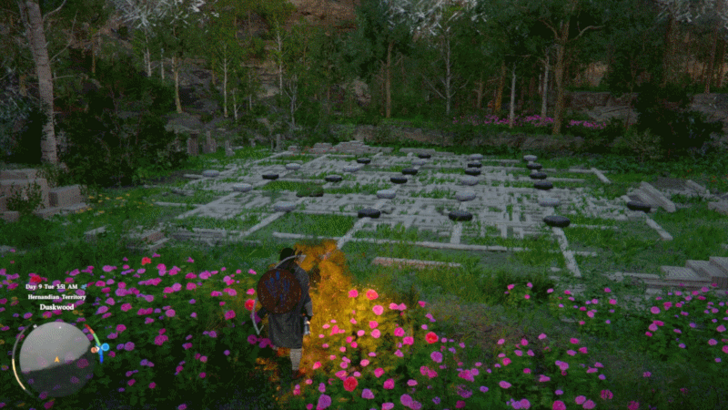  Align any five stones of the same color on the grid to complete the challenge. The line may be vertical, horizontal, or diagonal. White or Black Stones can be moved anywhere. |
|
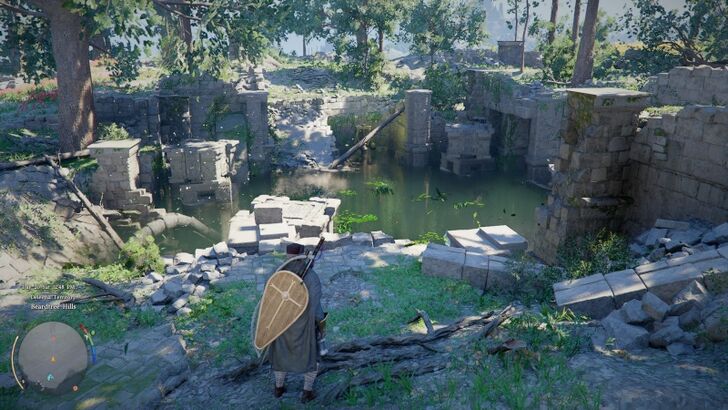
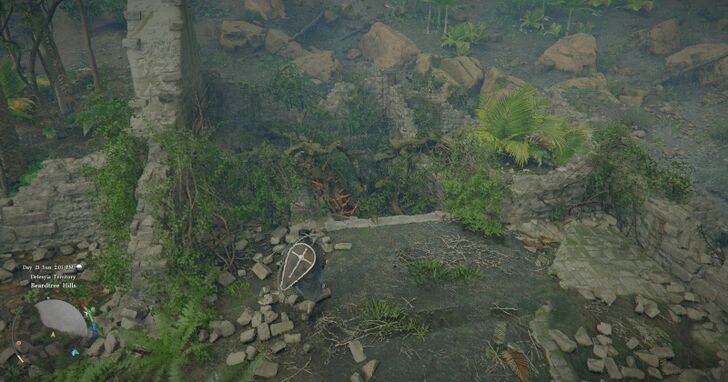
Beardtree Hills Rock Ruins
|
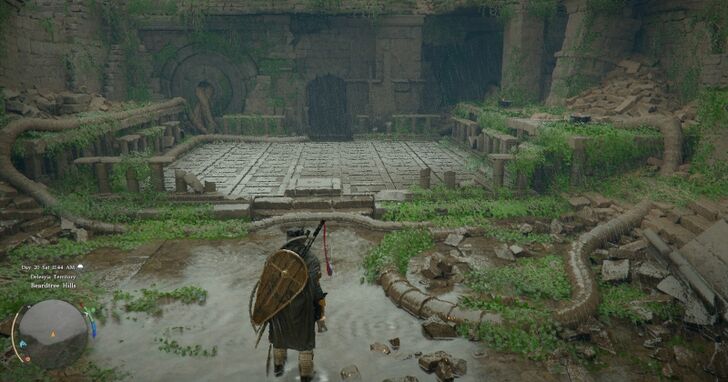 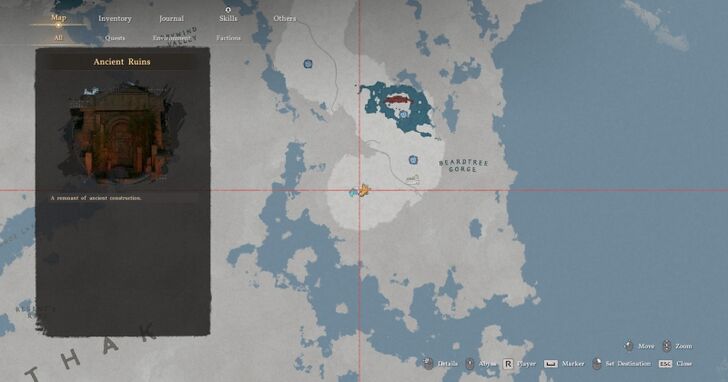 Solve the Beardtree Hills Rock Ruins puzzle by connecting the same symbols without stepping on the same platform twice or without having overlapping platform paths. |
|
Precipice of Echoes Ruins
|
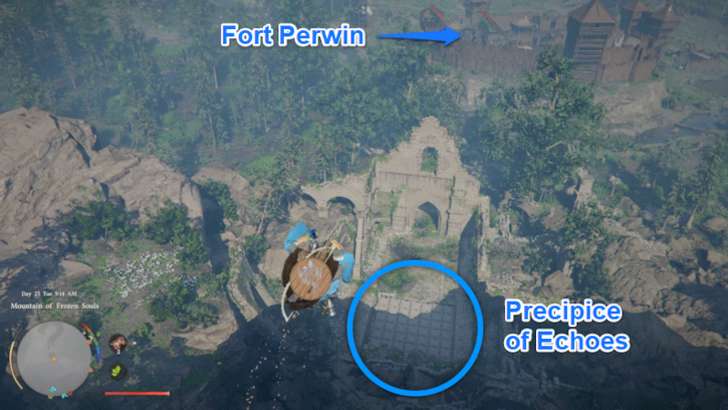  Complete the puzzle by stepping on a sequence of tiles that links two identical icons. After stepping on a tile with a symbol, you must navigate through the grid to step on the tile with the identical symbol. Stepping on an already pressed tile or the wrong symbol tile will reset the puzzle. |
|
Deepfog Basin Dragon Head Ruins
|
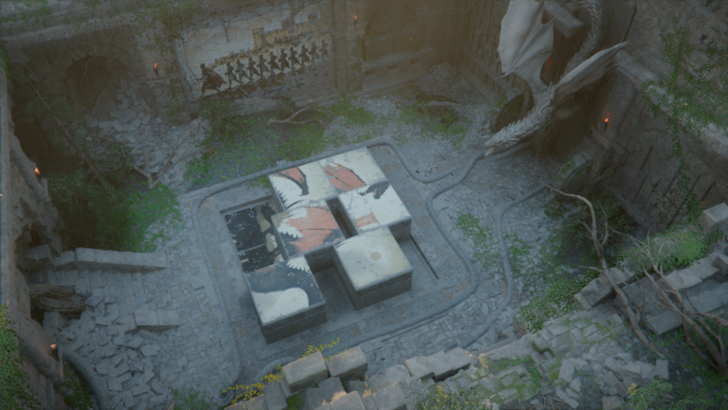  The goal in the Deepfog Basin Dragon Head Ruins is to complete a sliding image puzzle. Use the Stab One-Handed Skill to move each individual tile. Organize the tiles correctly to reveal the full artwork and unlock the Abyss Cresset. |
|
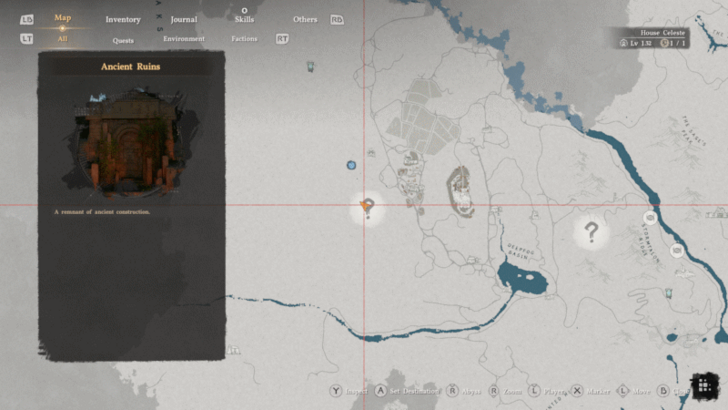
Five-Finger Mountain Icy Ruins
|
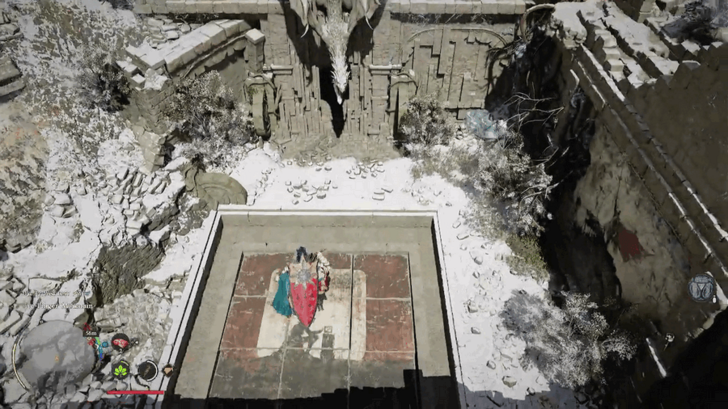 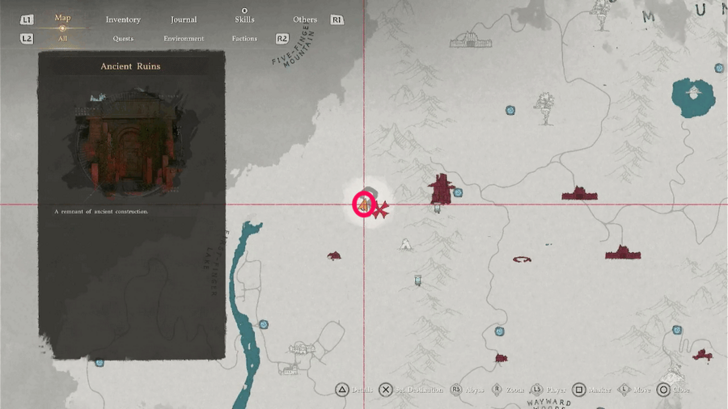 Form the correct image by solving the sliding square puzzle on the floor. Manually move the pieces around by pushing and pulling them. |
|
Five-Finger Mountain Valley Ruins
|
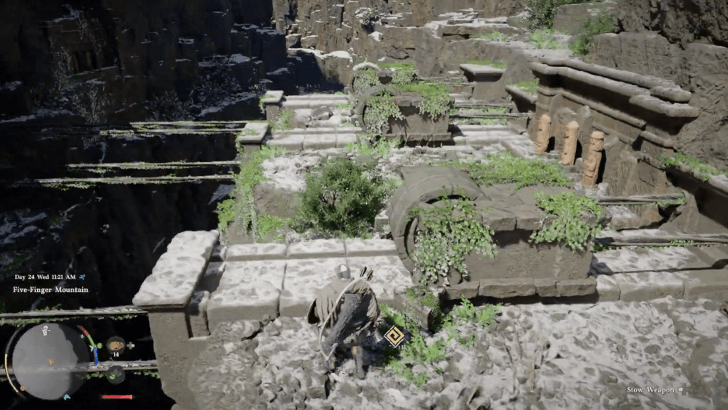  There are three stones you need to push, each one revealing a statue across the chasm. At the center of the monument is a statue holding glowing weapons: a sword, a shield, and a battle axe. You need to push a stone to reveal a statue, then shoot the statue to rotate it and find the correct weapon. |
|
Red River Ruins
|
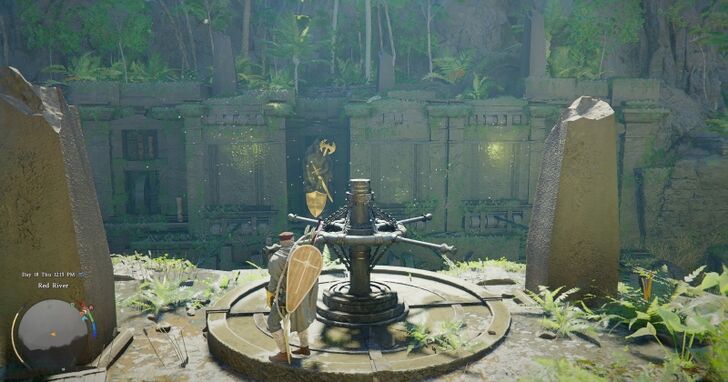  Open the statue gates by pushing the horizontal wheel. Then, use the bow to rotate the statues until they glow blue or are showing the correct faces. |
|
Bamboo Forest Seonangdang Ruins
|
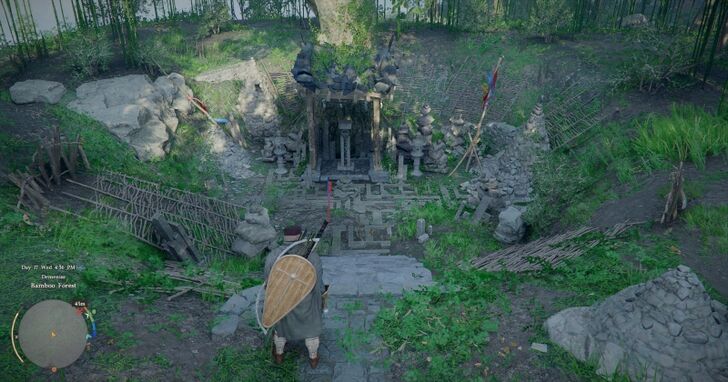  Solve the Bamboo Forest Seonangdang puzzle by finding and placing 3 stones on the pile at the middle of the shrine. |
|
Kingshield Mountains Ruins
|
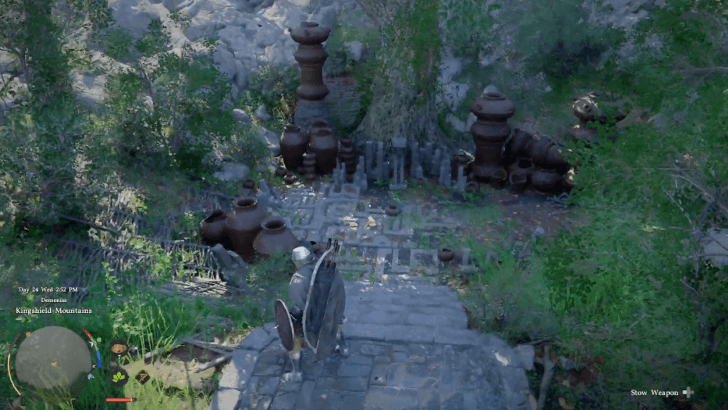 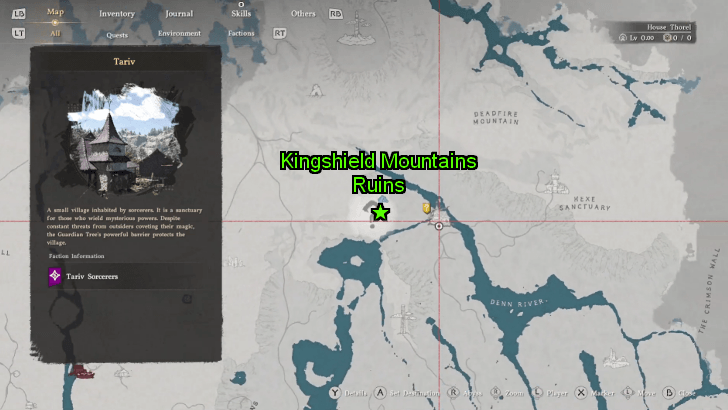 Stack four sturdy pots on top of each other in front of the Abyss Cresset to obtain the Abyss Artifact from it. |
|
Sunrise Plains Ruins
|
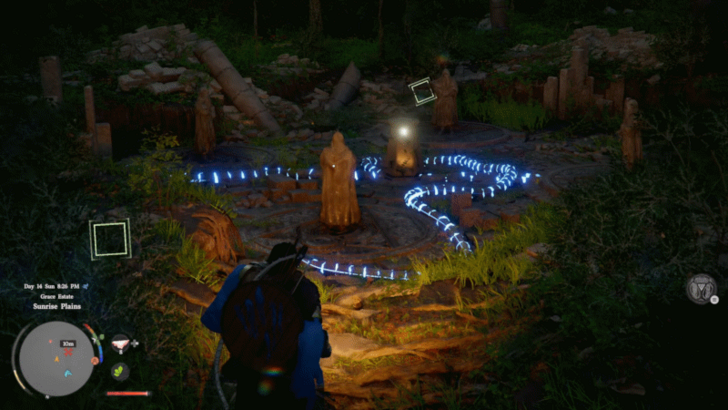  To complete the Sunrise Plains puzzle, rotate the statues using the dials behind them until every statue is facing Abyss Cresset at the center. |
|
Golden Plains Ruins
|
  With Blinding Flash, burn the vines in front of the middle statue. This reveals the fourth statue. Rotate the middle and left statues so that all statues face the center at the same time. |
|
Arboria Forest Ruins
|
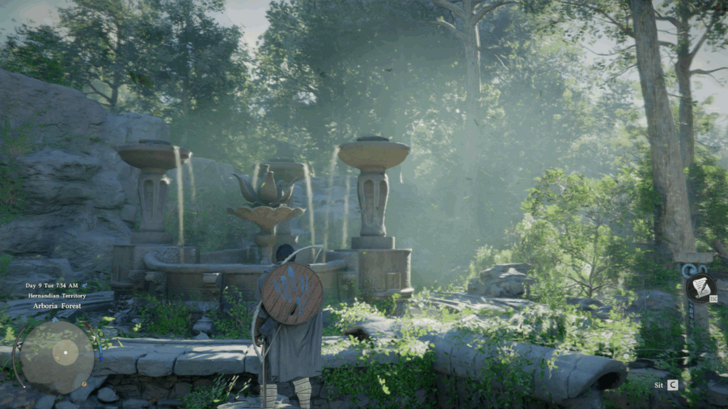 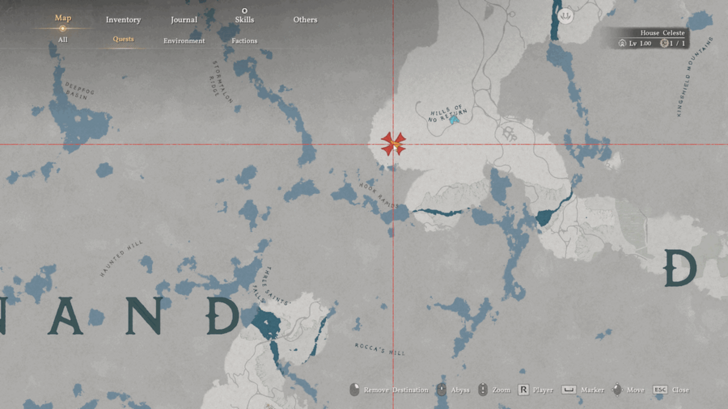 To complete the Arboria Forest Ruins Puzzle, rotate the statues until all water is falling into the fountain. You can rotate them by thrusting your weapon into the notches on the statue's base by pressing RB + Y or Left Shift + Right Click. |
|
Fuming Lands Ruins
|
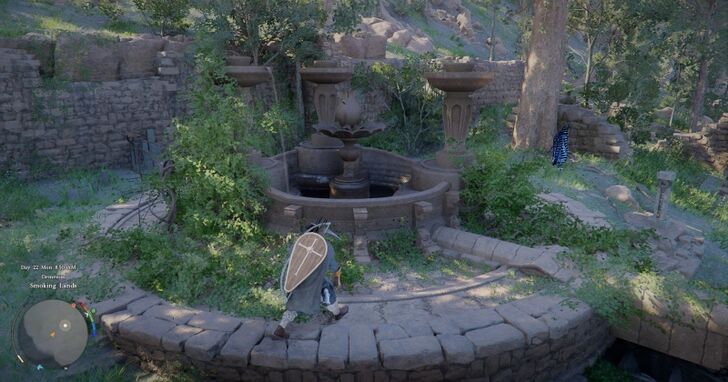 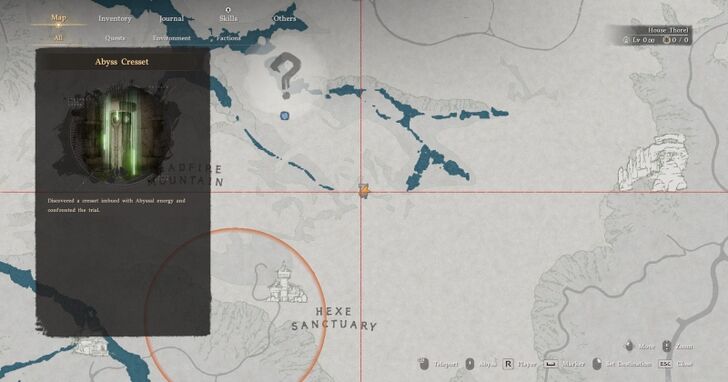 To complete the Fuming Lands Ruins, clear the bushes and rotate the water fountains towards the well. |
|
Beardtree Hills Sunflower Ruins
|
  Solve Beardtree Hills Sunflower Ruins by spinning the turbines with Focus and Nature's Snare to drain the water and reveal the Abyss Cresset. |
|
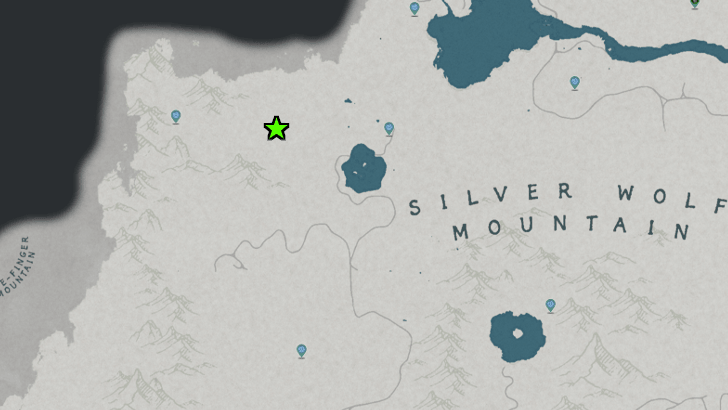
Silver Wolf Mountain Ruins
|
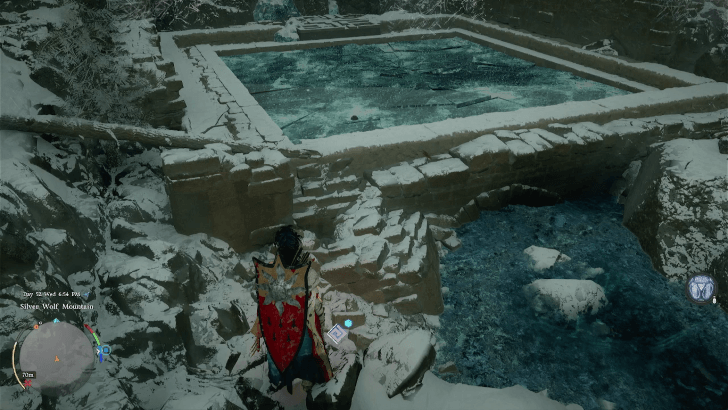  Solve the puzzle in the Silver Wolf Mountain by breaking the ice and draining the water from the ruins. Use Nature's Snare near the mechanism submerged in the water until it drains the water and unlock the Abyss Cresset. |
|
Haunted Hill Ruins
|
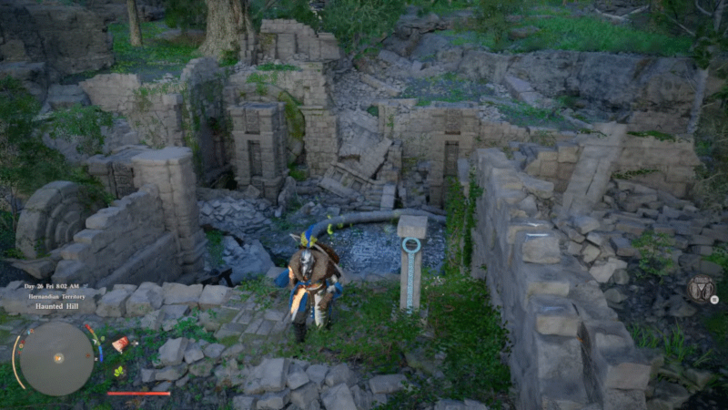 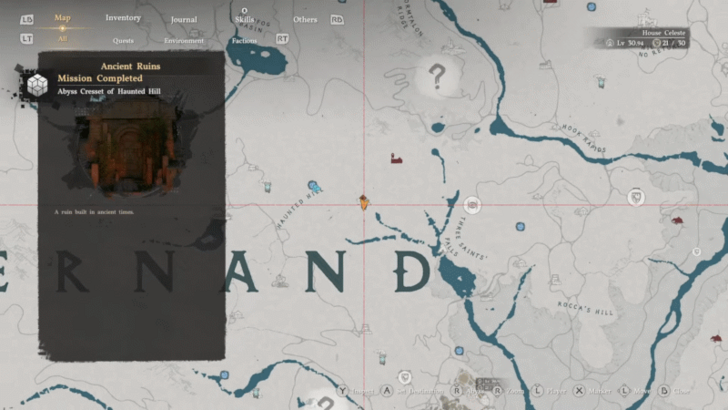 Solve the puzzle in the Haunted Hill by draining the water from the ruins. Use Focus near the mechanism submerged in the water until it drains the water and unlock the Abyss Cresset. |
|
Halssius Conflux Ruins
|
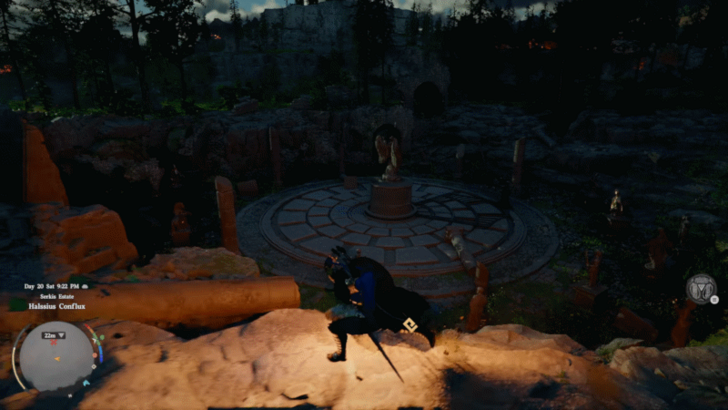 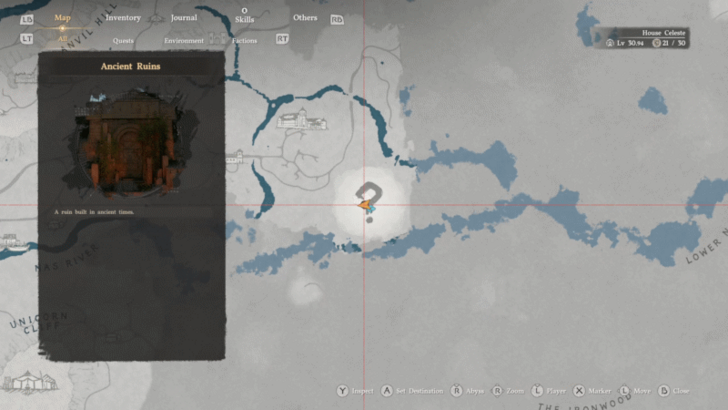 To complete the Hallsius Conflux Puzzle, rotate the central dial to match the symbols of the illuminated statues. |
|
The Grey Forest Ruins
|
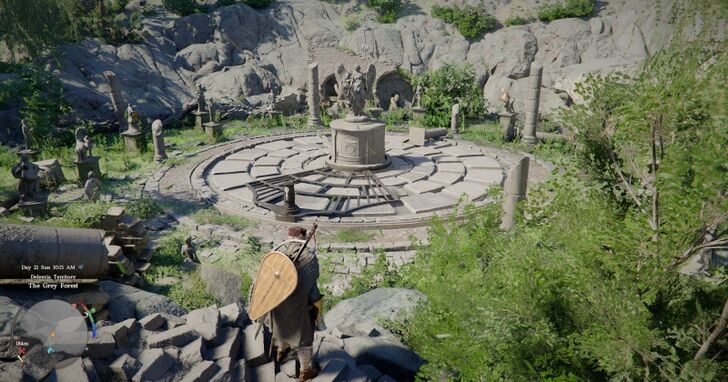 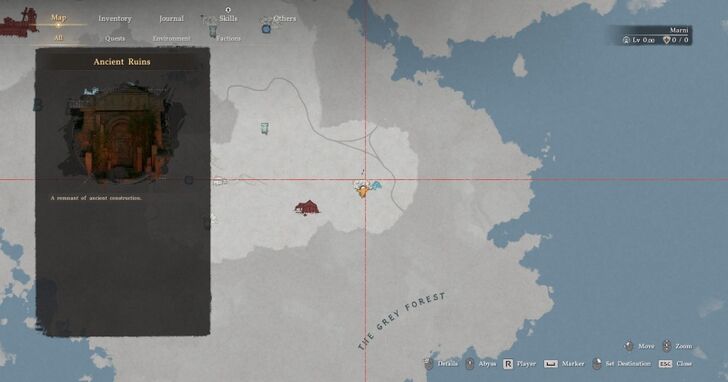 Solve the Grey Forest Ruins by dragging the mechanism to the symbols illuminated by the yellow light beam. |
|
Drakesfall Gorge Ruins
|
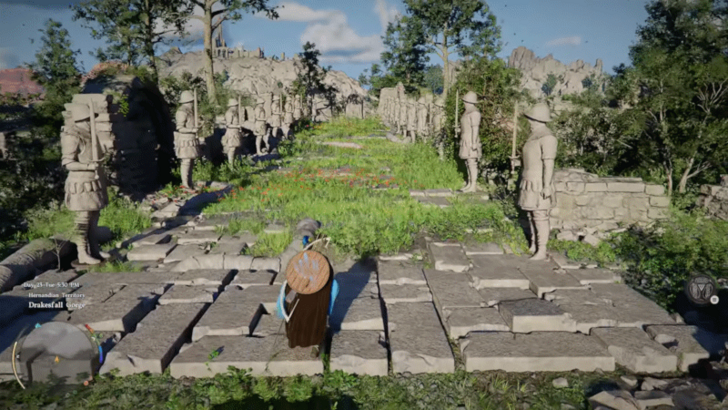 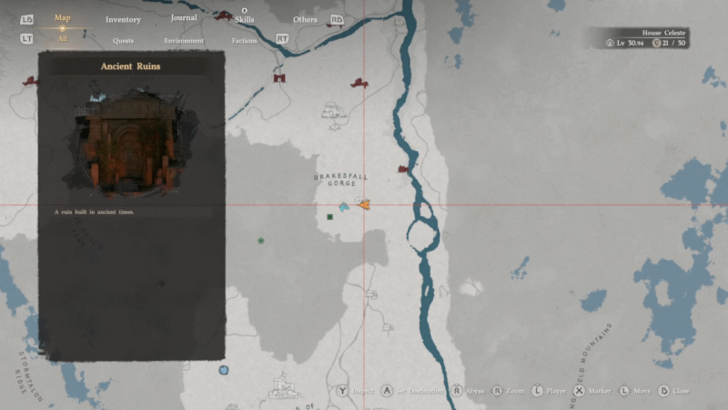 Stand on the stone floor at the opposite side of the large statue and the Abyss Cresset to start a minigame of “Green Light, Red Light.” Get to the Abyss Cresset without getting spotted to complete the puzzle. |
|
Mount Benus Ruins
|
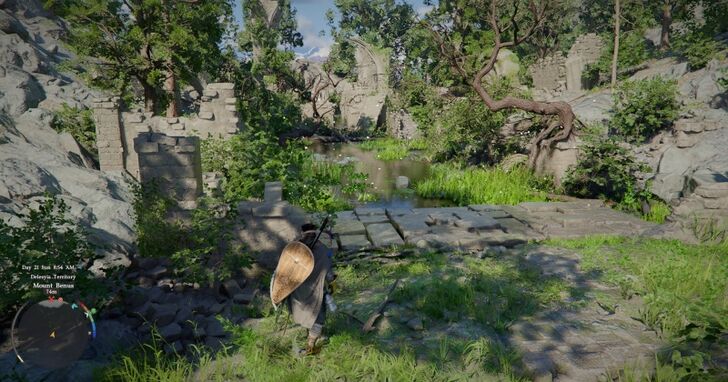  Complete the Mount Benus Ruins by reaching the statue and only moving when it's not looking. |
|
Dragon's Stone Chamber Ruins
|
  There are three dials inside these ruins that you must rotate to a certain direction to open the door containing the Abyss Cresset. Investigate the mural and find the clues in Anvil Hillside Terrace. |
|
Hidden Chamber of Wisdom Ruins
|
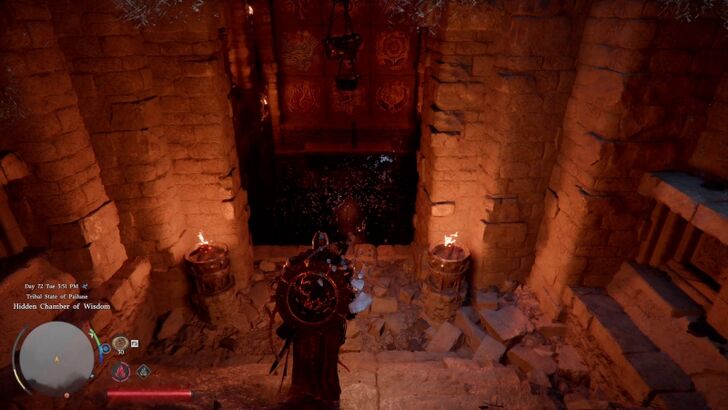 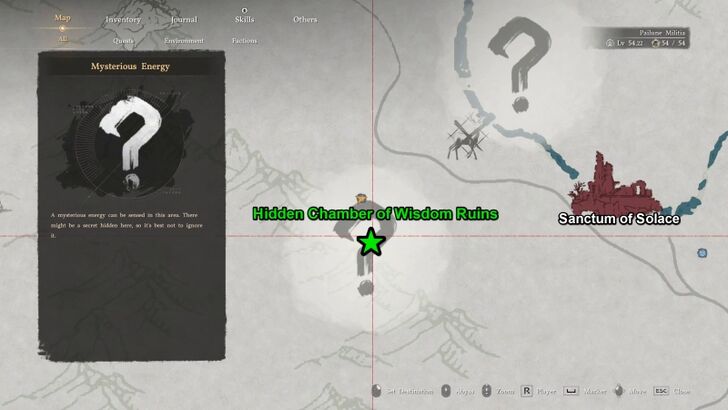 Push the correct buttons in the Hidden Chamber of Wisdom Ruins to reveal the Abyss Cresset. The symbols for the correct buttons are found on the locations marked on the chamber's map. |
|
Secret Chamber of the Golden Plains Ruins
|
  Solve the wall puzzle at the end of the ruins. Hit the buttons in any order: Grape, Horse, Pomegranate, Bird, and Fish. Doing so will lower the wall to reveal the Abyss Artifact. |
|
The Screaming Vault Ruins
|
  Rotate each dial found in the cells of the Screaming Vault Ruins to the correct position to solve the puzzle and unlock the Abyss Cresset. A mural depicting the three scarecrow locations in the nearby farmland can be found in the ruins. Find each scarecrow to find out the puzzle solution. |
|
Memory-Laden Ruins
|
  Solve the Memory-Laden Ruins by crossing the spikes trap and pressing the four correct buttons. The symbols are found scattered near Red River. |
|
Azure Moon Labyrinth Ruins
|
  Activate the correct buttons at the end of the labyrinth. A mural within the labyrinth shows the location of five trees in Pororin showing the right buttons to press. Use the visual aid above to solve the puzzle. |
※ Click on the Ancient Ruin’s name to open the full guide. Click on the checkmark to mark the ruin as complete both on this page and on the map.
There are a total of 37 Ancient Ruins each with different puzzles to solve. While some require specific Skills to be learned, none of them require game progress to solve.
Ancient Ruins Challenge Rewards
Abyss Artifacts for Skill Upgrades
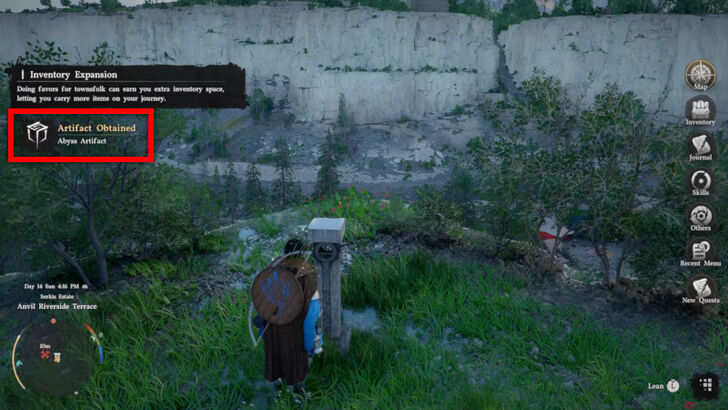
Completing each Ancient Ruin activates an Abyss Cresset where you can obtain an Abyss Artifact. These artifacts are essential for character progression as they are used in the skill tree to learn new skills or enhance core stats, improving your combat effectiveness or exploration abilities.
Best Ways to Farm Abyss Artifacts
Abyss Cresset for Fast Travel
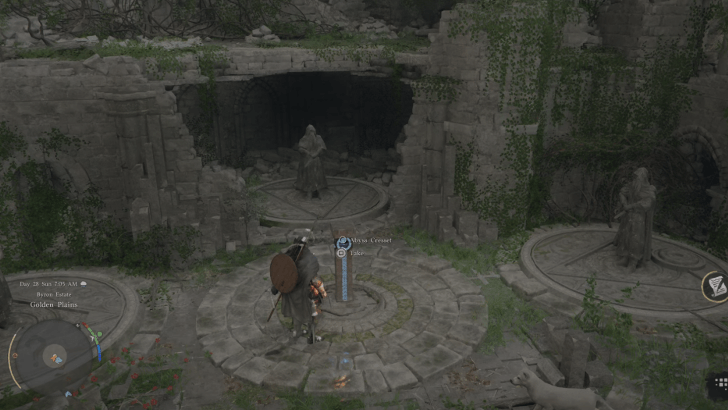
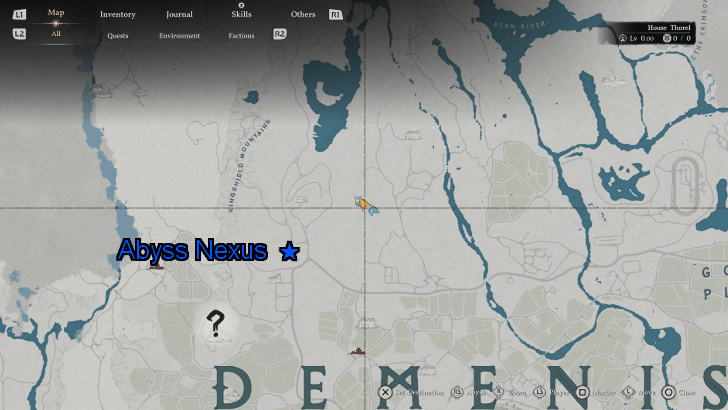
The Abyss Cressets you activate by completing each Ancient Ruin’s challenge also serve as Fast Travel points, functioning in the same way as Abyss Nexuses.
How to Fast Travel: All Fast Travel Points
Crimson Desert Related Guides
Exploration Challenges
| Abyss | Secret Places | Ancient Ruins | |||
| Sanctums | Spires | Mazes |
Mastery Challenges
| Sword | Shield | ||||
| Bow | Spear | ||||
| Two-Handed Weapon | Rapier and Shield | Gun | |||
Combat Challenges
| Training | Operation |
Life Challenges
| Hunting | Life | ||
| Above the Law | Challenges and Changes |
Minigame Challenges
| Duel | Mind Games |
Comment
1  Anonymous 20 days
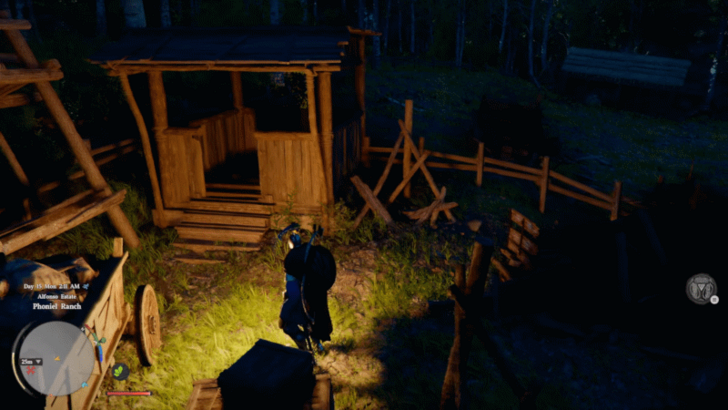
There’s one more puzzle in Castlewood ruins - a lil south to Petalton workshop (Pororin forest guardian territory). Couldn’t figure it out 🥲
Author

All 37 Ancient Ruins Puzzle Solutions and Locations
Please participate in our site
improvement survey
04/2026
improvement survey
04/2026
Would you assist in
improving Game8's site?
improving Game8's site?

×
We are listening to our users' valuable opinions and discussing how to act on them.
The information collected through this survey will be used for the purpose of improving our services. In addition, the information will only be disclosed a part of a statistic in a format that will not allow identification of personal information.
Begin Survey
Not Now
×
Please rate each item regarding Game8.co's Advertisements.
Amount of Ads
Very Dissatisfied
Somewhat Dissatisfied
Fine
Somewhat Satisfied
Highly Satisfied
Placement of Ads
Timing of Ad Display
Ad Loading Speed
Safeness of Ads
Content of Ads
×
Please rate each item regarding Game8.co's Quality of Articles.
Amount of information
Very Dissatisfied
Somewhat Dissatisfied
Fine
Somewhat Satisfied
Highly Satisfied
Frequency of updates
Speed of new information
Accuracy of articles
Understandibility of articles
Readability of sentences
×
Please rate each item regarding Game8.co's Usability of the Site.
Ease of finding information
Very Dissatisfied
Somewhat Dissatisfied
Fine
Somewhat Satisfied
Highly Satisfied
Loading Speed
Use of Color
Font Size
Visibility of Images
Easy to Understand Layout
×
Please rate each item regarding Game8.co's Message Boards, Comments.
Ease of Writing
Very Dissatisfied
Somewhat Dissatisfied
Fine
Somewhat Satisfied
Highly Satisfied
Readability
Ease in Finding Information
Comment Quality
Comment Quantity
Admin Response
×
Please rate each item regarding Game8.co's Site's new design.
Please rate our site's new design
Very Dissatisfied
Somewhat Dissatisfied
Fine
Somewhat Satisfied
Highly Satisfied
Do you think that the website's design change makes the site easier to use?
Has the new design made it easier for you to find information on the site?
Has the new design improved the overall visual appeal of the site?
How would you rate your overall satisfaction with the new design of the site?
×
How likely are you to recommend Game8 to someone you know?
Very Unlikely
0
1
2
3
4
5
6
7
8
9
10
Very Likely
If you have other opinions regarding potential improvement to the website, please share them with us. We would appreciate your honest opinion.
Note: This is a free response section, so you can proceed without entering anything.
Note: Please be sure not to enter any kind of personal information into your response.
Note: Please be sure not to enter any kind of personal information into your response.
×
Thank You
×
Thank you for participating in our survey! Your answers will help us to improve the quality of our website and services.
We hope you continue to make use of Game8.
We hope you continue to make use of Game8.
Close
Rankings
- We could not find the message board you were looking for.
Gaming News

![Forza Horizon 6 Review [Preview] | Beautiful Roads With a Whole Lot of Oversteer](https://img.game8.co/4460981/a7254c24945c43fbdf6ad9bea52b5ce9.png/show)


![Forza Horizon 6 Review [Preview] | Beautiful Roads With a Whole Lot of Oversteer](https://img.game8.co/4460981/a7254c24945c43fbdf6ad9bea52b5ce9.png/thumb)
Popular Games

Genshin Impact Walkthrough & Guides Wiki
Crimson Desert Walkthrough & Guides Wiki
Umamusume: Pretty Derby Walkthrough & Guides Wiki
Honkai: Star Rail Walkthrough & Guides Wiki
Monster Hunter Stories 3: Twisted Reflection Walkthrough & Guides Wiki
Wuthering Waves Walkthrough & Guides Wiki
The Seven Deadly Sins: Origin Walkthrough & Guides Wiki
Pokemon TCG Pocket (PTCGP) Strategies & Guides Wiki
Pokemon Pokopia Walkthrough & Guides Wiki
Zenless Zone Zero Walkthrough & Guides Wiki


Recommended Games
Monster Hunter World Walkthrough & Guides Wiki
Fire Emblem Heroes (FEH) Walkthrough & Guides Wiki
Pokemon Brilliant Diamond and Shining Pearl (BDSP) Walkthrough & Guides Wiki
Super Smash Bros. Ultimate Walkthrough & Guides Wiki
Diablo 4: Vessel of Hatred Walkthrough & Guides Wiki
Cyberpunk 2077: Ultimate Edition Walkthrough & Guides Wiki
Yu-Gi-Oh! Master Duel Walkthrough & Guides Wiki
Elden Ring Shadow of the Erdtree Walkthrough & Guides Wiki
The Legend of Zelda: Tears of the Kingdom Walkthrough & Guides Wiki
Persona 3 Reload Walkthrough & Guides Wiki


All rights reserved
© Pearl Abyss Corp. All Rights Reserved.
The copyrights of videos of games used in our content and other intellectual property rights belong to the provider of the game.
The contents we provide on this site were created personally by members of the Game8 editorial department.
We refuse the right to reuse or repost content taken without our permission such as data or images to other sites.
okay figured it out. You have to burn the thorny veins on the side of the chest door. And, then turn on the fire.