Chapter 04 Walkthrough - To War! (Golden Wildfire)
Check out our:
★ Story Walkthrough for how to get S Rank Rewards and the Best Responses to Support Conversations!
★ Character Tier List / Class Tier List for party building!
★ List of Characters for guides on recruiting all characters and their best classes.
To War! is Chapter 04 of the Golden Wildfire Route in Fire Emblem Warriors Three Hopes. Read on to learn about the different quests, survey spots, rewards, and support conversations within the chapter, as well as our walkthrough for its main quest!
| ⮜ Previous Chapter | Next Chapter ⮞ |
|---|---|
| Chapter 3: The Battle for the Locket |
Chapter 5: The Golden Guardian |
List of Contents
To War! Recruitable Characters
| All Recruitable Characters in To War! | ||
|---|---|---|
 Linhardt Linhardt
|
 Gatekeeper Gatekeeper
|
|
Linhardt can be recruited using the Persuade Strategy during the Battle Prep part of the main quest. You need at least 10 Strategy Points to recruit him.
Gatekeeper will only appear on this chapter on the third New Game Plus playthrough.
Recruitment Guide: How to Recruit Units
To War! Quests, Survey Spots, and Rewards
To War! Quests
| Quest | Type | Rewards |
|---|---|---|
| The Defense of the Great Bridge | Main |
S Rank Reward: Ambrosia x1
First Time Reward: Rusted Sword x1 |
| Eliminate the Bandits | Side |
S Rank Reward: Mace x1
Capture Reward: 1800 G |
| Cleanup in Phlegethon | Side |
S Rank Reward: Bullion x1
Capture Reward: Training Points Recovered: 1 |
| Rendezvous with the Vanguard | Side |
S Rank Reward: Intermediate Seal x1
Capture Reward: Activity Points Recovered:1 |
To War! Survey Spots
| Side Mission | Survey Spot | Type | Reward / Conditions |
|---|---|---|---|
| Eliminate the Bandits | Stronghold | Visit | Reward: Crude Building Material x10 |
| Eliminate the Bandits | Tent | Visit | Reward: Alliance Sniper Fusiillade |
| Eliminate the Bandits | House | Visit | Reward: Floral Adornment |
| Cleanup in Phlegethon | House | Choice | Reward: Strength Ring or Speed Ring |
| Cleanup in Phlegethon | Stronghold | Visit | Reward: Crude Building Material x10 |
| Rendezvous with the Vanguard | Cave | Visit |
Survey Conditions: Must complete all side missions in this area.
Reward: 2,400 G |
| Rendezvous with the Vanguard | Stronghold | Visit | Reward: Call in Guards |
| Rendezvous with the Vanguard | Tent | Pay |
Gold Required: 100 G
Reward: Crude Building Material x10 |
The Defense of the Great Bridge Strategies and Walkthrough
Recommended Strategies for The Defense of the Great Bridge
| Strategy | Description | Cost |
|---|---|---|
| Call in Guards | Summon a support unit to cover the Alliance general's retreat. | 10 |
| Persuade Linhardt | Convince an enemy general to join your army. | 10 (GW) / 30 (AG) |
| Stronghold Sabotage | Decrease the durability of all enemy strongholds at the beginning of battle. | 10 |
The Defense of the Great Bridge Objectives
| Victory Condition | Defeat Condition |
|---|---|
| Rescue Count Gloucester. | Count Gloucester is routed. |
|
Main Objectives
1. Seize the surrounding strongholds to secure the escape route. 2. Defeat the Fighter and aid Count Gloucester. 3. Defeat Acheron and Acheron's minions! 4. Protect the Alliance Soldiers as they retreat! 5. Defeat Caspar! 6. Defeat Linhardt!/ Defeat and recruit Linhardt! Side Objectives ・ Defeat the Fighters targeting the Pier Stronghold! ・ Seize all the strongholds and take control of the Great Bridge of Myrddin! |
|
The Defense of the Great Bridge Walkthrough
| Objectives | |
|---|---|
| 1 | 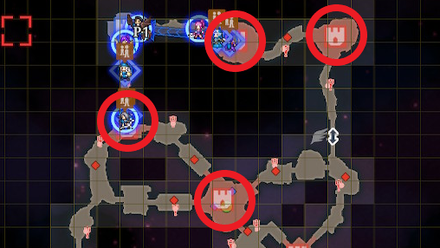 Once the battle begins, pair off characters and send them in at least 4 teams around the map. Aim to take over each stronghold in the area! This should be much easier with the Stronghold Sabotage Strategy Assign Shez or the character you plan to play near the center. |
| 2 | Because you will need to get to Count Gloucester quickly, once you have taken at least one fort, send over the closest ally to guard him. For the units sent to the north, leave at lease one near your original stronghold for the upcoming sidequest. |
| 3 | 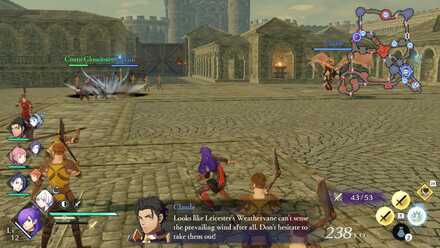 Once you have protected the Count, Acheron will betray you and switch sides. This means that the central stronghold is now under enemy control. |
| 4 | You'll need to defeat the Acheron and his minions. Send one to two allies towards your original stronghold and keep one near you to deal with the Acheron. |
| 5 | 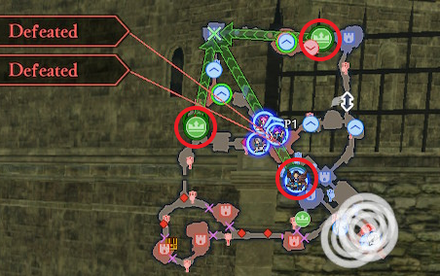 You will need to keep allies spread out as you will need to protect the Alliance Soldiers who are retreating. Since there are about 4 groups, have 3 of the groups guard the 3 Alliance Soldiers. If you used the Call In Guards Strategy, you can summon them at this point to help protect the Soldiers while you focus on other things. |
| 6 | 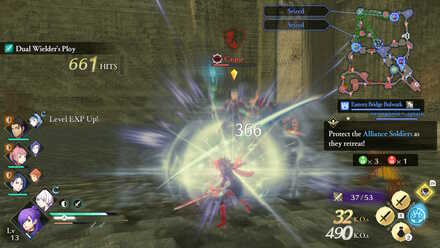 To achieve S-rank you'll need to take out as many soldiers as you can, so while your party is leading the soldiers away, head to the south east and fight groups until you find Caspar. You won't be able to beat him just yet, Linhardt will rescue him before he can get injured further. |
| 7 | 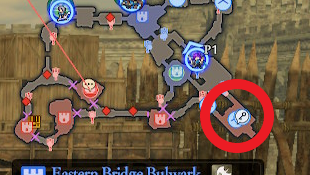 Optional: Head further back and take the Key to the chest from the enemy! You will get a chance to use it much later on. |
| 8 | 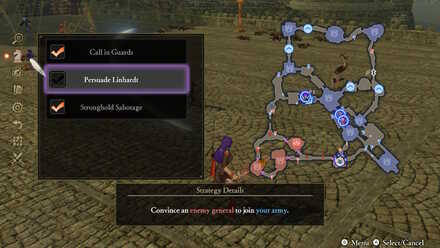 Once the soldiers are safe, send one ally to Linhardt. He will open the gates to the final section of the map. If you chose the strategy to recruit Linhardt, initiate your strategy and your goal will be to defeat and recruit him. |
| 9 | 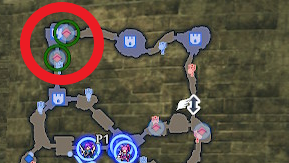 Optional: Leave your other two allies near the original stronghold to defend it against Fighters. |
| 10 | 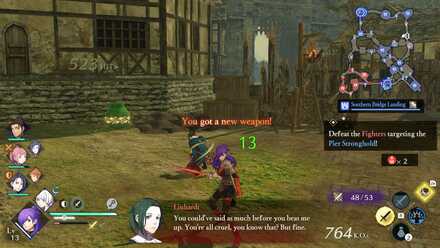 Fight Linhardt with all you've got! We recommend saving some of your abilities to make it quick! |
| 11 | 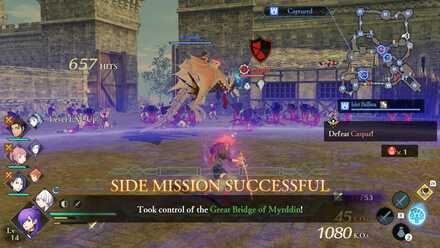 Optional: After defeating Linhardt, all that's left is Caspar. You will have the option to take over all the Strongholds or to just deal with Caspar directly. We recommend taking this on to achieve S-Rank for enemies defeated. Check the menu to see your current progress for S-Rank! If you need to defeat more enemies, this is the perfect time! |
| 12 | Be sure your Awakening Gauge and Warrior Specials are ready to go and bombard Caspar with some. When he's defeated, he'll retreat. Check the menu to see your current progress for S-Rank! If you need to defeat more enemies, this is the perfect time! |
To War! Support and Romance Conversations
In Camp
| There doesn't appear to be any conversations that affect Support in this Chapter's camp. |
Between Battles
| There doesn't appear to be any conversations that affect Support between this Chapter's battles. |
Fire Emblem Warriors: Three Hopes Related Guides

Story Walkthrough: List of Chapters
All Story Walkthroughs
All Paralogues
Author
Chapter 04 Walkthrough - To War! (Golden Wildfire)
Rankings
- We could not find the message board you were looking for.
Gaming News
Popular Games

Genshin Impact Walkthrough & Guides Wiki

Honkai: Star Rail Walkthrough & Guides Wiki

Umamusume: Pretty Derby Walkthrough & Guides Wiki

Pokemon Pokopia Walkthrough & Guides Wiki

Resident Evil Requiem (RE9) Walkthrough & Guides Wiki

Monster Hunter Wilds Walkthrough & Guides Wiki

Wuthering Waves Walkthrough & Guides Wiki

Arknights: Endfield Walkthrough & Guides Wiki

Pokemon FireRed and LeafGreen (FRLG) Walkthrough & Guides Wiki

Pokemon TCG Pocket (PTCGP) Strategies & Guides Wiki
Recommended Games

Diablo 4: Vessel of Hatred Walkthrough & Guides Wiki

Cyberpunk 2077: Ultimate Edition Walkthrough & Guides Wiki

Fire Emblem Heroes (FEH) Walkthrough & Guides Wiki

Yu-Gi-Oh! Master Duel Walkthrough & Guides Wiki

Super Smash Bros. Ultimate Walkthrough & Guides Wiki

Pokemon Brilliant Diamond and Shining Pearl (BDSP) Walkthrough & Guides Wiki

Elden Ring Shadow of the Erdtree Walkthrough & Guides Wiki

Monster Hunter World Walkthrough & Guides Wiki

The Legend of Zelda: Tears of the Kingdom Walkthrough & Guides Wiki

Persona 3 Reload Walkthrough & Guides Wiki
All rights reserved
© Nintendo / INTELLIGENT SYSTEMS © KOEI TECMO GAMES CO., LTD. Fire Emblem and Nintendo Switch are trademarks of Nintendo. © Nintendo.
The copyrights of videos of games used in our content and other intellectual property rights belong to the provider of the game.
The contents we provide on this site were created personally by members of the Game8 editorial department.
We refuse the right to reuse or repost content taken without our permission such as data or images to other sites.
 Crossed Roads


![Monster Hunter Stories 3 Review [First Impressions] | Simply Rejuvenating](https://img.game8.co/4438641/2a31b7702bd70e78ec8efd24661dacda.jpeg/show)


![Monster Hunter Stories 3 Review [First Impressions] | Simply Rejuvenating](https://img.game8.co/4438641/2a31b7702bd70e78ec8efd24661dacda.jpeg/thumb)


