Chapter 05 Walkthrough - The Golden Guardian (Golden Wildfire)
Check out our:
★ Story Walkthrough for how to get S Rank Rewards and the Best Responses to Support Conversations!
★ Character Tier List / Class Tier List for party building!
★ List of Characters for guides on recruiting all characters and their best classes.
The Golden Guardian is Chapter 05 of the Golden Wildfire Route in Fire Emblem Warriors Three Hopes. Read on to learn about the different quests, survey spots, rewards, and support conversations within the chapter, as well as our walkthrough for its main quest!
| ⮜ Previous Chapter | Next Chapter ⮞ |
|---|---|
| Chapter 4: To War! |
Chapter 6: The Leader's Stratagem |
List of Contents
The Golden Guardian Recruitable Characters
| All Recruitable Characters in The Golden Guardian | ||
|---|---|---|
 Balthus Balthus
|
 Holst Holst
|
|
Balthus can be recruited using the Persuade Strategy during the Battle Prep part of the main quest. You need at least 20 Strategy Points to recruit him.
Holst will automatically join the party in this chapter.
Recruitment Guide: How to Recruit Units
The Golden Guardian Quests, Survey Spots, and Rewards
The Golden Guardian Quests
| Quest | Type | Rewards |
|---|---|---|
| The Derdriu Gambit | Main |
S Rank Reward: Speed Carrot x1
Capture Reward: Intermediate Seal x1 |
| Delay the Enemy's Advance | Side |
S Rank Reward: Steel Gauntlets
Capture Reward: Activity Points Recovered:1 |
| Rout Bandits in Riegan | Side |
S Rank Reward: Intermediate Seal x1
Capture Reward: Training Points Recovered: 1 |
| Strike the Vulnerable Imperial Forces | Side |
S Rank Reward: Intermediate Seal x1
Capture Reward: Training Points Recovered: 1 |
| Port in Peril | Side |
S Rank Reward: Bullioin x1
Capture Reward: Activity Points Recovered: 1 |
| Capture the Thieves - Golden Deer | Extra | No Fixed Rewards |
| A Grave Threat - Golden Deer | Extra | No Fixed Rewards |
| Capture the Thieves - Golden Deer | Extra | No Fixed Rewards |
The Golden Guardian Survey Spots
| Side Mission | Survey Spot | Type | Reward / Conditions |
|---|---|---|---|
| Delay the Enemy's Advance | Tent | Choice | Reward: Volunteer Infantry Battalion or Volunteer Magic Corps Battalion |
| Delay the Enemy's Advance | Ruins | Choice | Reward: (+)5 Mag.. to a character of choice |
| Delay the Enemy's Advance | Mine | Meet Conditions |
Survey Conditions: Exchange 3 Airmid Goby
Reward: Smithing Stone x20 |
| Delay the Enemy's Advance | House | Visit | Reward: Basic Building Material x20 and Recruit Training Gear x30 |
| Rout Bandits in Riegan | Spring | Choice | Reward: Increased Support between two characters of choice. |
| Rout Bandits in Riegan | Tent | Visit | Reward: Call In Archers |
| Rout Bandits in Riegan | House | Visit | Reward: Basic Building Material x38, Apprentice Smithing Set x15, and Humble Furnishings x10 |
| Strike the Vulnerable Imperial Forces | Tent | Pay |
Gold Required: 500 G
Reward: Intermediate Seal x3 |
| Strike the Vulnerable Imperial Forces | Cave | Visit |
Survey Conditions: Must complete all side missions in this area.
Reward: 3,200 G |
| Strike the Vulnerable Imperial Forces | Ruins | Choice | Reward: Leather Shield or Evasion Ring |
| Strike the Vulnerable Imperial Forces | Tent | Visit | Reward: Basic Building Material x38 and Squire's Insignia x15 |
| Strike the Vulnerable Imperial Forces | House | Visit | Reward: Wild Game x3 and Cabbage x3 |
| Port in Peril | Estate | Visit | Reward: Basic Building Material x38 , Sutler's License x15, and Storage Bag x10 |
| Port in Peril | House | Meet Conditions |
Survey Conditions: Must have a Priest
Reward: FIsherman's Bounty |
| Port in Peril | Bridge | Visit | Reward: Pontoon Bridge |
The Derdriu Gambit Strategies and Walkthrough
Recommended Strategies for The Derdriu Gambit
| Strategy | Description | Cost |
|---|---|---|
| Persuade Balthus | Convince an enemy general to join your army. | 10 (SB) / 20 (AG) |
| Pontoon Bridge | Move boats to form a bridge and create a new path. | 20 |
| Stronghold Sabotage | Decrease the durability of all enemy strongholds at the beginning of battle. | 10 |
The Derdriu Gambit Objectives
| Victory Condition | Defeat Condition |
|---|---|
| Defeat Ferdinand. | Judith is routed, or the Port Town Checkpoint is captured. |
|
Main Objectives
1. Seize the port strongholds! 2. Defeat the ambushers! 3. Defeat the invading troops! 4. Defeat Balthus!/Defeat and Recruit Balthus! 5. Defeat Ferdinand and defend Derdriu until the very end! Side Objectives ・ Don't let the Thief reach the evacuation point! ・ Seize the strongholds to stop the fire orbs! ・ Seize all the strongholds. |
|
The Derdriu Gambit Walkthrough
| Objectives | |
|---|---|
| 1 | 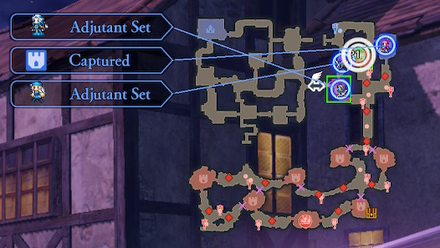 Once the mission starts, focus on sending one of your powerful allies towards Judith, protecting her and taking over the strongholds. Send the rest of you team to take the surrounding strongholds down. To make make it easier to get S-Rank, take out as many soldiers as possible while your allies deal with the strongholds. |
| 2 | 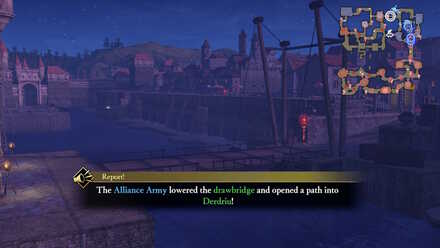 Once the strongholds have been taken over, keep at least 2 allies on this side before taking the lowered drawbridge across. You'll need to protect each stronghold so send out at last 2 allies to the other western side. If Shez is a Fluegel, they will be at a disadvantage on the Eastern side, so send them West. |
| 3 | 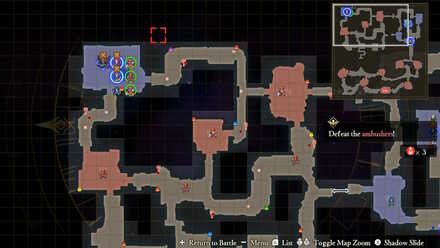 Defeat the ambushers on both sides, keeping the ports up at the same time. |
| 4 | 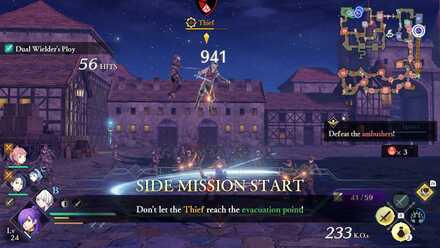 Sometime during the ambush, a Thief will appear on the eastern side. Send one ally to take them out quickly to finish an optional side quest. |
| 5 | If your characters are managing, take time to take over strongholds and defeat enemies. This will be helpful later on. |
| 6 | 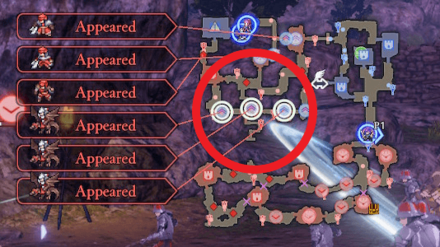 Once the ambushers are defeated, invading troops will appear on the western side. Don't worry though! Holst will join you as a playable character. Holst will be Lv 15, making him a a powerful ally. |
| 7 | Have Holst take over a few strongholds for you. But be careful as they will begin to attack you with fire orbs. |
| 8 | 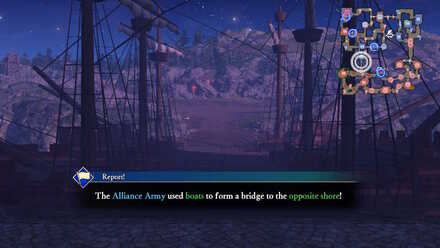 If you chose the Pontoon Bridge strategy, boats will arrive to create a bridge to the other side. Leave one ally on the northwest to take over the strongholds and to defend your own, then send everyone else to the south. If Judith is fine, leave a healer in her area and send your other allies to take over strongholds. |
| 9 |  After defeating the invading troops, Balthus will appear. This is your chance to recruit him if you chose the Persuade Batlhus strategy. |
| 10 | 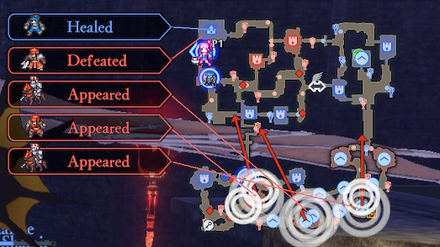 Defeating Balthus will draw Ferdinand out. He'll be making his way towards Judith while his allies will attempt to take the western stronghold. |
| 11 | Assign allies to defend these areas. |
| 12 | Optional but recommended for S-Rank: Seize all the strongholds. If you've been sending allies out from the beginning, you should have most of the strongholds under your control. |
| 13 | Once you're finished, order an All Out Attack on Ferdinand. Making the most of your current allies, unleash a volley of attacks to knock him down quickly. Defeating him will end the Quest. |
The Golden Guardian Support and Romance Conversations
In Camp
 Claude Claude
|
Prompt: | I know I came up with it, but I'm not sure we can manage it given our inferior numbers. | ||
|---|---|---|---|---|
| Answers: | Reactions: | |||
| Add that you're also getting a late start. | None. | |||
| Take an optimistic view | +1 Support with Claude | |||
 Lysithea Lysithea
|
Prompt: | But that would only make him a target for the Empire... | ||
| Answers: | Reactions: | |||
| Encourage her.. | None. | |||
| Comfort her. | +1 Support with Lysithea | |||
 Lorenz Lorenz
|
Prompt: | Urgh. | ||
| Answers: | Reactions: | |||
| Say something. | +1 Support with Lorenz | |||
| Ignore him and pass by. | None | |||
 Ignatz Ignatz
|
Prompt: | But I'm just a nobody now. I'm not sure my soldiers will still follow me. | ||
| Answers: | Reactions: | |||
| Agree with Raphael. | +1 Support with Raphael | |||
| Agree with Ignatz. | +1 Support with Ignatz | |||
 Marianne Marianne
|
Prompt: | But what scheme could he have up his sleeve? | ||
| Answers: | Reactions: | |||
| Suggest he'll call reinforcements from the Kingdom. | +1 Support with Marianne | |||
| Suggest he'll call reinforcement from Almyra. | None | |||
 Linhardt Linhardt
|
Prompt: | And now I'm on the front lines. The Alliance must be really desperate for help. | ||
| Answers: | Reactions: | |||
| Agree with him. | +1 Support with Linhardt | |||
| Disagree with him. | None | |||
 Shamir Shamir
|
Prompt: | They're currently taking refuge in the Kingdom capital, but plan to move to Camulus and resume their work eventually. | ||
| Answers: | Reactions: | |||
| Express shock that she's so well-informed. | +1 Support with Shamir | |||
| Ask what will happen to the church. | None | |||
Between Battles
| There doesn't appear to be any conversations that affect Support between this Chapter's battles. |
Fire Emblem Warriors: Three Hopes Related Guides

Story Walkthrough: List of Chapters
All Story Walkthroughs
All Paralogues
Author
Chapter 05 Walkthrough - The Golden Guardian (Golden Wildfire)
improvement survey
03/2026
improving Game8's site?

Your answers will help us to improve our website.
Note: Please be sure not to enter any kind of personal information into your response.

We hope you continue to make use of Game8.
Rankings
- We could not find the message board you were looking for.
Gaming News
Popular Games

Genshin Impact Walkthrough & Guides Wiki

Honkai: Star Rail Walkthrough & Guides Wiki

Umamusume: Pretty Derby Walkthrough & Guides Wiki

Pokemon Pokopia Walkthrough & Guides Wiki

Resident Evil Requiem (RE9) Walkthrough & Guides Wiki

Monster Hunter Wilds Walkthrough & Guides Wiki

Wuthering Waves Walkthrough & Guides Wiki

Arknights: Endfield Walkthrough & Guides Wiki

Pokemon FireRed and LeafGreen (FRLG) Walkthrough & Guides Wiki

Pokemon TCG Pocket (PTCGP) Strategies & Guides Wiki
Recommended Games

Diablo 4: Vessel of Hatred Walkthrough & Guides Wiki

Cyberpunk 2077: Ultimate Edition Walkthrough & Guides Wiki

Fire Emblem Heroes (FEH) Walkthrough & Guides Wiki

Yu-Gi-Oh! Master Duel Walkthrough & Guides Wiki

Super Smash Bros. Ultimate Walkthrough & Guides Wiki

Pokemon Brilliant Diamond and Shining Pearl (BDSP) Walkthrough & Guides Wiki

Elden Ring Shadow of the Erdtree Walkthrough & Guides Wiki

Monster Hunter World Walkthrough & Guides Wiki

The Legend of Zelda: Tears of the Kingdom Walkthrough & Guides Wiki

Persona 3 Reload Walkthrough & Guides Wiki
All rights reserved
© Nintendo / INTELLIGENT SYSTEMS © KOEI TECMO GAMES CO., LTD. Fire Emblem and Nintendo Switch are trademarks of Nintendo. © Nintendo.
The copyrights of videos of games used in our content and other intellectual property rights belong to the provider of the game.
The contents we provide on this site were created personally by members of the Game8 editorial department.
We refuse the right to reuse or repost content taken without our permission such as data or images to other sites.
 Crossed Roads


![Monster Hunter Stories 3 Review [First Impressions] | Simply Rejuvenating](https://img.game8.co/4438641/2a31b7702bd70e78ec8efd24661dacda.jpeg/thumb)


