Chapter 14 Walkthrough - Torment of the Eagle and Lion (Scarlet Blaze)
Check out our:
★ Story Walkthrough for how to get S Rank Rewards and the Best Responses to Support Conversations!
★ Character Tier List / Class Tier List for party building!
★ List of Characters for guides on recruiting all characters and their best classes.

Torment of the Eagle and Lion is Chapter 14 of the Scarlet Blaze Route in Fire Emblem Warriors Three Hopes. Read on to learn about the different quests, survey spots, rewards, and support conversations within the chapter, as well as our walkthrough for its main quest!
| ⮜ Previous Chapter | Next Chapter ⮞ |
|---|---|
| Chapter 13: Severing the Past |
Chapter 15: The Hour of Vengeance |
List of Contents
How to Unlock Torment of the Eagle and Lion
Recruit Byleth in Chapter 10
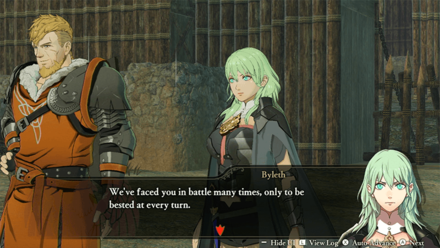
You can only unlock Chapter 14: Torment of the Eagle and Lion if you recruited Byleth in Chapter 10: Shifting History.
Chapter 10 Walkthrough - Shifting History
Torment of the Eagle and Lion Recruitable Characters
| All Recruitable Characters in Torment of the Eagle and Lion | ||
|---|---|---|
| There are no recruitable characters in this chapter. | ||
Recruitment Guide: How to Recruit Units
Torment of the Eagle and Lion Quests, Survey Spots, and Rewards
Torment of the Eagle and Lion Quests
| Quest | Type | Rewards |
|---|---|---|
| Showdown at Ailell | Main |
S Rank Reward: Scroll of Talos x1
First Time Reward: Master Seal x1 |
| Rout the Attacking Knights | Side |
S Rank Reward: Sword of Zoltan+10 x1
Capture Reward: 7,800 G |
| Chaos in Albany | Side |
S Rank Reward: Fruit of Life x1
Capture Reward: Training Points Recovered: 1 |
| Ride for Charon | Side |
S Rank Reward: Master Seal x1
Capture Reward: 7,800 G |
| The Alliance Army's Reinforcements | Side |
S Rank Reward: Bow of Zoltan+10 x1
Capture Reward: Activity Points Recovered: 1 |
| Secure the Ambush Point | Side |
S Rank Reward: Extra Large Bullion x1
Capture Reward: Activity Points Recovered: 1 |
| Defend Daphnel Territory | Side |
S Rank Reward: Axe of Zoltan+10 x1
Capture Reward: Training Points Recovered: 1 |
| Eliminate the Scouts | Side |
S Rank Reward: Lance of Zoltan+10 x1
Capture Reward: 7,800 G |
| Like Cats and Dogs | Paralogue |
S Rank Reward: Hevring Prayer Troops x1
First Time Reward: Berglie Squadron x1 |
Torment of the Eagle and Lion Survey Spots
| Side Mission | Survey Spot | Type | Reward / Conditions |
|---|---|---|---|
| Rout the Attacking Knights | Tent | Meet Condition |
Survey Conditions: Defeat a total of 2000 enemies in this chapter.
Reward: Free Forge Uses: 10 |
| Rout the Attacking Knights | Mine | Visit | Reward: Smithing Stone x30 |
| Chaos in Albany | House | Visit | Reward: Def +5 to a selected unit. |
| Chaos in Albany | Forest | Choice | Reward: Agile Dexterity Ring or Lightning Speed Ring |
| Chaos in Albany | House | Visit | Reward: Lavish Building Material x16, Luxurious Furnishings x6 |
| Ride for Charon | Cave | Visit | Reward: Lance Combat Arts Level Up |
| Ride for Charon | Mine | Meet Condition |
Survey Conditions: Must complete all side missions in this area.
Reward: Agarthium x10 |
| The Alliance Army's Reinforcements | House | Visit | Reward: Lavish Building Material x16, Elite Training Gear x6 |
| The Alliance Army's Reinforcements | House | Visit | Reward: Morale Up for two selected units |
| The Alliance Army's Reinforcements | Cave | Visit | Reward: Summon Alliance Wyverns |
| Secure the Ambush Point | Tent | Visit | Reward: Alliance Sniper Fusillade |
| Secure the Ambush Point | Mine | Visit | Reward: Lavish Building Material x16, Master Smithing Set x12 |
| Defend Daphnel Territory | Mine | Choice | Reward: Mythril or Umbral Steel |
| Defend Daphnel Territory | Tent | Visit | Reward: Lavish Building Material x16, Purveyor's License x10, Storage Compartment x6 |
| Eliminate the Scouts | Cave | Visit | Reward: Lavish Building Material x16, Advanced Combat Manual x12, Hero's Insignia x6. |
| Eliminate the Scouts | Tent | Pay |
Gold Required: 2,000 G
Reward: Item Shop Restocked |
Showdown at Ailell Strategies and Walkthrough
Recommended Strategies for Showdown at Ailell
| Strategy | Description | Cost |
|---|---|---|
| Summon Alliance Wyverns | Summon the Alliance Wyvern Co. to reinforce your allies. | 30 |
| Alliance Sniper Fusillade | Have the Alliance Snipers loose a fusillade of arrows. | 20 (AG) / 30 (SB/GW) |
| Reversal | Begin the battle with some enemy and ally positions switched. | 10 |
Showdown at Ailell Objectives
| Victory Condition | Defeat Condition |
|---|---|
| Defeat the Kingdom and Church of Seiros Army. | The defense point is captured. |
|
Main Objectives
1. Seize the strongholds and defeat the enemy's vanguard! 2. Defeat Felix! 3. Defeat Sylvain! 4. Seize the strongholds and defeat the enemy rear guard! 5. Defeat Dedue! 6. Defeat Flayn! 7. Defeat Dimitri! 8. Defeat Seteth! Side Objectives ・ Defeat the Kingdom soldiers and defend the Alliance Army stronghold protecting the right flank! ・ Defeat the Gremories and stop the magic attacks on the Defense Point! ・ Seize the stronghold and prevent the enemy assault from the lava cave! |
|
Showdown at Ailell Walkthrough
| Objectives | |
|---|---|
| * | We recommend bringing a pair of Sword-wielders, Bow-wielders, and Axe-wielders for this quest. This map will also have terrain that can deal damage to your grounded units. Having a flying unit such as Caspar will help avoid unnecessary damage. |
| 1 | 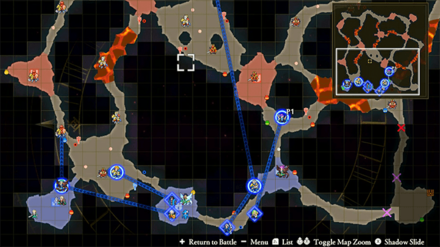 Seize the strongholds and defeat the enemy's vanguard! The battle starts with your team at the southern end of Ailell. Distribute half of your troops to handle the stronghold to the west, with the other half of your team heading north. |
| 2 | 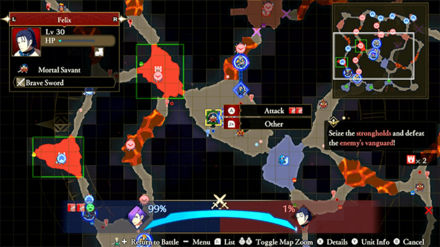 Defeat Felix! The Kingdom will try several attempts to breach your defenses and to reach the Defense Point on the southwestern section of the map. First to try and make their blitz will be Felix. Take him out swiftly as you make your way towards the inner west strongholds. |
| 3 | 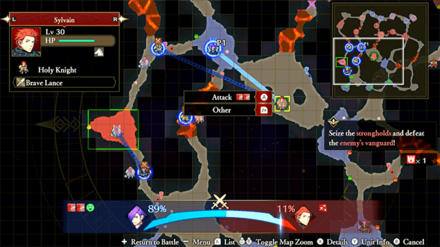 Defeat Sylvain! Next up is going to be Sylvain, just after a handful of Holy and Great Knights. He will be charging forward a bit faster since he is a mounted unit, so feel free to Warp as Shez if necessary. |
| 4 | Mortal Savants will also make their advances. Always have a unit ready to respond by the Defense Point. You can also take this chance to Summon the Alliance Wyverns to help defend the base. |
| 5 | 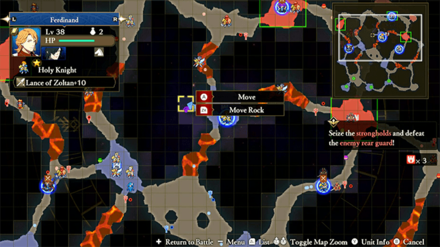 Seize the strongholds and defeat the enemy rear guard! Keep the pressure on as you move towards the northern strongholds. It's better to press on slowly by making sure no enemy breaches the defense. |
| 6 | After clearing the crater stronghold at the center of the map, you can command a unit to Move a Rock to block the lava, reducing the amount of damaging terrain. This will allow you to traverse the map a bit easier. |
| 7 | The Kingdom army will have a similar idea, opening up a path for them on the southeast corner of the map. Have a unit intercept after taking the outer east stronghold. |
| 8 | 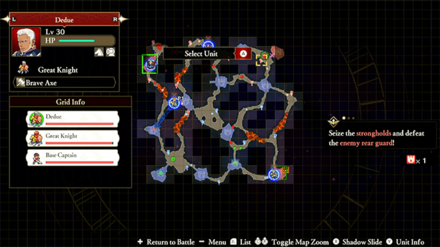 Defeat Dedue! As you seize more and more of the strongholds, Dedue will make his appearance at the northeast part of the map. Make sure the rest of the map is secure before you move towards him. |
| 9 | 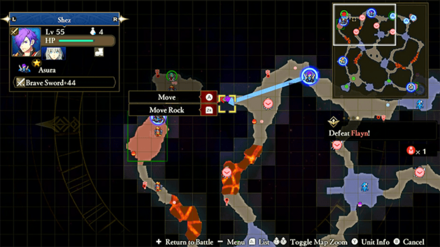 Defeat Flayn! Flayn will also make her appearance, but at the northwest part of the map. You'll have to move a rock to make your way to her. Defeating her will stop the Resonant White Magic from healing the enemy. |
| 10 | 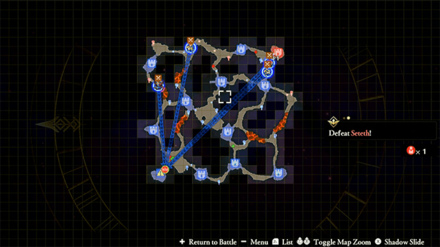 Defeat Dimitri! After Dedue has been defeated, he will make his retreat, triggering Dimitri and Seteth to counterattack. Seteth will pop-up by the Defense Point, so we recommend rushing him as fast as possible. This will also be your chance to Initiate the Alliance Sniper Fusillade. |
| 11 | Defeat Seteth! Dimitri will appear on the opposite end of the map, just past where Dedue was. Having one unit behind to defeat him should be enough. Take him out quickly before returning your focus to Seteth. Be sure to defeat him without allowing the Defense Point to fall. |
Torment of the Eagle and Lion Support and Romance Conversations
In Camp
 Edelgard Edelgard
|
Prompt: | All that is left is to vanquish the Central Church and the Kingdom, who obstinately persist in their opposition to us. | ||
|---|---|---|---|---|
| Answers: | Reactions: | |||
| Express concern about the Alliance. | None | |||
| Express concern about those who slither in the dark. | +1 Support with Edelgard | |||
 Hubert Hubert
|
Prompt: | Do you truly not know anything? | ||
| Answers: | Reactions: | |||
| Remain silent. | None | |||
| Say something even though you don't know. | +1 Support with Hubert | |||
 Linhardt Linhardt
|
Prompt: | But I'm not so sure. They say bad things come in threes. That means more trouble is on the way. | ||
| Answers: | Reactions: | |||
| Take an optimistic view. | +1 Support with Linhardt | |||
| Proclaim you'll deal with anything that happens. | None | |||
 Caspar Caspar
|
Prompt: | Ugh, I just don't know what to do. | ||
| Answers: | Reactions: | |||
| Express concern for Caspar's brother. | None | |||
| Speculate how this will affect Caspar. | +1 Support with Caspar | |||
 Bernadetta Bernadetta
|
Prompt: | It'll be OK...right? | ||
| Answers: | Reactions: | |||
| Reassure her. | +1 Support with Bernadetta | |||
| Express doubt. | None | |||
 Dorothea Dorothea
|
Prompt: | Though really, that shouldn't change the fact that they're all people with families and lives. | ||
| Answers: | Reactions: | |||
| Reassure her. | None | |||
| Say it doesn't matter who it is. | +1 Support with Dorothea | |||
 Monica Monica
|
Prompt: | And there may be more who secretly oppose Her Majesty's plan, even if they show outward support. | ||
| Answers: | Reactions: | |||
| Claim they must be stamped out. | +1 Support with Monica | |||
| Claim they must be accepted regardless. | None | |||
 Ashe Ashe
|
Prompt: | I don't know if I'd be able to defeat him in battle. | ||
| Answers: | Reactions: | |||
| Say he could win. | None | |||
| Say he probably couldn't win. | +1 Support with Ashe | |||
| Say he doesn't have to fight. | None | |||
 Mercedes Mercedes
|
Prompt: | Do you remember the girl who fought alongside me at Arianrhod...and lost her life in the process? | ||
| Answers: | Reactions: | |||
| Say you remember her. | +1 Support with Mercedes | |||
| Say you don't remember. | None | |||
 Lorenz Lorenz
|
Prompt: | The issue is what happens after we win. I am concerned about the relationship between the Empire and the Alliance. | ||
| Answers: | Reactions: | |||
| Agree there's cause for concern. | None | |||
| Take an optimistic stance. | +1 Support with Lorenz | |||
 Raphael Raphael
|
Prompt: | I've heard he's ridiculously strong. I wonder which of us would come out on top. | ||
| Answers: | Reactions: | |||
| Say Dimitri's stronger. | +1 Support with Raphael | |||
| Say Raphael's stronger. | None | |||
 Ignatz Ignatz
|
Prompt: | But now I feel strangely clam, even though we're facing a major fight. | ||
| Answers: | Reactions: | |||
| Praise him. | +1 Support with Ignatz | |||
| Warn him. | None | |||
 Lysithea Lysithea
|
Prompt: | If their aim is to throw Fodlan into chaos, then the best way to stop that would be... | ||
| Answers: | Reactions: | |||
| To bring peace to Fodlan. | None | |||
| To unify Fodlan. | +1 Support with Lysithea | |||
 Marianne Marianne
|
Prompt: | I wouldn't be of any use back home anyway. I have no idea what he's thinking. | ||
| Answers: | Reactions: | |||
| Say he must have his reasons | None | |||
| Say he must be worried about her. | +1 Support with Marianne | |||
 Balthus Balthus
|
Prompt: | I've had a hankerin' to really let someone have it. And it looks like I'll be finally getting my wish. | ||
| Answers: | Reactions: | |||
| Say you feel the same. | +1 Support with Balthus | |||
| Stare in confusion. | None | |||
 Hapi Hapi
|
Prompt: | Yeah, which is exactly why I decided to help you. I dunno how much I can really do, though. | ||
| Answers: | Reactions: | |||
| Side with Hapi. | +1 Support with Hapi | |||
| Side with Constance. | +1 Support with Constance | |||
 Manuela Manuela
|
Prompt: | But Lady Rhea wouldn't possibly appear on the front lines herself...right? | ||
| Answers: | Reactions: | |||
| Say it's a possibility. | +1 Support with Manuela | |||
| Say she probably won't. | None | |||
 Jeritza Jeritza
|
Prompt: | A pointless battle. I hope the next will satisfy me. | ||
| Answers: | Reactions: | |||
| Suggest it will. | +1 Support with Jeritza | |||
| Suggest it won't. | None | |||
 Shamir Shamir
|
Prompt: | But if it did... Hm. | ||
| Answers: | Reactions: | |||
| Ask her to finish her though. | None | |||
| Give a vague response. | +1 Support with Shamir | |||
Between Battles
| There doesn't appear to be any conversations that affect Support between this Chapter's battles. |
Fire Emblem Warriors: Three Hopes Related Guides

Story Walkthrough: List of Chapters
All Story Walkthroughs
All Paralogues
Comment
At the record keeper is says I still have one more quest to do but I know I beat every quest on this chapter. It just says ??? Does anyone know what this means?
Author
Chapter 14 Walkthrough - Torment of the Eagle and Lion (Scarlet Blaze)
improvement survey
03/2026
improving Game8's site?

Your answers will help us to improve our website.
Note: Please be sure not to enter any kind of personal information into your response.

We hope you continue to make use of Game8.
Rankings
- We could not find the message board you were looking for.
Gaming News
Popular Games

Genshin Impact Walkthrough & Guides Wiki

Honkai: Star Rail Walkthrough & Guides Wiki

Umamusume: Pretty Derby Walkthrough & Guides Wiki

Pokemon Pokopia Walkthrough & Guides Wiki

Resident Evil Requiem (RE9) Walkthrough & Guides Wiki

Monster Hunter Wilds Walkthrough & Guides Wiki

Wuthering Waves Walkthrough & Guides Wiki

Arknights: Endfield Walkthrough & Guides Wiki

Pokemon FireRed and LeafGreen (FRLG) Walkthrough & Guides Wiki

Pokemon TCG Pocket (PTCGP) Strategies & Guides Wiki
Recommended Games

Diablo 4: Vessel of Hatred Walkthrough & Guides Wiki

Cyberpunk 2077: Ultimate Edition Walkthrough & Guides Wiki

Fire Emblem Heroes (FEH) Walkthrough & Guides Wiki

Yu-Gi-Oh! Master Duel Walkthrough & Guides Wiki

Super Smash Bros. Ultimate Walkthrough & Guides Wiki

Pokemon Brilliant Diamond and Shining Pearl (BDSP) Walkthrough & Guides Wiki

Elden Ring Shadow of the Erdtree Walkthrough & Guides Wiki

Monster Hunter World Walkthrough & Guides Wiki

The Legend of Zelda: Tears of the Kingdom Walkthrough & Guides Wiki

Persona 3 Reload Walkthrough & Guides Wiki
All rights reserved
© Nintendo / INTELLIGENT SYSTEMS © KOEI TECMO GAMES CO., LTD. Fire Emblem and Nintendo Switch are trademarks of Nintendo. © Nintendo.
The copyrights of videos of games used in our content and other intellectual property rights belong to the provider of the game.
The contents we provide on this site were created personally by members of the Game8 editorial department.
We refuse the right to reuse or repost content taken without our permission such as data or images to other sites.
 Crossed Roads


![Monster Hunter Stories 3 Review [First Impressions] | Simply Rejuvenating](https://img.game8.co/4438641/2a31b7702bd70e78ec8efd24661dacda.jpeg/thumb)


my guess is the main mission is different if you recruit byleth or not look at how it looks like another main mission