Chapter 11 Walkthrough - The Sword Swings Wide (Golden Wildfire)
Check out our:
★ Story Walkthrough for how to get S Rank Rewards and the Best Responses to Support Conversations!
★ Character Tier List / Class Tier List for party building!
★ List of Characters for guides on recruiting all characters and their best classes.

The Sword Swings Wide is Chapter 11 of the Golden Wildfire Route in Fire Emblem Warriors Three Hopes. Read on to learn about the different quests, survey spots, rewards, and support conversations within the chapter, as well as our walkthrough for its main quest!
| ⮜ Previous Chapter | Next Chapter ⮞ |
|---|---|
| Chapter 10: Love and Loss |
Chapter 12: Two Kings |
List of Contents
The Sword Swings Wide Recruitable Characters
| All Recruitable Characters in The Sword Swings Wide | ||
|---|---|---|
 Ashe Ashe
|
||
Ashe can be recruited using the Persuade Strategy during the Battle Prep part of the main quest. You need at least 30 Strategy Points to recruit him.
Recruitment Guide: How to Recruit Units
The Sword Swings Wide Quests, Survey Spots, and Rewards
The Sword Swings Wide Quests
| Quest | Type | Rewards |
|---|---|---|
| Invasion of the Northern Kingdom | Main |
S Rank Reward: Talisman x1
First Time Reward: Master Seal x1 |
| Battle on the Coast | Side |
S Rank Reward: Foreign Tome x1
Capture Reward: Activity Points Recovered: 1 |
| Secure a Naval Retreat | Side |
S Rank Reward: Speed Carrot x1
Capture Reward: Training Points Recovered: 1 |
| Breach Fraldarius Territory | Side |
S Rank Reward: Master Seal x1
Capture Reward: Training Points Recovered: 1 |
| Free-For-All | Side |
S Rank Reward: Brave Lance x1
Capture Reward: 6000 G |
| Eliminate Bandits at Conand Tower | Side |
S Rank Reward: Extra Large Bullion x1
Capture Reward: Activity Points Recovered: 1 |
| Eliminate the Pirates | Side |
S Rank Reward: Rocky Burdok x1
Capture Reward: 6000 G |
| Cycles of Nostalgia | Paralogue |
S Rank Reward: Fodlan Liberation Army x1
First Time Reward: Spirit Dust x1 |
| Coming Clean | Paralogue |
S Rank Reward: Almyra Wyvern Co. x1
First Time Reward: Secret Book x1 |
The Sword Swings Wide Survey Spots
| Side Mission | Survey Spot | Type | Reward / Conditions |
|---|---|---|---|
| Battle on the Coast | Tent | Meet Condition |
Survey Conditions: Must complete all side missions in this area.
Reward: Almyra Mercenaries x1 |
| Battle on the Coast | Stronghold | Choice | Reward: Raise combat art level of Axes for one unit. |
| Battle on the Coast | Stronghold | Visit | Reward: Lavish Building Material x16 and Elite Training Gear x10 |
| Free-For-All | House | Meet Condition |
Survey Conditions: Defeat at least 2000 enemies in the chapter.
Reward: Training Points Recovered: 1 |
| Free-For-All | Tent | Meet Condition |
Survey Conditions: Trade Exotic Spices x1
Reward: Master Seals x3 |
| Free-For-All | Cave | Choice | Reward: Premium Magic Herbs or Miracle Bean |
| Free-For-All | Tent | Visit | Reward: Lavish Building Material x16 and Advanced Combat Manual x12 |
| Breach Fraldariuus Territory | House | Visit | Reward: Combat Engineer Reinforcement |
| Breach Fraldariuus Territory | Stronghold | Visit | Reward: Lavish Building Material x16, Master Smithing Set x12, and Storage Compartment x6 |
| Eliminate Bandits at Conand Tower | House | Pay |
Gold Required: 1500 G
Reward: Forget-me-nots x2, Baby's Breath x2, and Anemone x2 |
| Eliminate Bandits at Conand Tower | Tower | Visit | Reward: Lavish Building Material x16, Hero's Insignia x6, Luxurious Furnishings x6 |
| Secure a Naval Retreat | Forest | Choice | Reward: Talisman Shield or Prayer Ring |
| Secure a Naval Retreat | House | Visit | Reward: Lavish Building Material x16 and Purveyor's License |
| Eliminate the Pirates | Forest | Visit | Reward: Call the Guards |
| Eliminate the Pirates | Sping | Visit | Reward: Dex Up for one Unit |
Invasion of the Northern Kingdom Strategies and Walkthrough
Recommended Strategies for Invasion of the Northern Kingdom
| Strategy | Description | Cost |
|---|---|---|
| Combat Engineer Reinforcements | Bolster the combat engineers' numbers, reducing the time needed to rig explosives. | 20 |
| Persuade Ashe | Convince an enemy general to join your army. | 20 (SB) / 30 (GW) |
| Mounted Surge | Summon a mounted unit to engage the enemy. Reinforcements will deploy periodically. | 10 |
Invasion of the Northern Kingdom Objectives
| Victory Condition | Defeat Condition |
|---|---|
| Defeat the Kingdom Army. | The Combat Engineer is routed. |
|
Main Objectives
1. Seize the surrounding strongholds and secure a path for the Combat Engineer! 2. Protect the Combat Engineer until the main gate is blown open! 3. Defeat Ashe! / Defeat and recruit Ashe! 4. Protect the Combat Engineer until the central gate is blown open! 5. Defeat the remaining Kingdom Soldiers inside the fortress! 6. Defeat Felix and Rodrigiue! 7. Defeat Margrave Gautier! Side Objectives ・ Seize the strongholds to prevent enemy reinforcements from appearing! ・ Defeat Felix! ・ Seize the strongholds to prevent enemy reinforcements from appearing! ・ Defeat the Priest to prevent them from healing the enemy general! |
|
Invasion of the Northern Kingdom Walkthrough
| Objectives | |
|---|---|
| 1 | 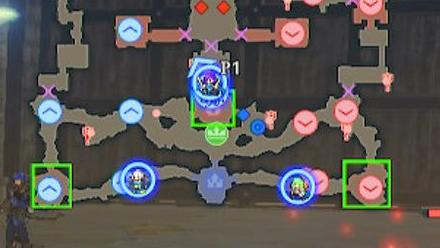 Once the quest begins,split your allies into three teams. Send one to the gates, the southwestern stronghold, and the southeastern stronghold. |
| 2 | 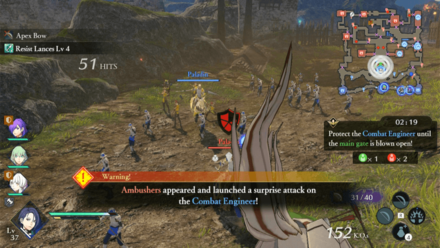 Once you've taken the strongholds the combat engineers will begin to make their way to the front gates. Note that they will be ambushed so keep at least one ally with them at all times. Using the Combat Engineer Reinforcements, the time needed to blow up the gate will be reduced. |
| 3 | 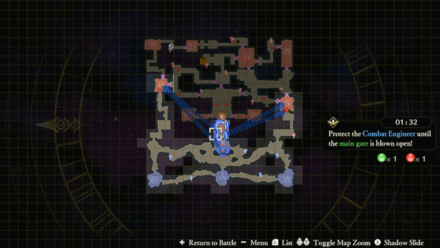 Enemies will attack from the east and west strongholds here so once they're open, send one ally into each to take them out while another protects the Engineer. It's best to leave a powerful ally or Shez with the engineer, but note that Paladins will attack. |
| 4 | 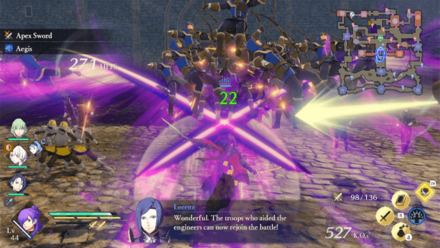 When the timer strikes zero, the gates will be blasted open! Immediately seize the opportunity to take down the enemies at the entrance. Get as many as you can before Ashe appears. |
| 5 | 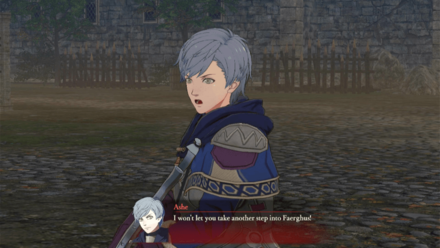 If you chose to recruit Ashe, this is your time! Quickly defeat him so the Combat Engineer can continue to work on the next door. |
| 6 | 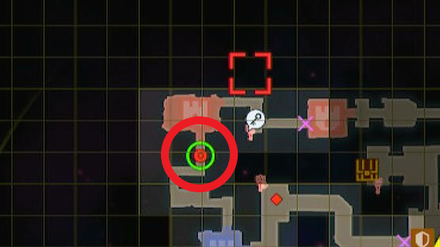 If you have a team on the western side of the map, send them up northwest to defeat Felix. |
| 7 | 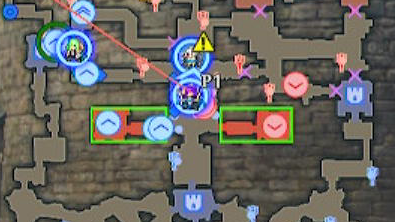 While defeating Felix, the rest of your allies should be by the gate, protective the Engineer from the onslaught of enemies. A side quest will begin to take the strongholds to the left and right of the gate. |
| 8 | 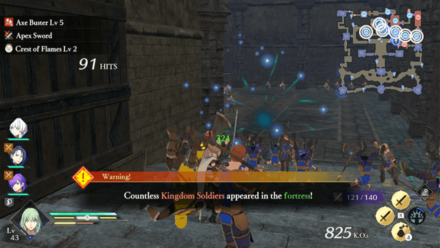 Once they're defeated and the gate is open, about 6 Kingdom Soldier units will appear, along with reinforcements from the Federation. Defeat them as quickly as possible by spreading your allies across the map. |
| 9 | 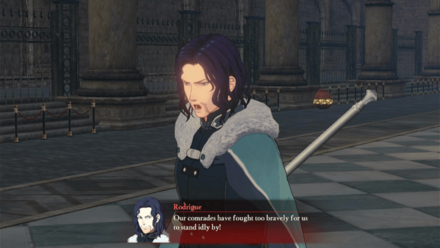 By defeating the soldiers, Felix and Rodrigue will open the strongholds to the north. Run over and take them down as quickly as you can. Note that this is not the last fight. So save a few resources for later. |
| 10 | There will be a side quest to stop a Priest from healing either Felix or Rodrigue. This is optional and can be done for extra gold. |
| 11 | 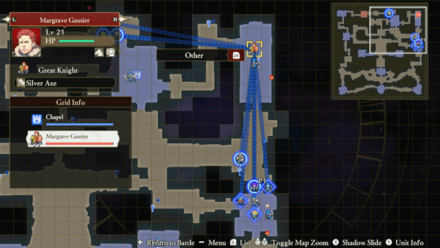 Once Felix and Rodrigue have been defeated, Margrave Gautier will come in to rescue them. Order an All-Out Offensive on his position and overwhelm him with everything you've got to end the fight quickly. |
The Sword Swings Wide Support and Romance Conversations
In Camp
 Claude Claude
|
Prompt: | They've already got their hands full with the Empire to the west and Sreng to the north. | ||
|---|---|---|---|---|
| Answers: | Reactions: | |||
| Ask about Sreng. | None | |||
| Ask about the Empire. | +1 Support with Claude | |||
 Hilda Hilda
|
Prompt: | At least we won't have to worry about any invasions from Almyra while we're gone. | ||
| Answers: | Reactions: | |||
| That's right. | +1 Support with Hilda | |||
| There's still reason to worry. | None | |||
 Lorenz Lorenz
|
Prompt: | I thought our technology was much more advanced than theirs, but that does not appear to be the case at all. | ||
| Answers: | Reactions: | |||
| Agree with him. | +1 Support with Lorenz | |||
| Say you don't know. | None | |||
 Raphael Raphael
|
Prompt: | Once, he tried going all the way into the northern reaches of the Kingdom. | ||
| Answers: | Reactions: | |||
| Ask why he did that. | None | |||
| Ask if he got anything out of it. | +1 Support with Raphael | |||
 Lysithea Lysithea
|
Prompt: | People say large ships don't rock as much, so you won't get seasick. But that's obviously untrue. | ||
| Answers: | Reactions: | |||
| Agree that ship swayed a lot. | +1 Support with Lysithea | |||
| Say it was smooth sailing. | None | |||
 Marianne Marianne
|
Prompt: | He was too busy preparing the ships and securing supplies for us. | ||
| Answers: | Reactions: | |||
| Comfort her. | +1 Support with Marianne | |||
| Assure her it's for the best. | None | |||
 Holst Holst
|
Prompt: | I imagine he was able to build it because of his constant business dealings. | ||
| Answers: | Reactions: | |||
| Ask about Margrave Edmund. | None | |||
| Ask about Margrave Edmund's business. | +1 Support with Holst | |||
 Linhardt Linhardt
|
Prompt: | It's not as though we're honored guests, however, so I can't spend my time doing Crest research. | ||
| Answers: | Reactions: | |||
| Express surprise. | None | |||
| Tell him he hasn't changed at all. | +1 Support with Linhardt | |||
 Bernadetta Bernadetta
|
Prompt: | I spend all my time inside, so I can't tell the difference! | ||
| Answers: | Reactions: | |||
| Confirm there is a difference. | +1 Support with Bernadetta | |||
| Chastise her. | None | |||
 Petra Petra
|
Prompt: | Eastern ships are not coming to Brigid. Maybe because it is hard to cross the ocean. | ||
| Answers: | Reactions: | |||
| Offer a counterargument. | +1 Support with Petra | |||
| Give a vague reply. | None | |||
 Yuri Yuri
|
Prompt: | Up until two years ago, I lived with them underground as part of the Ashen Wolves House. | ||
| Answers: | Reactions: | |||
| Ask about the Ashen Wolves. | None | |||
| Tease him about it. | +1 Support with Yuri | |||
 Constance Constance
|
Prompt: | But it is truly a great relief to hear they've allied with the Empire! | ||
| Answers: | Reactions: | |||
| Ask if she's OK with fighting the church. | None | |||
| Ask if she doesn't want to fight the Empire. | +1 Support with Constance | |||
 Hapi Hapi
|
Prompt: | Ugh, I can't believe I let you all drag me to the Kingdom. | ||
| Answers: | Reactions: | |||
| Try and cheer her up. | +1 Support with Hapi | |||
| Ask what's wrong. | None | |||
 Shamir Shamir
|
Prompt: | But Margrave Gautier's set up a powerful defense in the north. I doubt they'd make it to the capital. | ||
| Answers: | Reactions: | |||
| Ask why Sreng would invade. | None | |||
| Ask about Margrave Gautier. | +1 Support with Shamir | |||
Between Battles
| There doesn't appear to be any conversations that affect Support between this Chapter's battles. |
Fire Emblem Warriors: Three Hopes Related Guides

Story Walkthrough: List of Chapters
All Story Walkthroughs
All Paralogues
Author
Chapter 11 Walkthrough - The Sword Swings Wide (Golden Wildfire)
improvement survey
03/2026
improving Game8's site?

Your answers will help us to improve our website.
Note: Please be sure not to enter any kind of personal information into your response.

We hope you continue to make use of Game8.
Rankings
- We could not find the message board you were looking for.
Gaming News
Popular Games

Genshin Impact Walkthrough & Guides Wiki

Honkai: Star Rail Walkthrough & Guides Wiki

Umamusume: Pretty Derby Walkthrough & Guides Wiki

Pokemon Pokopia Walkthrough & Guides Wiki

Resident Evil Requiem (RE9) Walkthrough & Guides Wiki

Monster Hunter Wilds Walkthrough & Guides Wiki

Wuthering Waves Walkthrough & Guides Wiki

Arknights: Endfield Walkthrough & Guides Wiki

Pokemon FireRed and LeafGreen (FRLG) Walkthrough & Guides Wiki

Pokemon TCG Pocket (PTCGP) Strategies & Guides Wiki
Recommended Games

Diablo 4: Vessel of Hatred Walkthrough & Guides Wiki

Cyberpunk 2077: Ultimate Edition Walkthrough & Guides Wiki

Fire Emblem Heroes (FEH) Walkthrough & Guides Wiki

Yu-Gi-Oh! Master Duel Walkthrough & Guides Wiki

Super Smash Bros. Ultimate Walkthrough & Guides Wiki

Pokemon Brilliant Diamond and Shining Pearl (BDSP) Walkthrough & Guides Wiki

Elden Ring Shadow of the Erdtree Walkthrough & Guides Wiki

Monster Hunter World Walkthrough & Guides Wiki

The Legend of Zelda: Tears of the Kingdom Walkthrough & Guides Wiki

Persona 3 Reload Walkthrough & Guides Wiki
All rights reserved
© Nintendo / INTELLIGENT SYSTEMS © KOEI TECMO GAMES CO., LTD. Fire Emblem and Nintendo Switch are trademarks of Nintendo. © Nintendo.
The copyrights of videos of games used in our content and other intellectual property rights belong to the provider of the game.
The contents we provide on this site were created personally by members of the Game8 editorial department.
We refuse the right to reuse or repost content taken without our permission such as data or images to other sites.
 Crossed Roads


![Monster Hunter Stories 3 Review [First Impressions] | Simply Rejuvenating](https://img.game8.co/4438641/2a31b7702bd70e78ec8efd24661dacda.jpeg/thumb)


