Final Chapter Walkthrough - Field of Beginnings (Golden Wildfire)
Check out our:
★ Story Walkthrough for how to get S Rank Rewards and the Best Responses to Support Conversations!
★ Character Tier List / Class Tier List for party building!
★ List of Characters for guides on recruiting all characters and their best classes.

Field of Beginnings is the final chapter of the Golden Wildfire Route in Fire Emblem Warriors Three Hopes. Read on to learn about the different quests, survey spots, rewards, and support conversations within the chapter, as well as our walkthrough for its main quest!
| ⮜ Previous Chapter | Next Chapter ⮞ |
|---|---|
| Chapter 14: A Symbol of the Past (If Byleth is defeated) Chapter 16: Into the Chasm (If Byleth is recruited) |
- |
List of Contents
Field of Beginnings Recruitable Characters
| All Recruitable Characters in Field of Beginnings | ||
|---|---|---|
| There are no recruitable characters in this chapter. | ||
Recruitment Guide: How to Recruit Units
Field of Beginnings Quests, Survey Spots, and Rewards
Field of Beginnings Quests
| Quest | Type | Rewards |
|---|---|---|
| The Battle of Tailtean | Main |
S Rank Reward: Partha+10 x1
First Time Reward: Master Seal x1 |
| Attack of the Pegasus Knights | Side |
S Rank Reward: Master Seal x1
Capture Reward: 8,400 G |
| Breach Galatea Territory | Side |
S Rank Reward: Sword of Zoltan+10 x1
Capture Reward: Training Points Recovered: 1 |
| Clash in Charon | Side |
S Rank Reward: Sage's Tome+10 x1
Capture Reward: Activity Points Recovered: 1 |
| Arrival at the Tailtean Plains | Side |
S Rank Reward: Lance of Zoltan+10 x1
Capture Reward: Activity Points Recovered: 1 |
| Disorder in the Kingdom | Side |
S Rank Reward: Extra Large Bullion x1
Capture Reward: 8,400 G |
| Seize Brennius Territory | Side |
S Rank Reward: Ambrosiia x1
Capture Reward: 8,400 G |
| Root Out the Darkness | Side |
S Rank Reward: Axe of Zoltan+10 x1
Capture Reward: Training Points Recovered: 1 |
| Capture the Thieves | Survey Spot | No Fixed Rewards |
Field of Beginnings Survey Spots
| Side Mission | Survey Spot | Type | Reward / Conditions |
|---|---|---|---|
| Attack of the Pegasus Knights | Cave | Meet Condition |
Survey Conditions: Defeat at least 2000 enemies.
Reward: 11.200 G |
| Attack of the Pegasus Knights | Mine | Choice | Reward: Mythril or Arcane Crystal |
| Attack of the Pegasus Knights | Tent | Pay |
Gold Required: 1,300 G
Reward: Turnip x10, Chickpeas x10, and Cabbage x10 |
| Attack of the Pegasus Knights | House | Visit | Reward: Master Seal x3 |
| Attack of the Pegasus Knights | Stronghold | Visit | Reward: Lavish Building Material x16, Elite Training Gear x6, and Storage Compartment x6 |
| Breach Galatea Territory | House | Battle | Reward: Assorted rewards from battle. |
| Breach Galatea Territory | Tent | Visit | Reward: Lavish Building Material x16 and Purveyor's License x10 |
| Breach Galatea Territory | House | Choice | Reward: Raise Morale for 2 units of choice. |
| Disorder in the Kingdom | Stronghold | Choice |
Survey Conditions: Choose between "Show off your martial prowess" or "Hone your cooking skills"
Reward: Training or Activity Points Recovered: x1 |
| Disorder in the Kingdom | House | Meet Condition |
Survey Conditions: Have the Dancer Class
Reward: Speedwing x1 |
| Disorder in the Kingdom | Ruins | Visit | Reward: Lavish Building Material x16, Advanced Combat Manual x12, and Hero's Insignia x6 |
| Clash in Charon | House | Visit | Reward: Lavish Building Material x16 and Luxurious Furnishings x6 |
| Clash in Charon | Ruins | Meet Condition |
Survey Conditions: Select a unit with Str 33 or higher
Reward: Scythe of Sariel +10 x1 |
| Clash in Charon | Forest | Choice | Reward: Energy Drop or Spirit Dust |
| Clash in Charon | Stronghold | Choice | Reward: Raise a unit's Combat Art Level for Gauntlets |
| Clash in Charon | House | Trade |
Survey Conditions: Trade a Board Game
Reward: Training Weight x1, Whetstone x1, and Ceremonial Sword x1 |
| Arrival at the Tailtean Plains | Tent | Visit | Reward: Rain of Ash |
| Arrival at the Tailtean Plains | House | Pay |
Gold Required: 1,000 G
Reward: Free Forge Uses: 10 |
| Arrival at the Tailtean Plains | Cave | Meet Condition |
Survey Conditions: Attain S Rank on any difficulty
Reward: 11,200 G |
| Arrival at the Tailtean Plains | Pond | Choice | Reward: Raise support points between two units. |
| Root Out the Darkness | Tent | Pay |
Gold Required: 2,000 G
Reward: Item Shop Restocked |
| Root Out the Darkness | Stronghold | Visit | Reward: Fodlan Archers x1 |
| Seize Brenniius Territory | House | Visit | Reward: Lavish Building Material x16 and Master Smithing Set |
| Seize Brenniius Territory | Spring | Choice | Reward: Raise the Spd. of one unit. |
| Seize Brenniius Territory | Mine | Visit | Reward: Umbral Steel x20 |
| Seize Brenniius Territory | Swamp | Meet Conditions |
Survey Conditions: Complete all side missions in the area.
Reward: Aura Knuckles +10 x1 |
| Seize Brenniius Territory | Cave | Choice | Reward: Monstrous Strength Ring or Lightning Speed Ring |
The Battle of Tailtean Strategies and Walkthrough
Recommended Strategies for The Battle of Tailtean
| Strategy | Description | Cost |
|---|---|---|
| Rain of Ash | Have the Leicester Federation's elites loose countless arrows and reduce the enemy to ash. | 30 |
| Leaders of the Federation | Set Claude and Lorenz loose on the enemy. | 30 |
| Stronghold Sabotage | Decrease the durability of all enemy strongholds at the beginning of battle. | 10 |
The Battle of Tailtean Objectives
| Victory Condition | Defeat Condition |
|---|---|
| Drive back the Church of Seiros army. | Either group of your units is routed. |
|
Main Objectives
1. Seize the strongholds to hold the front line! 2. Defeat Mercedes! 3. Defeat Cyril! 4. Defeat Seteth! 5. Defeat Flayn! 6. Use the controls to disable the Phantom Soldiers' devices! 7. Defeat Seteth and Flayn! 8. Defeat Rhea, and lead the Leicester Federation to victory! / Defeat the Immaculate One, and lead the Leicester Federation to victory! Side Objectives ・ Defeat the Church Soldier and their allies! |
|
The Battle of Tailtean Walkthrough
| Objectives | |
|---|---|
| 1 | 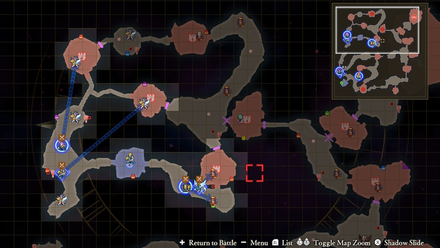 Seize the strongholds to hold the front line! Send units to each of the available strongholds. You'll need to take them to continue moving forward in the map. |
| 2 | 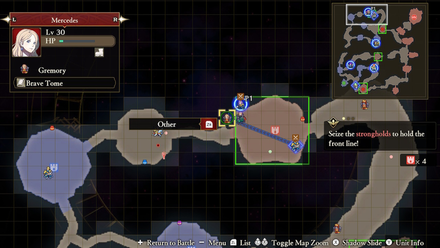 Defeat Mercedes! Send the units nearest to Mercedes to fight her. She's particularly weak to War Masters. |
| 3 | 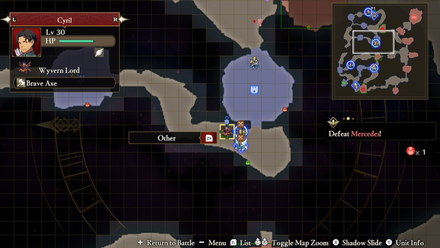 Defeat Cyril! Send the units nearest to Cyril to fight him. He's particularly weak to Bow Knights. |
| 4 | 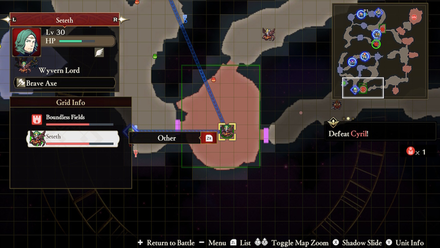 Defeat Seteth! Send the units nearest to Seteth to fight him. Try not to use up your Warrior Gauge in this fight since he will reappear later on. |
| 5 | 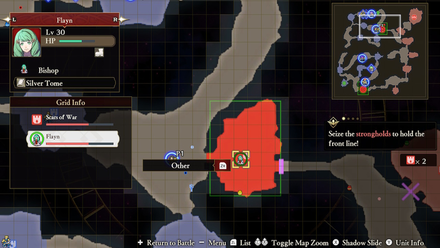 Defeat Flayn! Send the units nearest to Flayn to fight her. She's fairly weak so avoid using your Warrior Gauge. She'll reappear later on. |
| 6 | During these consecutive boss fights, make sure there are no idle units. All units should either be moving forward in the map or fighting enemies. |
| 7 | 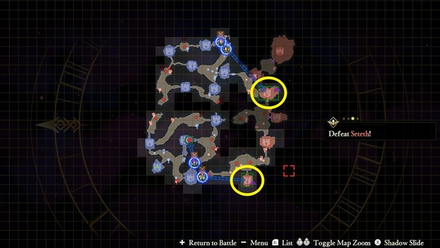 Use the controls to disable the Phantom Soldiers' devices! Don't fight the Phantom Soldiers head-on and just send a unit to each of the controls to disable them. This automatically makes the Phantom Soldiers disapper. |
| 8 | 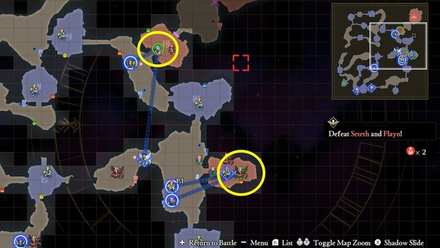 Defeat Seteth and Flayn! As you move forward in the quest, Seteth and Flayn will reappear. Use the same tactics from your previous fights since their moveset will remain the same. |
| 9 | 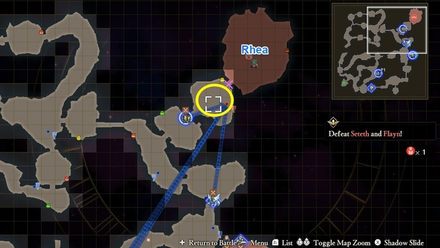 Position units that aren't in combat outside Rhea's boss area to easily coordinate them. You'll initially be splitting them up with one group fighting Rhea and another fighting the Church Soldiers. |
| 10 | 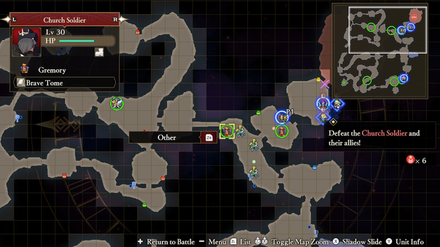 Defeat the Church Soldier and their allies! Finish this side quest before sending all your units up against Rhea. Doing so will give you less distractions during the fight and you'll be able to focus all your attention on her. |
| 11 | 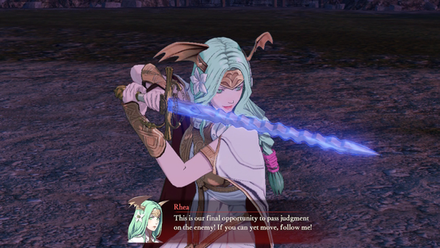 Defeat Rhea, and lead the Leicester Federation to victory! / Defeat the Immaculate One, and lead the Leicester Federation to victory! Order an all-out attack on Rhea. Avoid using up your special attacks on her since she'll still transform into the Immaculate One after you defeat her. At that point, you can unleash all your attacks. |
Field of Beginnings Support and Romance Conversations
In Camp
 Shez
(Cutscene) Shez
(Cutscene) |
Prompt: | I think I get it. Dimitri is counting on Claude... | ||
|---|---|---|---|---|
| Answers: | Reactions: | |||
| To temporarily rule the Capital. | None | |||
| To dissolve the central church. | +1 Support with Claude | |||
 Claude Claude
|
Prompt: | But that Arval being is gone now, right? | ||
| Answers: | Reactions: | |||
| Reassure him you'll be fine. | +1 Support with Claude | |||
| Say you're not sure. | None | |||
 Lorenz Lorenz
|
Prompt: | I might be crushed under the weight of such a momentous responsibility. Do you not feel the same way? | ||
| Answers: | Reactions: | |||
| Tell him you do. | +1 Support with Lorenz | |||
| Weight? What weight? | None | |||
 Raphael Raphael
|
Prompt: | You must feel the same way, right? C'mon, you can tell me. | ||
| Answers: | Reactions: | |||
| Agree with him. | +1 Support with Raphael | |||
| Disagree with him. | None | |||
 Marianne Marianne
|
Prompt: | I get the feeling they'll want to fight on the Tailtean Plains. | ||
| Answers: | Reactions: | |||
| Ask why. | None | |||
| Guess why. | +1 Support with Marianne | |||
 Linhardt Linhardt
|
Prompt: | Except now they come up anbd talk to me for no reason. I'm not a noble anymore, so I can't imagine why. | ||
| Answers: | Reactions: | |||
| Ask if he plans to return to the Empire. | None | |||
| Console him. | +1 Support with Linhardt | |||
 Dorothea Dorothea
|
Prompt: | And now these two forces of faith are clashing. I can't imagine the goddess wanting to have anything to do with a conflict like this. | ||
| Answers: | Reactions: | |||
| Say that she would. | None | |||
| Agree that she wouldn't. | +1 Support with Dorothea | |||
 Petra Petra
|
Prompt: | Though, Brigid does not have any other friendships except the church and Empire. | ||
| Answers: | Reactions: | |||
| Reassure her. | None | |||
| Admit it will be difficult. | +1 Support with Petra | |||
 Yuri Yuri
|
Prompt: | The people will never trust the ones who deposed her, no matter how hard the kings try to smooth it over. | ||
| Answers: | Reactions: | |||
| Agree with him. | None | |||
| Disagree with him. | +1 Support with Yuri | |||
 Hapi Hapi
|
Prompt: | But do we really have to kiill her? Maybe she'll just give up and back down on her own. | ||
| Answers: | Reactions: | |||
| Insist she has to die. | None | |||
| Admit that killing her might not be necessary. | +1 Support with Hapi | |||
 Byleth Byleth
|
Prompt: | I was so confused when you got caught in that strange magic and vanished. | ||
| Answers: | Reactions: | |||
| Apologize for attacking her. | None | |||
| Thank her for not killing you. | +1 Support with Byleth | |||
Between Battles
| There doesn't appear to be any conversations that affect Support between this Chapter's battles. |
Fire Emblem Warriors: Three Hopes Related Guides

Story Walkthrough: List of Chapters
All Story Walkthroughs
All Paralogues
Author
Final Chapter Walkthrough - Field of Beginnings (Golden Wildfire)
improvement survey
03/2026
improving Game8's site?

Your answers will help us to improve our website.
Note: Please be sure not to enter any kind of personal information into your response.

We hope you continue to make use of Game8.
Rankings
- We could not find the message board you were looking for.
Gaming News
Popular Games

Genshin Impact Walkthrough & Guides Wiki

Honkai: Star Rail Walkthrough & Guides Wiki

Umamusume: Pretty Derby Walkthrough & Guides Wiki

Pokemon Pokopia Walkthrough & Guides Wiki

Resident Evil Requiem (RE9) Walkthrough & Guides Wiki

Monster Hunter Wilds Walkthrough & Guides Wiki

Wuthering Waves Walkthrough & Guides Wiki

Arknights: Endfield Walkthrough & Guides Wiki

Pokemon FireRed and LeafGreen (FRLG) Walkthrough & Guides Wiki

Pokemon TCG Pocket (PTCGP) Strategies & Guides Wiki
Recommended Games

Diablo 4: Vessel of Hatred Walkthrough & Guides Wiki

Cyberpunk 2077: Ultimate Edition Walkthrough & Guides Wiki

Fire Emblem Heroes (FEH) Walkthrough & Guides Wiki

Yu-Gi-Oh! Master Duel Walkthrough & Guides Wiki

Super Smash Bros. Ultimate Walkthrough & Guides Wiki

Pokemon Brilliant Diamond and Shining Pearl (BDSP) Walkthrough & Guides Wiki

Elden Ring Shadow of the Erdtree Walkthrough & Guides Wiki

Monster Hunter World Walkthrough & Guides Wiki

The Legend of Zelda: Tears of the Kingdom Walkthrough & Guides Wiki

Persona 3 Reload Walkthrough & Guides Wiki
All rights reserved
© Nintendo / INTELLIGENT SYSTEMS © KOEI TECMO GAMES CO., LTD. Fire Emblem and Nintendo Switch are trademarks of Nintendo. © Nintendo.
The copyrights of videos of games used in our content and other intellectual property rights belong to the provider of the game.
The contents we provide on this site were created personally by members of the Game8 editorial department.
We refuse the right to reuse or repost content taken without our permission such as data or images to other sites.
 Crossed Roads


![Monster Hunter Stories 3 Review [First Impressions] | Simply Rejuvenating](https://img.game8.co/4438641/2a31b7702bd70e78ec8efd24661dacda.jpeg/thumb)


