Chapter 04 Walkthrough - The Struggle Commences (Scarlet Blaze)
Check out our:
★ Story Walkthrough for how to get S Rank Rewards and the Best Responses to Support Conversations!
★ Character Tier List / Class Tier List for party building!
★ List of Characters for guides on recruiting all characters and their best classes.
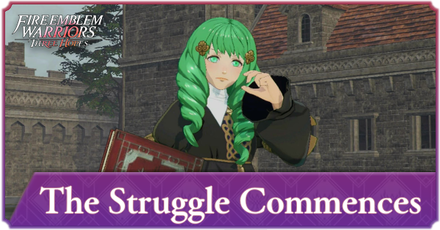
The Struggle Commences is Chapter 04 of the Scarlet Blaze Route in Fire Emblem Warriors Three Hopes. Read on to learn about the different quests, survey spots, rewards, and support conversations within the chapter, as well as our walkthrough for its main quest!
| ⮜ Previous Chapter | Next Chapter ⮞ |
|---|---|
| Chapter 3: The Shadows of Adrestia |
Chapter 5: Skirmish in the Fog |
List of Contents
The Struggle Commences Recruitable Characters
| All Recruitable Characters in The Struggle Commences | ||
|---|---|---|
 Constance Constance
|
 Hapi Hapi
|
 Manuela Manuela
|
 Jeritza Jeritza
|
 Gatekeeper Gatekeeper
|
|
Manuela and Jertiza will join your party at this chapter while Constance and Hapi can be recruited using the Persuade Strategy during the Battle Prep part of the main quest. Both characters require 10 Strategy Points each to recruit them.
Gatekeeper will only appear on this chapter on the third New Game Plus playthrough.
Recruitment Guide: How to Recruit Units
The Struggle Commences Quests, Survey Spots, and Rewards
The Struggle Commences Quests
| Quest | Type | Rewards |
|---|---|---|
| The Battle of Garreg Mach | Main |
S Rank Reward: Ambrosia x1
First Time Reward: Rusted Sword x1 |
| Breach Burgundy Territory | Side |
S Rank Reward: Mace x1
Capture Reward: 1800 G |
| Rescue Allied Troops | Side |
S Rank Reward: Intermediate Seal x1
Capture Reward: Training Points Recovered: 1 |
| Prepare for the Conquest of Garreg Mach | Side |
S Rank Reward: Bullion x1
Capture Reward: Activity Points Recovered: 1 |
| Eagles, Lions, and Deer | Paralogue |
S Rank Reward: Seiros Gatekeepers x1
First Time Reward: Seraph Robe x1 |
The Struggle Commences Survey Spots
| Side Mission | Survey Spot | Type | Reward / Conditions |
|---|---|---|---|
| Breach Burgundy Territory | House | Visit | Reward: Crude Building Material x10 |
| Breach Burgundy Territory | House | Visit | Reward: Floral Adornment x10 |
| Breach Burgundy Territory | Stronghold | Visit | Reward: 2,400 G |
| Rescue Allied Troops | House | Pay |
Gold Required: 500 G
Reward: Crude Building Material x10 |
| Rescue Allied Troops | Tower | Visit | Reward: Impregnable Wall |
| Prepare for the Conquest of Garreg Mach | Tent | Visit |
Survey Conditions: Must complete all side missions in this area.
Reward: Blaze |
| Prepare for the Conquest of Garreg Mach | House | Visit | Reward: Crude Building Material x10 |
| Prepare for the Conquest of Garreg Mach | Cave | Choice | Reward: Strength Ring or Speed Ring |
The Battle of Garreg Mach Strategies and Walkthrough
Recommended Strategies for The Battle of Garreg Mach
| Strategy | Description | Cost |
|---|---|---|
| Impregnable Wall | Bolster defenses, temporarily reducing damage taken by allied strongholds. | 10/30 |
| Persuade Constance | Convince an enemy general to join your army. | 10 (SB) / 30 (AG) / 20 (GW) |
| Persuade Hapi | Convince an enemy general to join your army. | 10 (SB) / 20 (GW) |
The Battle of Garreg Mach Objectives
| Victory Condition | Defeat Condition |
|---|---|
| Gain control of all strongholds. | None. |
|
Main Objectives
1. Seize all the strongholds within the monastery walls! 2. Defeat Hapi! / Defeat and recruit Hapi! 3. Defeat Constance / Defeat and recruit Constance! 4. Defeat Flayn to stop the Resonant Lightning attack! 5. Seize all the strongholds within the monastery walls! 6. Defeat Seteth! 7. Defeat Cyril! 8. Defeat Archbishop Rhea and take Garreg Mach! Side Objectives ・ Defeat the Armored Knights to prevent them from retaking a stronghold! ・ Defeat the Pegasus Knights to prevent them from retaking a stronghold! ・ Defeat Cyril to prevent them from retaking the stronghold! ・ Seize the strongholds to stop the ballistae and fire orbs! |
|
The Battle of Garreg Mach Walkthrough
| Objectives | |
|---|---|
| 1 | In the Battle Prep screen, switch your units to make sure they have the advantage against the enemies you'll face in the map. Put Edelgard on the top section of the map for her to destroy the walls later on. |
| 2 | 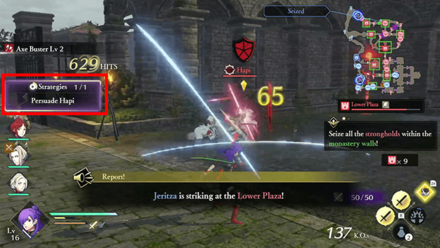 Order the AI-controlled units to seize the two strongholds on the top and bottom parts map. If you have used the Persuade Strategy, avoid depleting Hapi's or Constance's health and wait for the persuade option to appear. Press and hold the Right Arrow on the D-Pad to activate the strategy to defeat and recruit them. |
| 3 | 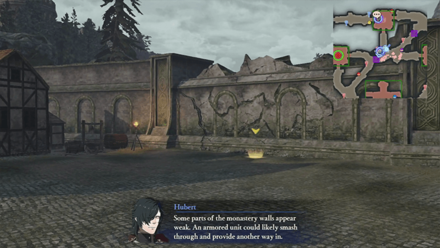 Use Edelgard to destroy the wall to create a path leading to Flayn. |
| 4 | 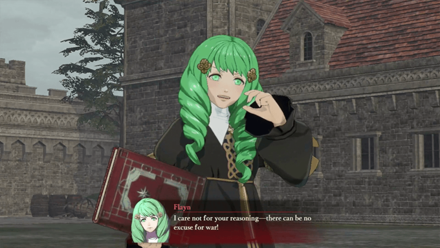 Defeat Flayn and seize the stronghold to disable the Resonant Lightning. You can also order the AI-controlled unit on the top part of the map to assist you in defeating Flayn or assign them to seize the stronghold on the opposite site. |
| 5 | 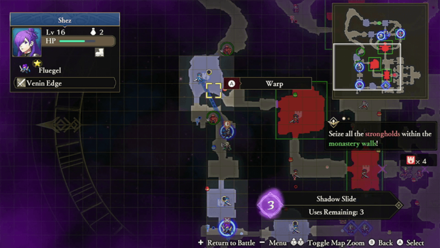 Use Shadow Slide to warp Shez at the stronghold where the Armor Knights are heading to. Use Shez to defeat the knights to complete the side mission. |
| 6 | 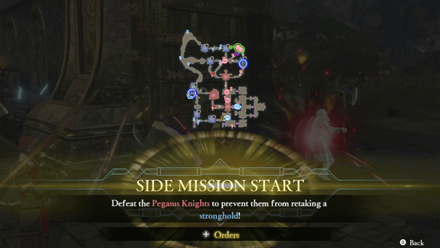 Assign the two units on the top part of the map to defeat the Pegasus Knights on the top-right corner of the map. |
| 7 | Use Shadow Slide to warp Shez on the stronghold opposite of Cyril. Use Shez and assign one unit to defeat Cyril before he takes over the stronghold. |
| 8 | Seize the remaining strongholds and order an All-Out Offensive towards Seteth. |
| 9 | 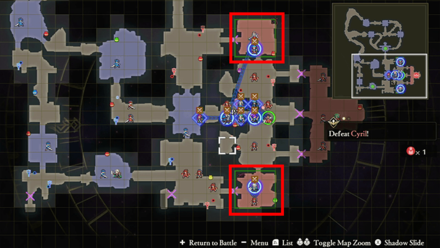 Assign units to seize the two strongholds with the ballistae and fire orbs. Use your controlled character to defeat Cyril once he reappears on the amp. |
| 10 | Order an All-Out Offensive towards Rhea to defeat her and complete the battle. |
The Struggle Commences Support and Romance Conversations
In Camp
 Monica Monica
|
Prompt: | But Her Majesty asked me to put you to work! | ||
|---|---|---|---|---|
| Answers: | Reactions: | |||
| Side with Monica. | +1 Support with Monica | |||
| Side with Linhardt. | +1 Support with Linhardt. | |||
 Caspar Caspar
|
Prompt: | They've got tons of other strong fighters too, and I can't wait to take 'em all on! How about you? | ||
| Answers: | Reactions: | |||
| Share in his bloodlust. | None | |||
| Claim that you're not interested. | +1 Support with Caspar. | |||
 Dorothea Dorothea
|
Prompt: | Our target is Garreg Mach, which means we're likely to encounter a lot of people we know... | ||
| Answers: | Reactions: | |||
| Say that they are only acquaintances. | +1 Support with Dorothea. | |||
| Empathize with her plight. | None | |||
 Bernadetta Bernadetta
|
Prompt: | But then I was talking to Edelgard and boom! I got some stupid urge to fight, and here I am. | ||
| Answers: | Reactions: | |||
| Says she was guided by her heart. | None | |||
| Try to comfort her. | +1 Support with Bernadetta. | |||
 Edelgard Edelgard
|
Prompt: | But even if you feel some reservations, I need you to face this with everything you have. | ||
| Answers: | Reactions: | |||
| Do a little chest-thumping. | None | |||
| Give a sad look. | +1 Support with Edelgard. | |||
 Manuela Manuela
|
Prompt: | Emotional injuries can be even worse than physical ones during times of war. | ||
| Answers: | Reactions: | |||
| Say you find that reassuring. | +1 Support with Manuela. | |||
| Tell her that sounds a bit dodgy. | None | |||
Between Battles
| There doesn't appear to be any conversations that affect Support between this Chapter's battles. |
Fire Emblem Warriors: Three Hopes Related Guides

Story Walkthrough: List of Chapters
All Story Walkthroughs
All Paralogues
Author
Chapter 04 Walkthrough - The Struggle Commences (Scarlet Blaze)
improvement survey
03/2026
improving Game8's site?

Your answers will help us to improve our website.
Note: Please be sure not to enter any kind of personal information into your response.

We hope you continue to make use of Game8.
Rankings
- We could not find the message board you were looking for.
Gaming News
Popular Games

Genshin Impact Walkthrough & Guides Wiki

Honkai: Star Rail Walkthrough & Guides Wiki

Umamusume: Pretty Derby Walkthrough & Guides Wiki

Pokemon Pokopia Walkthrough & Guides Wiki

Resident Evil Requiem (RE9) Walkthrough & Guides Wiki

Monster Hunter Wilds Walkthrough & Guides Wiki

Wuthering Waves Walkthrough & Guides Wiki

Arknights: Endfield Walkthrough & Guides Wiki

Pokemon FireRed and LeafGreen (FRLG) Walkthrough & Guides Wiki

Pokemon TCG Pocket (PTCGP) Strategies & Guides Wiki
Recommended Games

Diablo 4: Vessel of Hatred Walkthrough & Guides Wiki

Cyberpunk 2077: Ultimate Edition Walkthrough & Guides Wiki

Fire Emblem Heroes (FEH) Walkthrough & Guides Wiki

Yu-Gi-Oh! Master Duel Walkthrough & Guides Wiki

Super Smash Bros. Ultimate Walkthrough & Guides Wiki

Pokemon Brilliant Diamond and Shining Pearl (BDSP) Walkthrough & Guides Wiki

Elden Ring Shadow of the Erdtree Walkthrough & Guides Wiki

Monster Hunter World Walkthrough & Guides Wiki

The Legend of Zelda: Tears of the Kingdom Walkthrough & Guides Wiki

Persona 3 Reload Walkthrough & Guides Wiki
All rights reserved
© Nintendo / INTELLIGENT SYSTEMS © KOEI TECMO GAMES CO., LTD. Fire Emblem and Nintendo Switch are trademarks of Nintendo. © Nintendo.
The copyrights of videos of games used in our content and other intellectual property rights belong to the provider of the game.
The contents we provide on this site were created personally by members of the Game8 editorial department.
We refuse the right to reuse or repost content taken without our permission such as data or images to other sites.
 Crossed Roads


![Monster Hunter Stories 3 Review [First Impressions] | Simply Rejuvenating](https://img.game8.co/4438641/2a31b7702bd70e78ec8efd24661dacda.jpeg/thumb)


