Chapter 14 Walkthrough - A Symbol of the Past (Golden Wildfire)
Check out our:
★ Story Walkthrough for how to get S Rank Rewards and the Best Responses to Support Conversations!
★ Character Tier List / Class Tier List for party building!
★ List of Characters for guides on recruiting all characters and their best classes.

A Symbol of the Past is Chapter 14 of the Golden Wildfire Route in Fire Emblem Warriors Three Hopes. Read on to learn about the different quests, survey spots, rewards, and support conversations within the chapter, as well as our walkthrough for its main quest!
| ⮜ Previous Chapter | Next Chapter ⮞ |
|---|---|
| Chapter 13: Darkness Attacks |
Chapter 15: The Hour of Vengeance (If Byleth is recruited) Final Chapter: Field of Beginnings (If Byleth is defeated) |
List of Contents
A Symbol of the Past Recruitable Characters
| All Recruitable Characters in A Symbol of the Past | ||
|---|---|---|
| There are no recruitable characters in this chapter. | ||
Recruitment Guide: How to Recruit Units
A Symbol of the Past Quests, Survey Spots, and Rewards
A Symbol of the Past Quests
| Quest | Type | Rewards |
|---|---|---|
| Salvation | Main |
S Rank Reward: Suttungr's Mystery x1
First Time Reward: Master Seal x1 |
| Clear a Path | Side |
S Rank Reward: Premium Magic Herbs x1
Capture Reward: Training Points Recovered: 1 |
| Save the Citizenry | Side |
S Rank Reward: Heretic's Tome x1
Capture Reward: 7,800 G |
| Rescue the Prisoner | Side |
S Rank Reward: Abyssal Tome x1
Capture Reward: Training Points Recovered: 1 |
| Secure the Construction Site | Side |
S Rank Reward: Extra Large Bullion x1
Capture Reward: Activity Points Recovered: 1 |
| Hold the Line | Side |
S Rank Reward: Devil Axe x1
Capture Reward: 7,800 G |
| Gather Intel | Side |
S Rank Reward: Master Seal x1
Capture Reward: Activity Points Recovered: 1 |
| The Way to Garreg Mach | Side |
S Rank Reward: Bow of Zoltan +10 x1
Capture Reward: 7,800 G |
| Under the Protection of the Golden Deer | Paralogue |
S Rank Reward: Ordelia Sorcery Co. x1
First Time Reward: Black Pearl x1 |
| An Unexpected Encounter | Battle | No Fixed Rewards |
A Symbol of the Past Survey Spots
| Side Mission | Survey Spot | Type | Reward / Conditions |
|---|---|---|---|
| Clear a Path | Cave | Choice | Reward: Raise the Def. of one unit |
| Clear a Path | Cave | Choice | Reward: Axe of Zoltan or Bow of Zoltan |
| Save the Citizenry | Tent | Meet Condition |
Survey Conditions: Trade 3 Venomstone
Reward: Master Seal x3 |
| Save the Citizenry | Stronghold | Visit | Reward: Lavish Building Material x16 and Elite Training Gear x6 |
| Save the Citizenry | House | Meet Condition |
Survey Conditions: Defeat at least 2000 enemies in the chapter.
Reward: Tome of Comely Saints |
| Save the Citizenry | House | Choice | Reward: Raise support points between two units. |
| Secure the Construction Site | Stronghold | Visit | Reward: Her Majesty's Healers |
| Secure the Construction Site | Mine | Visit | Reward: Lavish Building Material x16 and Master Smithing Set x12 |
| Rescue the Prisoner | Ruins | Choice | Reward: Hexlock Shield or Healing Staff |
| Rescue the Prisoner | Tent | Choice | Reward: Lavish Building Material x16 and Advanced Combat Manual x12 |
| Rescue the Prisoner | Stronghold | Visit | Reward: Alliance Sniper Fusillade |
| Hold the Line | Stronghold | Visit | Reward: Lavish Building Material x16, Purveyor's License x10, and Luxurious Furnishings x6 |
| Hold the Line | Cave | Battle | Reward: Assorted rewards from battle. |
| Gather Intel | Tent | Visit | Reward: Dispatch Combat Engineers |
| Gather Intel | Mine | Pay |
Gold Required: 1,300 G
Reward: Agarthium x10 |
| The Way to Garreg Mach | House | Visit | Reward: Lavish Building Material x16, Hero's Insignia x6, and Storage Compartment x6 |
| The Way to Garreg Mach | Gate | Meet Condition |
Survey Conditions: Must complete all side missions in this area.
Reward: Daphnel Duelists x1 |
| The Way to Garreg Mach | House | Choice |
Survey Conditions: Choose between "Watch the contest of strength" or "Try some of the local delicacies"
Reward: Training or Activity Points Recovered: x1 |
Salvation Strategies and Walkthrough
Recommended Strategies for Salvation
| Strategy | Description | Cost |
|---|---|---|
| Her Majesty's Healers | Heal Edelgard as she advances to the front lines, where the fighting is fiercest. | 30 |
| Assign Armored Unit | Assign an armored unit to protect a target. | 10 |
| High Spirits | Strengthen units stationed in allied strongholds. | 10 |
| Stronghold Sabotage | Decrease the durability of all enemy strongholds at the beginning of battle. | 10 |
Salvation Objectives
| Victory Condition | Defeat Condition |
|---|---|
| Defeat the Kingdom and Church of Seiros Army | Edelgard is routed, or the Upper Defense Gate is captured. |
|
Main Objectives
1. Escort Edelgard to the front lines! 2. Defeat the Mortal Savants and aid Monica! 3. Defeat the Holy Knights and aid Count Varley! 4. Defeat Ingrid! 5. Defeat Dedue! 6. Defeat Dimitri! 7. Defeat Rhea! Side Objectives ・ Defeat the Mortal Savant and their allies targeting allied strongholds! ・ Defeat the Great Knight and their allies targeting allied strongholds! |
|
Salvation Walkthrough
| Objectives | |
|---|---|
| 1 | 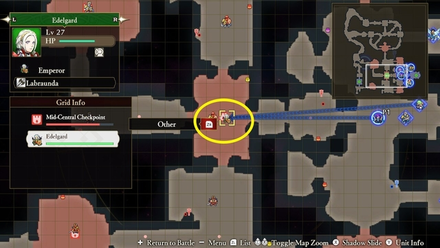 Escort Edelgard to the front lines! Order two units to escort Edelgard throughout the map. They will stay with her for the duration of the quest. Make sure at least one unit guarding her is controllable. Send the rest to capture available enemy strongholds. |
| 2 | 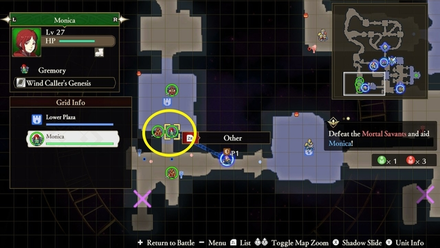 Defeat the Mortal Savants and aid Monica! Send the unit nearest to Monica to protect her. Holy Knights and Bow Knights will be particularly effective against Mortal Savants. |
| 3 | 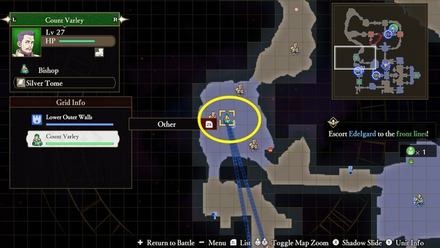 Defeat the Holy Knights and aid Count Varley! Send the unit nearest to Count Varley to protect him. Tricksters are fairly effective against Holy Knights. |
| 4 | 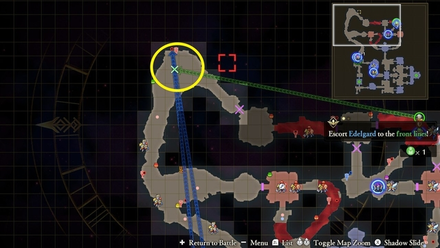 After saving Count Varley, send a few units that aren't escorting Edelgard straight to her destination so that you'll have immediate help when Dimitri appears. |
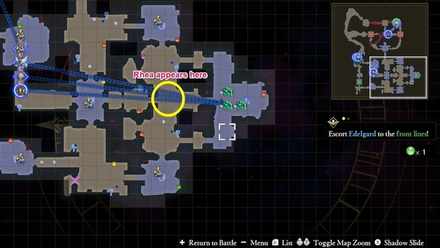 Send the remaining units to your first Stronghold since Rhea will appear nearby. |
|
| 5 | 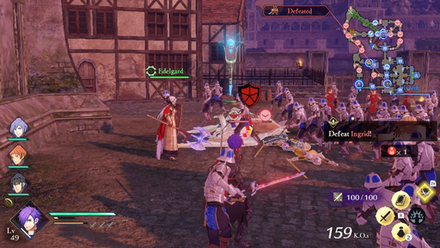 Defeat Ingrid! Control the unit guarding Edelgard and use them to beat Ingrid. |
| 6 | 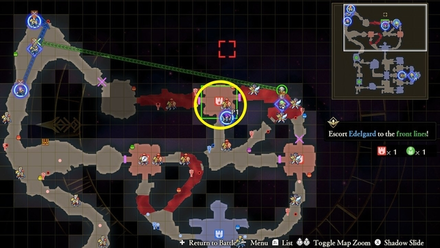 Edelgard will sometimes get walled off from your units. Take any strongholds near her to get access through the blockades. |
| 7 | 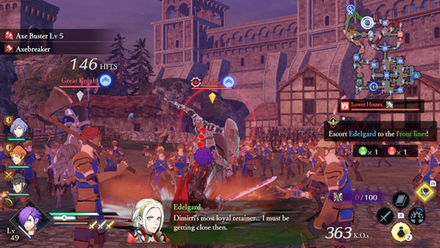 Defeat Dedue! Control the unit guarding Edelgard and use them to beat Dedue. |
| 9 | 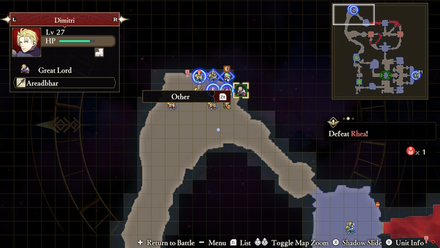 Defeat Dimitri! Order nearby units to attack Dimitri. While tanky, he'll be overwhelmed by your numbers. |
| 10 | 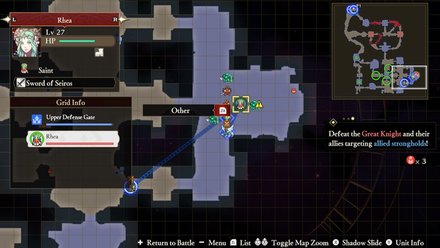 Defeat Rhea! As you fight Dimitri, switch back and forth with the units near Rhea so that you can safely beat her as well. |
A Symbol of the Past Support and Romance Conversations
In Camp
 Ignatz Ignatz
|
Prompt: | I'm honestly happy to hear that. It means she trusts us... That she considers us her friends. | ||
|---|---|---|---|---|
| Answers: | Reactions: | |||
| She does. | +1 Support with Ignatz | |||
| That's not what's happening. | None | |||
 Lysithea Lysithea
|
Prompt: | If their aim is to throw Fódlan into chaos, then the best way to stop that would be... | ||
| Answers: | Reactions: | |||
| To bring peace to Fódlan. | None | |||
| To unify Fódlan. | +1 Support with Lysithea | |||
 Shamir Shamir
|
Prompt: | I don't feel any personal obligation to help them though. | ||
| Answers: | Reactions: | |||
| Ask what she means. | None | |||
| Admonish her. | +1 Support with Shamir | |||
 Hapi Hapi
|
Prompt: | I know it's got historical significance, but is it really worth sacrificing so many lives over? | ||
| Answers: | Reactions: | |||
| Suggest it has hidden secrets. | +1 Support with Hapi | |||
| Say it's sacred ground. | None | |||
 Constance Constance
|
Prompt: | Feel free to use me as a decoy, or make me pretend to surrender, or have me sabotage from undergound. I care not what I do. | ||
| Answers: | Reactions: | |||
| Refuse. | None | |||
| Comment on her suggestions. | +1 Support with Constance | |||
 Balthus Balthus
|
Prompt: | Then the count's gonna be sitting pretty for the rest of his life. And even then it'd hardly make up for what he's been through. | ||
| Answers: | Reactions: | |||
| Ask about Balthus's life. | None | |||
| Ask about your own life. | +1 Support with Balthus | |||
 Yuri Yuri
|
Prompt: | It's most certainly a terrible state of affairs, but it could also turn into a business opportunity. | ||
| Answers: | Reactions: | |||
| Ask what he means. | None | |||
| Get upset with him. | +1 Support with Yuri | |||
 Ashe Ashe
|
Prompt: | I don't know if I'd be able to defeat him in battle. | ||
| Answers: | Reactions: | |||
| Say he could win. | None | |||
| Say he probably couldn't win. | +1 Support with Ashe | |||
| Say he doesn't have to fight. | None | |||
 Petra Petra
|
Prompt: | When relations between two regions can easily shatter, a third one takes importance. | ||
| Answers: | Reactions: | |||
| Agree with her. | +1 Support with Petra | |||
| Bring up the Kingdom. | None | |||
 Dorothea Dorothea
|
Prompt: | Let's hurry to Garreg Mach, OK? I'll be counting on you, Shez. | ||
| Answers: | Reactions: | |||
| Emphatically agree. | +1 Support with Dorothea | |||
| Ask about her relationship with Edelgard. | None | |||
 Bernadetta Bernadetta
|
Prompt: | I really don't want to go, but I guess I don't have much of a choice. | ||
| Answers: | Reactions: | |||
| Encourage her to face her fears. | +1 Support with Bernadetta | |||
| Tell her she shouldn't push herself. | None | |||
Between Battles
| There doesn't appear to be any conversations that affect Support between this Chapter's battles. |
Fire Emblem Warriors: Three Hopes Related Guides

Story Walkthrough: List of Chapters
All Story Walkthroughs
All Paralogues
Author
Chapter 14 Walkthrough - A Symbol of the Past (Golden Wildfire)
improvement survey
03/2026
improving Game8's site?

Your answers will help us to improve our website.
Note: Please be sure not to enter any kind of personal information into your response.

We hope you continue to make use of Game8.
Rankings
- We could not find the message board you were looking for.
Gaming News
Popular Games

Genshin Impact Walkthrough & Guides Wiki

Honkai: Star Rail Walkthrough & Guides Wiki

Umamusume: Pretty Derby Walkthrough & Guides Wiki

Pokemon Pokopia Walkthrough & Guides Wiki

Resident Evil Requiem (RE9) Walkthrough & Guides Wiki

Monster Hunter Wilds Walkthrough & Guides Wiki

Wuthering Waves Walkthrough & Guides Wiki

Arknights: Endfield Walkthrough & Guides Wiki

Pokemon FireRed and LeafGreen (FRLG) Walkthrough & Guides Wiki

Pokemon TCG Pocket (PTCGP) Strategies & Guides Wiki
Recommended Games

Diablo 4: Vessel of Hatred Walkthrough & Guides Wiki

Cyberpunk 2077: Ultimate Edition Walkthrough & Guides Wiki

Fire Emblem Heroes (FEH) Walkthrough & Guides Wiki

Yu-Gi-Oh! Master Duel Walkthrough & Guides Wiki

Super Smash Bros. Ultimate Walkthrough & Guides Wiki

Pokemon Brilliant Diamond and Shining Pearl (BDSP) Walkthrough & Guides Wiki

Elden Ring Shadow of the Erdtree Walkthrough & Guides Wiki

Monster Hunter World Walkthrough & Guides Wiki

The Legend of Zelda: Tears of the Kingdom Walkthrough & Guides Wiki

Persona 3 Reload Walkthrough & Guides Wiki
All rights reserved
© Nintendo / INTELLIGENT SYSTEMS © KOEI TECMO GAMES CO., LTD. Fire Emblem and Nintendo Switch are trademarks of Nintendo. © Nintendo.
The copyrights of videos of games used in our content and other intellectual property rights belong to the provider of the game.
The contents we provide on this site were created personally by members of the Game8 editorial department.
We refuse the right to reuse or repost content taken without our permission such as data or images to other sites.
 Crossed Roads


![Monster Hunter Stories 3 Review [First Impressions] | Simply Rejuvenating](https://img.game8.co/4438641/2a31b7702bd70e78ec8efd24661dacda.jpeg/thumb)


