This survey will take about 1 minute.
Your answers will help us to improve our website.
Crimson Desert
The Face Behind the Mask Walkthrough
☆ Best: Side Quests | Weapons | Armor | Skills
★ Controls | Best Items | What to Do First
☆ Characters: Damiane | Oongka | Kliff
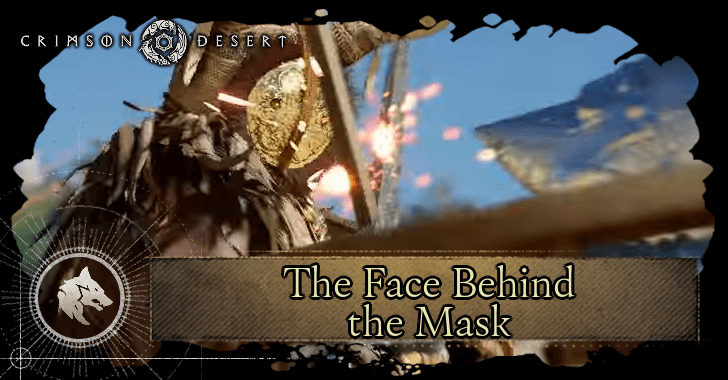
This is a The Face Behind the Mask walkthrough for Crimson Desert. Learn how to complete The Face Behind the Mask and its quest rewards in this guide!
| ◄ Previous Quest | Next Quest ▶ |
|---|---|
| Homestead | Pioneering |
List of Contents
The Face Behind the Mask Walkthrough
1. Return
| 1.1 | Speak with Marius |
|---|---|
| Head back to the Greymane Camp and talk to Marius. You will be able to meet Duane during your conversation with Marius. |
2. Traces in the Manor
| 2.1 | Go to Glenbright Manor |
|---|---|
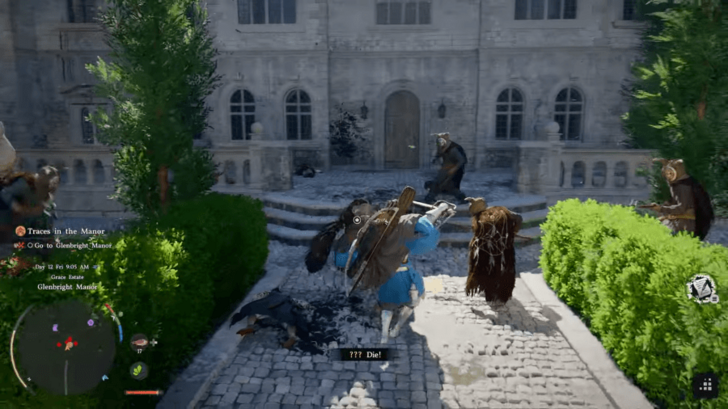 Go to Glenbright Manor in Grace Estate to find the place under attack. Fend yourself against the ambushers once you enter the manor. |
|
| 2.2 | Investigate Glenbright Manor |
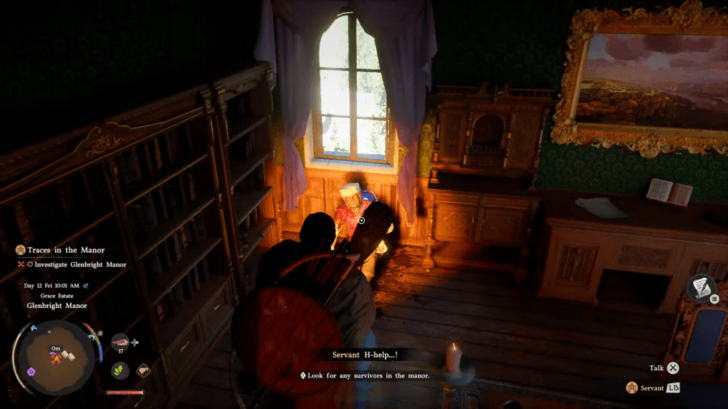 Investigate the manor and look for any survivors. Go to the second level to find a wounded servant by the window of the study. You may also get the Iron Door Key of the Grace Manor in the same room. |
3. Nonhuman
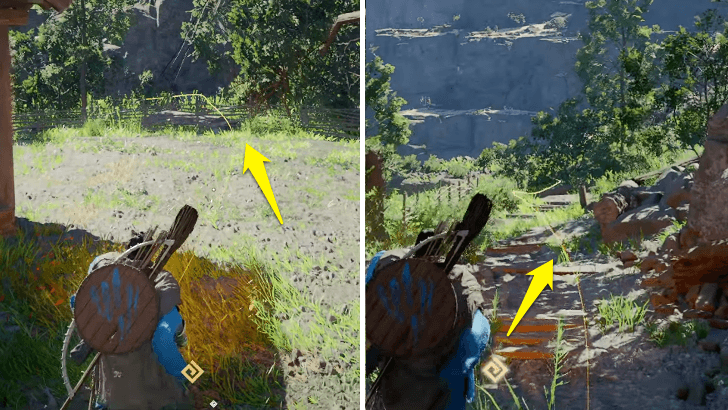
| 3.1 | Track the Devil of the Reed Field |
|---|---|
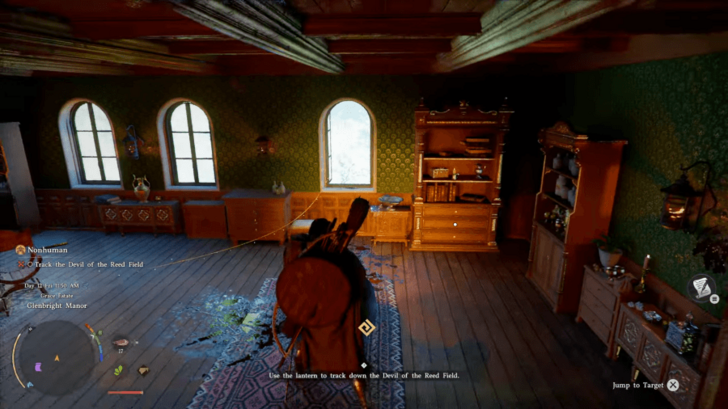 The Tracking mechanic will be unlocked at this point of the story. To use it, point your Lantern to the open window or use the Blinding Sword to see the trail of the Devil of the Reed Field, chasing after survivors. |
|
| 3.2 | Follow the Trail to Reedfield Graves |
 Keep tracking their trail using the Lantern or Blinding Sword. You will be ambushed once you pass through the houses in the farm, so be prepared for combat. You can avoid them entirely if you don't pass through those houses and go straight to the Reedfield Graves. You will be able to see the survivors and the Devil of the Reed Field once you get there. |
4. Seed of Unease
| 4.1 | Use the Lantern to Show Tracks |
|---|---|
 From the house in the previous quest, Nonhuman, you must now track the Reed Devil with the Lantern instead of an objective marker. Head outside and shine the lantern to see the yellow line that leads you west of the house, and continue following it. |
|
| 4.2 | |
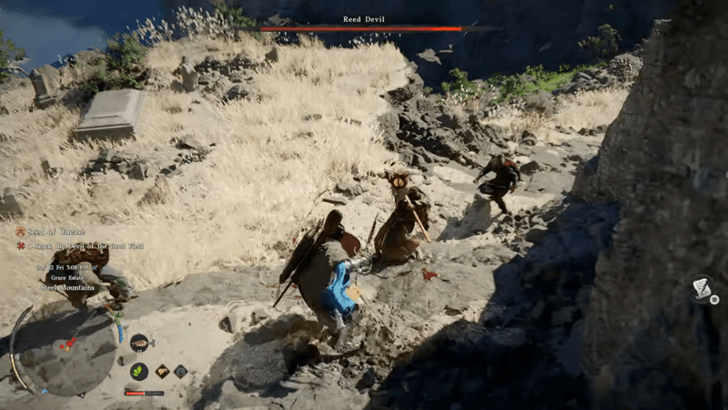 Follow the tracks to reach the Steel Mountains area. You will be ambushed by the Reed Devil and his minions, and you must deal enough damage to the boss for him to disappear. Once he disappears, use your lantern to follow the path again to his next location. You will be tracking and fighting him multiple times, so make sure you have enough food and heals. It's best to fight the enemies you will encounter here as they give tons of Abyss Artifact XP, but you can skip them if you want, as they can be daunting. |
|
| 4.3 | |
| Continue tracking the Reed Devil with the lantern, and you will fight him again shortly after, in the Mountain of Frozen Souls area. He will also have larger and more elite enemies with him this time. | |
| 4.4 | |
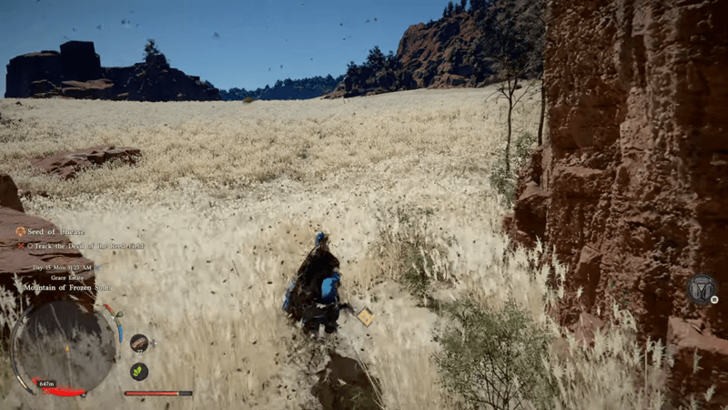 After he retreats from the second ambush, continue climbing up the mountain trail going south. There will be more minions you can defeat or run past along the linear path, and one more Reed Devil ambush. Once you make it to the large open reed field, the final showdown with the boss will be next. |
|
| 4.5 | Head to the Altar by the Tree |
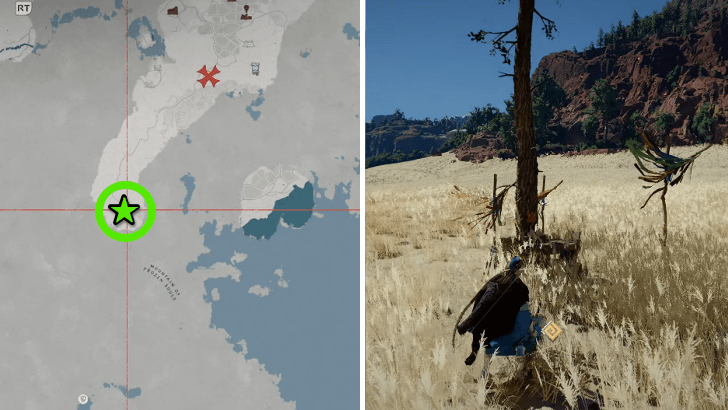 Follow the faint trail towards the tree in the field with an altar. |
|
| 4.6 | Examine the Altar and Doll |
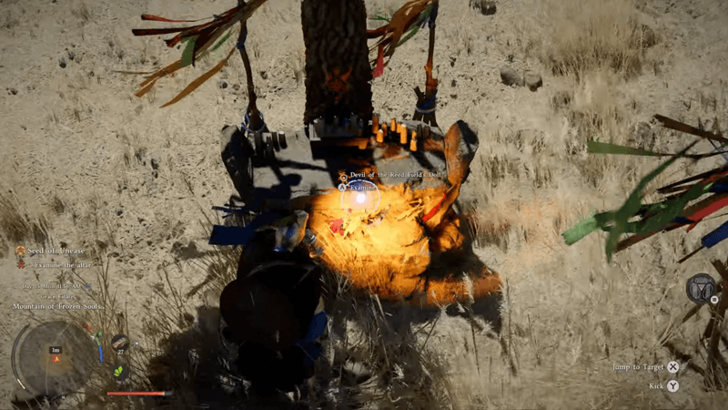 Examine the doll in the center of the altar, finishing the quest and leading to the real boss fight against the Reed Devil. |
5. Dance with the Devil
| 5.1 | Defeat the Devil of the Reed Field |
|---|---|
Defeat Reed Devil in a two-phase boss fight. Most of his attacks during your first encounters are the same, but there will be additions, like range attacks and he will keep his distance most of the time. You can focus on parrying his quick slashes and then land a counter to damage him. Rinse and repeat until you get to the second phase. ▶ How to Beat Reed Devil |
|
| * | Destroy All Totems in the Second Phase |
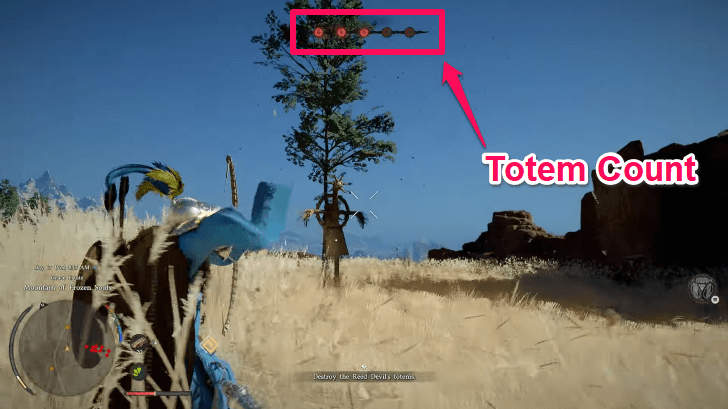 Reed Devil is invincible in the second phase and will summon clones to fight you. Destroy the 5 Totems in the area to remove his invincibility and clones. After that, it will be the same as the first phase. Follow the same strategy until you beat him! |
|
| * | Learn the Swift Stab |
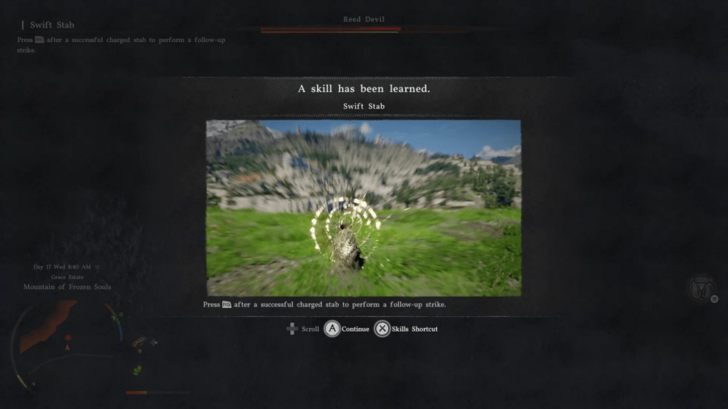 You may learn the Swift Stab skill from Reed Devil during the boss fight. You can use it against him once you learn it! ▶ Next Quest: Pioneering |
The Face Behind the Mask Rewards
| ・Sunset Reed Cloth Gloves x1 |
Crimson Desert Related Guides

Story Walkthrough and List of Chapters
All Chapters and Quests
Comment
Author

The Face Behind the Mask Walkthrough
Please participate in our site
improvement survey
04/2026
improvement survey
04/2026
Would you assist in
improving Game8's site?
improving Game8's site?

×
We are listening to our users' valuable opinions and discussing how to act on them.
The information collected through this survey will be used for the purpose of improving our services. In addition, the information will only be disclosed a part of a statistic in a format that will not allow identification of personal information.
Begin Survey
Not Now
×
Please rate each item regarding Game8.co's Advertisements.
Amount of Ads
Very Dissatisfied
Somewhat Dissatisfied
Fine
Somewhat Satisfied
Highly Satisfied
Placement of Ads
Timing of Ad Display
Ad Loading Speed
Safeness of Ads
Content of Ads
×
Please rate each item regarding Game8.co's Quality of Articles.
Amount of information
Very Dissatisfied
Somewhat Dissatisfied
Fine
Somewhat Satisfied
Highly Satisfied
Frequency of updates
Speed of new information
Accuracy of articles
Understandibility of articles
Readability of sentences
×
Please rate each item regarding Game8.co's Usability of the Site.
Ease of finding information
Very Dissatisfied
Somewhat Dissatisfied
Fine
Somewhat Satisfied
Highly Satisfied
Loading Speed
Use of Color
Font Size
Visibility of Images
Easy to Understand Layout
×
Please rate each item regarding Game8.co's Message Boards, Comments.
Ease of Writing
Very Dissatisfied
Somewhat Dissatisfied
Fine
Somewhat Satisfied
Highly Satisfied
Readability
Ease in Finding Information
Comment Quality
Comment Quantity
Admin Response
×
Please rate each item regarding Game8.co's Site's new design.
Please rate our site's new design
Very Dissatisfied
Somewhat Dissatisfied
Fine
Somewhat Satisfied
Highly Satisfied
Do you think that the website's design change makes the site easier to use?
Has the new design made it easier for you to find information on the site?
Has the new design improved the overall visual appeal of the site?
How would you rate your overall satisfaction with the new design of the site?
×
How likely are you to recommend Game8 to someone you know?
Very Unlikely
0
1
2
3
4
5
6
7
8
9
10
Very Likely
If you have other opinions regarding potential improvement to the website, please share them with us. We would appreciate your honest opinion.
Note: This is a free response section, so you can proceed without entering anything.
Note: Please be sure not to enter any kind of personal information into your response.
Note: Please be sure not to enter any kind of personal information into your response.
×
Thank You
×
Thank you for participating in our survey! Your answers will help us to improve the quality of our website and services.
We hope you continue to make use of Game8.
We hope you continue to make use of Game8.
Close
Rankings
- We could not find the message board you were looking for.
Gaming News


![Forza Horizon 6 Review [Preview] | Beautiful Roads With a Whole Lot of Oversteer](https://img.game8.co/4460981/a7254c24945c43fbdf6ad9bea52b5ce9.png/thumb)
Popular Games

Genshin Impact Walkthrough & Guides Wiki
Crimson Desert Walkthrough & Guides Wiki
Umamusume: Pretty Derby Walkthrough & Guides Wiki
Honkai: Star Rail Walkthrough & Guides Wiki
Monster Hunter Stories 3: Twisted Reflection Walkthrough & Guides Wiki
Wuthering Waves Walkthrough & Guides Wiki
The Seven Deadly Sins: Origin Walkthrough & Guides Wiki
Pokemon TCG Pocket (PTCGP) Strategies & Guides Wiki
Pokemon Pokopia Walkthrough & Guides Wiki
Zenless Zone Zero Walkthrough & Guides Wiki


Recommended Games
Monster Hunter World Walkthrough & Guides Wiki
Fire Emblem Heroes (FEH) Walkthrough & Guides Wiki
Pokemon Brilliant Diamond and Shining Pearl (BDSP) Walkthrough & Guides Wiki
Super Smash Bros. Ultimate Walkthrough & Guides Wiki
Diablo 4: Vessel of Hatred Walkthrough & Guides Wiki
Cyberpunk 2077: Ultimate Edition Walkthrough & Guides Wiki
Yu-Gi-Oh! Master Duel Walkthrough & Guides Wiki
Elden Ring Shadow of the Erdtree Walkthrough & Guides Wiki
The Legend of Zelda: Tears of the Kingdom Walkthrough & Guides Wiki
Persona 3 Reload Walkthrough & Guides Wiki


All rights reserved
© Pearl Abyss Corp. All Rights Reserved.
The copyrights of videos of games used in our content and other intellectual property rights belong to the provider of the game.
The contents we provide on this site were created personally by members of the Game8 editorial department.
We refuse the right to reuse or repost content taken without our permission such as data or images to other sites.