The Battle of Garreg Mach Walkthrough
Check out our:
★ Story Walkthrough for how to get S Rank Rewards and the Best Responses to Support Conversations!
★ Character Tier List / Class Tier List for party building!
★ List of Characters for guides on recruiting all characters and their best classes.
The Battle of Garreg Mach is a Main Quest in Fire Emblem Warriors: Three Hopes. Know more about The Battle of Garreg Mach's objectives, unlock condition, recommended level, support conversations, as well as the S Rank Reward!
List of Contents
The Battle of Garreg Mach Overview
| Tap to Jump to a Section | |||
|---|---|---|---|
| Battle Info | S Rank Requirements and Rewards | Objectives | Survey Spots |
Battle Info
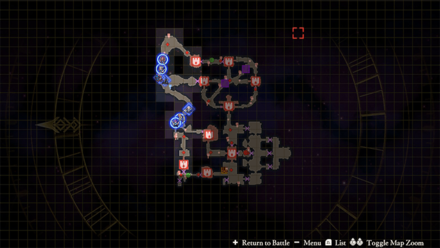 View Full Image |
|
| Story Chapter | The Struggle Commences |
|---|---|
| Branching Path | Scarlet Blaze |
| Location | Garreg Mach Monastery |
| Enemy Level | 5 |
| Unlock Condition | Complete Prepare for the Conquest of Garreg Mach. |
| Preparations for war now complete, the Imperial army arrives at Garreg Mach Monastery. The time has come to sack the seat of the Central Church. | |
S Rank Requirements and Rewards
| First Time Reward | Rusted Sword x1 |
|---|---|
| S Rank Reward | Ambrosia x1 |
| S Rank Requirements |
Completion Time: 18 Minutes Enemies Defeated: 1500 Damage Taken: 50% |
Objectives
| Victory Condition | Defeat Condition |
|---|---|
| Gain control of all strongholds. | None. |
|
Main Objectives
1. Seize all the strongholds within the monastery walls! 2. Defeat Hapi! / Defeat and recruit Hapi! 3. Defeat Constance / Defeat and recruit Constance! 4. Defeat Flayn to stop the Resonant Lightning attack! 5. Seize all the strongholds within the monastery walls! 6. Defeat Seteth! 7. Defeat Cyril! 8. Defeat Archbishop Rhea and take Garreg Mach! Side Objectives ・ Defeat the Armored Knights to prevent them from retaking a stronghold! ・ Defeat the Pegasus Knights to prevent them from retaking a stronghold! ・ Defeat Cyril to prevent them from retaking the stronghold! ・ Seize the strongholds to stop the ballistae and fire orbs! |
|
Survey Spots
Garreg Mach Monastery
| There are no survey spots available in this region. |
The Battle of Garreg Mach Recommended Strategies
| Strategy | Description | Cost |
|---|---|---|
| Impregnable Wall | Bolster defenses, temporarily reducing damage taken by allied strongholds. | 10/30 |
| Persuade Constance | Convince an enemy general to join your army. | 10 (SB) / 30 (AG) / 20 (GW) |
| Persuade Hapi | Convince an enemy general to join your army. | 10 (SB) / 20 (GW) |
The Battle of Garreg Mach Walkthrough
| Objectives | |
|---|---|
| 1 | In the Battle Prep screen, switch your units to make sure they have the advantage against the enemies you'll face in the map. Put Edelgard on the top section of the map for her to destroy the walls later on. |
| 2 | 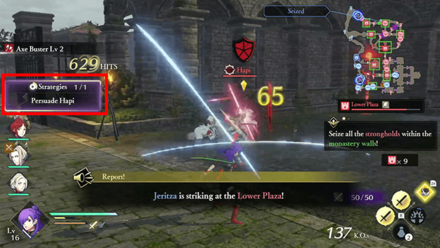 Order the AI-controlled units to seize the two strongholds on the top and bottom parts map. If you have used the Persuade Strategy, avoid depleting Hapi's or Constance's health and wait for the persuade option to appear. Press and hold the Right Arrow on the D-Pad to activate the strategy to defeat and recruit them. |
| 3 | 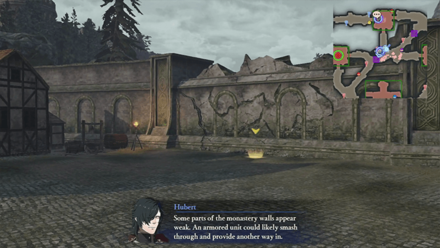 Use Edelgard to destroy the wall to create a path leading to Flayn. |
| 4 | 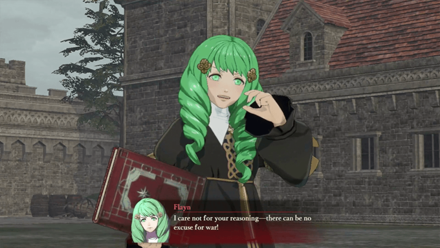 Defeat Flayn and seize the stronghold to disable the Resonant Lightning. You can also order the AI-controlled unit on the top part of the map to assist you in defeating Flayn or assign them to seize the stronghold on the opposite site. |
| 5 | 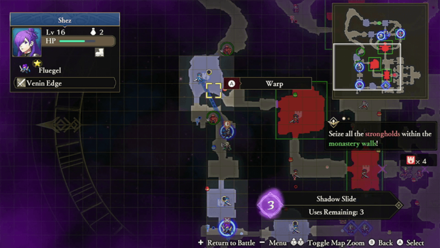 Use Shadow Slide to warp Shez at the stronghold where the Armor Knights are heading to. Use Shez to defeat the knights to complete the side mission. |
| 6 | 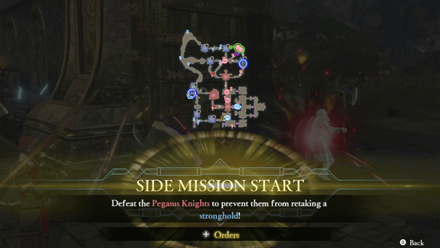 Assign the two units on the top part of the map to defeat the Pegasus Knights on the top-right corner of the map. |
| 7 | Use Shadow Slide to warp Shez on the stronghold opposite of Cyril. Use Shez and assign one unit to defeat Cyril before he takes over the stronghold. |
| 8 | Seize the remaining strongholds and order an All-Out Offensive towards Seteth. |
| 9 | 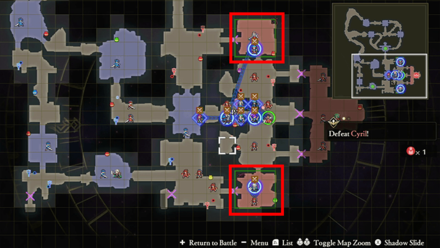 Assign units to seize the two strongholds with the ballistae and fire orbs. Use your controlled character to defeat Cyril once he reappears on the amp. |
| 10 | Order an All-Out Offensive towards Rhea to defeat her and complete the battle. |
Fire Emblem Warriors: Three Hopes Related Guides

Story Walkthrough: List of Chapters
All Story Walkthroughs
All Paralogues
Comment
Author
The Battle of Garreg Mach Walkthrough
improvement survey
03/2026
improving Game8's site?

Your answers will help us to improve our website.
Note: Please be sure not to enter any kind of personal information into your response.

We hope you continue to make use of Game8.
Rankings
- We could not find the message board you were looking for.
Gaming News
Popular Games

Genshin Impact Walkthrough & Guides Wiki

Honkai: Star Rail Walkthrough & Guides Wiki

Umamusume: Pretty Derby Walkthrough & Guides Wiki

Pokemon Pokopia Walkthrough & Guides Wiki

Resident Evil Requiem (RE9) Walkthrough & Guides Wiki

Monster Hunter Wilds Walkthrough & Guides Wiki

Wuthering Waves Walkthrough & Guides Wiki

Arknights: Endfield Walkthrough & Guides Wiki

Pokemon FireRed and LeafGreen (FRLG) Walkthrough & Guides Wiki

Pokemon TCG Pocket (PTCGP) Strategies & Guides Wiki
Recommended Games

Diablo 4: Vessel of Hatred Walkthrough & Guides Wiki

Cyberpunk 2077: Ultimate Edition Walkthrough & Guides Wiki

Fire Emblem Heroes (FEH) Walkthrough & Guides Wiki

Yu-Gi-Oh! Master Duel Walkthrough & Guides Wiki

Super Smash Bros. Ultimate Walkthrough & Guides Wiki

Pokemon Brilliant Diamond and Shining Pearl (BDSP) Walkthrough & Guides Wiki

Elden Ring Shadow of the Erdtree Walkthrough & Guides Wiki

Monster Hunter World Walkthrough & Guides Wiki

The Legend of Zelda: Tears of the Kingdom Walkthrough & Guides Wiki

Persona 3 Reload Walkthrough & Guides Wiki
All rights reserved
© Nintendo / INTELLIGENT SYSTEMS © KOEI TECMO GAMES CO., LTD. Fire Emblem and Nintendo Switch are trademarks of Nintendo. © Nintendo.
The copyrights of videos of games used in our content and other intellectual property rights belong to the provider of the game.
The contents we provide on this site were created personally by members of the Game8 editorial department.
We refuse the right to reuse or repost content taken without our permission such as data or images to other sites.
 Crossed Roads


![Monster Hunter Stories 3 Review [First Impressions] | Simply Rejuvenating](https://img.game8.co/4438641/2a31b7702bd70e78ec8efd24661dacda.jpeg/thumb)


