Reversal of Fortune Walkthrough
Check out our:
★ Story Walkthrough for how to get S Rank Rewards and the Best Responses to Support Conversations!
★ Character Tier List / Class Tier List for party building!
★ List of Characters for guides on recruiting all characters and their best classes.
Reversal of Fortune is a Main Quest in Fire Emblem Warriors: Three Hopes. Know more about Reversal of Fortune's objectives, unlock condition, recommended level, support conversations, as well as the S Rank Reward!
Reversal of Fortune Overview
| Tap to Jump to a Section | ||
|---|---|---|
| Battle Info | S Rank Requirements and Rewards | Objectives |
Battle Info
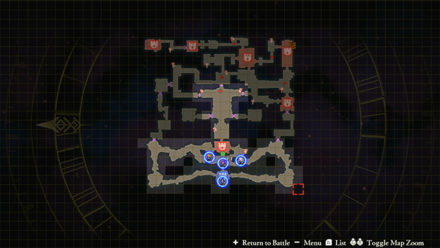 View Full Image |
|
| Story Chapter | Three Houses |
|---|---|
| Branching Path | Prologue |
| Unlock Condition | Complete A Struggle at Dawn. |
S Rank Requirements and Rewards
| First Time Reward | Bullion x1 |
|---|---|
| S Rank Reward | Premium Magic Herbs x1 |
| S Rank Requirements |
Completion Time: 12 Minutes Enemies Defeated: 600 Damage Taken: 40% |
Objectives
| Victory Condition | Defeat Condition |
|---|---|
| Defeat the Thieves. Defeat Kronya. Defeat the Wild Demon Beast. |
Monica is routed. |
|
Main Objectives
1. Defeat the Gatekeeper! 2. Seize the Thieves' base! 3. Investigate the dungeon! 4. Seize the Dungeon and rescue the captive Officers Academy student! 5. Escort Monica to safety! 6. Defeat Kronya 7. Defeat the Wild Demon Beast Side Objectives ・ Don't let the Thief retreat! |
|
Reversal of Fortune Walkthrough
Walkthrough
| Objectives | |
|---|---|
| 1 | Use Shez and defeat the Gatekeeper. |
| 2 | 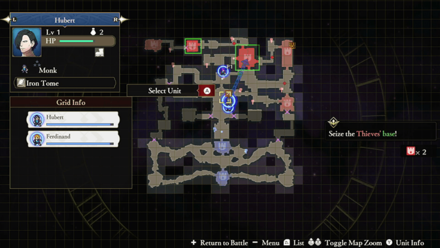 Order two units to seize the two strongholds marked with the red color on the map. Look for the blue upward pointing arrow to know if the character is strong against a particular unit. |
| 3 | 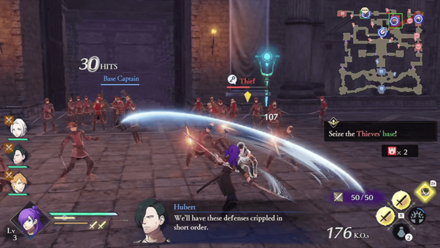 Defeat the Thief with the key before he reaches the the treasure chest on the top right corner of the map. |
| 4 | 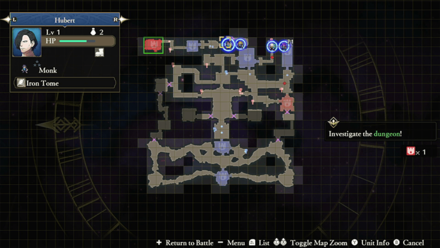 Order at least two units to head to the top left corner of the dungeon. |
| 5 | 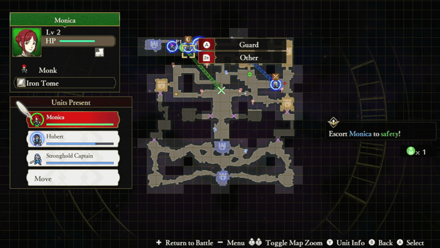 Assign the two units to guard Monica as they escort her to the area with the green "X" on the map. |
| 6 | Optional: Use your character to defeat the fleeing Thief before he reaches his destination. |
| 7 | Assign all units to defeat Kronya. |
| 8 | Assign at least one unit to guard Monica and have the remaining units attack the Wild Demon Beast. Avoid staying on the area with the red aura to avoid getting hit by the boss' attacks. |
How to Beat the Wild Demon Beast
Perform a Critical Rush When the Yellow Aura Appears
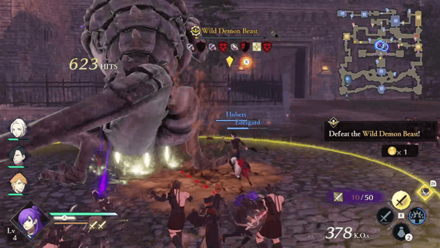
Once you deplete the Wild Demon Beast's Stun Gauge, a yellow aura appears surrounding the boss. This indicates that you can perform a critical rush against it and deplete its health in the process.
Avoid the Areas with Red Aura
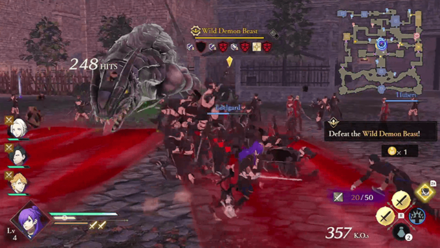
Whenever the Wild Demon Beast prepares an strong attack, red auras will appear on the ground indicating the area affected by its attack. Dodge to the safe area to avoid getting hit by its attack.
Assign One Unit to Guard Monica
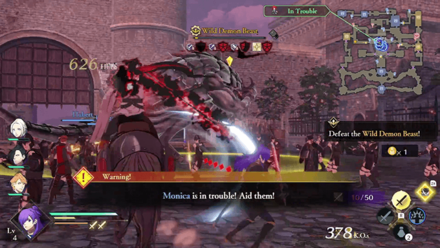
If the battle takes too long, you may receive a notification that Monica is in trouble. Assign one unit to guard her to prevent her from getting hit by the boss.
Fire Emblem Warriors: Three Hopes Related Guides

Story Walkthrough: List of Chapters
All Story Walkthroughs
All Paralogues
Comment
Dimitri Route hold back +1 Sylvain suggest charge forth +1 Felix
Author
Reversal of Fortune Walkthrough
improvement survey
03/2026
improving Game8's site?

Your answers will help us to improve our website.
Note: Please be sure not to enter any kind of personal information into your response.

We hope you continue to make use of Game8.
Rankings
- We could not find the message board you were looking for.
Gaming News
Popular Games

Genshin Impact Walkthrough & Guides Wiki

Honkai: Star Rail Walkthrough & Guides Wiki

Umamusume: Pretty Derby Walkthrough & Guides Wiki

Pokemon Pokopia Walkthrough & Guides Wiki

Resident Evil Requiem (RE9) Walkthrough & Guides Wiki

Monster Hunter Wilds Walkthrough & Guides Wiki

Wuthering Waves Walkthrough & Guides Wiki

Arknights: Endfield Walkthrough & Guides Wiki

Pokemon FireRed and LeafGreen (FRLG) Walkthrough & Guides Wiki

Pokemon TCG Pocket (PTCGP) Strategies & Guides Wiki
Recommended Games

Diablo 4: Vessel of Hatred Walkthrough & Guides Wiki

Cyberpunk 2077: Ultimate Edition Walkthrough & Guides Wiki

Fire Emblem Heroes (FEH) Walkthrough & Guides Wiki

Yu-Gi-Oh! Master Duel Walkthrough & Guides Wiki

Super Smash Bros. Ultimate Walkthrough & Guides Wiki

Pokemon Brilliant Diamond and Shining Pearl (BDSP) Walkthrough & Guides Wiki

Elden Ring Shadow of the Erdtree Walkthrough & Guides Wiki

Monster Hunter World Walkthrough & Guides Wiki

The Legend of Zelda: Tears of the Kingdom Walkthrough & Guides Wiki

Persona 3 Reload Walkthrough & Guides Wiki
All rights reserved
© Nintendo / INTELLIGENT SYSTEMS © KOEI TECMO GAMES CO., LTD. Fire Emblem and Nintendo Switch are trademarks of Nintendo. © Nintendo.
The copyrights of videos of games used in our content and other intellectual property rights belong to the provider of the game.
The contents we provide on this site were created personally by members of the Game8 editorial department.
We refuse the right to reuse or repost content taken without our permission such as data or images to other sites.
 Crossed Roads


![Monster Hunter Stories 3 Review [First Impressions] | Simply Rejuvenating](https://img.game8.co/4438641/2a31b7702bd70e78ec8efd24661dacda.jpeg/thumb)


Cap 2, S reward