Forgotten Cove Platinum Medal Walkthrough (Collect Treasure!)
A guide to obtaining the platinum medal for the Collect Treasure! Mission: Forgotten Cove in Pikmin 3 Deluxe for the Nintendo Switch. This guide will walk you through how to clear the mission and earn a platinum medal!
| Previous Mission | Next Mission |
|---|---|
| Beastly Caverns | Clockwork Chasm |
List of Contents
Forgotten Cove Video Walkthrough
Note that the video above contains Japanese text. Please be patient while we work on creating an English one!
Forgotten Cove Tips and Strategy
Bomb Rocks are Key
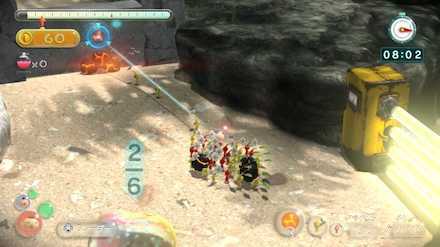
In the Forgotten Cove, the use of Bomb Rocks will become key. Effectively use them to destroy iron walls and defeat enemies in order to score high points.
Pikmin are Vital for Retrieval
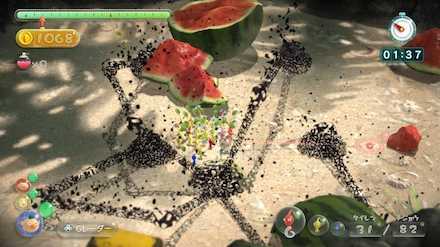
Many Pikmin will be required for retrieval in this mission, so be sure to efficiently use your Pikmin. After defeating the Baldy Long Legs, a lot of fruit will drop from it, making transportation work especially tough. Devise a plan to send reinforcements if necessary.
Forgotten Cove Platinum Medal Walkthrough
1: Explore While Gathering Pikmin
Olimar
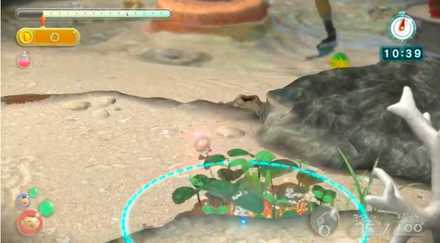
First, retrieve Red and Yellow Pikmin and use the Go Here function to head to the southern area where Yellow Pikmin are growing. Upon arriving, pluck them and defeat the Fiery Blowhog located to the southeast of the starting area with Red Pikmin. Pull up the Red Pikmin in the back when you are done.
Alph
When starting with Alph, pluck the Blue Pikmin and head to the upper area via the geyser. Throw a few Pikmin at the hole and use the remaining numbers to charge attack the Waddlepus. While they are attacking it, go retrieve the Yellow Pikmin on the right-hand side.
2: Continue Retreival and Exploration
Olimar
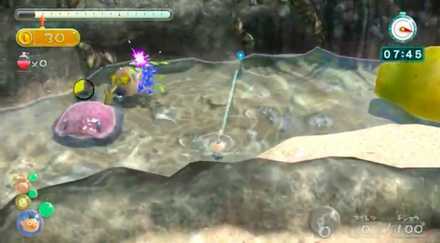
Once you have retrieved the Red Pikmin, descend down to the top of the rock. From there, throw Yellow Pikmin at the 2 holes while also calling back the other Yellow Pikmin. After obtaining some Bomb Rocks, use one defeat the Medusal Slurker and one to destroy the iron wall.
After that, have the Yellow Pikmin destroy the electric gate and use the remaining Pikmin to continue retrieval work.
Alph
Next, retrieve the Waddlepus with Yellow Pikmin and throw the remaining Pikmin fruit in the north and the Climbing Stick. Then use the Go Here function to head towards the northwestern area where the Blue Pikmin are located. After arriving, use 1 Bomb Rock to defeat the Bearded Amprat and defeat the nearby submerged enemies with Blue Pikmin and Bomb Rocks.
After this, start retrieving everything. Use any leftover Blue Pikmin to retrieve the Nuggets nearby.
3: Explore Further with the Addition of Louie
Olimar
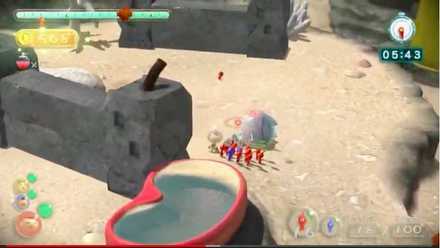
Have Olimar progress towards the east and throw some Red Pikmin to collect the Nuggets. After departing with your Pikmin, use the Go Here function to head east where the Blue Pikmin are located. Upon arriving, use the Blue Pikmin to defeat the nearby enemy and continue retrieval work.
Louie
Gather the Pikmin left by Alph and use Bomb Rocks to destroy both the rock and iron walls. After destroying them, reunite with the Yellow Pikmin who destroyed the electric gate and go defeat the Baldy Long Legs. Afterward, have Louie take charge of retrieval work.
Alph
Have Alph move to the corresponding West side of the starting area and defeat the submerged enemies while also retrieving the fruits.
4: The Last Retrievals to Complete the Mission
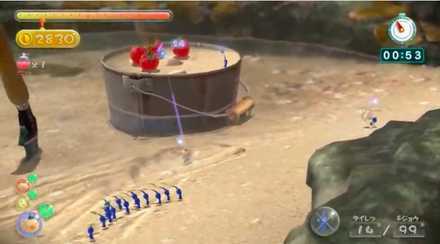
Lastly, retrieve the fruits which are the Seed Hive, Dawn Pustules, Dapper Blob, Scaly Custard, Juicy Gaggle, Heroine's Tear, Crimson Banquet, and Fire-Breathing Feast. Plus the nuggets and enemy bodies in the various remaining places. There are also fruits in fairly far places, so we recommend one leader to use the starting area and assist.
Related Guides
| Previous Mission | Next Mission |
|---|---|
| Beastly Caverns | Clockwork Chasm |

Collect Treasure! Missions List
| All Collect Treasure! Walkthroughs | |
|---|---|
 1: Tropical Forest 1: Tropical Forest |
 2: Silver Lake 2: Silver Lake |
 3: Thirsty Desert 3: Thirsty Desert |
 4: Twilight Hollow 4: Twilight Hollow |
 5: Shaded Garden 5: Shaded Garden |
 6: Tropical Forest Remix 6: Tropical Forest Remix |
 7: Silver Lake Remix 7: Silver Lake Remix |
 8: Thirsty Desert Remix 8: Thirsty Desert Remix |
 9: Twilght Hollow Remix 9: Twilght Hollow Remix |
 10: Shaded Garden Remix 10: Shaded Garden Remix |
 11: Fortess of Festivity 11: Fortess of Festivity |
 12: The Rustyard 12: The Rustyard |
 13: Beastly Caverns 13: Beastly Caverns |
 14: Forgotten Cove 14: Forgotten Cove |
 15: Clockwork Chasm 15: Clockwork Chasm |
- |
Author
Forgotten Cove Platinum Medal Walkthrough (Collect Treasure!)
improvement survey
03/2026
improving Game8's site?

Your answers will help us to improve our website.
Note: Please be sure not to enter any kind of personal information into your response.

We hope you continue to make use of Game8.
Rankings
- We could not find the message board you were looking for.
Gaming News
Popular Games

Genshin Impact Walkthrough & Guides Wiki

Honkai: Star Rail Walkthrough & Guides Wiki

Umamusume: Pretty Derby Walkthrough & Guides Wiki

Pokemon Pokopia Walkthrough & Guides Wiki

Resident Evil Requiem (RE9) Walkthrough & Guides Wiki

Monster Hunter Wilds Walkthrough & Guides Wiki

Wuthering Waves Walkthrough & Guides Wiki

Arknights: Endfield Walkthrough & Guides Wiki

Pokemon FireRed and LeafGreen (FRLG) Walkthrough & Guides Wiki

Pokemon TCG Pocket (PTCGP) Strategies & Guides Wiki
Recommended Games

Diablo 4: Vessel of Hatred Walkthrough & Guides Wiki

Fire Emblem Heroes (FEH) Walkthrough & Guides Wiki

Yu-Gi-Oh! Master Duel Walkthrough & Guides Wiki

Super Smash Bros. Ultimate Walkthrough & Guides Wiki

Pokemon Brilliant Diamond and Shining Pearl (BDSP) Walkthrough & Guides Wiki

Elden Ring Shadow of the Erdtree Walkthrough & Guides Wiki

Monster Hunter World Walkthrough & Guides Wiki

The Legend of Zelda: Tears of the Kingdom Walkthrough & Guides Wiki

Persona 3 Reload Walkthrough & Guides Wiki

Cyberpunk 2077: Ultimate Edition Walkthrough & Guides Wiki
All rights reserved
© 2013 - 2020 Nintendo. Pikmin and Nintendo Switch are trademarks of Nintendo.
The copyrights of videos of games used in our content and other intellectual property rights belong to the provider of the game.
The contents we provide on this site were created personally by members of the Game8 editorial department.
We refuse the right to reuse or repost content taken without our permission such as data or images to other sites.




![Everwind Review [Early Access] | The Shaky First Step to A Very Long Journey](https://img.game8.co/4440226/ab079b1153298a042633dd1ef51e878e.png/thumb)

![Monster Hunter Stories 3 Review [First Impressions] | Simply Rejuvenating](https://img.game8.co/4438641/2a31b7702bd70e78ec8efd24661dacda.jpeg/thumb)


