Where's the Captain? Walkthrough

This is a story walkthrough for Where's the Captain? in Pikmin 3 Deluxe for the Nintendo Switch. This guide will cover the path in Distant Tundra that leads you to the boss, as well as all fruit that can be obtained at this time.
| Previous Walkthrough | Next Walkthrough |
|---|---|
| Reunite With Brittany! | Defeat the Vehemoth Phosbat! |
List of Contents
| Fruits That Can Be Recovered |
 Dapper Blob Dapper Blob
|
 Dusk Pustules Dusk Pustules
|
 Dawn Pustules Dawn Pustules
|
|---|---|---|
 Citrus Lump Citrus Lump
|
||
Where's the Captain? Walkthrough
Objectives List
| Order | Objectives |
|---|---|
| 1 | Use the Bouncing Mushroom to get the Dodge Whistle |
| 2 | Collect Some Ultra-Spicy Berries |
| 3 | Recover the Dawn Pustules too if you can manage it |
| 4 | Light up the Lightbulb and exit the cave |
| 5 | Break the crystals and continue to the right |
| 6 | Recover the Anti-Electrifier and head left |
| 7 | Use 10 yellow Pikmin to turn on the lights |
| 8 | Move the paper bag to create a shortcut |
1: Use the Bouncing Mushroom to get the Dodge Whistle
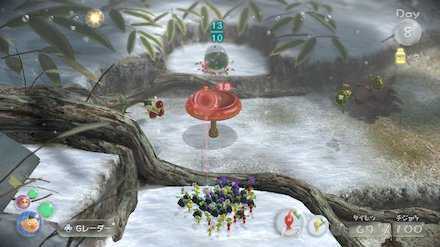
From the S.S. Drake and starting location, head east, and use some yellow Pikmin to take out the Bearded Amprat, and then use some rock Pikmin to take out the Joustmite, if they're still there. Continue moving ahead until you reach a dead end covered in snow.
To the right, you will see a Bouncing Mushroom. Throw a leader and at least 15 Pikmin at it. This will allow the Pikmin to carry the object back to the Drake, granting you use of the Dodge Whistle. Swapping over to the other leader and taking out the Swooping Snitchbug will allow you to transport the item without interruption. A single rock Pikmin can take them down, which is an opportunity to charge your other Pikmin at it.
2: Collect Some Ultra-Spicy Berries
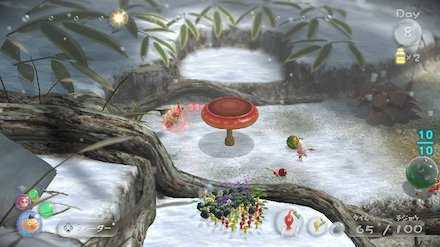
Nearby the Bouncing Mushroom, you'll see a plant with some red fruit on it, which you can charge your Pikmin at to have them recover. While this 'fruit' is not actually edible, bringing several of them back to the Drake will allow you to store up a reserve of Ultra-Spicy Spray, which is effective at making Pikmin faster and more powerful.
If you put about 5 Pikmin or so on the plant, they will continuously harvest the berries all day, allowing you to focus on other tasks while filling up your stock. Just be sure to go back and collect them before ending the day, as they'll keep going back to the same spot until commanded to regroup.
Recover the Dawn Pustules too if you can manage it
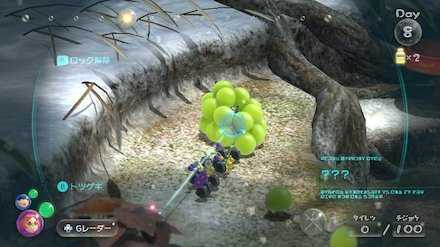
In the same vicinity, you can also find the Dawn Pustules. If you have enough time and Pikmin, you can go ahead and bring it back to the Drake for analysis, but if not, you can always come back for it later if you want to prioritize exploration.
3: Push the Iron Ball to Open the Cave Entrance
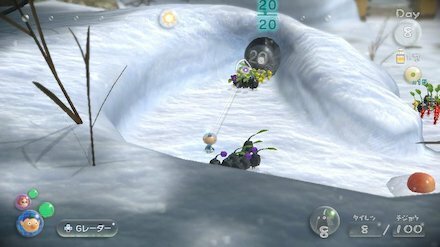
On the snowy hillside where Brittany used the geysers to collect bridge fragments earlier, there was an iron ball. Return to this spot, then throw a leader and 10 Pikmin over the cliff. Switch to the leader you just threw, and have them throw all 10 Pikmin at the iron ball, which will roll down the hill and open up a cave.
4: Light up the Lightbulb and exit the cave
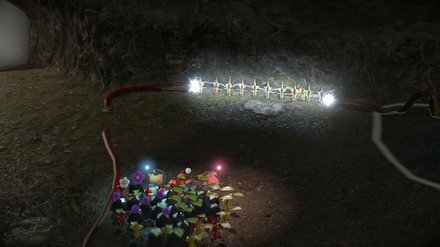
Enter the cave and use some red Pikmin to take out the 3 Pyroclasmic Slooches by throwing them on their backs, then throw 10 yellow Pikmin at the electrode to light up the lightbulb. This will cause the large flowers (Bloominous Stemples) to open up so that you can walk on them. Continue through the cave and go out the other side.
Recover the Citrus Lump before leaving
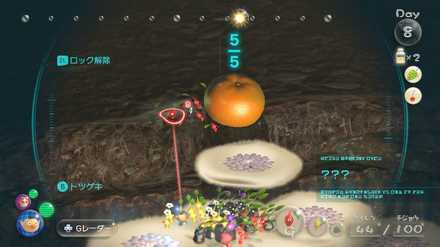
Before leaving the cave, go on top of the Bloominous Stemples and throw some Pikmin and a leader to the raised area, then have the Pikmin revover the Citrus Lump found up there.
5: Break the crystals and continue to the right
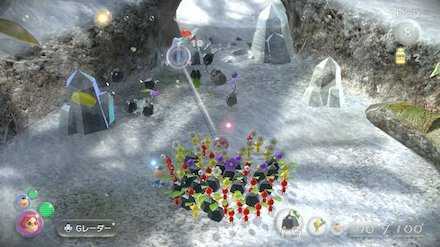
After exiting the cave, there will be several large crystals on your path. Use rock Pikmin to break them and continue. When the path forks, head to the right, as another upgrade can be found this way.
6: Recover the Anti-Electrifier and head left
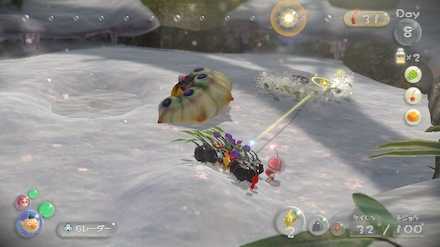
Head all the way right, and along the way you'll encounter 3 Desiccated Skitter Leaves (which look exactly like fallen leaves), as well as an Arctic Cannon Larva, so take them all out. Several things are buried here in the snow, including the Anti-Electrifier and a 5 Pikmin pellet, so have your Pikmin divide up to dig and subsequently recover everything here. Keep in mind that yellow Pikmin are the fastest diggers.
7: Use 10 yellow Pikmin to turn on the lights
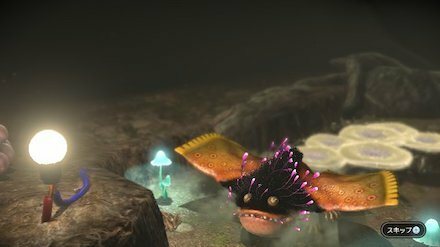
Now head back the way you came, and this time continue down the left path, where you'll find another cave. Several Phosbat larvae are inside, but by lighting up the mushrooms in the cave, they will die from exposure to the light. There is an electrode to the right wall, so head there and throw 10 yellow Pikmin on it to light up the lightbulb.
The Phosbat will drop eggs which, when broken by Pikmin, drop nectar. Use this nectar to power up your Pikmin, as it will make the approaching boss battle easier.
Recover the Dusk Pustules before leaving
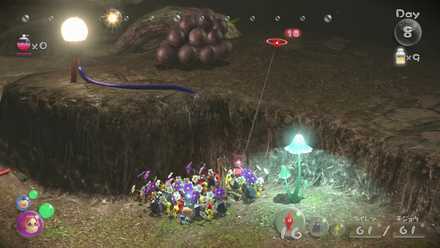
If you have enough time and Pikmin at your disposal, you can retrieve the Dusk Pustules found on a ledge nearby, and have it analyzed by the Drake.
8: Move the paper bag to create a shortcut
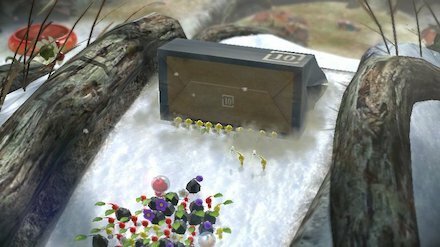
Before fighting with the Vehemoth Phosbat, continue forward into the cave, and head straight for the cave exit in this area. There is a paper bag here, so put 10 Pikmin on it to push it forward. This is a huge shortcut for getting directly to the Vehemoth Phosbat, and will also be useful for transporting the enemy remains and fruit after the battle ends, so make sure to secure this route beforehand.
After doing so, you can either choose to continue with the battle, or gather your Pikmin all up and end the day.
Recover the Dapper Blob if you have time
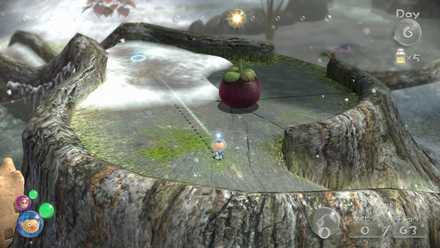
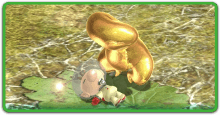
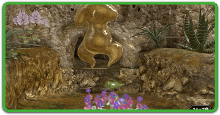
If you have enough time and choose to not proceed with the boss fight, you can recover a Dapper Blob. It can be found up a slope, in the middle of a tree trunk. Be wary of a hidden Joustmite nearby, it can catch you off guard and make you lose Pikmin. Defeating it first is a priority!
Related Guides
| Previous Walkthrough | Next Walkthrough |
|---|---|
| Reunite With Brittany! | Defeat the Vehemoth Phosbat! |

| Prologue | |
|---|---|
 Exploration Day 1 Exploration Day 1 |
- |
| Garden of Hope | |
 Where's Brittany? Where's Brittany? |
 The Captain's Signal? The Captain's Signal? |
 Defeat the Armored Mawdad! Defeat the Armored Mawdad! |
- |
| Distant Tundra | |
 Reunite With Brittany! Reunite With Brittany! |
 Where's the Captain? Where's the Captain? |
 Defeat the Vehemoth Phosbat! Defeat the Vehemoth Phosbat! |
- |
| Tropical Wilds | |
 Find the Cosmic-Drive Key! Find the Cosmic-Drive Key! |
- |
| Twilight River | |
 To Twilight River! To Twilight River! |
 Save Olimar! Save Olimar! |
 Defeat the Scornet Maestro! Defeat the Scornet Maestro! |
- |
| Garden of Hope (Revisited) | |
 Follow Olimar! Follow Olimar! |
 Find the Hocotatian! Find the Hocotatian! |
 Save the Hocotatian! Save the Hocotatian! |
- |
| Formidable Oak | |
 Head to the Formidable Oak Head to the Formidable Oak |
 Find Captain Olimar! Find Captain Olimar! |
 Save Captain Olimar! Save Captain Olimar! |
- |
Author
Where's the Captain? Walkthrough
improvement survey
03/2026
improving Game8's site?

Your answers will help us to improve our website.
Note: Please be sure not to enter any kind of personal information into your response.

We hope you continue to make use of Game8.
Rankings
- We could not find the article you were looking for.
- We could not find the message board you were looking for.
Gaming News
Popular Games

Genshin Impact Walkthrough & Guides Wiki

Honkai: Star Rail Walkthrough & Guides Wiki

Umamusume: Pretty Derby Walkthrough & Guides Wiki

Pokemon Pokopia Walkthrough & Guides Wiki

Resident Evil Requiem (RE9) Walkthrough & Guides Wiki

Monster Hunter Wilds Walkthrough & Guides Wiki

Wuthering Waves Walkthrough & Guides Wiki

Arknights: Endfield Walkthrough & Guides Wiki

Pokemon FireRed and LeafGreen (FRLG) Walkthrough & Guides Wiki

Pokemon TCG Pocket (PTCGP) Strategies & Guides Wiki
Recommended Games

Diablo 4: Vessel of Hatred Walkthrough & Guides Wiki

Fire Emblem Heroes (FEH) Walkthrough & Guides Wiki

Yu-Gi-Oh! Master Duel Walkthrough & Guides Wiki

Super Smash Bros. Ultimate Walkthrough & Guides Wiki

Pokemon Brilliant Diamond and Shining Pearl (BDSP) Walkthrough & Guides Wiki

Elden Ring Shadow of the Erdtree Walkthrough & Guides Wiki

Monster Hunter World Walkthrough & Guides Wiki

The Legend of Zelda: Tears of the Kingdom Walkthrough & Guides Wiki

Persona 3 Reload Walkthrough & Guides Wiki

Cyberpunk 2077: Ultimate Edition Walkthrough & Guides Wiki
All rights reserved
© 2013 - 2020 Nintendo. Pikmin and Nintendo Switch are trademarks of Nintendo.
The copyrights of videos of games used in our content and other intellectual property rights belong to the provider of the game.
The contents we provide on this site were created personally by members of the Game8 editorial department.
We refuse the right to reuse or repost content taken without our permission such as data or images to other sites.


