Clockwork Chasm Platinum Medal Walkthrough (Collect Treasure!)
A guide to obtaining the platinum medal for the Collect Treasure! Mission: Clockwork Chasm in Pikmin 3 Deluxe for the Nintendo Switch. This guide will walk you through how to clear the mission and earn a platinum medal!
| Previous Mission |
|---|
| Forgotten Cove |
List of Contents
Clockwork Chasm Video Walkthrough
Note that the video above contains Japanese text. Please be patient while we work on creating an English one!
Clockwork Chasm Tips and Strategy
Divide into 3 Groups and Explore
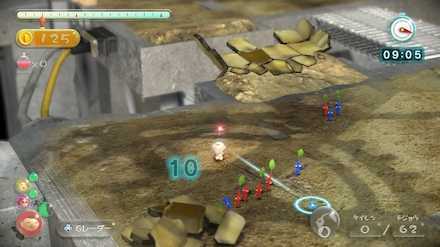
Clockwork Chasm will require some extensive exploration. Furthermore, there are many enemies that appear as well, so it is necessary to divide and conquer. Louie is not present at first, but he can be retrieved at the beginning of the mission. Be sure to quickly retrieve him.
Use the Button Wisely
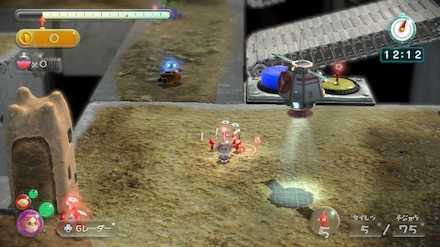
Using the button in this area to explore will be key. By pushing the button, the conveyer belt will switch direction, so avoid time loss when using the Go Here function or just moving normally. Make your way around by cleverly considering the direction you want to go in and using the conveyer belt.
Clockwork Chasm Platinum Medal Walkthrough
1: Split into 2 Groups and Explore
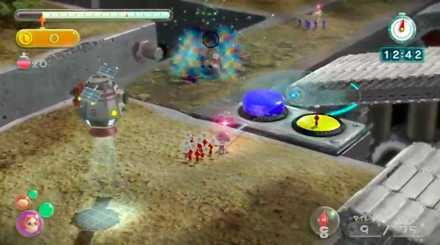
Olimar
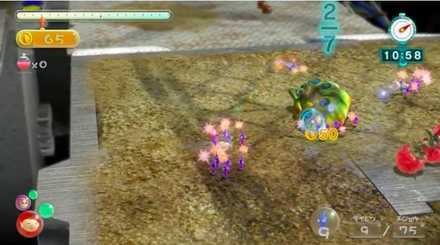
First, use the Go Here function to head to the southern area where the Blue Pikmin are and use the boulders that fall from above to defeat the Yellow Wollywog. Head to the second level area where the Blue Pikmin are after defeating the enemy using the Go Here function.
Brittany
After plucking the Red Pikmin in front of you, immediately have them absorb Nectar and blossom their flowers. Press the yellow button and while defeating the enemy on the right-hand side use the remaining Pikmin to destroy the dirt wall with a charge attack. After destroying the wall, pass by the side of the water area, and then defeat the enemies and retrieve the Sunseed Berry.
During this time, use the Dodge Whistle to go retrieve the Rock Pikmin located at the northern area of the map.
2: Perform Retrieval Work while Exploring
Olimar
After plucking the Blue Pikmin, defeat the nearby enemy and head even further up. Once you have plucked the Blue Pikmin, use the Ultra-Spicy Spray on them and defeat the Fiery Blowhog. Afterward, retrieve the nearby Juicy Gaggle, the Fiery Blowhog, and Louie.
Carry your remaining Pikmin and descend to the lower level and retrieve the Heroine's Tear. After retrieval, descend to the lower northern level and interrupt the fruit retrieval to have your Pikmin perform a charge attack at the rubble pieces.
Brittany
After retrieving the Rock Pikmin, use the Go Here function to go to the glass wall. Destroy the glass wall with the Rock Pikmin. After destroying it, crack the egg and charge the Red and Rock Pikmin at the Nectar in order to bloom.
Louie
Have Louie take the Pikmin who are finished with retrieval and reunite with Brittany. Then, head to the area where Olimar is located. On the way there retrieve Rock Pikmin while also heading to the upper northern area of the map.
After defeating the enemies, throw Brittany and the Rock Pikmin to the lower eastern level. Use the remaining Pikmin to charge attack the nearby rubble pieces.
3:Explore in Detail
Olimar
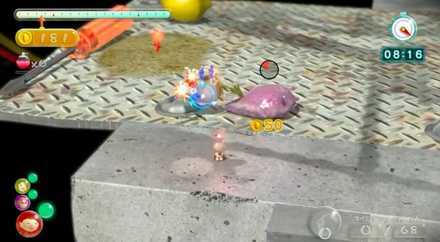
After gathering the Pikmin who retrieved the rubble pieces, use the Go Here function to head to the area in the northwest where the Red Pikmin are located. Upon arrival, break open the egg and bloom their flowers. Also be sure to collect the Pocked Airhead, Stellar Extrusion, and Face Wrinkler while defeating the enemies in this area.
Head to the right side a bit in order to retrieve a fallen Bomb Rock, and then use the Go Here function to go to near the water area in the center of the map.
Brittany
After blooming the Rock Pikmin, retrieve the fruit and return to the upper level. Call back the Pikmin that Louie left behind and defeat the enemy. Also, be sure to retrieve the Nuggets.
Louie
Call back the Pikmin who have retrieved the pieces and throw 1 Pikmin at the blue button. After that, dissolve your squad and head to the starting area using the Go Here function alone.
4: Explore an Undeveloped Area + Retrieval
Olimar
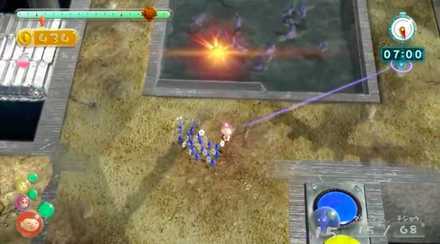
Throw the Bomb Rock into the water area and go toward near the water area on the right-hand side of the starting area using the Go Here function. Retrieve the submerged Bomb Rock and defeat and retrieve the Fiery Blowhog located in the northeast area. Afterward, return to the starting area using the Go Here function.
Brittany
Head to the water area Olimar was at with the Pikmin who have finished retrieving the Nuggets. Defeat the submerged enemies with the Blue Pikmin and retrieve them. Afterward, return to the starting area.
Reunite with Louie and explore the southern area with Red and Rock Pikmin. Throw several Pikmin into the sandpit and have the remaining Pikmin destroy the dirt wall with a charge attack.
5: Finish Up by Defeating Enemies and Retrieving Them
Brittany
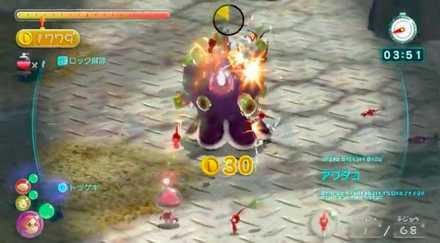
After destroying the dirt wall, descend to the lower level on the right-hand side and defeat the Waddlepus. Retrieve the Blue Pikmin and the Bomb Rock. Apply the Ultra-Spicy Spray and throw the Bomb Rock down to the lower level. After that, gang up on the enemy and defeat them. Push the yellow button and have the remaining Pikmin charge attack the rubble pieces to retrieve them.
Louie
After throwing Brittany, immediately use the Nectar and head to the starting area using the Go Here function. Then round up the remaining enemies that have yet to be retrieved.
Olimar
Head to the northern area where Brittany is located. Help support the retrieval of the Nuggets. Afterwards, return to the starting area and defeat the remaining enemies and retrieve them.
Related Guides
| Previous Mission |
|---|
| Forgotten Cove |

Collect Treasure! Missions List
| All Collect Treasure! Walkthroughs | |
|---|---|
 1: Tropical Forest 1: Tropical Forest |
 2: Silver Lake 2: Silver Lake |
 3: Thirsty Desert 3: Thirsty Desert |
 4: Twilight Hollow 4: Twilight Hollow |
 5: Shaded Garden 5: Shaded Garden |
 6: Tropical Forest Remix 6: Tropical Forest Remix |
 7: Silver Lake Remix 7: Silver Lake Remix |
 8: Thirsty Desert Remix 8: Thirsty Desert Remix |
 9: Twilght Hollow Remix 9: Twilght Hollow Remix |
 10: Shaded Garden Remix 10: Shaded Garden Remix |
 11: Fortess of Festivity 11: Fortess of Festivity |
 12: The Rustyard 12: The Rustyard |
 13: Beastly Caverns 13: Beastly Caverns |
 14: Forgotten Cove 14: Forgotten Cove |
 15: Clockwork Chasm 15: Clockwork Chasm |
- |
Author
Clockwork Chasm Platinum Medal Walkthrough (Collect Treasure!)
improvement survey
03/2026
improving Game8's site?

Your answers will help us to improve our website.
Note: Please be sure not to enter any kind of personal information into your response.

We hope you continue to make use of Game8.
Rankings
- We could not find the message board you were looking for.
Gaming News
Popular Games

Genshin Impact Walkthrough & Guides Wiki

Honkai: Star Rail Walkthrough & Guides Wiki

Umamusume: Pretty Derby Walkthrough & Guides Wiki

Pokemon Pokopia Walkthrough & Guides Wiki

Resident Evil Requiem (RE9) Walkthrough & Guides Wiki

Monster Hunter Wilds Walkthrough & Guides Wiki

Wuthering Waves Walkthrough & Guides Wiki

Arknights: Endfield Walkthrough & Guides Wiki

Pokemon FireRed and LeafGreen (FRLG) Walkthrough & Guides Wiki

Pokemon TCG Pocket (PTCGP) Strategies & Guides Wiki
Recommended Games

Diablo 4: Vessel of Hatred Walkthrough & Guides Wiki

Fire Emblem Heroes (FEH) Walkthrough & Guides Wiki

Yu-Gi-Oh! Master Duel Walkthrough & Guides Wiki

Super Smash Bros. Ultimate Walkthrough & Guides Wiki

Pokemon Brilliant Diamond and Shining Pearl (BDSP) Walkthrough & Guides Wiki

Elden Ring Shadow of the Erdtree Walkthrough & Guides Wiki

Monster Hunter World Walkthrough & Guides Wiki

The Legend of Zelda: Tears of the Kingdom Walkthrough & Guides Wiki

Persona 3 Reload Walkthrough & Guides Wiki

Cyberpunk 2077: Ultimate Edition Walkthrough & Guides Wiki
All rights reserved
© 2013 - 2020 Nintendo. Pikmin and Nintendo Switch are trademarks of Nintendo.
The copyrights of videos of games used in our content and other intellectual property rights belong to the provider of the game.
The contents we provide on this site were created personally by members of the Game8 editorial department.
We refuse the right to reuse or repost content taken without our permission such as data or images to other sites.




![Everwind Review [Early Access] | The Shaky First Step to A Very Long Journey](https://img.game8.co/4440226/ab079b1153298a042633dd1ef51e878e.png/thumb)

![Monster Hunter Stories 3 Review [First Impressions] | Simply Rejuvenating](https://img.game8.co/4438641/2a31b7702bd70e78ec8efd24661dacda.jpeg/thumb)


