Defeat the Scornet Maestro! Walkthrough
This is a story walkthrough for Defeat the Scornet Maestro! in Pikmin 3 Deluxe for the Nintendo Switch. This guide will cover the battle with the Scornet Maestro, the boss of the Twilight River, and saving Olimar. Read on for more tips and strategy!
| Previous Walkthrough | Next Walkthrough |
|---|---|
| Save Olimar! | Follow Olimar! |
List of Contents
| Fruit That Can Be Recovered |
 Blonde Impostor Blonde Impostor
|
 Seed Hive Seed Hive
|
 Tremendous Sniffer Tremendous Sniffer
|
|---|---|---|
Defeat the Scornet Maestro! Walkthrough
Objectives List
| Order | Objectives |
|---|---|
| 1 | Defeat the Scornets and Destroy the Dirt Wall |
| 2 | Lift the Clipboard and Carry the Fragments |
| 3 | Use the winged pikmin to carry the fragments from beyond the water |
| 4 | Use the Bouncing Mushroom to cross the river |
| 5 | Collect the bridge fragments from the stump |
| 6 | Defeat the Scornet Maestro |
| 7 | Recovering everything takes some time |
1: Defeat the Scornets and Destroy the Dirt Wall
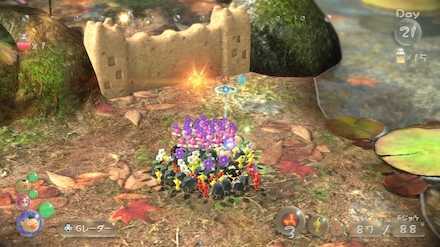
Take out a bunch of Winged Pikmin (at least 40), along with the other types, and head back to the southwest area. Go all the way until furthest southwest lily pad hop on point, and you will encounter a dirt wall swarming with scornets. Have your Winged Pikmin charge at the scornets to make quick work of them, then put all other Pikmin to work destroying the wall.
2: Lift the Clipboard and Carry the Fragments
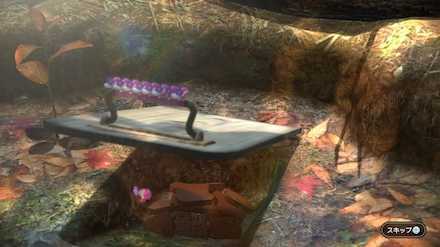
Pass through where the wall was and take out the Arachnode and other enemies in the vicinity. Throw your Winged Pikmin on the right clipboard to have them lift it up. Underneath it, you'll find bridge fragments, so have about half of your Winged Pikmin carry them to the bridge location.
Three locations for bridge fragments
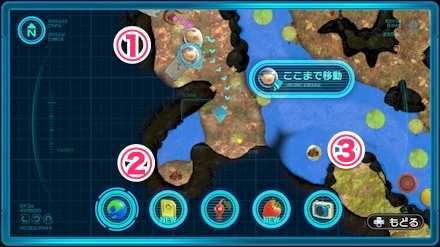
3: Use the winged pikmin to carry the fragments from beyond the water
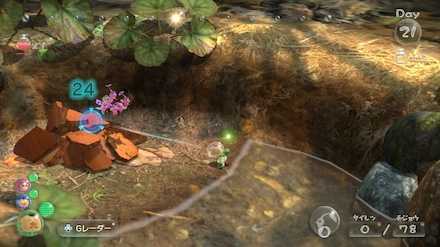
Have one leader along with some Winged Pikmin cross the water near where the dirt wall was. Since the Winged Pikmin can fly, they'll go straight over the water and avoid drowning. Continue until the dead end, where you'll find another pile of bridge fragments. Have the Winged Pikmin carry these to the appropriate location.
4: Use the Bouncing Mushroom to cross the river
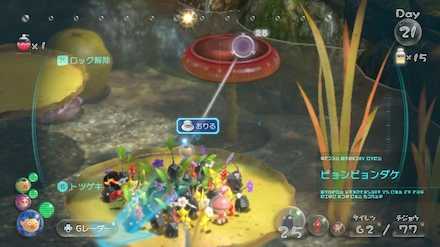
After the Winged Pikmin from the second location carry all the fragments, reassemble your team, and ride the lily pad again. Along the way, you'll encounter a Bouncing Mushroom. Throw two leaders and 15 Winged Pikmin, as well as several Rock Pikmin at the mushroom to have them cross. The remaining leader and Pikmin will hop off automatically, so you can go ahead and switch over to the leader you threw.
Recover the Blonde Impostor nearby
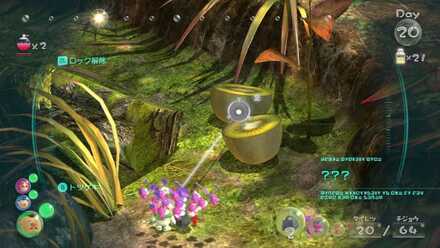
Using the Lily Pad and the Bouncy Mushroom you can reach the area where the Blonde Impostor is. The fruit will be trapped in a crystal so it is best to bring Rock Pikmin with you when you gather this fruit.
5: Collect the bridge fragments from the stump
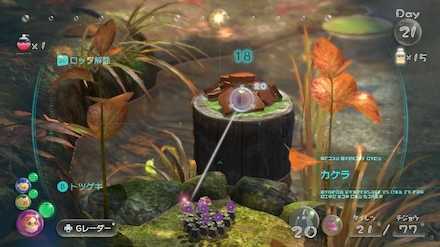
Taking control of the team now on the other side, head right and take out the Arachnode blocking the path. Afterward, throw the Winged Pikmin to the stump with the bridge fragments on it. After these are moved, the bridge will finally be complete, and you can change leaders again.
6: Dig up the Scorch Guard
| Scorch Guard Location |
|---|
 Enlarge Enlarge |
Switching back to the leader who rode the pad until the end now, throw 10 Yellow Pikmin to the lifted tree roots. They will begin digging up the Scorch Guard, which they will then bring back to the S.S. Drake. As the Yellow Pikmin head back toward the Drake, reunite with the other leaders and Pikmin.
7: Defeat the Scornet Maestro
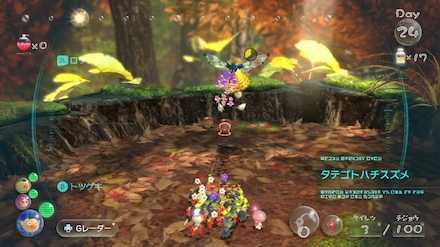
With the bridge complete, you can now cross over it and head to the top of the tree to begin battle with the Scornet Maestro. This boss cannot be damaged while its Scornet minions are protecting it, so be sure and wait until after it fires them off.
Using the Dodge Whistle here to dodge its scornets is very helpful. After dodging, lock on and have your Winged Pikmin charge at it, then send the rest of your Pikmin at it when it falls down.
Boss Battle Guide: How to Beat the Scornet Maestro
Once the Winged Pikmin bring it down, have all your pikmin charge at it
Using Ultra-Spicy Spray before charging will make your attacks even more effective. The basic order for this battle is to dodge the scornets, bring it down with Winged Pikmin, then attack with your remaining Pikmin when it falls down. Depending on how much HP it has, the flight pattern of its scornets will change, but for the most part, the strategy is the same.
8: Recovering everything takes some time
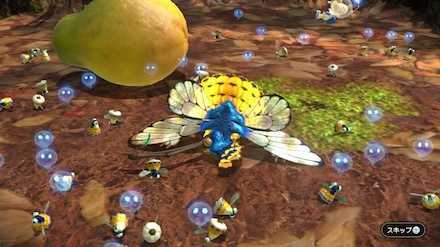
After defeating the Scornet Maestro, it will drop a Hocotatian who appears to be... Olimar? In addition, a Seed Hive, about 100 scornets, and the Maestro itself will be up for grabs, so getting everything will take two trips. If you have time, get all of the scornets, as they will be gone the next day (or leave them if you fell that you have enough Pikmin as is).
Everything else, including the boss remains, the fruit, and the Hocotatian can be recovered the next day, so consider ending the day and coming back again tomorrow if it seems like you don't have the time to carry everything. At the very least, go ahead and take the Hocotatian to the Drake.
The Hocotatian will steal all of your juice the following day, so having some fruit ready to be recovered right away will be very useful.
Recover the Tremendous Sniffer behind an iron wall
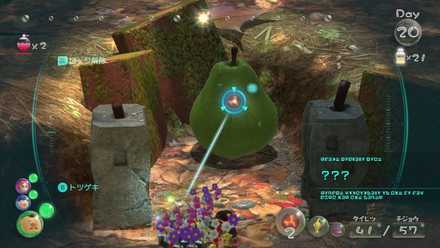
The Tremendous Sniffer can be found hidden behind an iron wall. You will need 3 bomb rocks to break this wall. This is the only area where you can get this fruit.
Related Guides
| Previous Walkthrough | Next Walkthrough |
|---|---|
| Save Olimar! | Follow Olimar! |

| Prologue | |
|---|---|
 Exploration Day 1 Exploration Day 1 |
- |
| Garden of Hope | |
 Where's Brittany? Where's Brittany? |
 The Captain's Signal? The Captain's Signal? |
 Defeat the Armored Mawdad! Defeat the Armored Mawdad! |
- |
| Distant Tundra | |
 Reunite With Brittany! Reunite With Brittany! |
 Where's the Captain? Where's the Captain? |
 Defeat the Vehemoth Phosbat! Defeat the Vehemoth Phosbat! |
- |
| Tropical Wilds | |
 Find the Cosmic-Drive Key! Find the Cosmic-Drive Key! |
- |
| Twilight River | |
 To Twilight River! To Twilight River! |
 Save Olimar! Save Olimar! |
 Defeat the Scornet Maestro! Defeat the Scornet Maestro! |
- |
| Garden of Hope (Revisited) | |
 Follow Olimar! Follow Olimar! |
 Find the Hocotatian! Find the Hocotatian! |
 Save the Hocotatian! Save the Hocotatian! |
- |
| Formidable Oak | |
 Head to the Formidable Oak Head to the Formidable Oak |
 Find Captain Olimar! Find Captain Olimar! |
 Save Captain Olimar! Save Captain Olimar! |
- |
Author
Defeat the Scornet Maestro! Walkthrough
improvement survey
03/2026
improving Game8's site?

Your answers will help us to improve our website.
Note: Please be sure not to enter any kind of personal information into your response.

We hope you continue to make use of Game8.
Rankings
- We could not find the message board you were looking for.
Gaming News
Popular Games

Genshin Impact Walkthrough & Guides Wiki

Honkai: Star Rail Walkthrough & Guides Wiki

Umamusume: Pretty Derby Walkthrough & Guides Wiki

Pokemon Pokopia Walkthrough & Guides Wiki

Resident Evil Requiem (RE9) Walkthrough & Guides Wiki

Monster Hunter Wilds Walkthrough & Guides Wiki

Wuthering Waves Walkthrough & Guides Wiki

Arknights: Endfield Walkthrough & Guides Wiki

Pokemon FireRed and LeafGreen (FRLG) Walkthrough & Guides Wiki

Pokemon TCG Pocket (PTCGP) Strategies & Guides Wiki
Recommended Games

Diablo 4: Vessel of Hatred Walkthrough & Guides Wiki

Cyberpunk 2077: Ultimate Edition Walkthrough & Guides Wiki

Fire Emblem Heroes (FEH) Walkthrough & Guides Wiki

Yu-Gi-Oh! Master Duel Walkthrough & Guides Wiki

Super Smash Bros. Ultimate Walkthrough & Guides Wiki

Pokemon Brilliant Diamond and Shining Pearl (BDSP) Walkthrough & Guides Wiki

Elden Ring Shadow of the Erdtree Walkthrough & Guides Wiki

Monster Hunter World Walkthrough & Guides Wiki

The Legend of Zelda: Tears of the Kingdom Walkthrough & Guides Wiki

Persona 3 Reload Walkthrough & Guides Wiki
All rights reserved
© 2013 - 2020 Nintendo. Pikmin and Nintendo Switch are trademarks of Nintendo.
The copyrights of videos of games used in our content and other intellectual property rights belong to the provider of the game.
The contents we provide on this site were created personally by members of the Game8 editorial department.
We refuse the right to reuse or repost content taken without our permission such as data or images to other sites.


![Monster Hunter Stories 3 Review [First Impressions] | Simply Rejuvenating](https://img.game8.co/4438641/2a31b7702bd70e78ec8efd24661dacda.jpeg/thumb)


