Find the Hocotatian! Walkthrough
This is a story walkthrough for Find the Hocotatian! in Pikmin 3 Deluxe for the Nintendo Switch. This guide will cover using blue pikmin, rock pikmin, and winged pikmin to progress through the Garden of Hope. Read on to learn fruit locations and how to get through this section without losing any pikmin.
| Previous Walkthrough | Next Walkthrough |
|---|---|
| Follow Olimar! | Save the Hocotatian! |
List of Contents
| Fruit That Can Be Recovered |
 Scaly Custard Scaly Custard
|
 Searing Acidshock Searing Acidshock
|
 Lesser Mock Bottom Lesser Mock Bottom
|
|---|---|---|
Find the Hocotatian! Walkthrough
Objectives List
| Order | Objectives |
|---|---|
| 1 | Break the dirt wall and carry the fragments |
| 2 | Defeat the Bug-Eyed Crawmad and collect the rest of the fragments |
| 3 | Cross over the pot and beat the Peckish Aristocrab |
| 4 | Collect the fragments from the 3 locations and complete the blue bridge |
| 5 | Collect the fruit if you have time |
1: Break the dirt wall and carry the fragments
 Enlarge
First, split into to groups: one with only Blue Pikmin (you'll want to take a lot), and the other with Winged Pikmin and Rock Pikmin. As the Blue Pikmin team, destroy the dirt wall west of the starting point, then carry the plant pot fragments. There are several enemies in the vicinity, so things will go much more smoothly if you have your Blue Pikmin charge at the enemies to take them out beforehand.
Be sure you have about 30 Pikmin of each type (the more Blue Pikmin, the better).
2: Defeat the Bug-Eyed Crawmad and collect the rest of the fragments
 Enlarge
As the other team of Winged and Rock Pikmin, head over to the other location with pot plant fragments and carry them. Only allow the Winged Pikmin to move the pot plant fragments, and have the Rock Pikmin wait in a safe place nearby.
Make the winged pikmin charge at the Bug-Eyed Crawmad
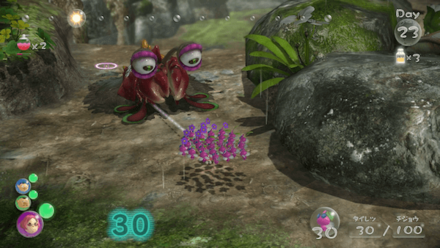
When going to move the pot fragments, the Bug-Eyed Crawmad presents a bit of a problem, so you'll want to have your Winged Pikmin charge at its eyes to take it out. Use some Ultra-Spicy Spray before charging at it, and a direct hit to its eyes should be enough to make quick work of it.
3: Cross over the pot and beat the Peckish Aristocrab
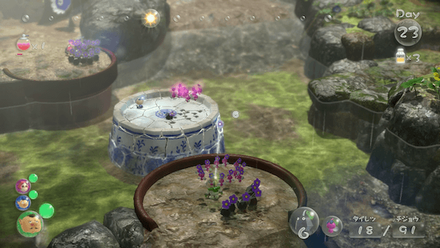
After the pot fragments have all been collected and the pot has been rebuilt, reunit the whole team and head over to the ledge just before it. First throw two leaders and the Pikmin to the pot. From the pot, throw a leader and all of your Pikmin but 5-10 Winged Pikmin to the other side. The leader and Winged Pikmin will be useful later, so keep them waiting on the pot.
4: Collect the fragments from the 3 locations and complete the blue bridge
| Blue Fragments: Use rock pikmin to break them out of the crystal |
|---|
 Enlarge Enlarge |
| Blue Fragments: Dig from the Dirt mounds |
 Enlarge Enlarge |
Take control of the leader who crossed to the other side now and defeat the Peckish Aristocrab, then carry the blue fragments to the bridge. The other fragments are hidden in a large crystal and in a dirt mound, so throw your Rock Pikmin at it to break the crystal, then have about half of your Pikmin dig up the fragments and carry them over to the bridge. Split up your Pikmin and have them carry fragments from different piles to use your time more efficiently.
Aim for the Peckish Aristocrab's claw with Rock Pikmin
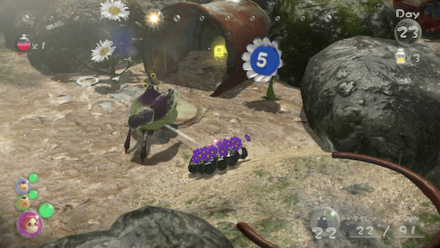
The Peckish Aristocrab can easily take out your Winged Pikmin, so instead attack it with Rock Pikmin. Rather than charging at it, throw Rock Pikmin directly at the creature's claw, and after it breaks, it will be defenseless to your attacks.
5: Collect the fruit if you have time
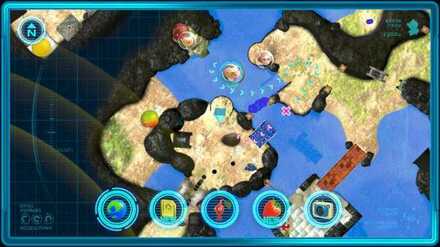 Enlarge
If you still have some time left after building the bridge, pick up the fruit that was nearby the pot you used to cross the water. Both the Peckish Aristocrab and Bug-Eyed Crawmad will drop some fruit after being defeated, so if you still have time, go ahead and recover these as well.
Recover the Searing Acidshock dropped by the Bug-Eyed Crawmad
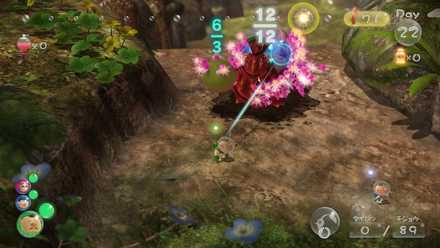
Once you defeat the Bug-Eyed Crawmad, it will drop a Searing Acidshock. It will take 3 Pikmin to carry this fruit back to the Drake for analysis.
Recover the Scaly Custard dropped by the Peckish Aristocrab
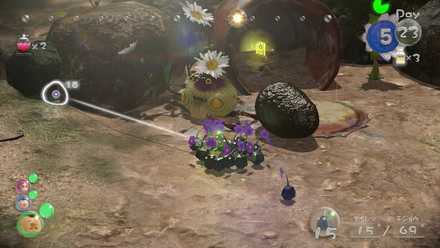
Once you defeat the Peckish Aristocrab, it will drop a Scaly Custard. It will take 8 Pikmin to carry this fruit back to the Drake for analysis.
Throw an ally and 5 winged pikmin across the water to retrieve the Lesser Mock Bottom
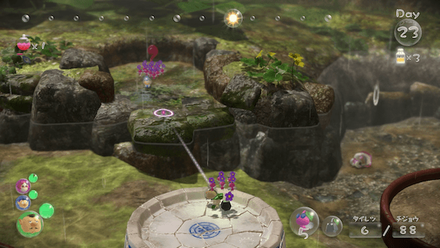
Throw another leader to the pot where you previously left a single leader. From the pot, throw a leader and the Winged Pikmin to the cliff to the east.
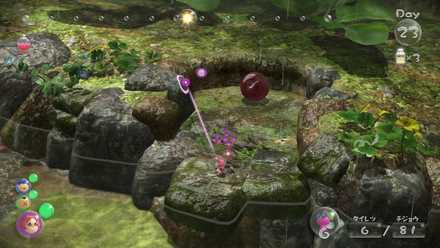
From there, have the Winged Pikmin pull up the flukeweed to uncover a Lesser Mock Bottom. The fruit will take at least 5 Pikmin to carry it, so be sure and throw at least that many Winged Pikmin over so that you can recover it.
Related Guides
| Previous Walkthrough | Next Walkthrough |
|---|---|
| Follow Olimar! | Save the Hocotatian! |

| Prologue | |
|---|---|
 Exploration Day 1 Exploration Day 1 |
- |
| Garden of Hope | |
 Where's Brittany? Where's Brittany? |
 The Captain's Signal? The Captain's Signal? |
 Defeat the Armored Mawdad! Defeat the Armored Mawdad! |
- |
| Distant Tundra | |
 Reunite With Brittany! Reunite With Brittany! |
 Where's the Captain? Where's the Captain? |
 Defeat the Vehemoth Phosbat! Defeat the Vehemoth Phosbat! |
- |
| Tropical Wilds | |
 Find the Cosmic-Drive Key! Find the Cosmic-Drive Key! |
- |
| Twilight River | |
 To Twilight River! To Twilight River! |
 Save Olimar! Save Olimar! |
 Defeat the Scornet Maestro! Defeat the Scornet Maestro! |
- |
| Garden of Hope (Revisited) | |
 Follow Olimar! Follow Olimar! |
 Find the Hocotatian! Find the Hocotatian! |
 Save the Hocotatian! Save the Hocotatian! |
- |
| Formidable Oak | |
 Head to the Formidable Oak Head to the Formidable Oak |
 Find Captain Olimar! Find Captain Olimar! |
 Save Captain Olimar! Save Captain Olimar! |
- |
Author
Find the Hocotatian! Walkthrough
improvement survey
03/2026
improving Game8's site?

Your answers will help us to improve our website.
Note: Please be sure not to enter any kind of personal information into your response.

We hope you continue to make use of Game8.
Rankings
- We could not find the message board you were looking for.
Gaming News
Popular Games

Genshin Impact Walkthrough & Guides Wiki

Honkai: Star Rail Walkthrough & Guides Wiki

Umamusume: Pretty Derby Walkthrough & Guides Wiki

Pokemon Pokopia Walkthrough & Guides Wiki

Resident Evil Requiem (RE9) Walkthrough & Guides Wiki

Monster Hunter Wilds Walkthrough & Guides Wiki

Wuthering Waves Walkthrough & Guides Wiki

Arknights: Endfield Walkthrough & Guides Wiki

Pokemon FireRed and LeafGreen (FRLG) Walkthrough & Guides Wiki

Pokemon TCG Pocket (PTCGP) Strategies & Guides Wiki
Recommended Games

Diablo 4: Vessel of Hatred Walkthrough & Guides Wiki

Cyberpunk 2077: Ultimate Edition Walkthrough & Guides Wiki

Fire Emblem Heroes (FEH) Walkthrough & Guides Wiki

Yu-Gi-Oh! Master Duel Walkthrough & Guides Wiki

Super Smash Bros. Ultimate Walkthrough & Guides Wiki

Pokemon Brilliant Diamond and Shining Pearl (BDSP) Walkthrough & Guides Wiki

Elden Ring Shadow of the Erdtree Walkthrough & Guides Wiki

Monster Hunter World Walkthrough & Guides Wiki

The Legend of Zelda: Tears of the Kingdom Walkthrough & Guides Wiki

Persona 3 Reload Walkthrough & Guides Wiki
All rights reserved
© 2013 - 2020 Nintendo. Pikmin and Nintendo Switch are trademarks of Nintendo.
The copyrights of videos of games used in our content and other intellectual property rights belong to the provider of the game.
The contents we provide on this site were created personally by members of the Game8 editorial department.
We refuse the right to reuse or repost content taken without our permission such as data or images to other sites.





![Monster Hunter Stories 3 Review [First Impressions] | Simply Rejuvenating](https://img.game8.co/4438641/2a31b7702bd70e78ec8efd24661dacda.jpeg/thumb)


