Find the Cosmic-Drive Key! Walkthrough
This is a story walkthrough for Find the Cosmic-Drive Key! in Pikmin 3 Deluxe for the Nintendo Switch. This guide will cover defeating the Sandbelching Meerslug, the boss of the Tropical Wilds, and how to recover the Cosmic-Drive Key. Read on for more tips and strategy!
| Previous Walkthrough | Next Walkthrough |
|---|---|
| Defeat the Vehemoth Phosbat! | To Twilight River! |
List of Contents
| Fruit That Can Be Recovered |
 Dapper Blob Dapper Blob
|
 Crimson Banquet Crimson Banquet
|
 Pocked Airhead Pocked Airhead
|
|---|---|---|
Find the Cosmic-Drive Key! Walkthrough
Objectives List
| Order | Objectives |
|---|---|
| 1 | Split into two groups on either sides of the bridge |
| 2 | Break the dirt wall while carrying fragments |
| 3 | Dig up the Bomb Rocks for the boss |
| 4 | Carry the remaining fragments and complete the bridge |
| 5 | Use all three members and cross over the stump |
| 6 | Push forward the paper bag and have all three members reunite |
| 7 | Defeat the Sandbelching Meerslug |
| 8 | Recover everything dropped after battle |
1: Split into two groups on either sides of the bridge
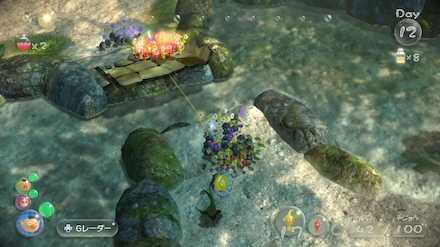
First, you'll need to split into two groups to build the bridge to the southeast. The fragments are on the opposite side of the bridge, so head over to the edge of the unfinished bridge, and throw two leaders and half of your Pikmin to the other side. Then have your leader head directly west to find a dirt wall. Have all of your Pikmin charge at it, then switch to the other leader.
2: Break the dirt wall while carrying fragments
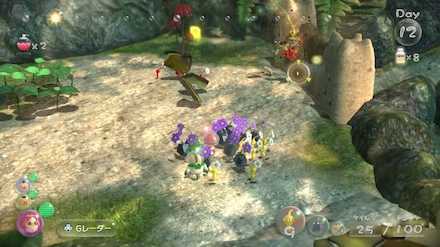
As the team on the other side of the bridge, throw several of your pikmin at the bridge fragments nearby, and have the remainder charge at the dirt wall. While you're waiting for both groups of Pikmin to finish their tasks, switch back to the leader on the other side.
3: Dig up the Bomb Rocks for the boss
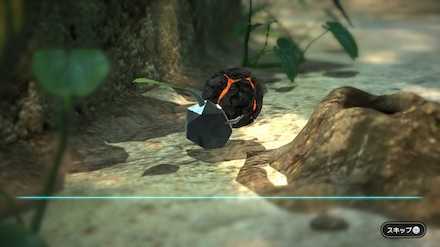
After swapping back over, the leader's Pikmin should be done (or almost done) destroying the dirt wall at the start of the level. Right after the wall breaks, there is a Whiptongue Bulborb waiting for you on the other side, so be ready to battle with it. It is much easier to take out if you aim for its back while it is turned around, as its long tongue can easily scoop Pikmin up from the front side, so exert caution.
Continue moving forward and around where the iron gate is, then look for a dirt mound. Throw your Pikmin at it to have them start digging, and they will eventually come up with some Bomb Rocks.
Afterward, recollect your Pikmin, and use the Go Here
command to return to the edge of the bridge.
Pick up the nearby fruit while here
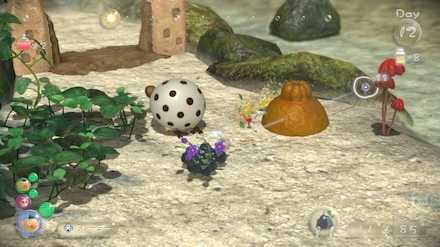
There is a Pocked Airhead near where you fought the Whiptongue Bulborb. Throw some Yellow Pikmin at it to have them dig it up while your other Pikmin are uncovering the Bomb Rocks.
4: Carry the remaining fragments and complete the bridge
| The two locations of the bridge fragments |
|---|
 Enlarge Enlarge |
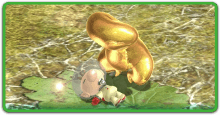
Swap back over to the team on the other side of the bridge, and after the dirt wall has been torn down, take out the Swooping Snitchbugs, then have your Pikmin transport the remaining bridge fragments. There is also a Dapper Blob buried in the dirt, so throw some of your Yellow Pikmin at it to have them dig it up while the other Pikmin are fixing the bridge. This will allow you to end the day with even more juice.
5: Use all three members and cross over the stump
| Crossing over the stump |
|---|
 Enlarge Enlarge |
After the bridge's reconstruction is finished, lead your team over to it, and have both teams and all Pimin reunite. Head to the right, and you will need all three leaders in order to cross the water. Have the first leader throw two leaders and about half of the Pikmin to the stump that sits in the water.
Take control of one of the leaders on the stump, and throw the other leader and all Pikmin to the cliff on the other side. Now you will have a leader on the other side, along with several Pikmin.
Have the remaining crew members go here
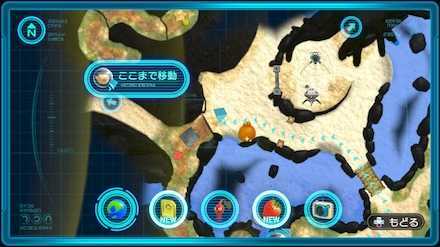
Have the first and second leader from before travel to the location just outside of the iron gate near the S.S. Drake. They will be able to reunite with the leader thrown over to the west cliff soon, so having them nearby will speed things up.
6: Push forward the paper bag and have all three members reunite
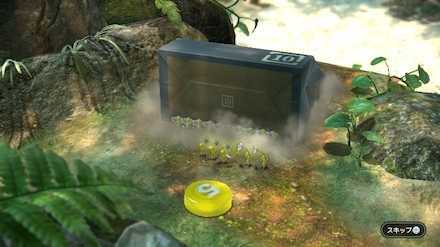
As the leader now on the west cliff, continue moving forward until you come across a paper bag. Have your Pimin charge at it, and a shortcut will be created to the where the other leaders are waiting.
7: Defeat the Sandbelching Meerslug
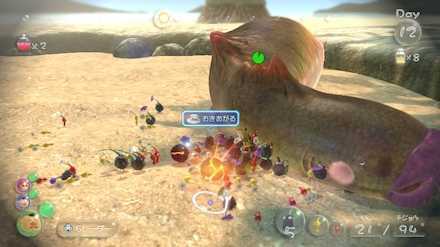
Note that if you are running low on time for this day, you may want to go ahead and end the day, then pick back up with this section tomorrow.
Have all three leaders join up, and head toward the source of the signal. After finding the source of this signal, the Folded Data Glutton, throw some Pikmin at it. Doing this causes the Sandbelching Meerslug to emerge from the sand, where the battle will begin.
The Sandbelching Meerslug can be damaged when it makes a mound and pokes its head out. When it does this, charge your Pikmin at it, or throw them, which will cause its whole body to emerge from the ground. Continue attacking it while it lies there.
Watch out for the sinkholes it creates. If you still have those bomb rocks, this is your chance to use them, as you can throw a Pikmin with a bomb rock in to have the Meerslug eat it, which will force it out of the sand. If Pikmin do get caught in the sand, make sure to whistle for them to save them from being eaten.
Boss Battle Guide: How to Beat the Sandbelching Meerslug
8: Recover everything dropped after battle
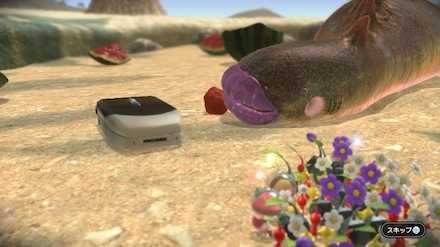
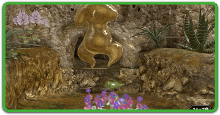
After finishing off the Sandbelching Meerslug, it will drop the Folded Data Glutton, as well as a Crimson Banquet. You'll need a lot of Pikmin to move everything (at least 33), so consider coming back for everything the next day if you are short on time.
Keep in mind that moving the enormous Sandbelching Meerslug remains also blocks the path, so you'll want to move it last.
Related Guides
| Previous Walkthrough | Next Walkthrough |
|---|---|
| Defeat the Vehemoth Phosbat! | To Twilight River! |

| Prologue | |
|---|---|
 Exploration Day 1 Exploration Day 1 |
- |
| Garden of Hope | |
 Where's Brittany? Where's Brittany? |
 The Captain's Signal? The Captain's Signal? |
 Defeat the Armored Mawdad! Defeat the Armored Mawdad! |
- |
| Distant Tundra | |
 Reunite With Brittany! Reunite With Brittany! |
 Where's the Captain? Where's the Captain? |
 Defeat the Vehemoth Phosbat! Defeat the Vehemoth Phosbat! |
- |
| Tropical Wilds | |
 Find the Cosmic-Drive Key! Find the Cosmic-Drive Key! |
- |
| Twilight River | |
 To Twilight River! To Twilight River! |
 Save Olimar! Save Olimar! |
 Defeat the Scornet Maestro! Defeat the Scornet Maestro! |
- |
| Garden of Hope (Revisited) | |
 Follow Olimar! Follow Olimar! |
 Find the Hocotatian! Find the Hocotatian! |
 Save the Hocotatian! Save the Hocotatian! |
- |
| Formidable Oak | |
 Head to the Formidable Oak Head to the Formidable Oak |
 Find Captain Olimar! Find Captain Olimar! |
 Save Captain Olimar! Save Captain Olimar! |
- |
Author
Find the Cosmic-Drive Key! Walkthrough
improvement survey
03/2026
improving Game8's site?

Your answers will help us to improve our website.
Note: Please be sure not to enter any kind of personal information into your response.

We hope you continue to make use of Game8.
Rankings
- We could not find the message board you were looking for.
Gaming News
Popular Games

Genshin Impact Walkthrough & Guides Wiki

Honkai: Star Rail Walkthrough & Guides Wiki

Umamusume: Pretty Derby Walkthrough & Guides Wiki

Pokemon Pokopia Walkthrough & Guides Wiki

Resident Evil Requiem (RE9) Walkthrough & Guides Wiki

Monster Hunter Wilds Walkthrough & Guides Wiki

Wuthering Waves Walkthrough & Guides Wiki

Arknights: Endfield Walkthrough & Guides Wiki

Pokemon FireRed and LeafGreen (FRLG) Walkthrough & Guides Wiki

Pokemon TCG Pocket (PTCGP) Strategies & Guides Wiki
Recommended Games

Diablo 4: Vessel of Hatred Walkthrough & Guides Wiki

Cyberpunk 2077: Ultimate Edition Walkthrough & Guides Wiki

Fire Emblem Heroes (FEH) Walkthrough & Guides Wiki

Yu-Gi-Oh! Master Duel Walkthrough & Guides Wiki

Super Smash Bros. Ultimate Walkthrough & Guides Wiki

Pokemon Brilliant Diamond and Shining Pearl (BDSP) Walkthrough & Guides Wiki

Elden Ring Shadow of the Erdtree Walkthrough & Guides Wiki

Monster Hunter World Walkthrough & Guides Wiki

The Legend of Zelda: Tears of the Kingdom Walkthrough & Guides Wiki

Persona 3 Reload Walkthrough & Guides Wiki
All rights reserved
© 2013 - 2020 Nintendo. Pikmin and Nintendo Switch are trademarks of Nintendo.
The copyrights of videos of games used in our content and other intellectual property rights belong to the provider of the game.
The contents we provide on this site were created personally by members of the Game8 editorial department.
We refuse the right to reuse or repost content taken without our permission such as data or images to other sites.




![Everwind Review [Early Access] | The Shaky First Step to A Very Long Journey](https://img.game8.co/4440226/ab079b1153298a042633dd1ef51e878e.png/thumb)

![Monster Hunter Stories 3 Review [First Impressions] | Simply Rejuvenating](https://img.game8.co/4438641/2a31b7702bd70e78ec8efd24661dacda.jpeg/thumb)


