This survey will take about 1 minute.
Your answers will help us to improve our website.
Pikmin 3 Deluxe
Follow Olimar! Walkthrough
This is a story walkthrough for Follow Olimar! in Pikmin 3 Deluxe for the Nintendo Switch. This guide will cover the section where your fruit is stolen and you first encounter blue pikmin, For fruit locations and strategy, read on!
| Previous Walkthrough | Next Walkthrough |
|---|---|
| Defeat the Scornet Maestro! | Find the Hocotatian! |
List of Contents
| Fruit That Can Be Recovered |
 Pocked Airhead Pocked Airhead
|
 Citrus Lump Citrus Lump
|
 Searing Acidshock Searing Acidshock
|
|---|---|---|
 Velvety Dreamdrop Velvety Dreamdrop
|
||
Follow Olimar! Walkthrough
Objectives List
| Order | Objectives |
|---|---|
| 1 | Break the electric gate and recover the fruit |
| 2 | Befriend the blue pikmin |
| 3 | Gather the Bridge Fragments |
| 4 | Break the Electric Gate to the north |
| 5 | Take out the enemies in and around the water |
| 6 | Recover the fruit |
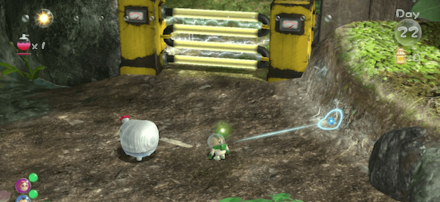
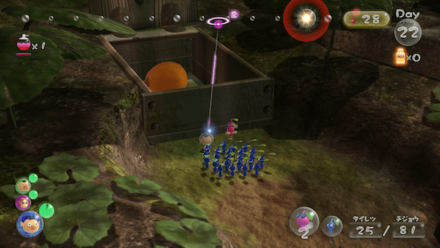
1: Break the electric gate and recover the fruit
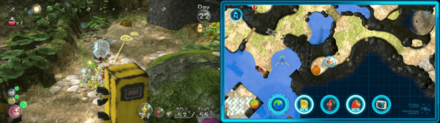
All of your juice has been stolen , so the first thing you should do is secure some fruit. From the starting point of the level, there is an electric gate to the south, so draw out some Red and Yellow Pikmin. Use the Red Pikmin to take out the nearby enemies while the Yellow Pikmin focus on destroying the electric gate. Dig up the fruit beyond the gate and have your Pikmin recover it.
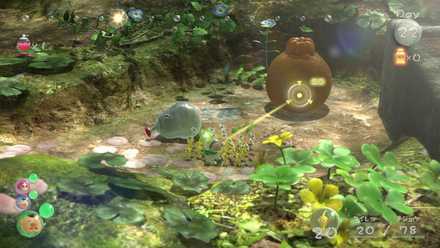
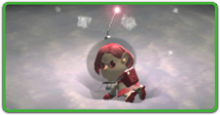
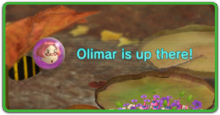
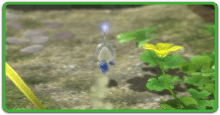
2: Befriend the blue pikmin
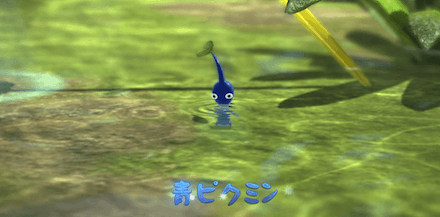
Have another leader separate from the previous team set off to encounter the Blue Pikmin. Bring about 10 Rock Pikmin and 20 Winged Pikmin over to this area, and later exploration will be much smoother. Have the Winged Pikmin pull the flukeweed, and you will be able to befriend your first Blue Pikmin.
You'll need several more Blue Pikmin to get the most out of them, so first prioritize bringing all nearby pellets and enemies to the blue onion to make more.
3: Gather the Bridge Fragments
| Upper Area Fragments |
|---|
 Enlarge Enlarge |
| Fragments in the Water |
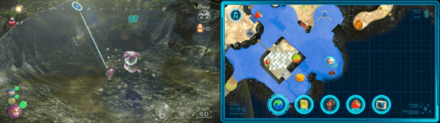 Enlarge Enlarge |
In order to fix the bridge, you'll need to carry back the bridge fragments from two areas. The fragments found underwater can only be carried by the Blue Pikmin, so increase their numbers to increase your overall efficiency in this area. The bridge fragments found on the surface can be carried by any of your Pikmin.
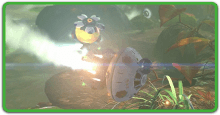
4: Break the Electric Gate to the north
Have the other leader who is not busy gathering fragments take some Yellow Pikmin and head north to break the electric gate there. Use the Go Here command so you can focus on getting more Blue Pikmin while they head that way. Watch out for the Fiery Blowhog that waits nearby.
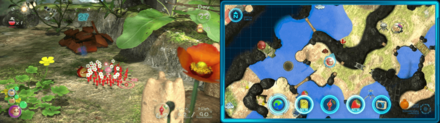
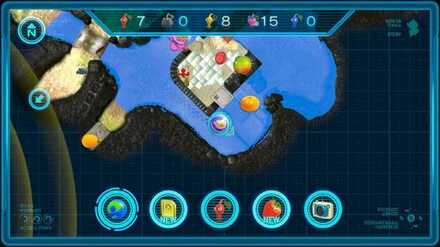
5: Take out the enemies in and around the water
After you finish building the bridge, you should take out all nearby enemies both in and out of the water, to make it easier to carry fruit back to the SS Drake. There are four fruit that can be recovered near where the blue onion is found, so clear out the path to make it easier to obtain them all.
6: Recover the fruit
After you finish taking out all of the nearby enemies, all that is left is carrying all of the fruit back. Since Louie took everything, you won't have any kind of juice buffer, so gathering up a lot of fruit will make the next few days much less stressful. Even if you cannot recover all the fruit on this day, recover as much as possible and bring the others near the SS Drake so it can be quickly recovered on a subsequent day.
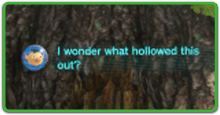
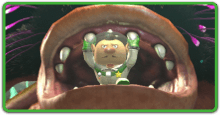
You need 8 Winged Pikmin to lift the Clipboard & recover the Velvety Dreamdrop
The fruit located to the south area can be carried after opening the clipboard, so you'll need at least 8 pikmin to get it open. If you are low on time or available Pikmin, you can always leave it and use Go Here to come back on another day.
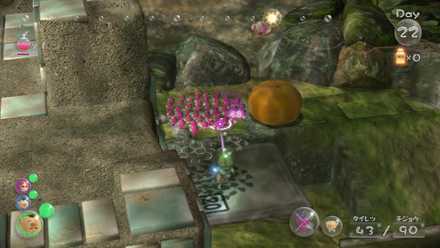
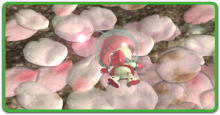
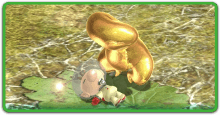
Recover the Pocked Airhead
The Pocked Airhead can be found buried in the ground. You need to unearth it so you may retrieve it. We wary that there is a Bulborb, 2 Dwarf Bulborbs, and the Fiery Blowhog your way. Defeating these enemies are crucial in safely transporting the fruit back to the Drake.
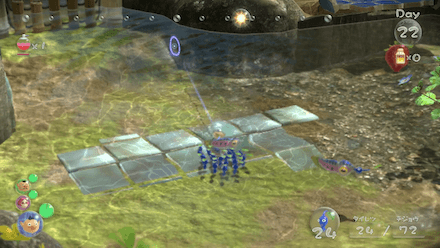
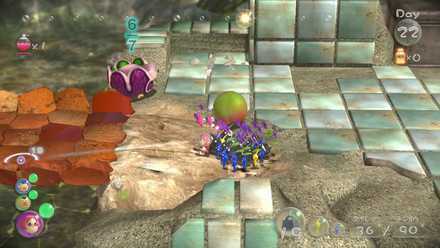
Recover the Citrus Lump near the tiles
This Citrus Lump can be obtained near the area with tiles that are submerged underwater. You need to use at least 5 Blue Pikmin to transport it back to the Drake.
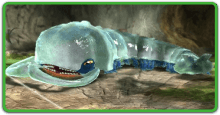
Recover the Searing Acidshock by the tiles
The Searing Acidshock can be obtained once you fixed the briudge. The fruit is encased in crystal near the southwestern area that has tiles on the ground, use Rock Pikmin to break the fruit free. Be wary of the Waddlepus lurking nearby, make sure to defeat it before transporting the fruit.
Related Guides
| Previous Walkthrough | Next Walkthrough |
|---|---|
| Defeat the Scornet Maestro! | Find the Hocotatian! |
| Prologue | |
|---|---|
 Exploration Day 1 Exploration Day 1 |
- |
| Garden of Hope | |
 Where's Brittany? Where's Brittany? |
 The Captain's Signal? The Captain's Signal? |
 Defeat the Armored Mawdad! Defeat the Armored Mawdad! |
- |
| Distant Tundra | |
 Reunite With Brittany! Reunite With Brittany! |
 Where's the Captain? Where's the Captain? |
 Defeat the Vehemoth Phosbat! Defeat the Vehemoth Phosbat! |
- |
| Tropical Wilds | |
 Find the Cosmic-Drive Key! Find the Cosmic-Drive Key! |
- |
| Twilight River | |
 To Twilight River! To Twilight River! |
 Save Olimar! Save Olimar! |
 Defeat the Scornet Maestro! Defeat the Scornet Maestro! |
- |
| Garden of Hope (Revisited) | |
 Follow Olimar! Follow Olimar! |
 Find the Hocotatian! Find the Hocotatian! |
 Save the Hocotatian! Save the Hocotatian! |
- |
| Formidable Oak | |
 Head to the Formidable Oak Head to the Formidable Oak |
 Find Captain Olimar! Find Captain Olimar! |
 Save Captain Olimar! Save Captain Olimar! |
- |
Author
Follow Olimar! Walkthrough
Please participate in our site
improvement survey
03/2026
improvement survey
03/2026
Would you assist in
improving Game8's site?
improving Game8's site?

×
We are listening to our users' valuable opinions and discussing how to act on them.
The information collected through this survey will be used for the purpose of improving our services. In addition, the information will only be disclosed a part of a statistic in a format that will not allow identification of personal information.
Begin Survey
Not Now
×
Please rate each item regarding Game8.co's Advertisements.
Amount of Ads
Very Dissatisfied
Somewhat Dissatisfied
Fine
Somewhat Satisfied
Highly Satisfied
Placement of Ads
Timing of Ad Display
Ad Loading Speed
Safeness of Ads
Content of Ads
×
Please rate each item regarding Game8.co's Quality of Articles.
Amount of information
Very Dissatisfied
Somewhat Dissatisfied
Fine
Somewhat Satisfied
Highly Satisfied
Frequency of updates
Speed of new information
Accuracy of articles
Understandibility of articles
Readability of sentences
×
Please rate each item regarding Game8.co's Usability of the Site.
Ease of finding information
Very Dissatisfied
Somewhat Dissatisfied
Fine
Somewhat Satisfied
Highly Satisfied
Loading Speed
Use of Color
Font Size
Visibility of Images
Easy to Understand Layout
×
Please rate each item regarding Game8.co's Message Boards, Comments.
Ease of Writing
Very Dissatisfied
Somewhat Dissatisfied
Fine
Somewhat Satisfied
Highly Satisfied
Readability
Ease in Finding Information
Comment Quality
Comment Quantity
Admin Response
×
Please rate each item regarding Game8.co's Site's new design.
Please rate our site's new design
Very Dissatisfied
Somewhat Dissatisfied
Fine
Somewhat Satisfied
Highly Satisfied
Do you think that the website's design change makes the site easier to use?
Has the new design made it easier for you to find information on the site?
Has the new design improved the overall visual appeal of the site?
How would you rate your overall satisfaction with the new design of the site?
×
How likely are you to recommend Game8 to someone you know?
Very Unlikely
0
1
2
3
4
5
6
7
8
9
10
Very Likely
If you have other opinions regarding potential improvement to the website, please share them with us. We would appreciate your honest opinion.
Note: This is a free response section, so you can proceed without entering anything.
Note: Please be sure not to enter any kind of personal information into your response.
Note: Please be sure not to enter any kind of personal information into your response.
×
Thank You
×
Thank you for participating in our survey! Your answers will help us to improve the quality of our website and services.
We hope you continue to make use of Game8.
We hope you continue to make use of Game8.
Close
Rankings
- We could not find the message board you were looking for.
Gaming News


![Everwind Review [Early Access] | The Shaky First Step to A Very Long Journey](https://img.game8.co/4440226/ab079b1153298a042633dd1ef51e878e.png/thumb)

![Monster Hunter Stories 3 Review [First Impressions] | Simply Rejuvenating](https://img.game8.co/4438641/2a31b7702bd70e78ec8efd24661dacda.jpeg/thumb)
Popular Games

Genshin Impact Walkthrough & Guides Wiki
Honkai: Star Rail Walkthrough & Guides Wiki
Umamusume: Pretty Derby Walkthrough & Guides Wiki
Pokemon Pokopia Walkthrough & Guides Wiki
Resident Evil Requiem (RE9) Walkthrough & Guides Wiki
Monster Hunter Wilds Walkthrough & Guides Wiki
Wuthering Waves Walkthrough & Guides Wiki
Arknights: Endfield Walkthrough & Guides Wiki
Pokemon FireRed and LeafGreen (FRLG) Walkthrough & Guides Wiki
Pokemon TCG Pocket (PTCGP) Strategies & Guides Wiki


Recommended Games
Diablo 4: Vessel of Hatred Walkthrough & Guides Wiki
Cyberpunk 2077: Ultimate Edition Walkthrough & Guides Wiki
Fire Emblem Heroes (FEH) Walkthrough & Guides Wiki
Yu-Gi-Oh! Master Duel Walkthrough & Guides Wiki
Super Smash Bros. Ultimate Walkthrough & Guides Wiki
Pokemon Brilliant Diamond and Shining Pearl (BDSP) Walkthrough & Guides Wiki
Elden Ring Shadow of the Erdtree Walkthrough & Guides Wiki
Monster Hunter World Walkthrough & Guides Wiki
The Legend of Zelda: Tears of the Kingdom Walkthrough & Guides Wiki
Persona 3 Reload Walkthrough & Guides Wiki


All rights reserved
© 2013 - 2020 Nintendo. Pikmin and Nintendo Switch are trademarks of Nintendo.
The copyrights of videos of games used in our content and other intellectual property rights belong to the provider of the game.
The contents we provide on this site were created personally by members of the Game8 editorial department.
We refuse the right to reuse or repost content taken without our permission such as data or images to other sites.