Earth Vellumental Temple 100% Walkthrough | Collectibles, Toads, and Hidden Block Locations
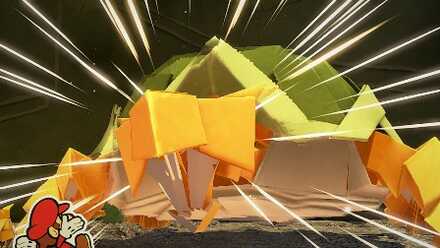
This is a walkthrough for Earth Vellumental Temple in Paper Mario: The Origami King. Read on to learn locations for all Earth Vellumental Temple collectibles and treasure, hidden toads, hidden blocks, and confetti holes, as well as other useful tips and strategies for getting through this area.
| Previous Area | Overlook Mountain |
|---|---|
| Current Area | Earth Vellumental Temple |
| Next Area | Overlook Tower |
List of Contents
- Earth Vellumental Temple Walkthrough
- Earth Vellumental Temple Video Walkthrough
- Tips and Strategies
- Boss Strategy Guide
- Earth Vellumental Temple Toad Locations
- Earth Vellumental Temple Collectible Treasure Locations
- Earth Vellumental Temple ? Block Locations
- Earth Vellumental Temple Not-Bottomless Hole Locations
- Story Walkthrough Related Links
Earth Vellumental Temple Walkthrough
Earth Vellumental Temple Interior
| Objectives | |
|---|---|
| 1 |
 Enlarge Enlarge
At the entrance to the Earth Vellumental Temple, use all four acquired Shell Stones with the door to open it.Where to Find All Shell Stones |
| 2 | Inside the temple, continue along the path until reaching the image of the Earth Vellumental. Hit it several times with the Hammer to knock it down. |
| 3 |
Jump across the platforms to continue. In the next room, you'll start a battle with 12 Koopa Troopas. If you fall off the platforms, you will take damage, but there is a Heart to fully restore Mario at the end of the room, so you will be fine as long as you don't completely run out of health. |
| 4 | Go down and to the right, and hop along the platforms to find two doors on the right side of the room. Before going in, hit the ? Block to get Shiny Boots. Go in the door currently accessible to you, and you'll find a ? Block with a Shiny Hammer. |
| 5 |
 Enlarge Enlarge
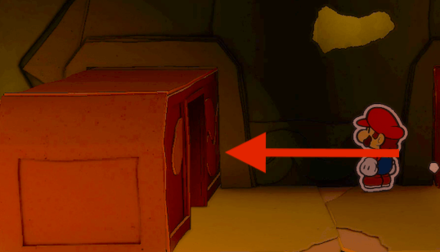
The next step is hard to find, so keep your eyes peeled! While walking along in the room, avoid being pushed off by the sliding blocks and get past the three sliding blocks with a face in the middle. |
| 6 |
 Enlarge Enlarge
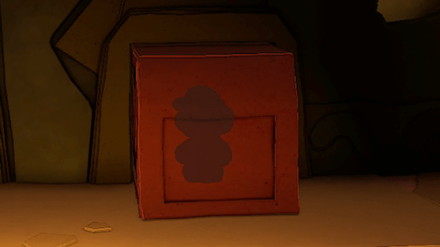
The next sliding block after that spot has a gap you can enter on its right side. You can check you're at the right block by looking at the wall to its right, there should be a gap visible. Once inside, walk right to go up the slope and find a hidden area with a door. |
| 7 | Go through the door and smash the cracked rock. You'll start a battle with 8 Koopa Troopas. Continue ahead while timing jumps to avoid the fire traps. |
| 8 |
 Enlarge Enlarge
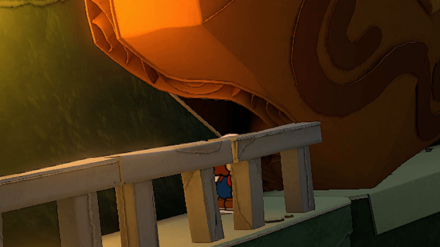
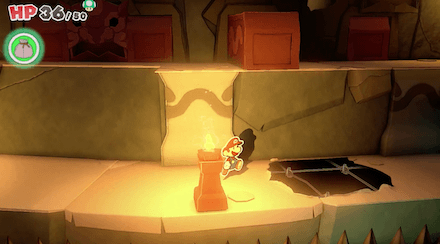
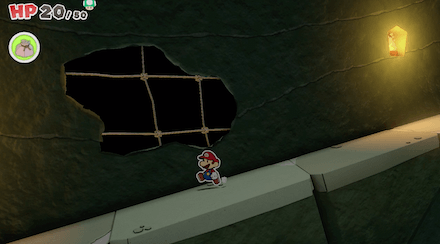
Ahead, you'll hit another cracked rock, which will cause a giant turtle shell to come sliding down Indiana Jones-style. Watch the holes in the turtle shell and line Mario up so that he can hide in one of the holes and let the turtle shell roll on ahead. Don't worry about filling in the non-bottomless hole in the wall while running – you can deal with it afterwards! |
| 9 |
You'll get a Max Up Heart, increasing Mario's Max HP by 20. Continue into the next room and pull off the seal on the cylindrical platform to the left to continue up. This is a room you've been in before, but don't jump down until you have removed the seal or you'll have to go all the way back again. |
| 10 | Go into the mouth of the statue to continue. Walk onto the ledge to fight the boss, the Earth Vellumental. |
| 11 |
 Enlarge Enlarge
After defeating the Earth Vellumental, you'll get the Earth Bibliofold, which will allow Olivia to fold into the shape of the Earth Vellumental. Take the Pipe to go back to the entrance of the Earth Vellumental Temple. |
| 12 | Head back to Overlook Mountain. At the peak, you'll be able to use Olivia's new power with the Earth Vellumental Circle to gain access to Overlook Tower. |
Earth Vellumental Temple Video Walkthrough
Tips and Strategies
Koopa Troopas
If you can arrange all the Koopa Troopas in a line, one jump will send the first one sliding, and knock all of them out without needing to time Perfect jumps. On the other hand, their shells will protect them from the Hammer, which will still deal damage but won't be able to knock them out in one hit, so try to arrange them in lines if possible.
Boss Strategy Guide
Earth Vellumental
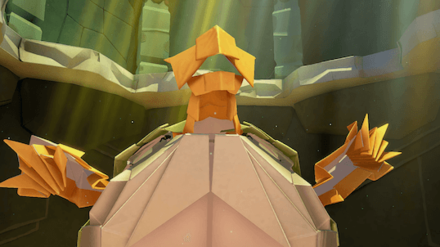
The Earth Vellumental battle is focused on attacking the boss's vulnerable areas (limbs+tail) with your hammer, then using the 1000-Fold Arms to inflict massive damage after it retreats into its shell (which happens by hitting its tail). For a full boss battle strategy, see the guide below.
How to Beat the Earth Vellumental
Earth Vellumental Temple Toad Locations
7 Locations Total
| Locations | |
|---|---|
 Enlarge Enlarge
|
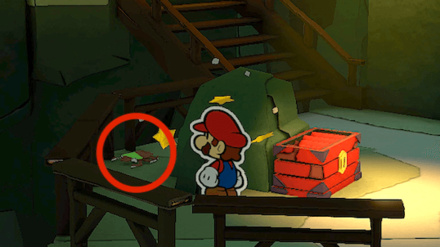
Interact with the second donation box and insert 10 coins. After the dialogue, a folded paper in the shape of a bug will appear. Hit it with your Hammer to free it. |
 Enlarge Enlarge
|
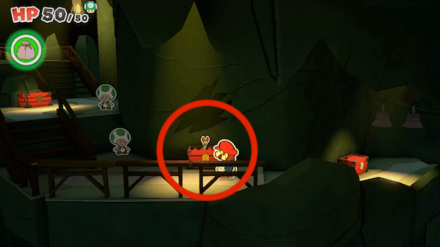
Hit the third chest with the Hammer, then jump on top and pull to get the Toad out. |
 Enlarge Enlarge
|
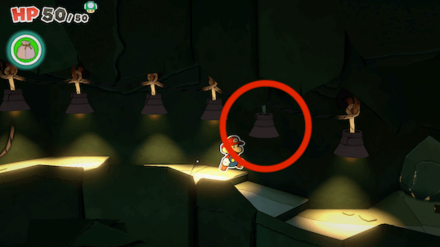
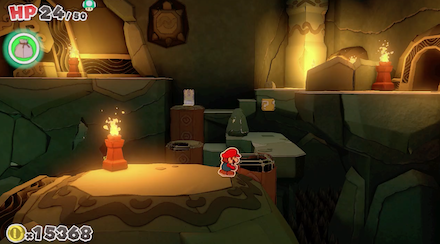
Following the path right from the third donation box, jump up into the last light from the right. It's the one that isn't on. A Toad in need of hammering will fall down. |
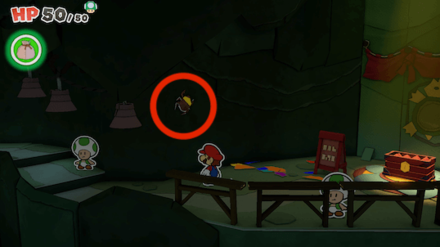 Enlarge Enlarge
(After Smashing Rock) |
Just before the last donation box, you can smash a big a cracked rock to release three beetle Toads. One will stay on the wall, so it it with your Hammer. This Toad will give access to the Accessories shop outside the temple. |
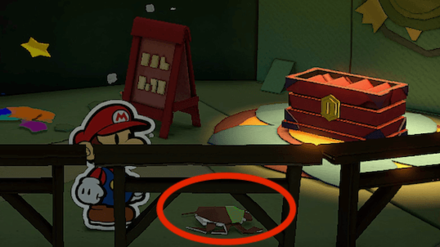 Enlarge Enlarge
(After Smashing Rock) |
On the ground directly after the cracked rock is another Toad. |
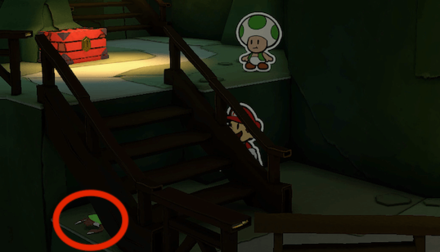 Enlarge Enlarge
(After Smashing Rock) |
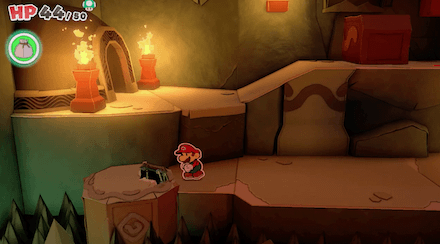
Another beetle Toad is hiding under the staircase right after the second donation box. |
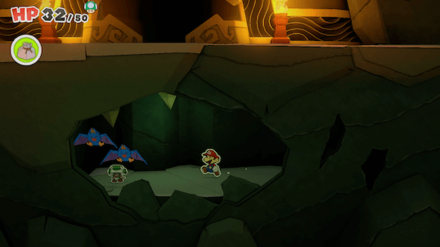 Enlarge Enlarge
|
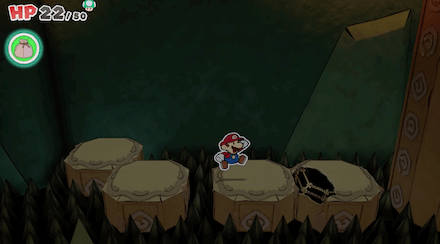
In the second room where you see the Boss entrance for the first time, cross the area with spikes below and go in the back to fix a cylinder with a Confetti hole. Ride it down, break the rock inside and rescue the Toad from the Swoops. |
Earth Vellumental Temple Collectible Treasure Locations
3 Locations Total
| Treasure Name and How to Find | |
|---|---|
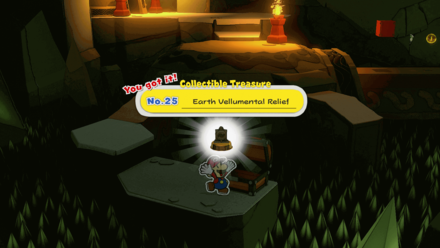 Enlarge Enlarge
Earth Vellumental Relief |
After the first battle with Koopa Troopas, go down and to the left along the narrow path to find this chest. |
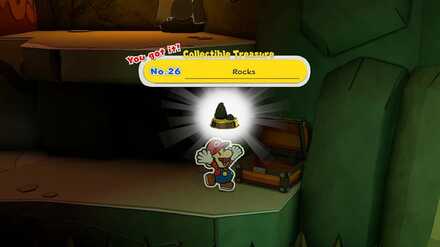 Enlarge Enlarge
Rocks |
In the room with the sliding blocks, at the far end, fall down onto the ledge in front to find a chest with this treasure. |
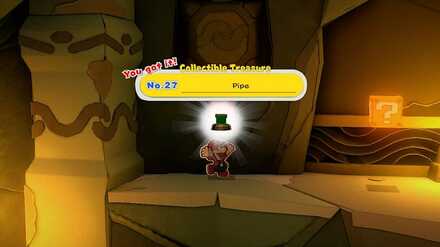 Enlarge Enlarge
Pipe |
Go to the west side of the entrance to the Earth Vellumental Boss. Underneath the turtle figure on the wall, jump to reveal a hidden block. Jump again to receive the Treasure. |
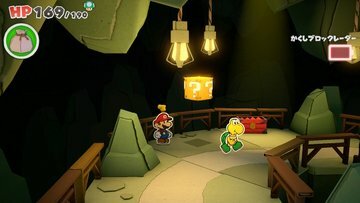
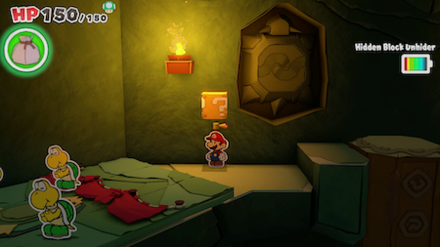
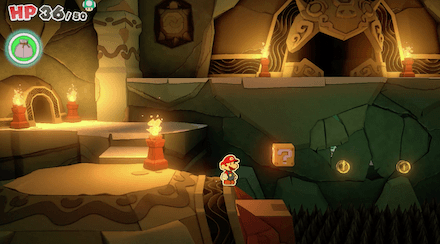
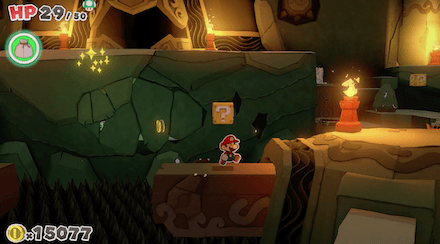
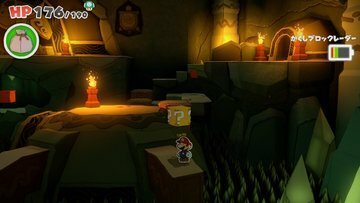
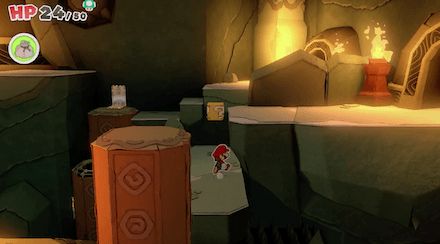
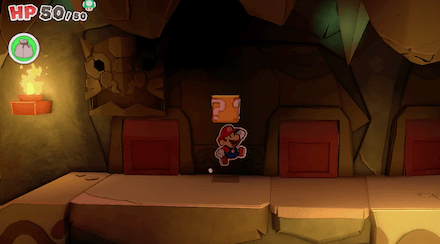
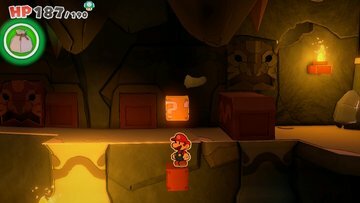
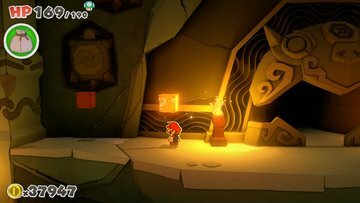
Earth Vellumental Temple ? Block (Hidden Block) Locations
11 Locations Total
| Location | |
|---|---|
 Enlarge Enlarge
|
 Enlarge Enlarge
|
 Enlarge Enlarge
|
 Enlarge Enlarge
|
 Enlarge Enlarge
|
 Enlarge Enlarge
|
 Enlarge Enlarge
|
 Enlarge Enlarge
|
 Enlarge Enlarge
|
 Enlarge Enlarge
|
 Enlarge Enlarge
|
|
Earth Vellumental Temple Not-Bottomless (Confetti) Hole Locations
10 Locations Total
| Location | |
|---|---|
 Enlarge Enlarge
|
 Enlarge Enlarge
|
 Enlarge Enlarge
|
 Enlarge Enlarge
|
 Enlarge Enlarge
|
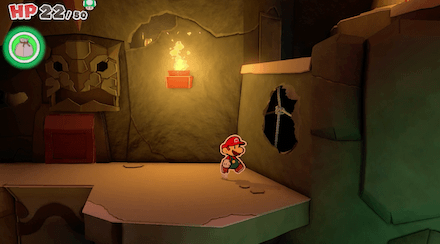 Enlarge Enlarge
|
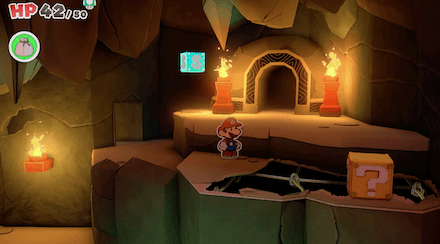 Enlarge Enlarge
|
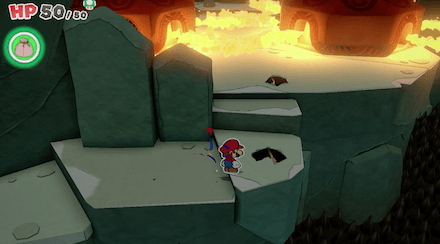 Enlarge Enlarge
|
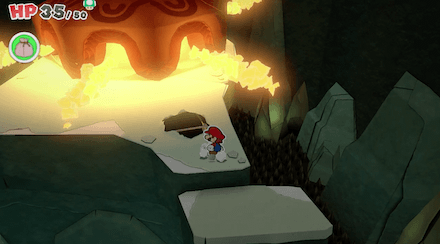 Enlarge Enlarge
|
 Enlarge Enlarge
|
Story Walkthrough Related Links
Main Story Walkthrough
Other Story Guides
| Location | Guide |
|---|---|
| Whispering Woods |
How to Walk Over Spiky Ground How to Start the Campfire |
| Toad Town |
How to Get the Toad Town Chest How to Get the Sewer Hook (Manhole Hook) |
| Overlook Mountain |
Where to Find All Shell Stones Best Green Shell Stone Price How to Get the Blue Shell Stone |
| Overlook Tower | Kitchen Goomba Locations |
| Autumn Mountain |
How to Save Bobby (Bob-omb) How to Open the Can |
| Water Vellumental Shrine | How to Solve the Water Puzzle |
| Snif City | How to Guess the Snifit Mood |
| Scorching Sandpaper Desert | Where to Find the Jewels |
| Temple of Shrooms |
How to Find All 40 Faceless Toads A Star Lights Your Way Puzzle Solution |
| The Great Sea |
How to Find Diamond Island Trial of Wisdom Quiz Answers |
| Several Locations | Where is Luigi? |
| Ending | How to Get the Secret Ending |
Author
Paper Mario: The Origami King (Switch) Walkthrough & Guides Wiki
Earth Vellumental Temple 100% Walkthrough | Collectibles, Toads, and Hidden Block Locations
improvement survey
03/2026
improving Game8's site?

Your answers will help us to improve our website.
Note: Please be sure not to enter any kind of personal information into your response.

We hope you continue to make use of Game8.
Rankings
- We could not find the message board you were looking for.
Gaming News
Popular Games

Genshin Impact Walkthrough & Guides Wiki

Honkai: Star Rail Walkthrough & Guides Wiki

Umamusume: Pretty Derby Walkthrough & Guides Wiki

Pokemon Pokopia Walkthrough & Guides Wiki

Resident Evil Requiem (RE9) Walkthrough & Guides Wiki

Monster Hunter Wilds Walkthrough & Guides Wiki

Wuthering Waves Walkthrough & Guides Wiki

Arknights: Endfield Walkthrough & Guides Wiki

Pokemon FireRed and LeafGreen (FRLG) Walkthrough & Guides Wiki

Pokemon TCG Pocket (PTCGP) Strategies & Guides Wiki
Recommended Games

Diablo 4: Vessel of Hatred Walkthrough & Guides Wiki

Cyberpunk 2077: Ultimate Edition Walkthrough & Guides Wiki

Fire Emblem Heroes (FEH) Walkthrough & Guides Wiki

Yu-Gi-Oh! Master Duel Walkthrough & Guides Wiki

Super Smash Bros. Ultimate Walkthrough & Guides Wiki

Pokemon Brilliant Diamond and Shining Pearl (BDSP) Walkthrough & Guides Wiki

Elden Ring Shadow of the Erdtree Walkthrough & Guides Wiki

Monster Hunter World Walkthrough & Guides Wiki

The Legend of Zelda: Tears of the Kingdom Walkthrough & Guides Wiki

Persona 3 Reload Walkthrough & Guides Wiki
All rights reserved
©2020 Nintendo
The copyrights of videos of games used in our content and other intellectual property rights belong to the provider of the game.
The contents we provide on this site were created personally by members of the Game8 editorial department.
We refuse the right to reuse or repost content taken without our permission such as data or images to other sites.


![Everwind Review [Early Access] | The Shaky First Step to A Very Long Journey](https://img.game8.co/4440226/ab079b1153298a042633dd1ef51e878e.png/thumb)

![Monster Hunter Stories 3 Review [First Impressions] | Simply Rejuvenating](https://img.game8.co/4438641/2a31b7702bd70e78ec8efd24661dacda.jpeg/thumb)


