This survey will take about 1 minute.
Your answers will help us to improve our website.
Paper Mario: The Origami King (Switch)
Overlook Mountain 100% Walkthrough | Collectibles, Toads, and Hidden Block Locations
This is a walkthrough for Overlook Mountain in Paper Mario: The Origami King. Read on to learn locations for all Overlook Mountain collectibles and treasure, hidden toads, hidden blocks, and confetti holes, as well as other useful tips and strategies for getting through this area.
| Previous Area | Picnic Road |
|---|---|
| Current Area | Overlook Mountain |
| Next Area | Earth Vellumental Temple |
List of Contents
- Where to Find the Shell Stones
- Overlook Mountain Walkthrough
- Overlook Mountain Video Walkthrough
- Tips and Strategies
- Overlook Mountain Toad Locations
- Overlook Mountain Collectible Treasure Locations
- Overlook Mountain ? Block Locations
- Overlook Mountain Not-Bottomless Hole Locations
- Story Walkthrough Related Links
Where to Find the Shell Stones

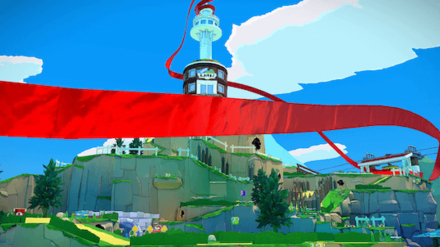
On your first time through Overlook Mountain, your goal will be to find the four missing Shell Stones to open the door to the Earth Vellumental Temple. For a detailed explanation of the location of each Shell Stone, check our full guide below.
Overlook Mountain Walkthrough
| Objectives | |
|---|---|
| 1 |
Upon arriving Overlook Mountain, you will find a ? Block on the path to the east. Hit the ? Block to obtain the Iron Boots. Go to the far left on this path to get Collectible Treasure No. 17. |
| 2 |

Interact with the Monty Mole at the table. He'll try to sell you the Green Shell Stone, but say No. Continue saying No to haggle him down until the price reaches 300 Coins, then buy it. Best Green Shell Stone Price |
| 3 |
Continue to the top of the hill. Tear off the seal to Pipe No. 1. This links to the Warp Zone, which you can use to access Toad Town, and other areas later on. |
| 4 | To cross the bridge, you'll have to battle with a Paper Macho Goomba. Wait until it comes to the end of the bridge and turns around, then hammer the seal on its back. |
| 5 |
 Crossing the bridge and turning right, you'll find a clearing with a suspicious square on the wall. Hit the ledge on the left and a Goomba will come out. Defeat 4 Goombas in battle and it will reveal a Magic Circle. Use the 1,000-Fold Arms to grab the square from the top and peel down to get the Yellow Shell Stone. |
| 6 |
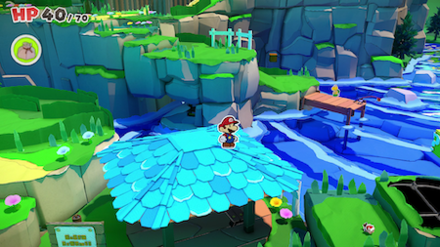
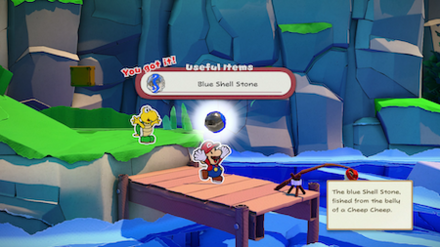 Go down the staircase to the right and interact with the fishing pole. In the fishing minigame, pull up the biggest fish. After defeating it and three smaller Cheep Cheeps in battle, you'll get the Blue Shell Stone.Fishing Guide |
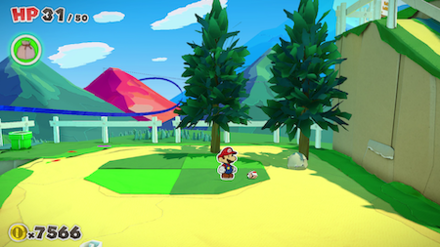
| 7 | Go back up the staircase and up the hill lined with stakes. Thwomps will start coming down, so run back to the bottom. Hit the tree to the left and a Starman will come out. Run through all the Thwomps while invincible to get up the hill. |
| 8 |
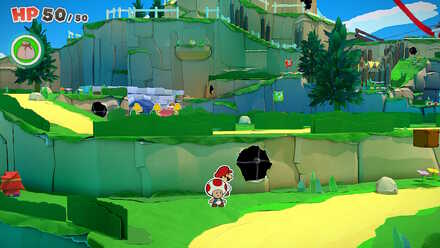
After a cutscene, continue up to the slope to the left. At the peak, a cutscene will begin. Go down the peak using the slope to the left. Down on the other side of the peak, take the path on the bottom-right to find a ? Block with 1000 coins. |
| 9 |
 Continue to the left along the path to find three Paper Macho Shy Guys playing soccer with the Red Shell Stone. Hit any of them with your Hammer to temporarily knock it down – don't worry about hitting the seals for now. Knock down the Shy Guy which the Stone is about to be passed to. After the Stone has been passed, the knocked-down Shy Guy won't be able to grab it, so you can intercept the Stone. |
| 10 | Go back to the previous area and take the Pipe to go directly to the Earth Vellumental Temple. |
Overlook Mountain Video Walkthrough
Tips and Strategies
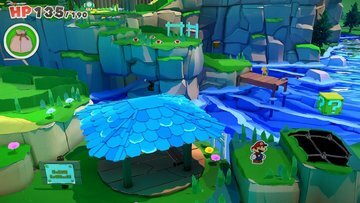
Finding the Blue Shell Stone

When starting the Fishing mini-game in Overlook Mountain, make sure to target the biggest fish. Once you reel it in, you'll have to fight it, so be sure to heal up before the battle!
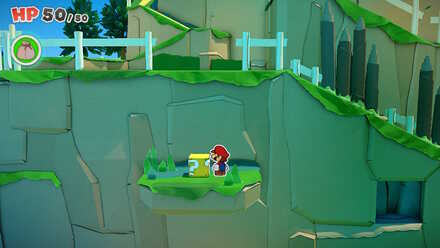
Finding the Yellow Shell Stone
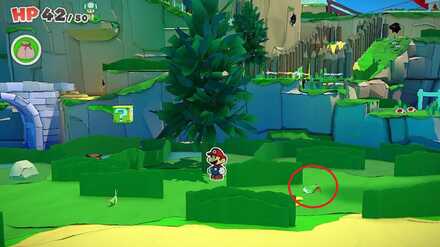
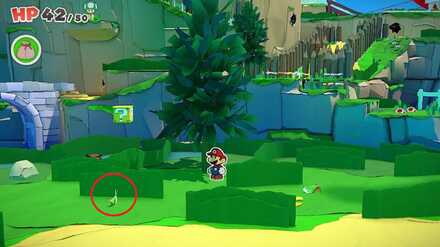
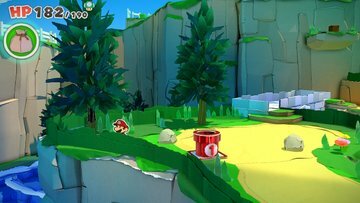
 Enlarge
To find the Magic Circle needed to reveal the Yellow Shell Stone, you'll need to break the shrub in the center-left with the Hammer. The shrub will start to move back and forth, so if you observe carefully you'll be able to spot it. Be prepared to fight a Goomba!
Finding the Green Shell Stone
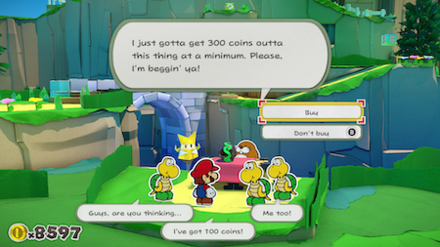
When haggling for the Green Shell Stone, answering No repeatedly will allow you to talk Monty Mole down to as cheap as 300 coins. However, you'll need to be careful, as if you accidentally hit No again on the 300-coin offer, the surrounding Koopa Troopas will buy the stone. After that, you'll need to buy it off them for the increased price of 1,500 coins.
Buy More Iron Boots
Your Iron Boots can break when used too many times. This will make it much harder to deal with Spinies, so before they break, take the Pipe No. 1 back to Toad Town and buy an extra pair from the shop for 300 coins.
New Enemies
Spinies
Spinies have sharp spikes on their back, so Mario will get hurt if he jumps on them. You'll want to grab the Iron Boots in the ? Block at the very start and equip them to jump on these foes without taking damage. The Hammer can also be used to damage them in a pinch.
Overlook Mountain Toad Locations
21 Locations Total
| Locations | |
|---|---|
 Enlarge Enlarge
|
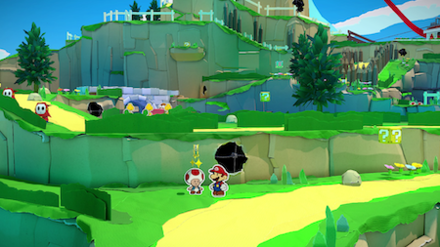
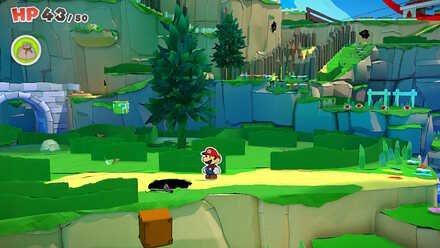
Upon entering Overlook Mountain, you will find a Toad folded into the shape of a signpost. Hit it with your Hammer to rescue it. |
 Enlarge Enlarge
|
To the left of the area entrance, on the same ledge with the chest containing Collectible Treasure No. 17, you can find a Toad behind the grass. |
 Enlarge Enlarge
|
If you go up the slope by the blue pavilion, you'll find a hedged-in area with grasshoppers. Hit all three with your Hammer – each one will turn into a Toad. You need to hit them twice, once to knock them down, then more more to free the Toad! |
 Enlarge Enlarge
|
Hit the second grasshopper. |
 Enlarge Enlarge
|
Hit the third grasshopper. |
 Enlarge Enlarge
|
From the grasshopper location, go right and jump onto the blue roof. Jump off on the opposite side to reach a ledge with a Toad. |
 Enlarge Enlarge
|
To the left of the area with the grasshoppers, there's a Toad in the shape of a beetle crawling aorund one of the hedges. Like always, it gets the hammer. |
 Enlarge Enlarge
|
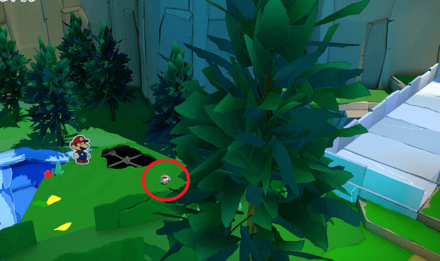
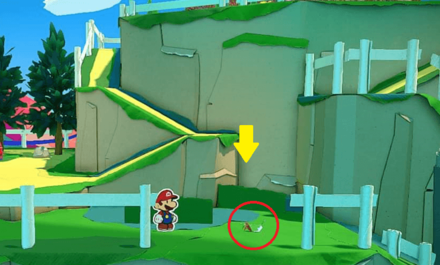
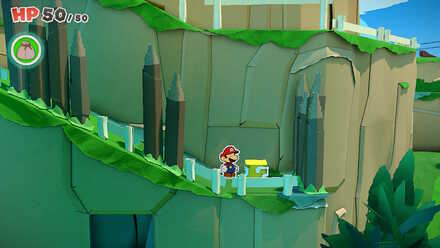
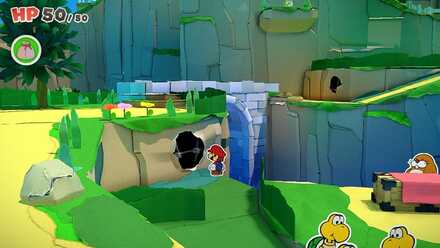
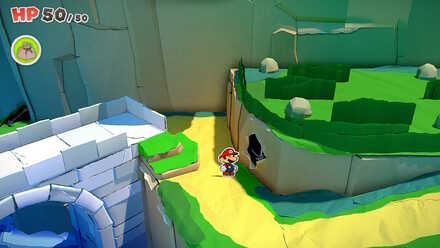
Before the bridge, behind the Pipe labeled with the number 1, there's a small rock. Hit it with your Hammer to reveal a Toad. |
 Enlarge Enlarge
(After Earth Temple) |
Before the bridge, behind the Pipe labeled with the number 1, there's a small rock. Hit it with your Hammer to reveal a Toad. Come back later in the story if this Toad isn't appearing. |
 Enlarge Enlarge
|
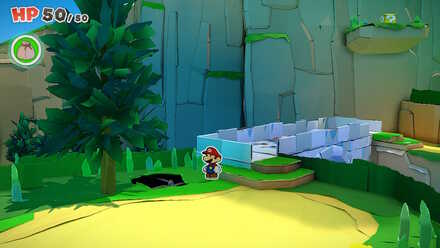
Right before the bridge, go far to the back and you'll find a ledge where a Toad is crumpled up on the ground. |
 Enlarge Enlarge
|
After crossing the bridge, take a left around the ledge and hammer the Toad on the far wall. |
 Enlarge Enlarge
|
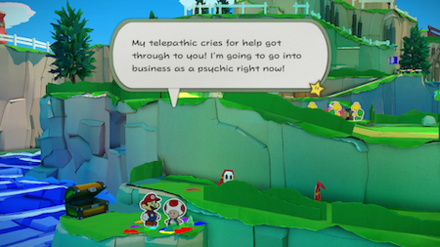
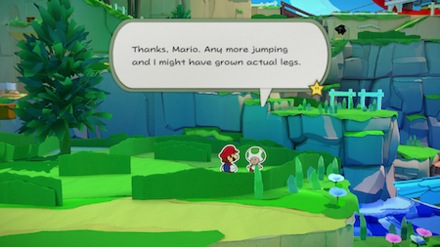
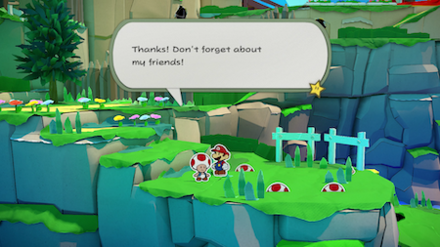
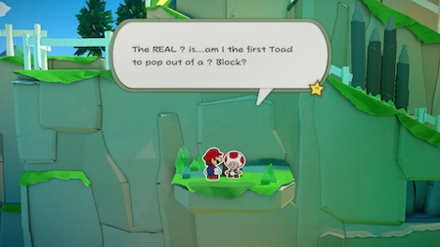
On the steps leading down to the fishing area, five Toads are poking out of the ground. Pull each of them up. |
 Enlarge Enlarge
|
At the fishing spot, one of the smaller shadows in the fishing mini-game will look more like origami than the others. Catch it to reveal a Toad. |
 Enlarge Enlarge
|
After blowing away the Thwomps, head down the slope to the left of the stake path and hammer the crumbled Toad. |
 Enlarge Enlarge
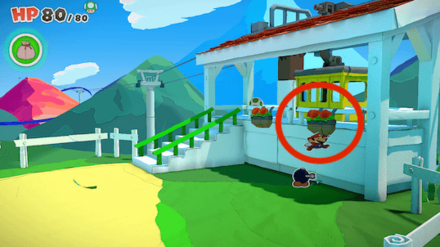
(After clearing the Red Streamer) |
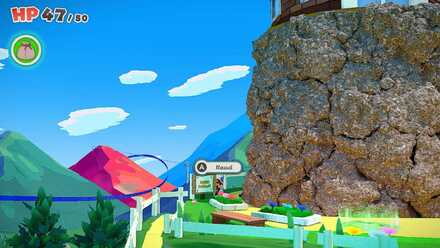
Hit the right flower box by the Tram station from below by jumping, then hit the crumbled Toad that comes out. |
 Enlarge Enlarge
|
To the left of the Tram station, there's a staircase heading up to Overlook Tower. Go behind it to find an area with a wrapped bundle of Toads. |
 Enlarge Enlarge
|
Going down to the left from the peak, you'll find two hedges. There's another grasshopper that needs hammering behind the back one. |
 Enlarge Enlarge
|
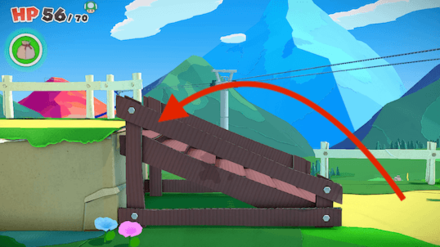
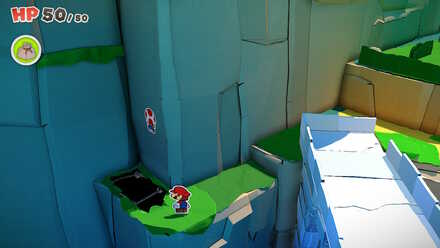
In front of the slope coming down from Overlook Tower, you'll be able to walk to the bottom through a hole in the fence and fall off onto a ledge. Hit the ? Block here to reveal a Toad. |
 Enlarge Enlarge
|
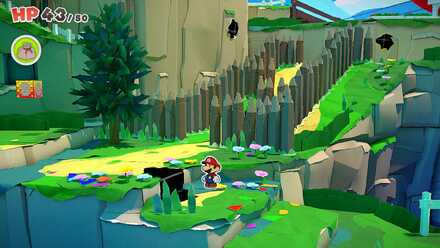
Going down to the left from the peak, two Shy Guys are using a crumpled-up Toad as a soccer ball. Defeat them or hit it mid-roll to rescue it. |
 Enlarge Enlarge
|
Defeat all three of the Paper Macho Shy Guys playing soccer with the Red Shell Stone and three Toads will burst out. |
 Enlarge Enlarge
|
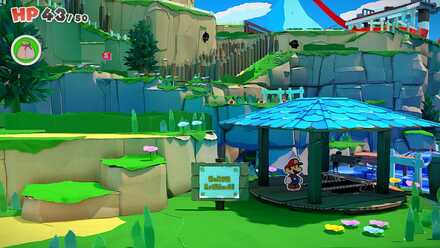
Hit the Overlook Sports Park Signpost, and a Toad in a shape of a crumpled paper will fall. Hit the crumpled paper to rescue it. |
Overlook Mountain Collectible Treasure Locations
5 Locations Total
| Treasure Name and How to Find | |
|---|---|
 Enlarge Enlarge
|
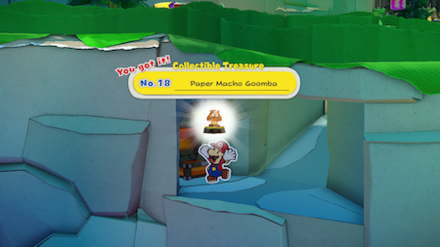
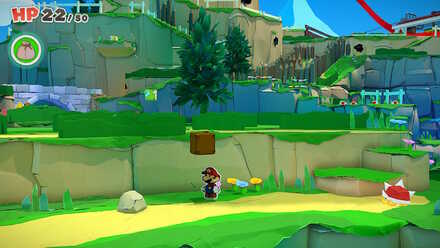
On the very first path, take a left at the entrance and continue to the far left to find a chest with this Treasure. |
 Enlarge Enlarge
|
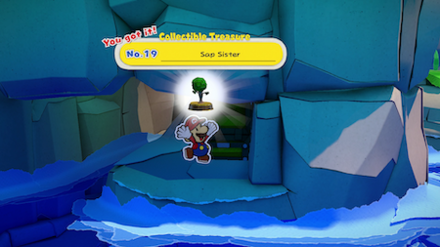
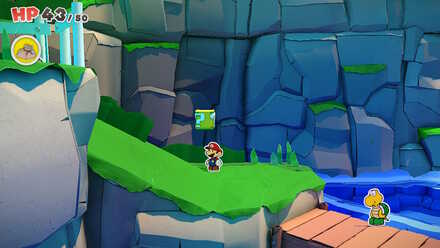
Directly back and to the left from Monty Mole's table, you'll find a path winding down and around to the front. Find this Treasure in a chest at the end. |
 Enlarge Enlarge
|
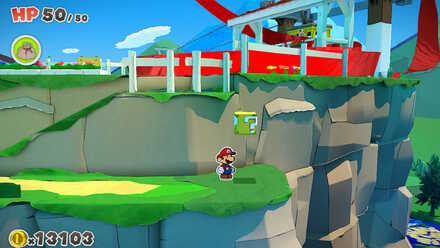
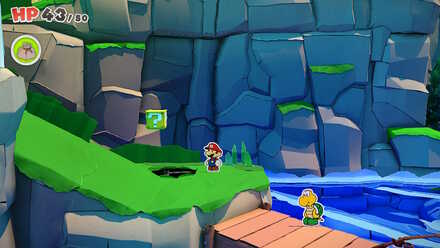
Right before the fishing pier, you'll find a ? Block with 100 coins. Continue left from there and you'll find a hidden path winding down and around to the front. Find this Treasure in a chest at the end. |
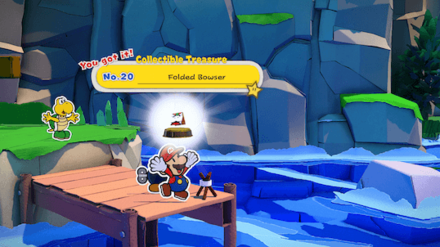 Treasure No. 20: Folded Bowser Treasure No. 20: Folded Bowser |
In the Fishing Spot, after catching the Toad in the water, you can sometimes see one of the shadows start to sparkle. Catch it to reel in this Treasure. |
 Enlarge Enlarge
|
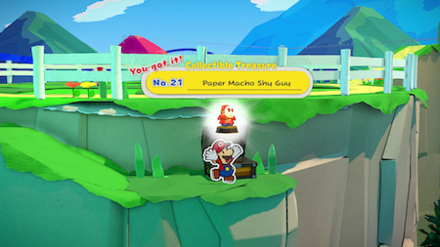
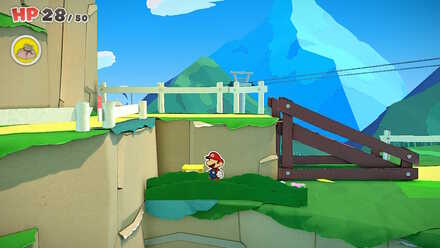
Go south from the clearing with the three Paper Macho Shy Guys to find a slope leading down. At the bottom, you'll find a chest with this Treasure. |
Overlook Mountain ? Block (Hidden Block) Locations
9 Locations Total
| Location | |
|---|---|
 Enlarge Enlarge
|
 Enlarge Enlarge
|
 Enlarge Enlarge
|
 Enlarge Enlarge
|
 Enlarge Enlarge
|
 Enlarge Enlarge
|
 Enlarge Enlarge
|
 Enlarge Enlarge
|
 Enlarge Enlarge
|
|
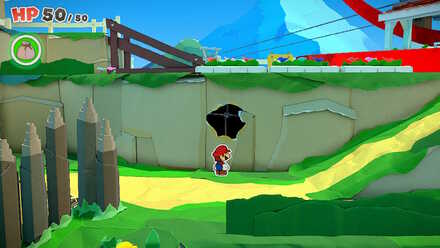
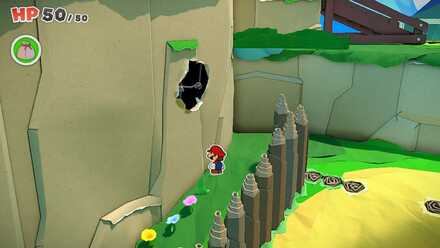
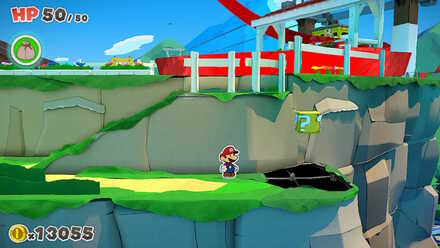
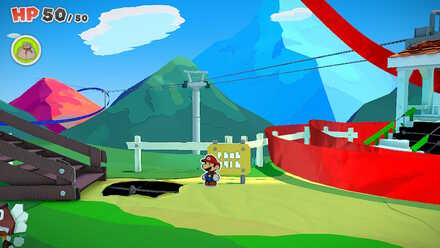
Overlook Mountain Not-Bottomless (Confetti) Hole Locations
18 Locations Total
| Location | |
|---|---|
 Enlarge Enlarge
|
 Enlarge Enlarge
|
 Enlarge Enlarge
|
 Enlarge Enlarge
|
 Enlarge Enlarge
|
 Enlarge Enlarge
|
 Enlarge Enlarge
|
 Enlarge Enlarge
|
 Enlarge Enlarge
|
 Enlarge Enlarge
|
 Enlarge Enlarge
|
 Enlarge Enlarge
|
 Enlarge Enlarge
|
 Enlarge Enlarge
|
 Enlarge Enlarge
|
 Enlarge Enlarge
|
 Enlarge Enlarge
|
 Enlarge Enlarge
|
Story Walkthrough Related Links
Main Story Walkthrough
Other Story Guides
| Location | Guide |
|---|---|
| Whispering Woods |
How to Walk Over Spiky Ground How to Start the Campfire |
| Toad Town |
How to Get the Toad Town Chest How to Get the Sewer Hook (Manhole Hook) |
| Overlook Mountain |
Where to Find All Shell Stones Best Green Shell Stone Price How to Get the Blue Shell Stone |
| Overlook Tower | Kitchen Goomba Locations |
| Autumn Mountain |
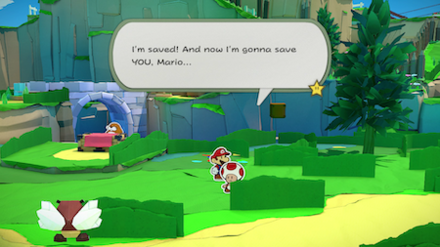
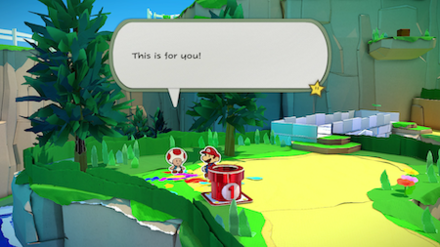
How to Save Bobby (Bob-omb) How to Open the Can |
| Water Vellumental Shrine | How to Solve the Water Puzzle |
| Snif City | How to Guess the Snifit Mood |
| Scorching Sandpaper Desert | Where to Find the Jewels |
| Temple of Shrooms |
How to Find All 40 Faceless Toads A Star Lights Your Way Puzzle Solution |
| The Great Sea |
How to Find Diamond Island Trial of Wisdom Quiz Answers |
| Several Locations | Where is Luigi? |
| Ending | How to Get the Secret Ending |
Comment
1  Anonymous about 5 years
There is also a Overlook tower collectible at level 3 of Tower, speak to drink stall Toad
Author

Paper Mario: The Origami King (Switch) Walkthrough & Guides Wiki
Overlook Mountain 100% Walkthrough | Collectibles, Toads, and Hidden Block Locations
Please participate in our site
improvement survey
03/2026
improvement survey
03/2026
Would you assist in
improving Game8's site?
improving Game8's site?

×
We are listening to our users' valuable opinions and discussing how to act on them.
The information collected through this survey will be used for the purpose of improving our services. In addition, the information will only be disclosed a part of a statistic in a format that will not allow identification of personal information.
Begin Survey
Not Now
×
Please rate each item regarding Game8.co's Advertisements.
Amount of Ads
Very Dissatisfied
Somewhat Dissatisfied
Fine
Somewhat Satisfied
Highly Satisfied
Placement of Ads
Timing of Ad Display
Ad Loading Speed
Safeness of Ads
Content of Ads
×
Please rate each item regarding Game8.co's Quality of Articles.
Amount of information
Very Dissatisfied
Somewhat Dissatisfied
Fine
Somewhat Satisfied
Highly Satisfied
Frequency of updates
Speed of new information
Accuracy of articles
Understandibility of articles
Readability of sentences
×
Please rate each item regarding Game8.co's Usability of the Site.
Ease of finding information
Very Dissatisfied
Somewhat Dissatisfied
Fine
Somewhat Satisfied
Highly Satisfied
Loading Speed
Use of Color
Font Size
Visibility of Images
Easy to Understand Layout
×
Please rate each item regarding Game8.co's Message Boards, Comments.
Ease of Writing
Very Dissatisfied
Somewhat Dissatisfied
Fine
Somewhat Satisfied
Highly Satisfied
Readability
Ease in Finding Information
Comment Quality
Comment Quantity
Admin Response
×
Please rate each item regarding Game8.co's Site's new design.
Please rate our site's new design
Very Dissatisfied
Somewhat Dissatisfied
Fine
Somewhat Satisfied
Highly Satisfied
Do you think that the website's design change makes the site easier to use?
Has the new design made it easier for you to find information on the site?
Has the new design improved the overall visual appeal of the site?
How would you rate your overall satisfaction with the new design of the site?
×
How likely are you to recommend Game8 to someone you know?
Very Unlikely
0
1
2
3
4
5
6
7
8
9
10
Very Likely
If you have other opinions regarding potential improvement to the website, please share them with us. We would appreciate your honest opinion.
Note: This is a free response section, so you can proceed without entering anything.
Note: Please be sure not to enter any kind of personal information into your response.
Note: Please be sure not to enter any kind of personal information into your response.
×
Thank You
×
Thank you for participating in our survey! Your answers will help us to improve the quality of our website and services.
We hope you continue to make use of Game8.
We hope you continue to make use of Game8.
Close
Rankings
- We could not find the message board you were looking for.
Gaming News


![Monster Hunter Stories 3 Review [First Impressions] | Simply Rejuvenating](https://img.game8.co/4438641/2a31b7702bd70e78ec8efd24661dacda.jpeg/thumb)
Popular Games

Genshin Impact Walkthrough & Guides Wiki
Honkai: Star Rail Walkthrough & Guides Wiki
Umamusume: Pretty Derby Walkthrough & Guides Wiki
Pokemon Pokopia Walkthrough & Guides Wiki
Resident Evil Requiem (RE9) Walkthrough & Guides Wiki
Monster Hunter Wilds Walkthrough & Guides Wiki
Wuthering Waves Walkthrough & Guides Wiki
Arknights: Endfield Walkthrough & Guides Wiki
Pokemon FireRed and LeafGreen (FRLG) Walkthrough & Guides Wiki
Pokemon TCG Pocket (PTCGP) Strategies & Guides Wiki


Recommended Games
Diablo 4: Vessel of Hatred Walkthrough & Guides Wiki
Fire Emblem Heroes (FEH) Walkthrough & Guides Wiki
Yu-Gi-Oh! Master Duel Walkthrough & Guides Wiki
Super Smash Bros. Ultimate Walkthrough & Guides Wiki
Pokemon Brilliant Diamond and Shining Pearl (BDSP) Walkthrough & Guides Wiki
Elden Ring Shadow of the Erdtree Walkthrough & Guides Wiki
Monster Hunter World Walkthrough & Guides Wiki
The Legend of Zelda: Tears of the Kingdom Walkthrough & Guides Wiki
Persona 3 Reload Walkthrough & Guides Wiki
Cyberpunk 2077: Ultimate Edition Walkthrough & Guides Wiki


All rights reserved
©2020 Nintendo
The copyrights of videos of games used in our content and other intellectual property rights belong to the provider of the game.
The contents we provide on this site were created personally by members of the Game8 editorial department.
We refuse the right to reuse or repost content taken without our permission such as data or images to other sites.
The toad that appears after the earth vellumental is wrong, I got the toad before facing the earth vellumental. I think I went to the the top of the mountain then back down and it was there.