This survey will take about 1 minute.
Your answers will help us to improve our website.
Paper Mario: The Origami King (Switch)
Diamond Island 100% Walkthrough | Collectibles, Toads, and Hidden Block Locations
This is a walkthrough for Diamond Island in Paper Mario: The Origami King. Read on to learn locations for all Diamond Island collectible treasures, hidden toads, hidden blocks, and confetti holes, as well as other useful tips and strategies for getting through this area.
| Previous Area | Ice Vellumental Mountain |
|---|---|
| Current Area | Diamond Island |
| Next Area | Sea Tower |
List of Contents
- Where to Find Diamond Island
- Diamond Island Location
- Diamond Island Walkthrough
- Diamond Island
- Trial of Power
- Trial of Wisdom
- Trial of Courage
- Diamond Island Video Walkthrough
- Tips and Strategies
- Diamond Island Toad Locations
- Diamond Island Collectible Treasure Locations
- Diamond Island ? Block (Hidden Block) Locations
- Diamond Island Not-Bottomless (Confetti) Hole Locations
- Story Walkthrough Related Links
Where to Find Diamond Island

Diamond Island can be found by finding the clues on Heart, Club, and Spade Island. However, this puzzle can be skipped entirely after finding the Diamond Key by submerging in the right spot.
The complete process to reach Diamond Island is detailed in our complete guide below.
Diamond Island Location

1.) The red X's represent Treasure locations
2.) The Princess Peach's location will change. It is represented by the pink ship.
| Letter | Island |
|---|---|
| A | Bonehead Island |
| B | Crescent / Moon Island |
| C | Mushroom Island |
| D | Heart Island |
| E | Spade Island |
| F | Club Island |
| G | Diamond Island |
| H | Sea Tower |
| I | Scuffle Island |
| J | ? Island |
| K | Hammer Island |
Diamond Island Walkthrough
Diamond Island
| Objectives | |
|---|---|
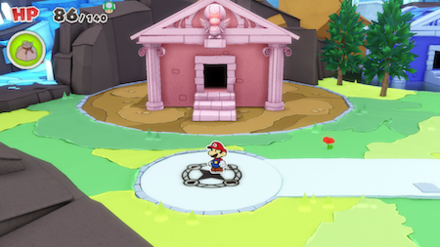
| 1 | Go down from the Ice Vellumental Mountain. In front of the Red Temple, step onto the rainbow-colored Magic Circle. Rainbow-colored Magic Circles give Olivia the power to transform into any Vellumental. Transform into the Earth Vellumental to lower the Red Temple and gain access to it. Go inside the Red Temple to start the Trial of Power. |
| 2 |
 Inside the Red Temple, check the statue towards the back wall, to reveal a small magic circle in the center of the room. Step onto the small magic circle to begin the Trial of Power. |
Trial of Power
| Objectives | |
|---|---|
| 1 |
 Enlarge Enlarge
Jump to break varying sizes of Blocks, with varying numbers of required hits, within 30 seconds. Small Blocks require 1 hit to destroy. Medium Blocks require 3 hits to destroy. Large Blocks require 6 hits to destroy. After completing each stage, step on the small magic circle that appears, to proceed to the next stage. |
| 2 |
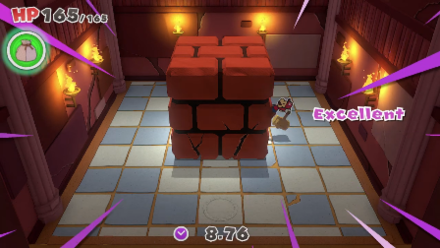 Enlarge Enlarge
Use your Hammer to destroy varying sizes of Blocks, with varying numbers of required hits, within 50 seconds. Press B to charge your Hammer, then press A to swing it. To save time, don't charge your Hammer when hitting small Blocks. Scoring an Excellent hit will count for 3 normal Hammer swings. |
| 3 |
 Enlarge Enlarge
Objective: smash the giant nail into the floor within 40 seconds. Wait for the steps to appear, go to the top of the giant nail, and the stage's buttons and controls will be explained. For best results, chain jump combos in the beginning, then finish it off with Excellent Hammer hits. Press B to charge, then A to swing the Hammer. Press A to jump, then as you land, A again to chain attacks (max 4). |
| 4 |
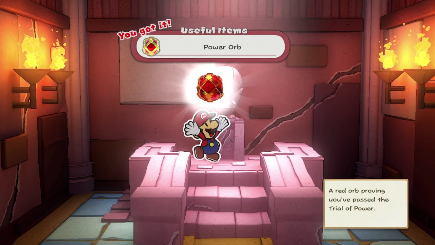 After completing the Final Stage, get the Power Orb in the next room, and exit the Red Temple. |
Trial of Wisdom
| Objectives | |
|---|---|
| 1 | Head east to the Blue Temple and stand in the rainbow-colored Magic Circle. Freeze the water using the Ice Vellumental. Once the water is frozen, enter the Blue Temple. |
| 2 |
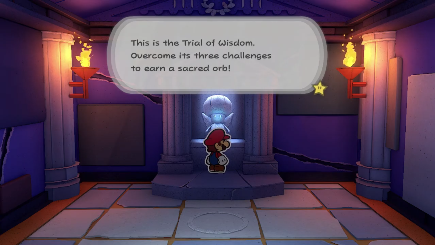 Interact with the Toad statue to start the Trial of Wisdom. |
| 3 | Trial of Wisdom: Stage 1 Correctly answer a question in-game details, within 20 seconds. Jump onto the blue checkmark for Yes and jump onto the red X for no. |
| 4 | Trial of Wisdom: Stage 2 Works just like Stage 1, but with a more difficult question. |
| 5 |
 Trial of Wisdom: Final Stage Trial of Wisdom: Final StageThe final stage is a logic puzzle. There will be either two Toads telling the truth or one liar, or two liars and one Toad telling the truth. Speak with Toads A, B, and C and judge the odd Toad out. Trial of Wisdom Questions and Answers |
| 6 |
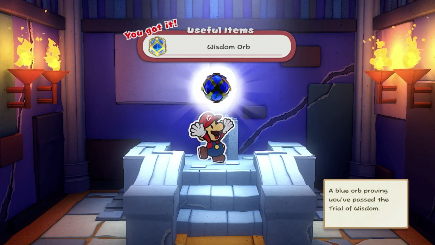 After completing the Final Stage, get the Wisdom Orb in the next room, and exit the Blue Temple. |
Trial of Courage
| Objectives | |
|---|---|
| 1 | Head east to the Green Temple and stand in the rainbow-colored Magic Circle. Surround it with water using the Water Vellumental, and freeze the water with the Ice Vellumental. Once the water is frozen, enter the Green Temple. |
| 2 |
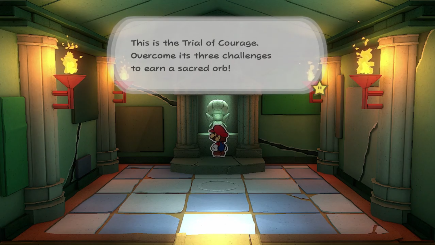 Complete the Trial of Courage. |
| 3 |
 Enlarge Enlarge
Press A to pull a rope and drop an iron weight from above. Once the weight is below where the arrow is pointing, press A again to stop it from falling. Be careful not to stop it too late, as it will flatten Mario and you will have to restart the trial. The items are measured from the bottom, so even if the top of the weight is slightly above the line, it will be counted as a pass. |
| 4 |
 Enlarge Enlarge
Works just like Stage 1, but with the arrow pointing lower and closer to Mario. |
| 5 |
 Enlarge Enlarge
Works just like Stage 2, but the item is a Thwomp that falls faster. Pull the rope when the bottom of the Thwomp passes the line. |
| 6 |
 After completing the Final Stage, get the Courage Orb in the next room, and exit the Green Temple. |
| 7 | Return to the submarine and head to Sea Tower. |
Diamond Island Video Walkthrough
Tips and Strategies
Trial of Wisdom Easy Mode
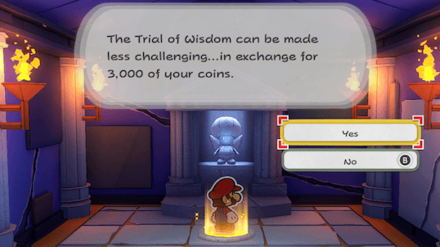
If you're having trouble answering the questions on the Trial of Wisdom, you can fail the trial once and try again on an easier difficulty in exchange for 3,000 coins.
Otherwise, the complete answers for the Trial of Wisdom can be found in our complete guide, so check it out if you're getting stuck and want to save your money!
Trial of Wisdom Questions and Answers
Diamond Island Toad Locations
0 Locations Total
There are no Toads hiding on Diamond Island.
Diamond Island Collectible Treasure Locations
0 Locations Total
There are no collectible Treasures in Diamond Island.
Diamond Island ? Block (Hidden Block) Locations
0 Locations Total
There are no ? Blocks on Diamond Island.
Diamond Island Not-Bottomless (Confetti) Hole Locations
0 Locations Total
There are no Confetti Holes on Diamond Island.
Story Walkthrough Related Links
Main Story Walkthrough
Other Story Guides
| Location | Guide |
|---|---|
| Whispering Woods |
How to Walk Over Spiky Ground How to Start the Campfire |
| Toad Town |
How to Get the Toad Town Chest How to Get the Sewer Hook (Manhole Hook) |
| Overlook Mountain |
Where to Find All Shell Stones Best Green Shell Stone Price How to Get the Blue Shell Stone |
| Overlook Tower | Kitchen Goomba Locations |
| Autumn Mountain |
How to Save Bobby (Bob-omb) How to Open the Can |
| Water Vellumental Shrine | How to Solve the Water Puzzle |
| Snif City | How to Guess the Snifit Mood |
| Scorching Sandpaper Desert | Where to Find the Jewels |
| Temple of Shrooms |
How to Find All 40 Faceless Toads A Star Lights Your Way Puzzle Solution |
| The Great Sea |
How to Find Diamond Island Trial of Wisdom Quiz Answers |
| Several Locations | Where is Luigi? |
| Ending | How to Get the Secret Ending |
Comment
3  Kainos Teleos over 5 years
There is at least 1 treasure spot missing in the map shown here. There is another one around the 4 area transition between E-1, E2, F1 and F2. Look at my picture for a more precise Info.
Author

Paper Mario: The Origami King (Switch) Walkthrough & Guides Wiki
Diamond Island 100% Walkthrough | Collectibles, Toads, and Hidden Block Locations
Please participate in our site
improvement survey
03/2026
improvement survey
03/2026
Would you assist in
improving Game8's site?
improving Game8's site?

×
We are listening to our users' valuable opinions and discussing how to act on them.
The information collected through this survey will be used for the purpose of improving our services. In addition, the information will only be disclosed a part of a statistic in a format that will not allow identification of personal information.
Begin Survey
Not Now
×
Please rate each item regarding Game8.co's Advertisements.
Amount of Ads
Very Dissatisfied
Somewhat Dissatisfied
Fine
Somewhat Satisfied
Highly Satisfied
Placement of Ads
Timing of Ad Display
Ad Loading Speed
Safeness of Ads
Content of Ads
×
Please rate each item regarding Game8.co's Quality of Articles.
Amount of information
Very Dissatisfied
Somewhat Dissatisfied
Fine
Somewhat Satisfied
Highly Satisfied
Frequency of updates
Speed of new information
Accuracy of articles
Understandibility of articles
Readability of sentences
×
Please rate each item regarding Game8.co's Usability of the Site.
Ease of finding information
Very Dissatisfied
Somewhat Dissatisfied
Fine
Somewhat Satisfied
Highly Satisfied
Loading Speed
Use of Color
Font Size
Visibility of Images
Easy to Understand Layout
×
Please rate each item regarding Game8.co's Message Boards, Comments.
Ease of Writing
Very Dissatisfied
Somewhat Dissatisfied
Fine
Somewhat Satisfied
Highly Satisfied
Readability
Ease in Finding Information
Comment Quality
Comment Quantity
Admin Response
×
Please rate each item regarding Game8.co's Site's new design.
Please rate our site's new design
Very Dissatisfied
Somewhat Dissatisfied
Fine
Somewhat Satisfied
Highly Satisfied
Do you think that the website's design change makes the site easier to use?
Has the new design made it easier for you to find information on the site?
Has the new design improved the overall visual appeal of the site?
How would you rate your overall satisfaction with the new design of the site?
×
How likely are you to recommend Game8 to someone you know?
Very Unlikely
0
1
2
3
4
5
6
7
8
9
10
Very Likely
If you have other opinions regarding potential improvement to the website, please share them with us. We would appreciate your honest opinion.
Note: This is a free response section, so you can proceed without entering anything.
Note: Please be sure not to enter any kind of personal information into your response.
Note: Please be sure not to enter any kind of personal information into your response.
×
Thank You
×
Thank you for participating in our survey! Your answers will help us to improve the quality of our website and services.
We hope you continue to make use of Game8.
We hope you continue to make use of Game8.
Close
Rankings
- We could not find the message board you were looking for.
Gaming News


![Everwind Review [Early Access] | The Shaky First Step to A Very Long Journey](https://img.game8.co/4440226/ab079b1153298a042633dd1ef51e878e.png/thumb)

![Monster Hunter Stories 3 Review [First Impressions] | Simply Rejuvenating](https://img.game8.co/4438641/2a31b7702bd70e78ec8efd24661dacda.jpeg/thumb)
Popular Games

Genshin Impact Walkthrough & Guides Wiki
Honkai: Star Rail Walkthrough & Guides Wiki
Umamusume: Pretty Derby Walkthrough & Guides Wiki
Pokemon Pokopia Walkthrough & Guides Wiki
Resident Evil Requiem (RE9) Walkthrough & Guides Wiki
Monster Hunter Wilds Walkthrough & Guides Wiki
Wuthering Waves Walkthrough & Guides Wiki
Arknights: Endfield Walkthrough & Guides Wiki
Pokemon FireRed and LeafGreen (FRLG) Walkthrough & Guides Wiki
Pokemon TCG Pocket (PTCGP) Strategies & Guides Wiki


Recommended Games
Diablo 4: Vessel of Hatred Walkthrough & Guides Wiki
Fire Emblem Heroes (FEH) Walkthrough & Guides Wiki
Yu-Gi-Oh! Master Duel Walkthrough & Guides Wiki
Super Smash Bros. Ultimate Walkthrough & Guides Wiki
Pokemon Brilliant Diamond and Shining Pearl (BDSP) Walkthrough & Guides Wiki
Elden Ring Shadow of the Erdtree Walkthrough & Guides Wiki
Monster Hunter World Walkthrough & Guides Wiki
The Legend of Zelda: Tears of the Kingdom Walkthrough & Guides Wiki
Persona 3 Reload Walkthrough & Guides Wiki
Cyberpunk 2077: Ultimate Edition Walkthrough & Guides Wiki


All rights reserved
©2020 Nintendo
The copyrights of videos of games used in our content and other intellectual property rights belong to the provider of the game.
The contents we provide on this site were created personally by members of the Game8 editorial department.
We refuse the right to reuse or repost content taken without our permission such as data or images to other sites.
Definitely changes every time. It was just B for me