 Anjanath
 Barroth
 Bazelgeuse
 Behemoth
 Deviljho
 Diablos
 Dodogama
 Great Girros
 Great Jagras
 Jyuratodus
 Kirin
Kirin Kulu-Ya-Ku
 Kulve Taroth
 Kushala Daora
 Lavasioth
 Legiana
 Leshen
 Lunastra
 Nergigante
 Odogaron
 Paolumu
 Pukei-Pukei
 Radobaan
 Rathalos
 Rathian
 Teostra
 Tobi-Kadachi
 Tzitzi-Ya-Ku
 Uragaan
 Vaal Hazak
 Xeno'jiiva
 Zorah Magdaros
 Arch-Tempered Great Jagras
 Arch-Tempered Kirin
 Arch-Tempered Kulve Taroth
 Arch-Tempered Kushala Daora
 Arch-Tempered Lunastra
 Arch-Tempered Nergigante
 Arch-Tempered Teostra
 Arch-Tempered Vaal Hazak
 Arch-Tempered Xeno'jiiva
 Arch-Tempered Zorah Magdaros
This survey will take about 1 minute.
Your answers will help us to improve our website.
Monster Hunter World (MHW)
Kulu-Ya-Ku Weakness and Strategy Guide
★ 2025/2/28: Monster Hunter Wilds is now available!
Join the hunt at our Monster Hunter Wilds Wiki!
Learn how to beat Kulu-Ya-Ku in the game Monster Hunter World (MHW)! This guide explains everything about Kulu-Ya-Ku's weakness, carves, rewards, and a complete strategy guide for beating and capturing it. Find out what parts are breakable and severable, and what drops and Monster materials are available.
| All Kulu-Ya-Ku Articles | ||
|---|---|---|
|
|
1 | ⍺ | β | ⍺ | ⍺+ | β+ |
|
List of Contents
Kulu-Ya-Ku Weakness, Body Parts, and Resistances
Kulu-Ya-Ku Characteristics
 |
|||||
| Roar | Wind | Tremor | Blight | Status | |
|---|---|---|---|---|---|
| None | None | None | None | None | |
| Breakable Parts | |||||
| Head, Hindlegs | |||||
Locations and Areas Visited
| Map | Starting Area | Visited Areas | Rest Spot |
|---|---|---|---|
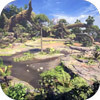 Ancient Forest Ancient Forest
|
5 | 1 / 2 / 4 / 6 / 8 / 9 / 12 / 14 / 15 / 16 | 7 |
 Wildspire Waste Wildspire Waste
|
5 | 4 / 5 / 6 / 7 / 8 / 9 / 10 / 11 / 12 | 6 |
*The starting location may change depending on the Quest.
Weakness, Body Parts, Extracts
Head
| Sever | Break | Bomb | Fire | Extract |
|---|---|---|---|---|
| 68 | 68 | 60 | 15 | Red |
| Water | Thunder | Ice | Dragon | |
| 20 | 15 | 15 | 15 |
Hindlegs
| Sever | Break | Bomb | Fire | Extract |
|---|---|---|---|---|
| 52 | 56 | 45 | 15 | Red |
| Water | Thunder | Ice | Dragon | |
| 20 | 15 | 15 | 15 |
Torso
| Sever | Break | Bomb | Fire | Extract |
|---|---|---|---|---|
| 45 | 45 | 40 | 15 | White |
| Water | Thunder | Ice | Dragon | |
| 20 | 15 | 15 | 15 |
Tail
| Sever | Break | Bomb | Fire | Extract |
|---|---|---|---|---|
| 55 | 50 | 35 | 15 | Red |
| Water | Thunder | Ice | Dragon | |
| 20 | 15 | 15 | 15 |
Higher values indicate higher damage.
Vulnerability to Status Effects and Items
| Poison | ★★ | Flash | ★★ |
|---|---|---|---|
| Paral | ★★ | Shock | ★★ |
| Sleep | ★★ | Pitfall | ★★ |
| Stun | ★★ | Ivy | ★★ |
| Blast | ★★ | Dung | ★★ |
| Exhaust | ★ | Meat | ❌ |
| Mount | ★ | Screamer | ❌ |
Countermeasures against Kulu-Ya-Ku
Recommended Weapon Element and Armor Skills
| Recommended Weapon Element | |
|---|---|
| Water Weapon | Kulu-Ya-Ku is weakest against water. |
| Recommended Armor Skills | |
| Water Attack | Since you do not need a lot of skills to fight Kulu-Ya-Ku, you can invest in a few Water Attack levels to make your water weapon stronger. |
| Mind's Eye/Ballistics | If you do not want to waste time to trying to get Kulu-Ya-Ku to drop his rock, you can also bring Mind's Eye/Ballistics to stop having your weapon bounce on it. |
| Stun Resistance | Kulu-Ya-Ku's rock attacks can cause stun more easily, which can easily lead to you getting carted. If you are not doing well in dodging him, consider putting Stun Resistance in your build. |
How to Beat Kulu-Ya-Ku
Kulu-Ya-Ku Rock

Kulu-Ya-Ku has a unique characteristic wherein he holds a small rock in front of him to use as a weapon and as a shield to bounce off melee weapons.
It is recommended that you focus on attacking Kulu-Ya-Ku on the sides when he is holding a rock or you can try to drop his rock by using a Flash Pod directly on to his head.
Jump Attack
Kulu-Ya-Ku's jump attack can be dangerous because of its fast animation. Stay alert and always be prepared to dodge or keep your distance to avoid getting hit by this attack.
Also, after Kulu-Ya-Ku performs his jump attack, he will be stationary for a few seconds. You can use this opportunity to attack and dish out some damage for efficiency.
Kulu-Ya-Ku Attack Patterns
| Attack | Attack Power | Guardable | Exhaustion |
|---|---|---|---|
| Peck | 20 | ◯ | 5 |
| Scratch | 30 | ◯ | 10 |
| Jump Attack (Holding Rock) | 80 | ◯ | 100 |
| Jump Attack | 20 | ◯ | 0 |
| Rock Thrust | 40 | ◯ | 80 |
| Rock Rush | 30 | ◯ | 15 |
| Rock Crush | 70 | ◯ | 0 |
| Rock Attack | 70 | ◯ | 0 |
Kulu-Ya-Ku Carves and Rewards
Carvings and Hunt Rewards
| Obtain Rate (%) | |
|---|---|
| LR |
Kulu-Ya-Ku Scale
/ Body 36 Kulu-Ya-Ku Hide / Body 28 Kulu-Ya-Ku Beak / Body 21 Kulu-Ya-Ku Plume / Body 15 |
| HR |
Bird Wyvern Gem
/ Body 5 Kulu-Ya-Ku Scale+ / Body 34 Kulu-Ya-Ku Hide+ / Body 27 Kulu-Ya-Ku Beak+ / Body 20 Kulu-Ya-Ku Plume+ / Body 14 |
| MR |
Fey Wyvern Gem
/ Body 5 Kulu-Ya-Ku Shard / Body 34 Kulu-Ya-Ku Thickhide / Body 27 Large Kulu-Ya-Ku Beak / Body 20 Large Kulu-Ya-Ku Plume / Body 14 |
Rewards for Each Body Part
| Obtain Rate (%) | |
|---|---|
| LR |
Kulu-Ya-Ku Plume
/ Hindlegs 100 Kulu-Ya-Ku Beak / Head 100 |
| HR |
Kulu-Ya-Ku Plume+
/ Hindlegs 100 Kulu-Ya-Ku Beak+ / Head 100 |
| MR |
Large Kulu-Ya-Ku Plume
/ Hindlegs 100 Large Kulu-Ya-Ku Beak / Head 100 |
Breakable Body Parts
| Defense Value | How to Break | |
|---|---|---|
| Head | 180 | Set durability to 0, twice. |
| Torso | 200 | - |
| Legs | 160 | - |
| Tail | 150 | - |
Shiny Drops
| Obtain Rate (%) | |
|---|---|
| LR Drops |
Kulu-Ya-Ku Scale
/ 50 Kulu-Ya-Ku Plume / 28 Wyvern Tear / 22 |
| HR Drops |
Kulu-Ya-Ku Scale+
/ 50 Kulu-Ya-Ku Plume+ / 28 Wyvern Tear / 22 |
| MR Drops |
Kulu-Ya-Ku Shard
/ 50 Large Kulu-Ya-Ku Plume / 28 Large Wyvern Tear / 22 |
Quest Clear & Investigation Rewards
| Obtain Rate (%) | |
|---|---|
| LR Quest |
Kulu-Ya-Ku Beak
/ 9 Kulu-Ya-Ku Hide / 32 Kulu-Ya-Ku Scale / 23 Kulu-Ya-Ku Plume / 20 Monster Bone S / 16 |
| LR Silver |
Kulu-Ya-Ku Plume
/ 30 Kulu-Ya-Ku Hide / 25 Kulu-Ya-Ku Beak / 25 Kulu-Ya-Ku Scale / 20 |
| LR Gold |
Kulu-Ya-Ku Plume
/ 40 Kulu-Ya-Ku Beak / 30 Kulu-Ya-Ku Hide / 16 Kulu-Ya-Ku Scale / 14 |
| HR Quest |
Kulu-Ya-Ku Hide+
/ 32 Bird Wyvern Gem / 3 Kulu-Ya-Ku Scale+ / 21 Monster Bone+ / 18 Kulu-Ya-Ku Plume+ / 15 Kulu-Ya-Ku Beak+ / 11 |
| HR Silver |
Kulu-Ya-Ku Plume+
/ 28 Kulu-Ya-Ku Beak+ / 23 Kulu-Ya-Ku Hide+ / 20 Kulu-Ya-Ku Scale+ / 18 Bird Wyvern Gem / 11 |
| HR Gold |
Kulu-Ya-Ku Plume+
/ 30 Kulu-Ya-Ku Beak+ / 24 Bird Wyvern Gem / 17 Kulu-Ya-Ku Hide+ / 16 Kulu-Ya-Ku Scale+ / 13 |
| MR Quest |
Kulu-Ya-Ku Thickhide
/ 32 Fey Wyvern Gem / 3 Kulu-Ya-Ku Shard / 21 Monster Toughbone / 18 Large Kulu-Ya-Ku Beak / 11 Large Kulu-Ya-Ku Plume / 11 |
Plunderblade Rewards
Plunderblade
| Obtain Rate (%) | |
|---|---|
| LR |
Kulu-Ya-Ku Scale
/ 43 Kulu-Ya-Ku Hide / 35 Kulu-Ya-Ku Plume / 22 |
| HR |
Kulu-Ya-Ku Scale+
/ 43 Kulu-Ya-Ku Hide+ / 33 Kulu-Ya-Ku Plume+ / 22 Bird Wyvern Gem / 2 Bird Wyvern Gem / 2 |
| MR |
Kulu-Ya-Ku Shard
/ 43 Kulu-Ya-Ku Thickhide / 33 Large Kulu-Ya-Ku Plume / 22 Fey Wyvern Gem / 2 |
Palarang
| Obtain Rate (%) | |
|---|---|
| MR |
Kulu-Ya-Ku Shard
/ 50 Large Kulu-Ya-Ku Plume / 28 Large Wyvern Tear / 22 |
Quests Where Kulu-Ya-Ku Appears
| Type | Quest Name |
|---|---|
| Assigned | ★2 - Bird-Brained Bandit |
| Optional | ★2 - Big Brained Bandit |
| Optional | ★2 - Camp Crasher |
| Optional | ★3 - Gettin' Yolked In The Waste |
| Optional | ★6 - Keep Your Hands To Yourself! |
| Optional | ★6 - Up To Your Waist In The Waste |
| Optional | ★6 - Brown Desert, Green Queen |
| Event | ★4 - Ya-Ku With That? |
| Event | ★7 - Wildspire Bolero |
| Event | ★6 - Egg Lovers United |
| Challenge | ★2 - Challenge Quest 1: Beginner |
| Special Assignment | ★6 - A Visitor from Another World |
| Optional | M★1 - Literary Thief |
| Optional | M★1 - Wildspire Treasure Hunt |
| Optional | M★1 - Taster's Tour |
| Optional | M★1 - Jyura in My Way |
| Event | M★2 - Colorful Carnival |
| Optional | ★2 - Snatch the Snatcher |
| Arena Quest | ★2 - Arena Quest 2 |
Related Links
All Monster Guides

List of All Base Game Monsters
MHW (Base Game) Monsters
Colored Variants
 Ancient Leshen Ancient Leshen
|
 Azure Rathalos Azure Rathalos
|
 Black Diablos Black Diablos
|
 Pink Rathian Pink Rathian
|
Arch-Tempered Elder Dragons
Monsters by Game
| All Monsters by Game | |
|---|---|
 Iceborne Iceborne |
 Monster Hunter World Monster Hunter World |
Comment
Author

Kulu-Ya-Ku Weakness and Strategy Guide
Please participate in our site
improvement survey
03/2026
improvement survey
03/2026
Would you assist in
improving Game8's site?
improving Game8's site?

×
We are listening to our users' valuable opinions and discussing how to act on them.
The information collected through this survey will be used for the purpose of improving our services. In addition, the information will only be disclosed a part of a statistic in a format that will not allow identification of personal information.
Begin Survey
Not Now
×
Please rate each item regarding Game8.co's Advertisements.
Amount of Ads
Very Dissatisfied
Somewhat Dissatisfied
Fine
Somewhat Satisfied
Highly Satisfied
Placement of Ads
Timing of Ad Display
Ad Loading Speed
Safeness of Ads
Content of Ads
×
Please rate each item regarding Game8.co's Quality of Articles.
Amount of information
Very Dissatisfied
Somewhat Dissatisfied
Fine
Somewhat Satisfied
Highly Satisfied
Frequency of updates
Speed of new information
Accuracy of articles
Understandibility of articles
Readability of sentences
×
Please rate each item regarding Game8.co's Usability of the Site.
Ease of finding information
Very Dissatisfied
Somewhat Dissatisfied
Fine
Somewhat Satisfied
Highly Satisfied
Loading Speed
Use of Color
Font Size
Visibility of Images
Easy to Understand Layout
×
Please rate each item regarding Game8.co's Message Boards, Comments.
Ease of Writing
Very Dissatisfied
Somewhat Dissatisfied
Fine
Somewhat Satisfied
Highly Satisfied
Readability
Ease in Finding Information
Comment Quality
Comment Quantity
Admin Response
×
Please rate each item regarding Game8.co's Site's new design.
Please rate our site's new design
Very Dissatisfied
Somewhat Dissatisfied
Fine
Somewhat Satisfied
Highly Satisfied
Do you think that the website's design change makes the site easier to use?
Has the new design made it easier for you to find information on the site?
Has the new design improved the overall visual appeal of the site?
How would you rate your overall satisfaction with the new design of the site?
×
How likely are you to recommend Game8 to someone you know?
Very Unlikely
0
1
2
3
4
5
6
7
8
9
10
Very Likely
If you have other opinions regarding potential improvement to the website, please share them with us. We would appreciate your honest opinion.
Note: This is a free response section, so you can proceed without entering anything.
Note: Please be sure not to enter any kind of personal information into your response.
Note: Please be sure not to enter any kind of personal information into your response.
×
Thank You
×
Thank you for participating in our survey! Your answers will help us to improve the quality of our website and services.
We hope you continue to make use of Game8.
We hope you continue to make use of Game8.
Close
Rankings
- We could not find the message board you were looking for.
Gaming News


![Monster Hunter Stories 3 Review [First Impressions] | Simply Rejuvenating](https://img.game8.co/4438641/2a31b7702bd70e78ec8efd24661dacda.jpeg/thumb)

Popular Games

Genshin Impact Walkthrough & Guides Wiki
Honkai: Star Rail Walkthrough & Guides Wiki
Umamusume: Pretty Derby Walkthrough & Guides Wiki
Pokemon Pokopia Walkthrough & Guides Wiki
Resident Evil Requiem (RE9) Walkthrough & Guides Wiki
Monster Hunter Wilds Walkthrough & Guides Wiki
Wuthering Waves Walkthrough & Guides Wiki
Arknights: Endfield Walkthrough & Guides Wiki
Pokemon FireRed and LeafGreen (FRLG) Walkthrough & Guides Wiki
Pokemon TCG Pocket (PTCGP) Strategies & Guides Wiki


Recommended Games
Diablo 4: Vessel of Hatred Walkthrough & Guides Wiki
Fire Emblem Heroes (FEH) Walkthrough & Guides Wiki
Yu-Gi-Oh! Master Duel Walkthrough & Guides Wiki
Super Smash Bros. Ultimate Walkthrough & Guides Wiki
Pokemon Brilliant Diamond and Shining Pearl (BDSP) Walkthrough & Guides Wiki
Elden Ring Shadow of the Erdtree Walkthrough & Guides Wiki
Monster Hunter World Walkthrough & Guides Wiki
The Legend of Zelda: Tears of the Kingdom Walkthrough & Guides Wiki
Persona 3 Reload Walkthrough & Guides Wiki
Cyberpunk 2077: Ultimate Edition Walkthrough & Guides Wiki


All rights reserved
©CAPCOM CO., LTD. 2018, 2019 ALL RIGHTS RESERVED.
The copyrights of videos of games used in our content and other intellectual property rights belong to the provider of the game.
The contents we provide on this site were created personally by members of the Game8 editorial department.
We refuse the right to reuse or repost content taken without our permission such as data or images to other sites.