This survey will take about 1 minute.
Your answers will help us to improve our website.
Black Myth: Wukong
Chapter 2: Yellow Sand Desolate Dusk Walkthrough Guide
☆ Walkthrough ▶ 1 | 2 | 3 | 4 | 5 | 6 | Endings | NG+
★ All Quests ▶ Man-in-Stone | Boar | Fox
☆ Best Builds | Transformations | Spells | Armor
★ Bosses ▶ Yellow Wind Sage | Captain Wise-Voice
┗ Erlang | 4 Heavenly Kings | Final Boss
A complete walkthrough for Black Myth: Wukong's Chapter 2: Yellow Sand, Desolate Dusk. Read on for a detailed guide for this chapter, including locations of collectables, how to beat the bosses, as well as to unlock the secret area for completing this chapter!
| ◄ Previous Chapter | Next Chapter ► |
|---|---|
| Chapter 1: Black Cloud, Red Fire |
Chapter 3: White Snow, Ice Cold |
Chapter 2: Yellow Sand, Desolate Dusk Guide
| Chapter 2: Yellow Sand, Desolate Dusk | |
|---|---|
 |
|
| Locations |
・Sandgate Village ・Crouching Tiger Temple ・Fright Cliff ・Yellow Wind Formation |
| Secret Location | ・Kingdom of Sahali |
| Yaoguai Chiefs |
・Lang-Li-Guhh-Baw ・Earth Wolf ・Second Prince of Flowing Sands ・King of Flowing Sands ・First Prince of Flowing Sands ・Mother of Stones ・Tiger’s Acolyte ・Gore-Eye Daoist ・Mad Tiger ・"Tiger Vanguard" |
| Yaoguai Kings |
・Tiger Vanguard ・Stone Vanguard ・Shigandang ・Black Loong ・Fuban ・Yellow Wind Sage |
| Characters |
・Man-in-Stone ・Yellow-Robed Squire ・Xu Dog |
Chapter 2: Yellow Sand, Desolate Dusk Walkthrough
| Jump to a Section! | |||||||||||
|---|---|---|---|---|---|---|---|---|---|---|---|
| Sandgate Village | Crouching Tiger Temple | ||||||||||
| Fright Cliff | Yellow Wind Formation | ||||||||||
| Secret Area: Kingdom of Sahali | |||||||||||
Sandgate Village Walkthrough
| # | Sandgate Village Objectives |
|---|---|
| 1 | Village Entrance |
| * | Bottom of the Well |
| 2 | Valley of Despair |
Village Entrance Guide
| Objectives | |
|---|---|
| 1 | 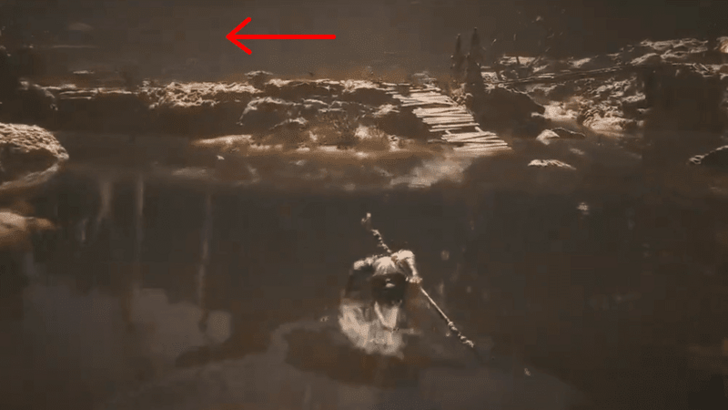 From the starting area, go through the water and towards the left, opposite the big dead tree. |
| 2 | Follow the path upwards until you can see the Sandgate Village. |
| 3 |  Continue following the path until you can drop down to defeat an enemy and unlock the Shrine. |
| * | Optionally, you can head back towards the starting area to explore and pick up any items you find. |
| 4 | Head towards the main gate and drop off the bridge into the ditch. From there, head into the cave. |
| * | 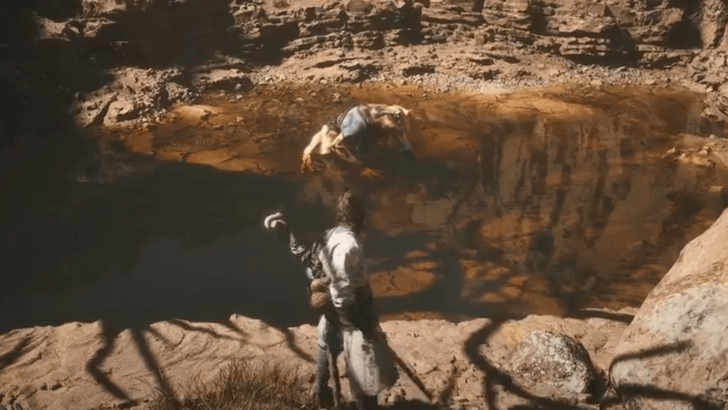 Head forward and down into the pit to defeat Lang-Li-Guhh-Baw for Xu Dog. Make sure to talk to him afterwards to initiate his quest. ▶ How to Beat Lang-Li-Guhh-Baw |
| 5 | Go up the stairs and to the left towards the back area of the village. Defeat enemies and pick up items on the way to the gate on the right. Be careful of the two-headed Rat Captains as they're tough even if they're regular enemies. |
| 6 | 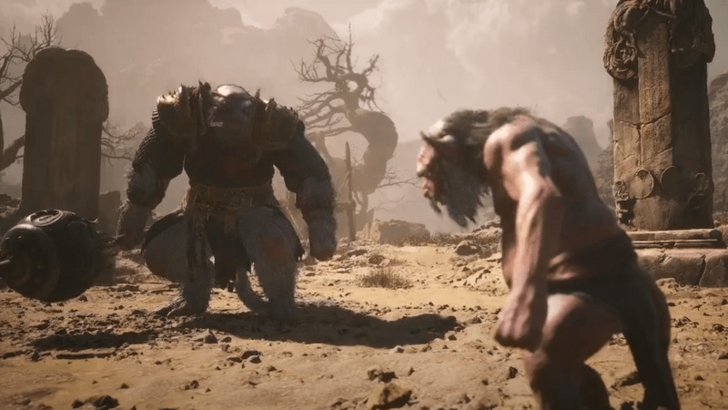 Go through the gate and defeat the King of Flowing Sands and his son, the Second Prince of Flowing Sands. ▶ Second Prince of Flowing Sands Boss Guide |
| 7 | After the fight, head left of the big locked gate to activate the Valley of Despair Shrine. |
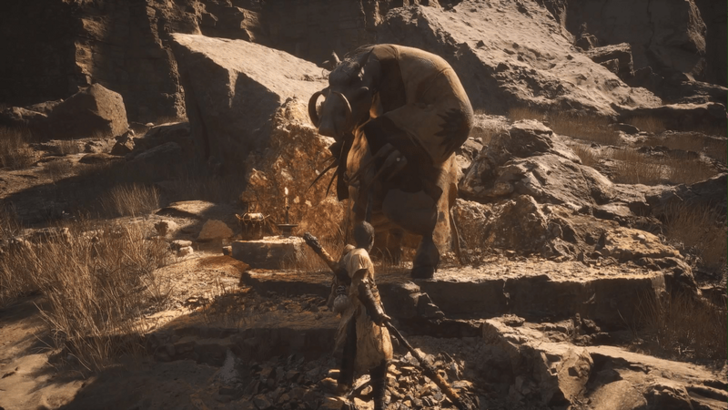
| * | 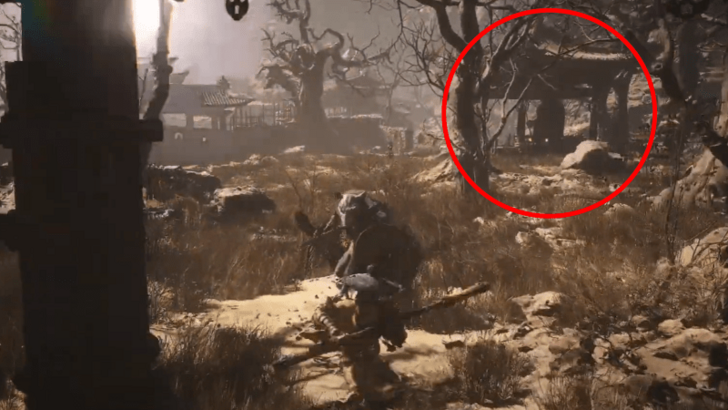 Head back towards the village, and go towards the large pagoda. Ignore the Earth Wolf and talk to the Horse Guai in the Pagoda. You can't free him, so just exhaust all of his dialogue. Once that's done, turn back and defeat the Earth Wolf to claim its Spirit. ▶ How to Beat Earth Wolf |
Bottom of the Well
| Objectives | |
|---|---|
| * | Only accessible after using the Old-Rattle Drum in three locations around Yellow Wind Ridge. ▶ Old Rattle-Drum Quest Guide |
| 1 |  Defeat the Mad Tiger at the bottom of the well. You can die the first time to reset before the boss and activate the shrine. ▶ Mad Tiger Boss Guide |
| 2 | Head to the left side of the arena and pick up the Plaguebane Gourd from the treasure chest. |
Valley of Despair Guide
| Objectives | |
|---|---|
| 1 | 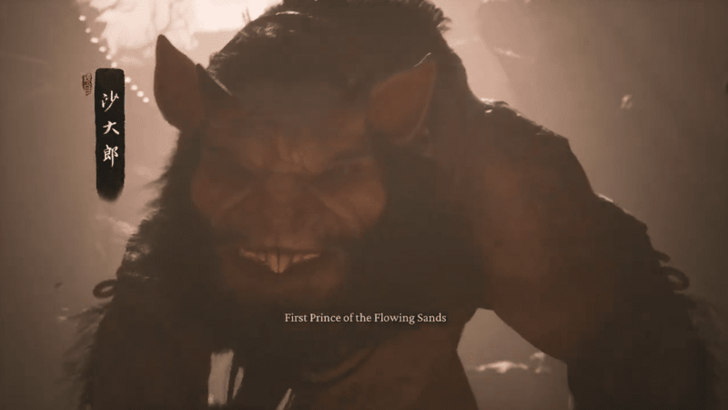 Head into the cave and go left towards the open-lit area. This is the boss arena for the First Prince of Flowing Sands, and its unlock conditions differ depending if you beat the King or Prince first in the previous boss fight. ▶ First Prince of Flowing Sands Boss Guide |
| * | Defeat the First Prince of Flowing Sands to get a drop necessary to unlock the Secret Area for this region. |
| ** | 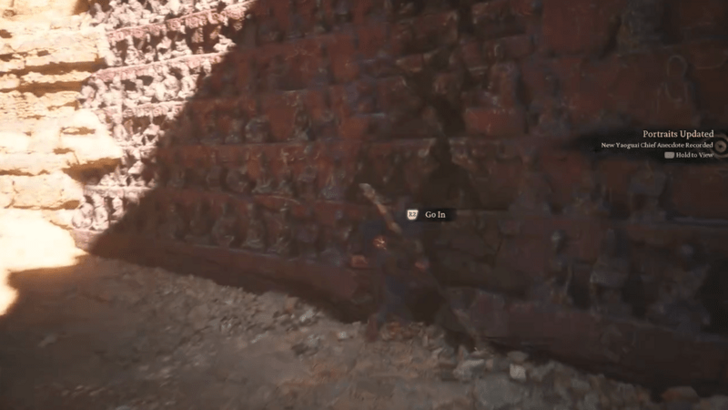 Break the red wall with one of the First Prince's attacks or with one of your Transformations, like the Wandering Wight. This will unlock an area that has the Loong Scales used to unlock the optional Loong bosses. ▶ The Loong Pattern Trophy Guide |
| 3 | 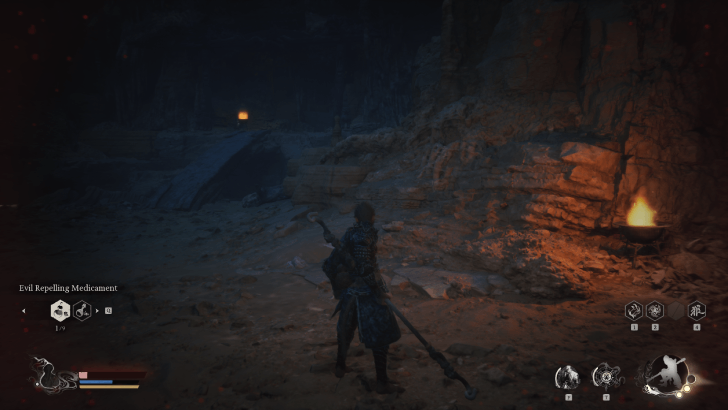 Follow the lit braziers to the left towards a wall that you'll need to squeeze through. |
| 4 | Defeat the Swift Bat and absorb its Spirit. |
| * | Roll through the wooden barricades to get to an area with more Bats and a small treasure chest. |
| 5 | Head out of the cave and back into the sunlight. Follow the path until you reach the Crouching Tiger Temple's Entrance Shrine. |
Crouching Tiger Temple Walkthrough
| # | Crouching Tiger Temple Objectives |
|---|---|
| 1 | Temple Entrance |
| 2 | Cellar |
Temple Entrance Guide
| Objectives | |
|---|---|
| * | Explore the area for items, a treasure chest, and a Meditation Spot. |
| 1 |  When you're ready, head up the stairs to fight the Tiger Vanguard. ▶ Tiger Vanguard (Crouching Tiger Temple) Boss Guide |
| 2 | After the fight, head past the statue and down the stairs. |
| 3 | Follow the path, defeating any enemies and picking up items along the way. |
| 4 | At the top of the path, unlock the Windrest Bridge Shrine. ▶ Jump to Windrest Bridge |
Cellar Guide
| Objectives | |
|---|---|
| * | Unlocked after beating both the Tiger and Stone Vanguards, and activating the statue on top of the pool's stairs. You can also reach this shrine by going down from the Windseal Gate Shrine and heading left before the tornado. Although, you'll lose out on the rewards you get from going through the Crouching Tiger Temple Entrance. |
| 1 | Head down through the mouth and follow the path until you reach the cave area past a doorway. |
| 2 | Defeat the Civet Sergeants and pick up the Spirit and treasure chest rewards after the fight. |
| 3 | Jump and slide down the sand until you reach the Cellar Shrine. Rest here before moving forward. During the small slide, you can jump and use a heavy attack to reach the small chest just above the slide. |
| * | 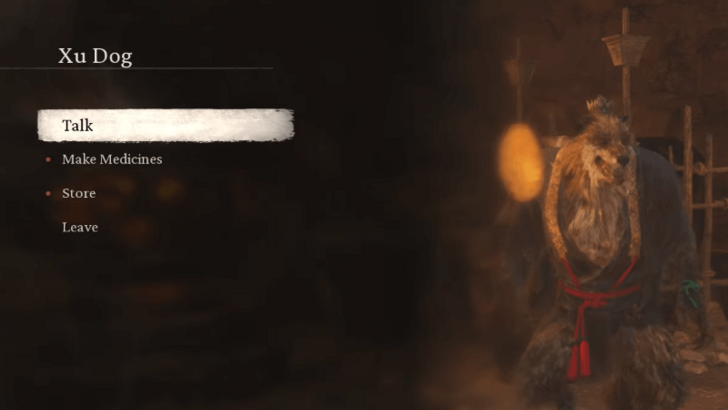 If you've beaten Lang-Li-Guhh-Baw and helped Xu Dog, he will appear to the right of the shrine. This unlocks the ability to make Celestial Medicines to buff your base stats. ▶ Xu Dog Questline Guide |
| 5 | 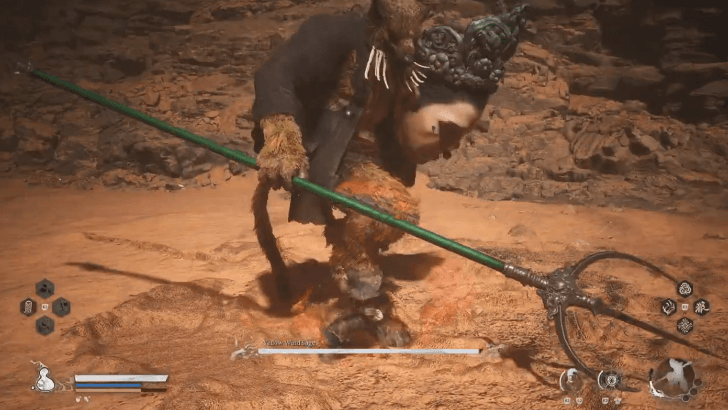 Head down and left to face the final boss of this chapter, the Yellow Wind Sage. ▶ Yellow Wind Sage Boss Guide |
Fright Cliff Walkthrough
| # | Fright Cliff Objectives |
|---|---|
| 1 | Squall Hideout |
| 2 | Rockrest Flat |
| 3 | Hidden Loong Cavern |
| 4 | Rock Crash Platform |
Squall Hideout Guide
| Objectives | |
|---|---|
| 1 | From the Valley of Despair Shrine, turn around and cross the bridge. |
| 2 | Follow the path until you reach the Squall Hideout shrine. |
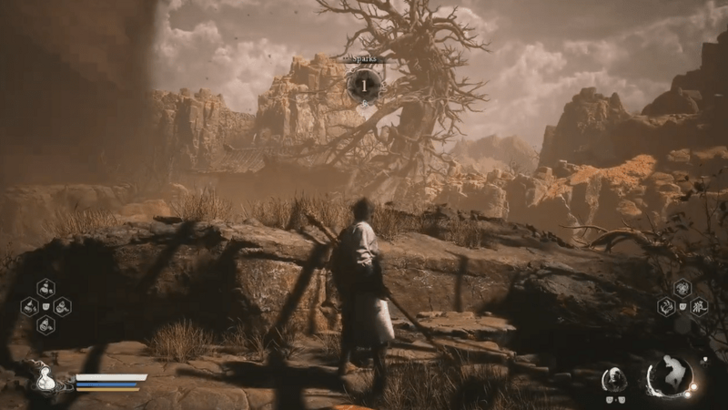
| * | 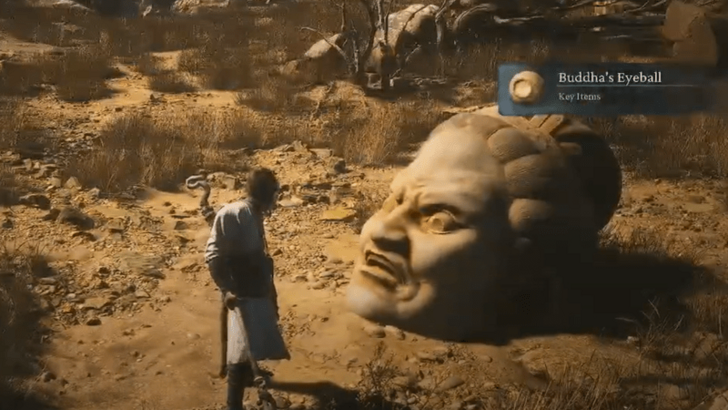 Explore the area for any items and treasures, as well as the 6 Buddha's Eyeballs to unlock the Shigandang boss fight. ▶ All Buddha's Eyeball Locations |
| 4 | From the shrine, take the left path towards the cave full of Stone-type enemies. |
| 5 | 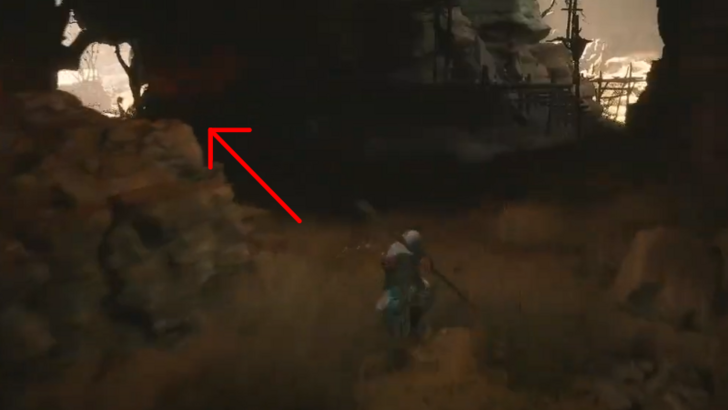 Continue through the cave until you reach a branching point with a Poistone and Blazebones. When you get there, head left. |
| * |  Optionally, follow the braziers on the left to go up and fight the Mother of Stones optional boss. This boss is part of the Man-in-Stone Quest, but can be fought at any time. ▶ Mother of Stones Boss Guide |
| 6 | After turning left, head out to the right to unlock the Rockrest Flat Shrine. |
Rockrest Flat Guide
| Objectives | |
|---|---|
| * | 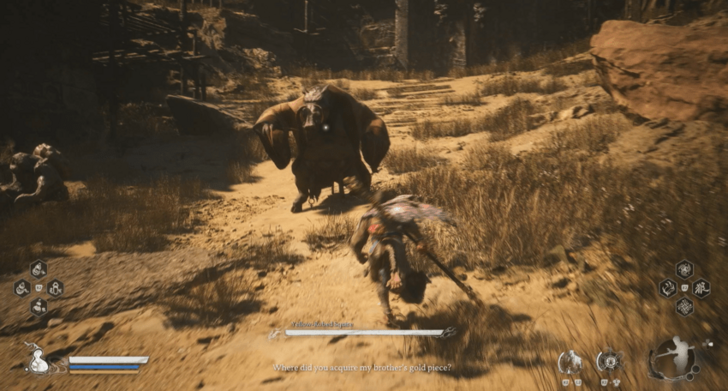 Going straight ahead from the shrine will lead you to the Yellow-Robed Squire for the Drunk Boar Quest. This quest is required to unlock the Secret Area for Chapter 2. ▶ Yellow-Robed Squire Boss Guide |
| ** | Going to the right from the shrine will lead you to the Spearbone Spirit and the sand waterfall that hides the Hidden Loong Cavern. ▶ Jump to the Hidden Loong Cavern |
| 1 | 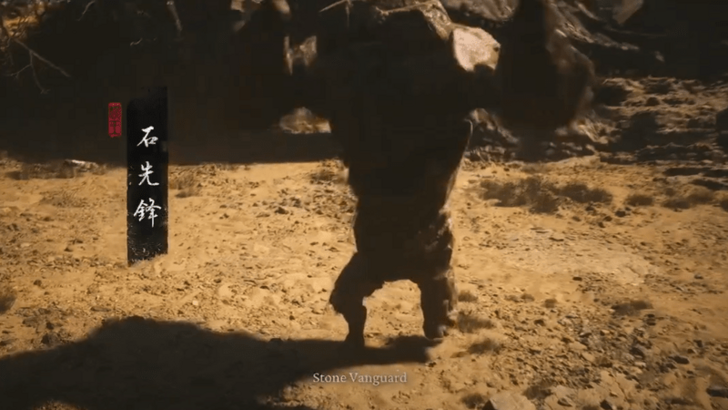 Hug the wall on the left until you reach the boss arena for the Stone Vanguard. When you're ready, head towards the back of the arena to start the fight. ▶ Stone Vanguard Boss Guide |
| * |  The boulder immediately on the left when entering the arena is Shigandang. If you have all 6 Buddha's Eyeballs, you can interact with it for a special boss battle with both Shigandang and Stone Vanguard! ▶ Shigandang Boss Guide |
| ** | Defeating Shigandang will reward you with the Skandha of Feeling which is part of the Five Skandha Quest! ▶ Five Skandhas Quest Guide |
| 2 | After beating the Stone Vanguard, head through the collapsed gateway to activate the Rock Crash Platform shrine. |
Hidden Loong Cavern Guide
| Objectives | |
|---|---|
| * | Unlocked after obtaining the Loong Scales and removing the sand waterfall in Rockrest Flat. |
| 1 | 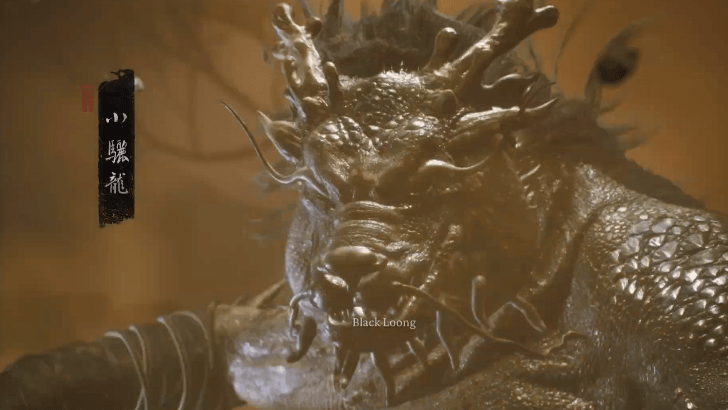 Defeat the Black Loong and open the treasure chest afterwards. ▶ Black Loong Boss Guide |
Rock Crash Platform Guide
| Objectives | |
|---|---|
| 1 | Follow the path defeating any enemies and picking up items along the way. |
| * |  Continue heading straight towards the ledge to unlock a Meditation Spot. |
| 2 | Head right following the lit braziers and continue to follow the path forward. |
| 3 | Jump down to the left and slide down the sandy slope. |
| 4 | Head on forwards towards the bridge and Rest at the Windseal Gate Shrine. ▶ Jump to the Windseal Gate |
Yellow Wind Formations Walkthrough
| # | Yellow Wind Formations Objectives |
|---|---|
| 1 | Windrest Bridge |
| 2 | Windrest Hamlet |
| 3 | Windseal Gate |
Windrest Bridge Guide
| Objectives | |
|---|---|
| 1 | Head down towards the bridge and clear the enemies blocking your path. |
| 2 | 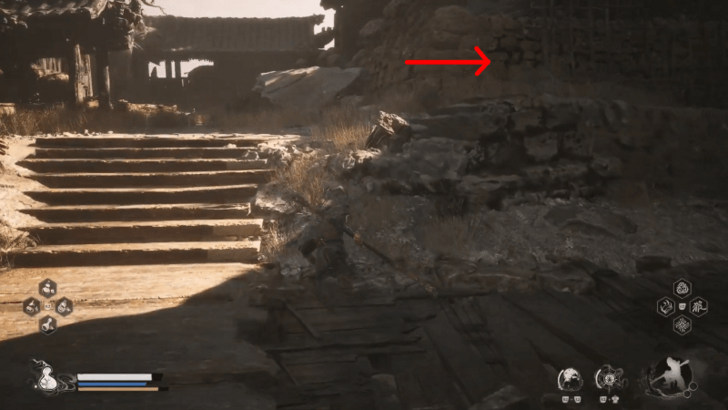 Go left and up the stairs, then immediately go right to where a Blazebone is blocking the way. |
| 3 | Keep going forward and down to kill the Spearbone on the way to the gate. |
| 4 | Defeat multiple Rat Imperial Guards to unlock the gate. You will also get a Spirit after killing the Rat with the blue flame. |
| 5 | 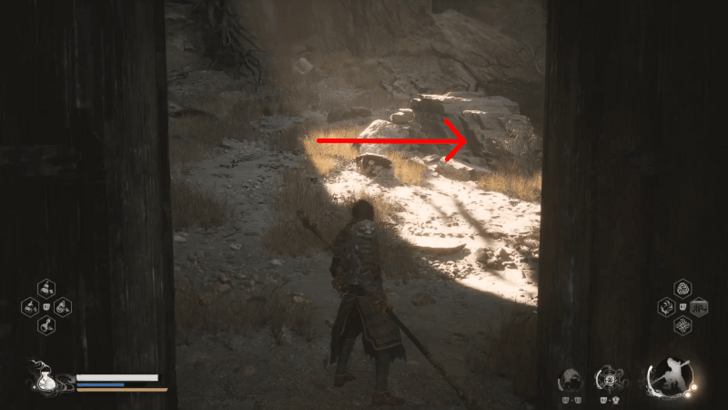 Open the gate and go right to pick up a Luojia Fragrant Vine for your Gourd upgrades. |
| 6 | Follow the path upwards until you reach the Windrest Hamlet shrine. |
Windrest Hamlet Guide
| Objectives | |
|---|---|
| 1 | Head towards the bridge and defeat any enemies in your way. |
| 2 | Pick up some Will and open the treasure chest on the way to the windy bridge. |
| 3 | 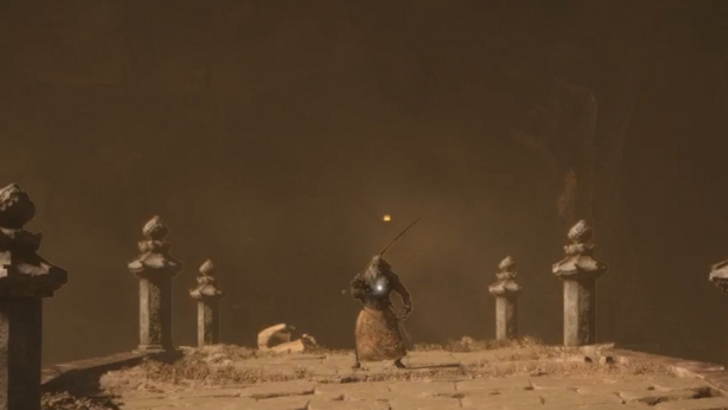 Prepare yourself to take on the Tiger's Acolyte. Be careful not to fall off the bridge since there are no invisible barriers on the sides. ▶ Tiger's Acolyte Boss Guide |
| 4 | Absorb the Spirit of the Tiger's Acolyte and head into the cave on the other side of the bridge. |
| 5 | Defeat enemies in your way and open the small chest containing the Glazed Reliquary Curio. |
| 6 | Continue through the cave until you're back outside and can drop down into the Stone Vanguard's arena. ▶ Jump to Stone Vanguard Section |
Windseal Gate Guide
| Objectives | |
|---|---|
| * | 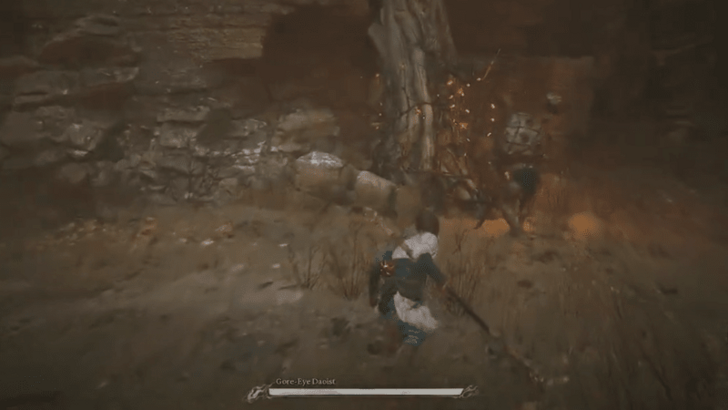 From the shrine, head to the left side of the bridge and up the path. This will lead you to the Gore-Eye Daoist boss, who rewards you with his Spirit and a Luojia Fragrant Vine afterwards. As a note, there's no need to continue further up the path right away since it leads you back to the Sandgate Village and Valley of Despair. ▶ How to Beat Gore-Eye Daoist |
| 1 | Open the gate after beating the Tiger and Stone Vanguards, then head down towards the sand tornado. |
| 2 | Prepare yourself before heading into the tornado as this is the final boss of the area. ▶ Yellow Wind Sage Boss Guide |
Kingdom of Sahali Walkthrough
| # | Kingdom of Sahali Objectives |
|---|---|
| 1 | Sandgate Pass |
| 2 | Sandgate Bound |
Sandgate Pass
| Objectives | |
|---|---|
| * | Complete the Drunk Boar Quest and interact with the massive doorway to access this Secret Area. ▶ Drunk Boar Quest Guide |
| 1 | After the cutscene, you'll be teleported to the Kingdom of Sahali. Head on forward until you reach the Sandgate Pass Shrine. |
| 2 |  When you're ready, go forward until you reach the "Tiger Vanguard", who you must defeat before proceeding forward. ▶ Tiger Vanguard (Kingdom of Sahali) Boss Guide |
Sandgate Bound
| Objectives | |
|---|---|
| 1 | Head towards the large area and activate the Sandgate Bound Shrine. |
| * | Explore the area for two treasure chests and a Meditation Spot. |
| 2 | Head up the cliff and talk to the Yellow Wind Sage beside the drum. |
| 3 | 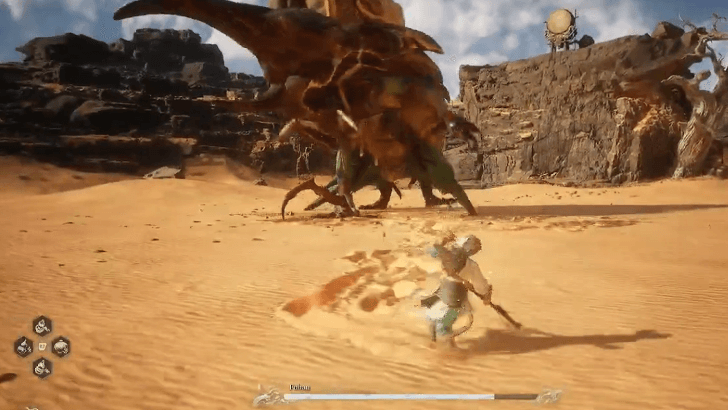 When you're ready, head down to the arena to fight Fuban. Once they get knocked down and you grab the vessel, the Yellow Wind Sage will join you, making the fight significantly easier. ▶ Fuban Boss Guide |
| 4 | After they've been defeated, you'll be teleported back to where you fought the Yellow-Robed Squire. |
Chapter 2: Yellow Sand, Desolate Dusk Interactive Map
Interactive Map Key
| Meditation Spot | Fragrant Vine | Wine Worm | Chest |
|---|---|---|---|
| Curio | Spirit | Shrine | Gourd |
| Boss | |||
Black Myth: Wukong Interactive Map
Chapter 2: Yellow Sand, Desolate Dusk Bosses
Chapter 2: Yellow Sand, Desolate Dusk Secret Location
How to Get to the Kingdom of Sahali
Complete the Drunk Boar's Sidequest
To access the secret location of Chapter 2, you'll need to complete the Boar's Sidequest. Once you've finished it and beat the Yellow-Robed Squire, you can teleport to the Kingdom of Sahali.
Boar Quest Guide (Chapter 2 Secret Area)
Black Myth: Wukong Related Guides

All Chapter Walkthrough Guides
Main Chapter Walkthroughs
| All Chapters | |||||
|---|---|---|---|---|---|
 Chapter 1 Chapter 1 |
Chapter 2 |
 Chapter 3 Chapter 3 |
|||
 Chapter 4 Chapter 4 |
 Chapter 5 Chapter 5 |
 Chapter 6 Chapter 6 |
|||
 All Endings Guide All Endings Guide |
 How to Get the Secret Ending How to Get the Secret Ending |
||||
Area Walkthroughs
| Chapter 1 Areas | |
|---|---|
| Black Wind Mountain | |
| Forest of Wolves | Bamboo Grove |
| Black Wind Cave | - |
| Chapter 2 Areas | |
| Sandgate Village | Crouching Tiger Temple |
| Fright Cliff | The Kingdom of Sahali |
| Chapter 3 Areas | |
| Pagoda Realm | The Great Pagoda |
| Secret Areas | |
| List of All Secret Areas | |
| Ancient Guanyin Temple | The Kingdom of Sahali |
| Mount Mei | Purple Cloud Mountain |
| Bishui Cave | - |
Side Quest Walkthroughs
| List of All Quests | |
|---|---|
| Chapter 1 Quests | |
| Ring the 3 Bells | - |
| Chapter 2 Quests | |
| Boar Quest | Man-In-Stone Quest |
| Old Rattle-Drum Quest | Xu Dog Quest |
| Two-Headed Rat Guai Quest | - |
| Chapter 3 Quests | |
| Treasure Hunter Quest | Fox Quest |
| Third Prince Quest | Ruyi Scroll Quest |
| Chapter 4 Quests | |
| Venom Daoist Quest | Daoist Mi Quest |
| Purple Talisman Quest | - |
| Chapter 5 Quests | |
| Five Element Carts | - |
| Other Quests | |
| Supreme Gourd Quest | Five Skandhas Quest |
| Horse Guai Questline | - |
Comment
Author

Chapter 2: Yellow Sand Desolate Dusk Walkthrough Guide
Please participate in our site
improvement survey
03/2026
improvement survey
03/2026
Would you assist in
improving Game8's site?
improving Game8's site?

×
We are listening to our users' valuable opinions and discussing how to act on them.
The information collected through this survey will be used for the purpose of improving our services. In addition, the information will only be disclosed a part of a statistic in a format that will not allow identification of personal information.
Begin Survey
Not Now
×
Please rate each item regarding Game8.co's Advertisements.
Amount of Ads
Very Dissatisfied
Somewhat Dissatisfied
Fine
Somewhat Satisfied
Highly Satisfied
Placement of Ads
Timing of Ad Display
Ad Loading Speed
Safeness of Ads
Content of Ads
×
Please rate each item regarding Game8.co's Quality of Articles.
Amount of information
Very Dissatisfied
Somewhat Dissatisfied
Fine
Somewhat Satisfied
Highly Satisfied
Frequency of updates
Speed of new information
Accuracy of articles
Understandibility of articles
Readability of sentences
×
Please rate each item regarding Game8.co's Usability of the Site.
Ease of finding information
Very Dissatisfied
Somewhat Dissatisfied
Fine
Somewhat Satisfied
Highly Satisfied
Loading Speed
Use of Color
Font Size
Visibility of Images
Easy to Understand Layout
×
Please rate each item regarding Game8.co's Message Boards, Comments.
Ease of Writing
Very Dissatisfied
Somewhat Dissatisfied
Fine
Somewhat Satisfied
Highly Satisfied
Readability
Ease in Finding Information
Comment Quality
Comment Quantity
Admin Response
×
Please rate each item regarding Game8.co's Site's new design.
Please rate our site's new design
Very Dissatisfied
Somewhat Dissatisfied
Fine
Somewhat Satisfied
Highly Satisfied
Do you think that the website's design change makes the site easier to use?
Has the new design made it easier for you to find information on the site?
Has the new design improved the overall visual appeal of the site?
How would you rate your overall satisfaction with the new design of the site?
×
How likely are you to recommend Game8 to someone you know?
Very Unlikely
0
1
2
3
4
5
6
7
8
9
10
Very Likely
If you have other opinions regarding potential improvement to the website, please share them with us. We would appreciate your honest opinion.
Note: This is a free response section, so you can proceed without entering anything.
Note: Please be sure not to enter any kind of personal information into your response.
Note: Please be sure not to enter any kind of personal information into your response.
×
Thank You
×
Thank you for participating in our survey! Your answers will help us to improve the quality of our website and services.
We hope you continue to make use of Game8.
We hope you continue to make use of Game8.
Close
Rankings
- We could not find the message board you were looking for.
Gaming News


![Monster Hunter Stories 3 Review [First Impressions] | Simply Rejuvenating](https://img.game8.co/4438641/2a31b7702bd70e78ec8efd24661dacda.jpeg/thumb)
Popular Games

Genshin Impact Walkthrough & Guides Wiki
Honkai: Star Rail Walkthrough & Guides Wiki
Umamusume: Pretty Derby Walkthrough & Guides Wiki
Pokemon Pokopia Walkthrough & Guides Wiki
Resident Evil Requiem (RE9) Walkthrough & Guides Wiki
Monster Hunter Wilds Walkthrough & Guides Wiki
Wuthering Waves Walkthrough & Guides Wiki
Arknights: Endfield Walkthrough & Guides Wiki
Pokemon FireRed and LeafGreen (FRLG) Walkthrough & Guides Wiki
Pokemon TCG Pocket (PTCGP) Strategies & Guides Wiki


Recommended Games
Diablo 4: Vessel of Hatred Walkthrough & Guides Wiki
Cyberpunk 2077: Ultimate Edition Walkthrough & Guides Wiki
Fire Emblem Heroes (FEH) Walkthrough & Guides Wiki
Yu-Gi-Oh! Master Duel Walkthrough & Guides Wiki
Super Smash Bros. Ultimate Walkthrough & Guides Wiki
Pokemon Brilliant Diamond and Shining Pearl (BDSP) Walkthrough & Guides Wiki
Elden Ring Shadow of the Erdtree Walkthrough & Guides Wiki
Monster Hunter World Walkthrough & Guides Wiki
The Legend of Zelda: Tears of the Kingdom Walkthrough & Guides Wiki
Persona 3 Reload Walkthrough & Guides Wiki


All rights reserved
Copyright © Game Science Interactive Technology Co., Ltd. All Rights Reserved.
备案号: 浙ICP备20024998号-1
The copyrights of videos of games used in our content and other intellectual property rights belong to the provider of the game.
The contents we provide on this site were created personally by members of the Game8 editorial department.
We refuse the right to reuse or repost content taken without our permission such as data or images to other sites.