List of All Secret Areas
☆ Walkthrough ▶ 1 | 2 | 3 | 4 | 5 | 6 | Endings | NG+
★ All Quests ▶ Man-in-Stone | Boar | Fox
☆ Best Builds | Transformations | Spells | Armor
★ Bosses ▶ Yellow Wind Sage | Captain Wise-Voice
┗ Erlang | 4 Heavenly Kings | Final Boss
Black Myth: Wukong has multiple secret area with hidden bosses and rewards inside. Check out all the secret areas in the game, as well as how to unlock them!
| Notice! | Currently, there's no secret area in Chapter 6. If you want to 100% the game, you'll only need to worry about secret areas in Chapters 1-5. |
|---|
Chapter 1: Ancient Guanyin Temple
| Ancient Guanyin Temple Guide | |
|---|---|
| How to Unlock | Walkthrough |
How to Unlock Ancient Guanyin Temple
Ring All the Bells After Defeating the Nearby Boss
| How to Unlock The Ancient Guanyin Temple |
|---|
|
|
In order to unlock the Secret Area in Chapter 1, you need to ring all three bells found around the Black Wind Mountain region. These can be rung in any order and once you ring the third one, it will instantly teleport you to The Ancient Guanyin Temple.
Three Bells Quest: All 3 Bells Locations
Bell 1: Outside the Forest by Guangzhi
| Objectives | |
|---|---|
| 1 | From the Outside the Forest shrine, head forward beating up the wolves along the way until you see a fork at the road. |
| 2 | Head left first and look for a bridge and archer head towards the shrine where you can find Guangzhi. Make sure you're prepared before you take on the boss! |
| 3 | Once you're ready, head towards Guangzhi to engage it in battle. ▶ Click here for Guangzhi Boss Guide |
| 4 | After beating Guangzhi, make sure to ring the nearby bell. It is located behind where you first see Guangzhi. |
Bell 2: Snake Trail by Guangmou
| Objectives | |
|---|---|
| 1 | Head towards the Snake Trail Shrine, you need to fight another Crow Diviner. Defeat it and you can rest up and swap some skills and equipment around. |
| 2 | After doing what you need at the Shine, head up the stairs. Cross the bridge past the old man who gave you the blessing for your Gourd. |
| 3 | Keep threading forward and you will see a field of Bones. Past that, you can continue walking until another fork in the road appears. Choose the path with the bridge overhead. |
| 4 | After a bit of walking, you will end up at a bamboo forest. Look around and you will see a small opening to the right lit up by torches. |
| 5 | Head inside the opening and you will be put into a battle with Guangmou. ▶ Click here for Guangmou Boss Guide |
| 6 | After beating Guangmou, make sure to ring the nearby bell. It is located up a stairway to the left of the path forward. |
Bell 3: Marsh of the White Mists by the Whiteclad Noble
| Objectives | |
|---|---|
| 1 | After resting up at the Marsh of the White Mists Shrine, head down the path where you saved the Monkey from the Snake Patroller. |
| 2 | Keep following the path and make sure you're equipped since at the end of the path and you will be put into a battle with the Whiteclad Noble. |
| 3 | After getting through the two phases of the boss, you can now go ahead to the left to a flooded ravine you can cross |
| 4 | Cross it and you need to fight wolves in order to ring the bell. Before you do so, you can interact with the hanging wolf to get a Fireproof Mantle. |
| 5 | Ring the bell and if this is your final bell, you will then be teleported to the The Ancient Guanyin Temple. |
Ancient Guanyin Temple Walkthrough
| Ancient Guanyin Temple Objectives | |
|---|---|
| 1 | Grand Chamber |
Grand Chamber
| Objectives | |
|---|---|
| 1 | After ringing the third bell, you will be teleported to the The Ancient Guanyin Temple. |
| 2 | Head to the Temple and there will be a Shrine there. Once you're ready, head inside and after a cutscene you will be put into a battle with Elder Jinchi. |
Chapter 2: The Kingdom of Sahali
| The Kingdom of Sahali Guide | |
|---|---|
| How to Unlock | Walkthrough |
How to Unlock The Kingdom of Sahali
| How to Unlock The Kingdom of Sahali |
|---|
|
|
Talk to the Drunken Boar Past the Rockrest Flat Shrine
| Objectives | |
|---|---|
| 1 | From the Rockrest Flat Shrine, head north and you will see a wooden gate with a Spearbone guarding it. Either defeat it or walk past it. |
| 2 | Past the guard the boar is in the middle of the field sitting by some rocks. |
| 3 | Talk to the boar and he'll ask you to find something to sober up. Hand him the Sobering Stone. ▶ Click Here to See Where You Can Find a Sobering Stone |
| 4 | After that, you can leave the area and head to the Crouching Tiger Temple. |
Give the Boar a Jade Lotus at the Crouching Tiger Temple
| Objectives | |
|---|---|
| 1 | Use a Shrine to teleport to the Crouching Tiger Temple's Entrance. Head up the stairs. |
| 2 | The Boar can be found just across the Meditation Spot, to your right, just before where you fight the Tiger Vanguard. |
| 3 | Talk to the boar and he'll ask you to then give him a Jade Lotus. These can be found at bodies of water or bought from the shop. |
| * | If you still haven't beaten the First Prince of Flowing Sands, head to the Valley of Despair. |
| 4 | If you have the Arhat Gold Piece, you can proceed back to the field where you first met the Boar. |
Defeat the First Prince of Flowing Sand
| Objectives | |
|---|---|
| 1 | At this point you should have beaten either the King of Flowing Sands and the Second Prince of Flowing Sands or just the son. ▶ Click here for the Second Prince and King of Flowing Sands boss guide. |
| * | If you just defeated the Second Rat Prince, you can also proceed to the Valley of Despair. |
| 2 | From the Valley of Despair shrine, head towards the nearby cave entrance. Take the path to the left where you will see an area lit up by sunlight. |
| 3 | Go towards the pit and either toss down the Pungent Flesh Chunk or watch the cutscene where the King summons the First Prince and kills him. |
| 4 | Proceed to fight the First Prince of Flowing Sands. Once defeated, take the Arhat Gold Piece back to the field where you first met the Boar. ▶ Click here for the First Prince of Flowing Sands boss guide. |
Return to Where You First Met the Boar
| Objectives | |
|---|---|
| 1 | Once you arrive at the field where you first met the boar, make aturn at the right and the Boar will attack you for having the Gold Piece. |
| 2 | Fight the Yellow-Robed Squire and once defeated, he will unlock the gate to the Kingdom of Sahali. |
| 3 | Go inside the gate and you have now unlocked the Secret Area for the Yellow Wind Ridge Area. |
The Kingdom of Sahali Walkthrough
| Kingdom of Sahali Objectives | |
|---|---|
| 1 | Sandgate Pass |
| 2 | Sandgate Bound |
Sandgate Pass
| Objectives | |
|---|---|
| 1 | After going inside the gate, a cutscene will play with the Yellow-Robed Squire. After being whisked away to the Sandgate Pass, head towards the Shrine. |
| 2 | After preparing yourself at the shrine, move forward where you have to fight the Tiger Vanguard. ▶ Click here for the Tiger Vanguard Boss Guide |
| 3 | After beating the Tiger Vanguard, you can keep pressing on to the Sandgate Bound. |
Sandgate Bound
| Objectives | |
|---|---|
| 1 | After getting to the Sandgate Bound, head towards the Shrine. |
| * | If you head west of the Shrine, there is a chest there with a Gold Ridge Beast and Knot of Voidness. If you keep heading West, you can also find the last Meditation Point. |
| 2 | After doing what you need, head up the slope and talk to the Yellow Wind Sage next to the drum. He will summon Fuban after the cutscene. |
| 3 | After the cutscene, head down and slide to where Fuban is. This is your last chance to prepare. |
| 4 | After getting Fuban down to 50%, the Yellow Wind Sage will join you in the fight. Work together until you defeat Fuban. |
| 5 | After getting your Rewards, you will be teleported back outside. |
Chapter 3: Mount Mei
| Mount Mei Guide | |
|---|---|
| How to Unlock | Walkthrough |
How to Unlock Mount Mei
| How to Unlock Mount Mei |
|---|
|
|
Fulfill Unlock Conditions
| Objectives | |
|---|---|
| 1 | Complete All Secret Areas in the other Chapters. |
| 2 | Complete the Treasure Hunter Quest in Chapter 3. |
| 2 | After returning to a shrine, travel back to The Great Pagoda in Chapter 3. |
All Chapter Walkthrough Guides
Travel to The Great Pagoda
| Objectives | |
|---|---|
| 1 | Return to Snowhill Path via a shrine, and take the right path to get to The Great Pagoda. |
| 2 | Within the Great Pagoda, activate the shrine and climb up the stairs to meet with the monk. |
| 3 | After a brief cutscene, the wall will open, revealing Mount Mei. |
Mount Mei Walkthrough
| Mount Mei Objectives | |
|---|---|
| 1 | Mei-Jian Peak |
Mei-Jian Peak
| Objectives | |
|---|---|
| 1 | Follow the path opened from the wall. The area is linear, so you will not get lost. |
| * | Unlock the Shrine at the top of the stairs to serve as a respawn point later on. |
| 2 | Continue following the path, towards the next set of stairs in front of you. A cutscene will begin once you reach the top of the stairs. |
| 3 | After the cutscene, you must first defeat Erlang the Sacred Divinity. |
| 4 | After reducing Erlang's HP to 0 the first time, a cutscene will ensue where you will both transform. |
| 5 | Defeat Erlang and the Four Heavenly Kings in your new transformed state. Once all bosses have been beaten, you can now unlock the secret ending! |
Chapter 4: Purple Cloud Mountain
| Purple Cloud Mountain Guide | |
|---|---|
| How to Unlock | Walkthrough |
How to Unlock Purple Cloud Mountain
Defeat Venom Daoist Twice
| How to Unlock Purple Cloud Mountain |
|---|
|
|
To unlock the secret area for Chapter 4, you'll need to defeat the Venom Daoist twice in two separate boss battles. The second fight is unlocked at the end of Chapter 4, so make your way through the story first before unlocking the Purple Cloud Mountain area.
Webbed Hollow, Pool of Shattered Jade
| Objectives | |
|---|---|
| 1 | From the Pool of Shattered Jade Shrine, head to the right towards the area with a massive cocoon in the middle. |
| 2 | Defeat the Old Cocoon, and afterwards you'll have a cutscene where the Venom Daoist will pop out of the cocoon. |
| 3 | Once the cutscene is over, defeat the Venom Daoist and continue with the main story. |
How to Get to the Pool of Shattered Jade Shrine
| Objectives | |
|---|---|
| 1 | Starting from the Upper Hallow Shrine, head northwest up the stairs. Keep following the torches until you reach a wooden path next to a torch you can drop off from. Go down the path and turn right and drop another level. |
| 2 | After the final drop, head right into the unlit path and you should see some spider sacs dangling from the ceiling. Keep following the path turning left and you should see some torches near the end. |
| 3 | Keep following the torches to progress, and when you see a fork in the road, choose the left path this one should have egg sacs in it. |
| 4 | Past the sacs, head up the staircase and just keep following this winding path onto another staircase. |
| 5 | Once you're up the last set of stairs, just keep heading forward and the Pool of Shattered Jade Shrine should be next to some torches next to a cave. |
Temple of Yellow Flowers, Court of Illumination
| Objectives | |
|---|---|
| 1 | From the Court of Illumination Shrine, turn around and down the stairs towards the other path opposite of the Shrine. |
| 2 | Follow the path upwards until you reach the area where you fight the Fungiwoman boss. |
| 3 | When you get there, turn around and you should see a path on the right from where you just came from. |
| 4 | Head down to the open are and face the Venom Daoist for the second time. Once he's defeated, you'll have unlocked Chapter 4's secret area! |
Purple Cloud Mountain Walkthrough
| Purple Cloud Mountain Objectives | |
|---|---|
| 1 | Valley of Blooms |
| 2 | Bounds of Deity's Abode |
| 3 | Petalfall Hamlet |
| 4 | Cloudnest Peak |
Valley of Blooms
| Objectives | |
|---|---|
| 1 | Interact with the painting after beating the Venom Daoist and it will take you to the Purple Cloud Mountain. |
| 2 | Once you arrive, just follow the path and a snake will talk to you. From there, cross the bridge and keep pressing on until you get to the Mountain Trail Shrine. |
| 3 | After resting at the Shrine, keep going onwards and grab the Verdant Glow Spirit along the way. |
| 4 | Eventually, the familiar sparkle will appear and it will guide you to the Bound of Deity's Abode Shrine. |
Bounds of Deity's Abode
| Objectives | |
|---|---|
| 1 | From the Bounds of Deity's Abode Shrine, head up and you will see The Scorpionlord. In order to start the fight, you need to break his jars of alcohol. |
| 2 | After beating him and claiming his rewards, you can progress to the other Shrines in this area. There's nothing else here so feel free to go back to Petalfall Hamlet or Bounds of Deity's Abode Shrines. |
| * | Warning! If you defeat The Duskveil without beating The Scorpionlord in this area first, you will not receive his rewards! |
Petalfall Hamlet
| Objectives | |
|---|---|
| 1 | From the Bounds of Deity's Abbode Shrine, head the opposite direction and get the Celestial Registry Tablet Curio under a pagoda. |
| 2 | From the pagoda, head the opposite direction and after taking care of the two guards, you can now get to the Petalfall Hamlet Shrine. |
| 3 | Before going in, go the opposite way from Petalfall Hamlet Shrine to a gate and grab the Snake Herbalist Spirit. You can also climb up the gate and follow the path to get the Gold Sun Crow Curio. |
| 4 | You can now head inside the Petalfall Hamlet Shrine and you will first see Daoist Mi. In order to start his boss fight you need the Violet Hail Key Item from one of the enemies in this area. |
| 5 | After beating him, Hong Yi, the talking snake, will appear and she will give you the Violet Hail Transformation. |
| * | Warning! If you defeat the Duskveil without battling Daoist Mi, you will not be able to get the Violet Hail Transformation! |
| 6 | After getting your new transformation, head further in through the cobble arch. You can go ahead and battle enemies along the way as long as you follow the path forward. |
| 7 | Just keep following the path until you see a well with a huge rock beside it. From there, turn right and you can fall down and the sparkle should guide you to the Cloudnest Peak Shrine. |
Cloudnest Peak
| Objectives | |
|---|---|
| 1 | After healing at the shrine, you can go ahead and grab the treasure chest and raid the nearby houses before going up. |
| 2 | Should you choose, you can go up and start the battle with The Duskveil. |
| * | Warning! If you defeat the Duskveil without battling Daoist Mi and The Scorpionlord, you will not be able to get the rewards for beating each boss! |
| 3 | After beating the two phases of the Duskveil, a cutscene will play and Hong Yi will give you the Weaver's Needle Vessel. |
Chapter 5: Bishui Cave
| Bishui Cave Guide | |
|---|---|
| How to Unlock | Walkthrough |
How to Unlock Bishui Cave
Complete the Five Elemental Carts Quest
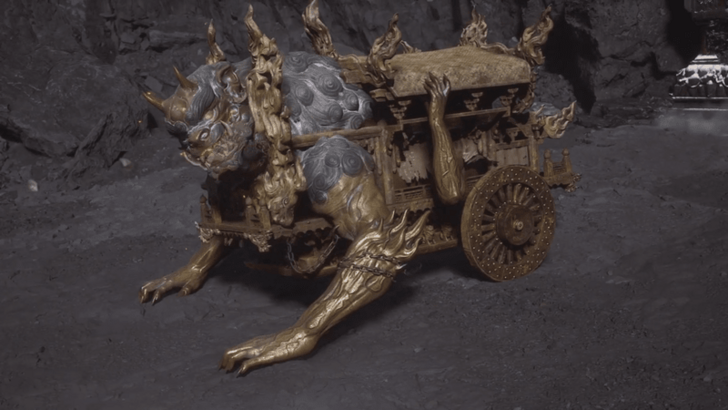
To unlock the Bishui Cave, you'll need to complete the Five Elemental Carts Quest. This involves killing the four different cart bosses and talking to the Pale-Axe Stalwart in three locations.
Thankfully, all of the carts besides the final one are encountered during the main story, so you'll naturally be progressing this quest by playing through the story!
Five Element Carts Quest Guide
Bishui Cave Walkthrough
| Bishui Cave Objectives | |
|---|---|
| 1 | Purge Pit |
| 2 | Cave Depths |
| 3 | Corridor of Fire and Ice |
Purge Pit Guide
| Objectives | |
|---|---|
| 1 | Once you spawn in, follow the path downwards and open the treasure chest along the way. Once you reach the large indoor area, turn left to activate the Purge Pit Shrine. |
| * | Follow the path right from the entrance to activate the final Meditation Spot. |
| 2 | Once you're ready, follow the path from the shrine down into the boss arena to fight Top Takes Bottom, Bottom Takes Top. |
| 3 | After the fight, head up the stairs and through the large doorway. |
| * | On the way down from the doorway, watch out for an area with a small chest on the left to grab a Celestial Pill. |
| 4 | Follow the path downwards until you reach the Cave Depths Shrine. |
Cave Depths Guide
| Objectives | |
|---|---|
| 1 | Follow the path downwards and fight all the rhinos to make getting the Bull Governor Spirit more manageable. Don't forget to pick up The Bull King's Iron Horn from the treasure chest as it's used to create one of the best armour sets in the game! |
| 2 | Continue following the path and picking up any items along the way. After sliding down the long ice slope, activate the Corridor of Fire and Ice Shrine. |
Corridor of Fire and Ice Guide
| Objectives | |
|---|---|
| 1 | Equip the Fireproof Mantle and head down into the Bishui Golden-Eyed Beast boss fight. |
| 2 | After the boss has been defeated, a cutscene will play and you'll have cleared the secret area! |
| * | Once the cutscene is over, teleport back to the Corridor of Fire and Ice Shrine and head back down to the boss arena. There will be a newly opened area that contains an Awaken Wine Worm! |
Ruyi Scroll: Zodiac Village
Hub Area With All of the Vendors
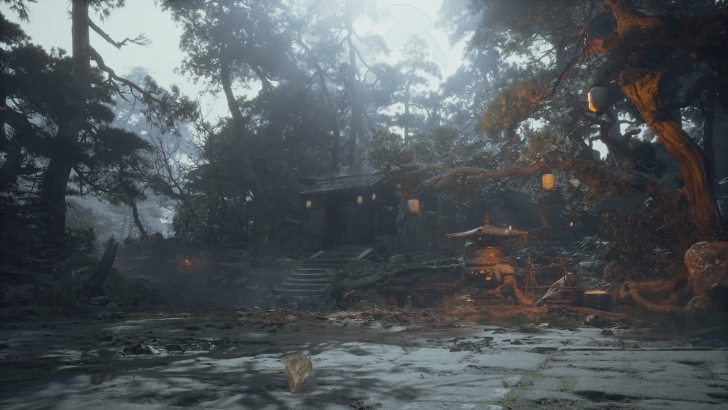
While this isn't labeled as a "Secret Area" in the game, it's considered to be a secret area by many due to it being missable and hard to find. It's highly recommended to unlock this location so that you can teleport to one place for your Gourds, Brews, and Armours upgrades, as well as medicine crafting and resource farming!
To unlock the Zodiac Village, you'll need to complete the Ruyi Scroll Quest started after beating Chen Loong in the North Shore of the Bitter Lake. Thankfully, this can be done at anytime and you can't get locked out of this quest, with the exception of New Game+.
How to Get Ruyi Scroll and Location
Black Myth: Wukong Related Guides

All Chapter Walkthrough Guides
Main Chapter Walkthroughs
| All Chapters | |||||
|---|---|---|---|---|---|
 Chapter 1 Chapter 1 |
 Chapter 2 Chapter 2 |
 Chapter 3 Chapter 3 |
|||
 Chapter 4 Chapter 4 |
 Chapter 5 Chapter 5 |
 Chapter 6 Chapter 6 |
|||
 All Endings Guide All Endings Guide |
 How to Get the Secret Ending How to Get the Secret Ending |
||||
Area Walkthroughs
| Chapter 1 Areas | |
|---|---|
| Black Wind Mountain | |
| Forest of Wolves | Bamboo Grove |
| Black Wind Cave | - |
| Chapter 2 Areas | |
| Sandgate Village | Crouching Tiger Temple |
| Fright Cliff | The Kingdom of Sahali |
| Chapter 3 Areas | |
| Pagoda Realm | The Great Pagoda |
| Secret Areas | |
| List of All Secret Areas | |
| Ancient Guanyin Temple | The Kingdom of Sahali |
| Mount Mei | Purple Cloud Mountain |
| Bishui Cave | - |
Side Quest Walkthroughs
| List of All Quests | |
|---|---|
| Chapter 1 Quests | |
| Ring the 3 Bells | - |
| Chapter 2 Quests | |
| Boar Quest | Man-In-Stone Quest |
| Old Rattle-Drum Quest | Xu Dog Quest |
| Two-Headed Rat Guai Quest | - |
| Chapter 3 Quests | |
| Treasure Hunter Quest | Fox Quest |
| Third Prince Quest | Ruyi Scroll Quest |
| Chapter 4 Quests | |
| Venom Daoist Quest | Daoist Mi Quest |
| Purple Talisman Quest | - |
| Chapter 5 Quests | |
| Five Element Carts | - |
| Other Quests | |
| Supreme Gourd Quest | Five Skandhas Quest |
| Horse Guai Questline | - |
Comment
Author
List of All Secret Areas
improvement survey
03/2026
improving Game8's site?

Your answers will help us to improve our website.
Note: Please be sure not to enter any kind of personal information into your response.

We hope you continue to make use of Game8.
Rankings
- We could not find the message board you were looking for.
Gaming News
Popular Games

Genshin Impact Walkthrough & Guides Wiki

Honkai: Star Rail Walkthrough & Guides Wiki

Umamusume: Pretty Derby Walkthrough & Guides Wiki

Pokemon Pokopia Walkthrough & Guides Wiki

Resident Evil Requiem (RE9) Walkthrough & Guides Wiki

Monster Hunter Wilds Walkthrough & Guides Wiki

Wuthering Waves Walkthrough & Guides Wiki

Arknights: Endfield Walkthrough & Guides Wiki

Pokemon FireRed and LeafGreen (FRLG) Walkthrough & Guides Wiki

Pokemon TCG Pocket (PTCGP) Strategies & Guides Wiki
Recommended Games

Diablo 4: Vessel of Hatred Walkthrough & Guides Wiki

Cyberpunk 2077: Ultimate Edition Walkthrough & Guides Wiki

Fire Emblem Heroes (FEH) Walkthrough & Guides Wiki

Yu-Gi-Oh! Master Duel Walkthrough & Guides Wiki

Super Smash Bros. Ultimate Walkthrough & Guides Wiki

Pokemon Brilliant Diamond and Shining Pearl (BDSP) Walkthrough & Guides Wiki

Elden Ring Shadow of the Erdtree Walkthrough & Guides Wiki

Monster Hunter World Walkthrough & Guides Wiki

The Legend of Zelda: Tears of the Kingdom Walkthrough & Guides Wiki

Persona 3 Reload Walkthrough & Guides Wiki
All rights reserved
Copyright © Game Science Interactive Technology Co., Ltd. All Rights Reserved.
备案号: 浙ICP备20024998号-1
The copyrights of videos of games used in our content and other intellectual property rights belong to the provider of the game.
The contents we provide on this site were created personally by members of the Game8 editorial department.
We refuse the right to reuse or repost content taken without our permission such as data or images to other sites.


![Monster Hunter Stories 3 Review [First Impressions] | Simply Rejuvenating](https://img.game8.co/4438641/2a31b7702bd70e78ec8efd24661dacda.jpeg/thumb)


