This survey will take about 1 minute.
Your answers will help us to improve our website.
Honkai: Star Rail
Team Building Guide - How to Build Teams
★ Exclusive: Check out the State of Meta in 4.0!
♦ Latest: 4.1 Livestream Redeem Codes
♦ Phase 2: Sparkxie, Sparkle, Cerydra, Rappa
♦ Upcoming: Ashveil, Silver Wolf Lv.999, Evanescia
♦ Events: Cosmicon, Roll On!, Ding! Arcadia Fun-Time Clock-In Essentials
In Honkai: Star Rail, team building is an essential part of gameplay. Check out the team templates and how to build teams here!
List of Contents
Team Building Templates
Team Templates
| Hypercarry | Main DPS | Support | Support | Sustain |
|---|---|---|---|---|
| Dual DPS | Main DPS | Sub-DPS | Support | Sustain |
There are two ways you can build a team, and both of them require one Main DPS and one Sustain unit.
As for your other two units, you can either have two Supports units or one Support and one Sub-DPS unit in a team.
It's possible to run a sustainless team comp by replacing a sustain with another support, but this usually requires specific investments or speeds which will be best left for end-game specific guides.
Hypercarry Team
| Main DPS | Support | Support | Sustain |
|---|---|---|---|
 Phainon Phainon
|
 Sunday Sunday
|
 Cerydra Cerydra
|
 Huohuo Huohuo
|
 Archer Archer
|
 Sparkle Sparkle
|
 Tribbie Tribbie
|
 Permansor Terrae Permansor Terrae
|
 Dan Heng Dan Heng
|
 Trailblazer (Ice) Trailblazer (Ice)
|
 Asta Asta
|
 Lynx Lynx
|
Most effective team comps consist of one Main DPS, two Supports, and one Sustain unit. Use the two Support units to provide buffs to your Main DPS or debuffs that help increase the damage they deal to enemies.
Dual DPS Teams
| Main DPS | Sub-DPS (Choose 1) |
|---|---|

|


|

|


|

|


|

|
|

|


|

|
|

|
|
Above is a list of character pairings that work well in a Dual DPS setting.
More often than not, teams that focus on one Main DPS are more effective compared to having two DPS units. However, there are some teams that are viable or even work better with two DPS units (one Main DPS and one Sub-DPS).
For Himeko and Herta specifically, this pairing only works in content such as Pure Fiction and Calyx Farming.
How to Build Teams in Honkai: Star Rail
Team Building Guide
- Select Your Main DPS
- Read The Traces of Your DPS
- Pick Supports or Sub-DPS Units
- Pick a Sustain Unit
- Build Your Characters
Select Your Main DPS
| Destruction DPS |
|---|


|
| The Hunt DPS |


|
| Erudition DPS |


|
| Nihility DPS |

|
| Remembrance DPS |

|
The first thing you need to do when building a team is to select one Main DPS (Damage Per Second) or Main Damage Dealer. Their main purpose is to finish combat as soon as possible by defeating enemies with high damage numbers.
You can find most DPS units in the Destruction, The Hunt, and Erudition Paths. Some DPS units can also be found in the Nihility and Remembrance Paths.
For more information on what each Path does, you can check out our Path Guide here!
Read The Traces of Your DPS
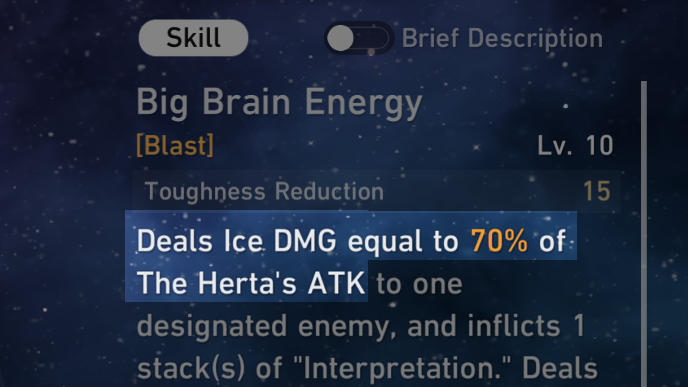
Once you have selected a DPS you want to use, read their Traces to see what stats their kits scale on and what kind of damage they deal.
Some DPS units may need characters with a specific Path in the team. You also need to keep in mind how much a character relies on Skill Point usage, and whether or not they use Energy for their Ultimates.
Pick Supports or Sub-DPS Units
| Harmony Support |
|---|


|
| Nihility Support |


|
| Remembrance Support |

|
| Sub-DPS |

|
After reading the kit of your DPS, look for two Support or Sub-DPS units that can enhance their damage dealt to enemies. These units can provide stat buffs to your allies, inflict debuffs on enemies, or provide supplemental damage.
Make sure the Support or Sub-DPS can benefit the Main DPS. Find units that give specific stats that the DPS scales on, or enhance the DPS' quality of life through debuffs, energy restoration, or turn-advance mechanics.
Most Support units can be found in the Harmony and Nihility Paths. Sub-DPS units tend to be characters from DPS paths or Nihility units.
Pick a Sustain Unit
| Preservation Sustain |
|---|


|
| Abundance Sustain |


|
| Remembrance Sustain |

|
Most teams have one Sustain unit that keeps your party alive through HP restoration, shields, or damage mitigation. Most of these characters can be found in the Preservation and Abundance Paths.
Keep in mind that there are DPS units that benefit from taking damage or getting hit. You also need to take into account the buffs they provide if they have any, and if they are useful against a specific type of enemy.
Build Your Characters
Once you have formed a team, you can start building your characters by upgrading their levels and equipping them with their best gear.
Check out our character guides to see the best builds for each character.
Honkai: Star Rail Characters and Builds
Character Build Priority
| 1st Priority | Main DPS |
|---|---|
| 2nd Priority | Sustain |
| 3rd Priority | Support / Sub-DPS |
If you're still starting on the game, prioritize building a DPS unit first since they're essential for clearing content such as Missions, Endgame, and Simulated Universe.
After building your DPS, focus on building your Sustain unit since enemies will get stronger as you progress through the story. Finally, build your Supports and Sub-DPS units last to increase team's damage output.
Honkai Star Rail Related Guides

All Tips and Tricks Guides
Comment
Author

Team Building Guide - How to Build Teams
Please participate in our site
improvement survey
03/2026
improvement survey
03/2026
Would you assist in
improving Game8's site?
improving Game8's site?

×
We are listening to our users' valuable opinions and discussing how to act on them.
The information collected through this survey will be used for the purpose of improving our services. In addition, the information will only be disclosed a part of a statistic in a format that will not allow identification of personal information.
Begin Survey
Not Now
×
Please rate each item regarding Game8.co's Advertisements.
Amount of Ads
Very Dissatisfied
Somewhat Dissatisfied
Fine
Somewhat Satisfied
Highly Satisfied
Placement of Ads
Timing of Ad Display
Ad Loading Speed
Safeness of Ads
Content of Ads
×
Please rate each item regarding Game8.co's Quality of Articles.
Amount of information
Very Dissatisfied
Somewhat Dissatisfied
Fine
Somewhat Satisfied
Highly Satisfied
Frequency of updates
Speed of new information
Accuracy of articles
Understandibility of articles
Readability of sentences
×
Please rate each item regarding Game8.co's Usability of the Site.
Ease of finding information
Very Dissatisfied
Somewhat Dissatisfied
Fine
Somewhat Satisfied
Highly Satisfied
Loading Speed
Use of Color
Font Size
Visibility of Images
Easy to Understand Layout
×
Please rate each item regarding Game8.co's Message Boards, Comments.
Ease of Writing
Very Dissatisfied
Somewhat Dissatisfied
Fine
Somewhat Satisfied
Highly Satisfied
Readability
Ease in Finding Information
Comment Quality
Comment Quantity
Admin Response
×
Please rate each item regarding Game8.co's Site's new design.
Please rate our site's new design
Very Dissatisfied
Somewhat Dissatisfied
Fine
Somewhat Satisfied
Highly Satisfied
Do you think that the website's design change makes the site easier to use?
Has the new design made it easier for you to find information on the site?
Has the new design improved the overall visual appeal of the site?
How would you rate your overall satisfaction with the new design of the site?
×
How likely are you to recommend Game8 to someone you know?
Very Unlikely
0
1
2
3
4
5
6
7
8
9
10
Very Likely
If you have other opinions regarding potential improvement to the website, please share them with us. We would appreciate your honest opinion.
Note: This is a free response section, so you can proceed without entering anything.
Note: Please be sure not to enter any kind of personal information into your response.
Note: Please be sure not to enter any kind of personal information into your response.
×
Thank You
×
Thank you for participating in our survey! Your answers will help us to improve the quality of our website and services.
We hope you continue to make use of Game8.
We hope you continue to make use of Game8.
Close
Premium Articles

Rankings
- We could not find the message board you were looking for.
Gaming News


![Monster Hunter Stories 3 Review [First Impressions] | Simply Rejuvenating](https://img.game8.co/4438641/2a31b7702bd70e78ec8efd24661dacda.jpeg/thumb)
Popular Games

Genshin Impact Walkthrough & Guides Wiki
Honkai: Star Rail Walkthrough & Guides Wiki
Umamusume: Pretty Derby Walkthrough & Guides Wiki
Pokemon Pokopia Walkthrough & Guides Wiki
Resident Evil Requiem (RE9) Walkthrough & Guides Wiki
Monster Hunter Wilds Walkthrough & Guides Wiki
Wuthering Waves Walkthrough & Guides Wiki
Arknights: Endfield Walkthrough & Guides Wiki
Pokemon FireRed and LeafGreen (FRLG) Walkthrough & Guides Wiki
Pokemon TCG Pocket (PTCGP) Strategies & Guides Wiki


Recommended Games
Diablo 4: Vessel of Hatred Walkthrough & Guides Wiki
Cyberpunk 2077: Ultimate Edition Walkthrough & Guides Wiki
Fire Emblem Heroes (FEH) Walkthrough & Guides Wiki
Yu-Gi-Oh! Master Duel Walkthrough & Guides Wiki
Super Smash Bros. Ultimate Walkthrough & Guides Wiki
Pokemon Brilliant Diamond and Shining Pearl (BDSP) Walkthrough & Guides Wiki
Elden Ring Shadow of the Erdtree Walkthrough & Guides Wiki
Monster Hunter World Walkthrough & Guides Wiki
The Legend of Zelda: Tears of the Kingdom Walkthrough & Guides Wiki
Persona 3 Reload Walkthrough & Guides Wiki


All rights reserved
Copyright © 2024 HoYoverse, COGNOSPHERE. All Rights Reserved.
The copyrights of videos of games used in our content and other intellectual property rights belong to the provider of the game.
The contents we provide on this site were created personally by members of the Game8 editorial department.
We refuse the right to reuse or repost content taken without our permission such as data or images to other sites.