Chapter 17: Bionis' Interior and Prison Island (Revisited) Walkthrough
This is a walkthrough for the Bionis' Interior and Prison Island (Revisited) section of Xenoblade Chronicles Definitive Edition for Nintendo Switch. For a map of Bionis' Interior and Prison Island (Revisited) Landmarks and Locations, as well as boss strategy and other tips and tricks, read on!
List of Contents
| Previous Section | Next Section |
|---|---|
| Central Factory (Revisited) | Final Boss |
Chapter 17: Bionis' Interior and Prison Island (Revisited) Walkthrough
Colony 6
| Objectives | |
|---|---|
| 1 | 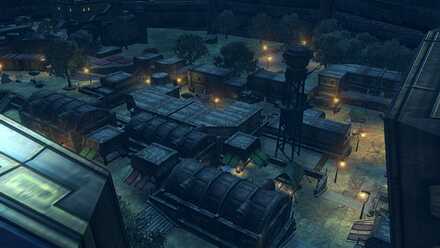 Head to Colony 6's entrance. After the cutscenes, you'll find yourself back at Colony 6, with danger incoming. Head there and prepare for battle. |
| 2 | Defeat the Telethias. You'll need defeat some smaller Telethia without Shulk available. Once the battle's over, he'll rejoin the party in a cutscene. |
| 3 | Defeat Sureny Telethia Add Shulk back into the party for your fight against the Sureny Telethia. Use Monado Purge or Soul Blast to remove its Soul Read ability. |
| 4 | Defeat Sani Telethia. After the cutscene, you'll have to contend with the Sani Telethia. Watch out for its weather-based attacks, but the fight is simpler than the previous one. When it's over, your final destination will be Prison Island. |
| Note 1 | 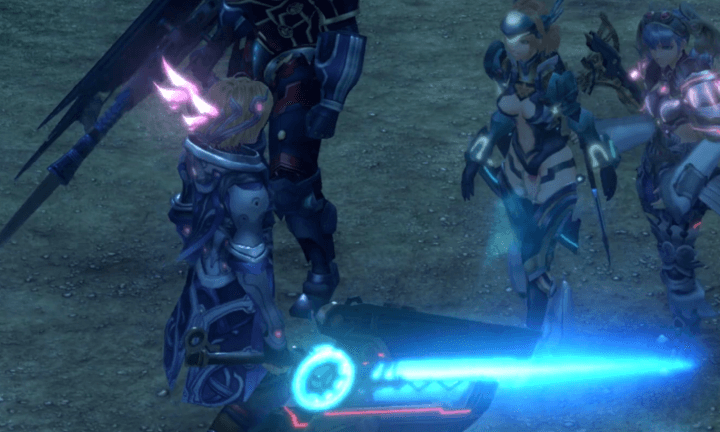 Complete Side Quests This is a good time to get as many remaining side quests as possible before heading off to Prison Island. Speak to Vanea to get a Side Quest for Replica Monado weapons to upgrade Shulk's power. Note that this quest requires levels ranging from the 80s to low 90s, though. |
| Note 2 | Prepare for Prison Island Prison Island contains some of the main game's final challenges, and features enemies with levels at and about 70. Consider completing quests and fighting enemies until the party is above level 70 to maximize your chance of victory. |
| 5 | Talk to Miqol. When ready to head to Prison Island, speak to Miqol. You'll first need to visit the Bionis' Interior, though. |
Bionis' Interior
| Objectives | |
|---|---|
| 1 | 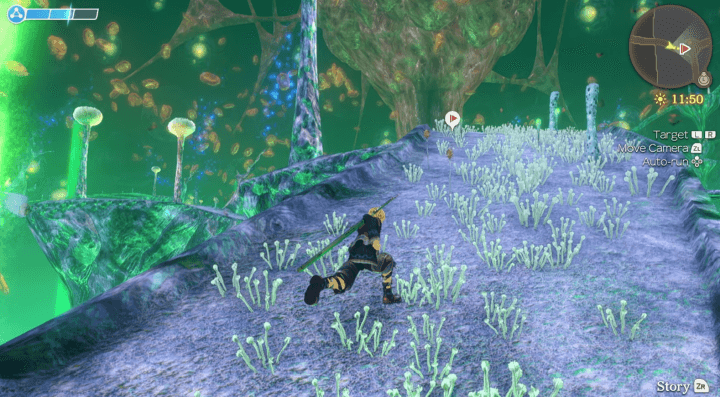 Traverse the Vein Crossroads. Make your way over the narrow bridges and platforms by following the quest guide. Elite Telethias guard some areas, so try to be around Level 70 or higher to get past them. |
| 2 | 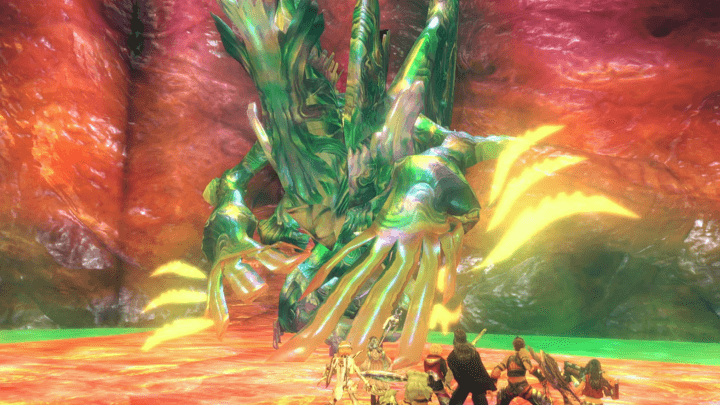 Defeat the 1st Disciple. Upon arriving at the Bionis' heart, you'll need to defeat the 1st Disciple in Telethia form. Her defenses are bolstered by her minions, so bring powerful area attacks to deal with them. |
| 3 | Use the teleporter to leave the Bionis' Interior. With the disciple down, use the teleporter to depart. |
Prison Island
| Objectives | |
|---|---|
| 1 | Head through the Central Hall until you see a platform. Stand on it to reach the next area. |
| note | This area is home to enemies whose levels range from 72-76. Level your characters to the high 70's or low 80's before proceeding. |
| 3 | Proceed to the teleporter stationed on the right side of the room. |
| 4 | Follow the narrow path until you reach the an open area. |
| 5 | Defeat the Obelis Obart and Demon Pavlosk. The Obelis Obart and Demon Pavlosk have a rank 6 and rank 5 talent art. Level your shield art to 6 and use it against them if the fight is proving itself to be difficult. |
| 6 | Enter the area where the Demon Pavlosk came from to reveal your next destination. |
| 7 | Defeat both Sanjibal Behemoth's to proceed. The Behemoth inhabits the same area, but the area itself is quite spacy. The Behemoths can be fought one by one to make the fight easier. |
| 8 | Climb the debris, then head to the right side of the room. Use the elevator to lift the elevator that's blocking the path below. |
| 9 | Descend to the Kitchen by using the walls of the elevator's path. |
| 10 | Open the gate and examine the Bone Pillar Control. |
| 11 | Return to the Arena. Jump to the water to avoid a possible death. |
| 12 | Defeat Master Obart. |
| 13 | Follow the quest guide, then use the teleporter. |
| 14 | Cross the Gravina Bridge then climb the stairs until you reach the next teleporter There will be several nebula enemies scattered along the path. You can draft a heavy ether team to dispatch them or make a pure physical team so you won't take their aggro. |
| 15 | After reaching the Gondorl Cathedral, head forward for a short scene, then head south and climb the tower. Activate the Dragon Summon. |
| 16 | Use the switch on the left most side of the teleporter to reveal the transporter. This is the point of no return! Avoid going forward if you still wish to do some other activities, or make a duplicate save file so you can backtrack later. |
| 17 | Defeat the 2nd disciple. |
Final Boss: Memory Space Walkthrough
Side Quests
From this chapter, a ton of new side quests will become available. Click on any of the buttons below to see the side quests in that area.
Colony 9 Side Quests
| Quest | Location | Giver | Rewards |
|---|---|---|---|
| Birthday Shoes | Fortress Entrance | Kantz | +150 Reputation 42500 G 50000 EXP Rex Helm |
| A Young Captain's Revival | Fortress Entrance | Miller | +500 Reputation 25000 G 75000 EXP Daze Plus V, Shulk's Skill Tree - Bravery |
| A Young Captain's Trust | Fortress Entrance | Miller | +500 Reputation 25000 G 75000 EXP Topple Plus V, Shulk's Skill Tree - Bravery |
| Friendship Tokens | Tranquil Square | Moritz | +250 Reputation 330 G 65000 EXP AP Up V, Friendship Tokens, Reyn's Skill Tree - Camaraderie |
| The Elite Captain's Anguish | Fortress Entrance | Raoul | +250 Reputation 22000 G 35000 EXP Topple Up V, Daze Up V |
| Getting to Know Minnie | Tranquil Square | Minnie | 23500 G 23500 EXP Muscle Up V, Strength Up VI |
| Getting to Know Dorothy | Ether Light | Dorothy | 20000 G 20000 EXP Ether Def Up V, Ether Up VI |
| A Token of Friendship | Weapon Dev. Lab - | - | 72000 EXP Vangarre Driver |
Quests in Red Text indicate Timed Quests. As these quests will expire after progressing to a certain part of the game, be sure to complete them while they are still available!
Tephra Cave Side Quests
| Quest | Location | Giver | Rewards |
|---|---|---|---|
| The Book of Bafalgar | Bafalgar Tomb | Shura | +100 Reputation |
| The Blood of Bafalgar | Bafalgar Tomb | Shura | +100 Reputation |
| The Path of Bafalgar | Bafalgar Tomb | Shura | +100 Reputation |
| The Coffin of Bafalgar | Bafalgar Tomb | Shura | +150 Reputation |
| The Gratitude of Bafalgar | Bafalgar Tomb | Shura | +300 Reputation 35000 G 80000 EXP Aura Heal IV, Auto-Heal Up III, Truth of the Giants |
Quests in Red Text indicate Timed Quests. As these quests will expire after progressing to a certain part of the game, be sure to complete them while they are still available!
Bionis' Leg Side Quests
| Quest | Location | Giver | Rewards |
|---|---|---|---|
| A Flower for a Rose | Refugee Camp | Dulland | +150 Reputation 38000 G 92500 EXP Cosmo Drones, Initial Tension VI |
| Battling Brutes | Refugee Camp | Dulland | +200 Reputation 63500 G 158000 EXP Eternity Knives, Speed V Frame, Speed V Booster, Fiora Skill Tree - Innocence |
| Supplies for Satorl | Refugee Camp | Elior | +100 Reputation 45000 G 58000 EXP Speed V Goggles, Speed V Arms |
Quests in Red Text indicate Timed Quests. As these quests will expire after progressing to a certain part of the game, be sure to complete them while they are still available!
Colony 6 Side Quests
| Quest | Location | Giver | Rewards |
|---|---|---|---|
| Family Secrets | North of the pond | Zel Argentis | +100 Reputation 20000 G 23000 EXP Rondine Cap, Rondine Gloves |
| Betrothal Test | North of the pond | Oleksiy | +100 Reputation 23500 G 26000 EXP Rafaga Gauntlets, Rafaga Boots |
| Stopping the Elopement | North of the pond | Don Argentis | +500 Reputation 28000 G 30000 EXP Satellite Shot, Hierax Top, Sharla Skill Tree - Affection |
| Lifespan of a Machine | Reconstruction HQ | Neonik | +150 Reputation 38000 G 31500 EXP Revival HP Up V |
| A Poet's Concerns | Near the farm in town | Yura | +150 Reputation 38500 G 33000 EXP Unbeatable IV |
| Delivering the Undeliverable | Stand south of entrance | Shilx | +100 Reputation 23000 G 29500 EXP Spike V |
| Finding the Unfindable | Stand south of entrance | Shilx | +200 Reputation 31500 G 37500 EXP Forma Spear |
| Nopon Determination | Reconstruction HQ | Mefimefi | +150 Reputation 48000 G 72000 EXP Arts Heal VI |
| A Dauntless Trader | Reconstruction HQ | Werner | +150 Reputation 33000 G 37500 EXP Auto-Heal Up V, Fall Defence IV, Terrain Defence IV |
| Securing Provisions | Reconstruction HQ | Dulland | +150 Reputation 36000 G 42500 EXP |
| Replica Monado 1 | Junks Ship | Vanea | 12000 EXP Monado Rudra |
| Replica Monado 2 | Junks Ship | Vanea | 12000 EXP Monado Agni |
| Replica Monado 3 | Junks Ship | Vanea | 12000 EXP Monado Abyss |
| Replica Monado 4 | Junks Ship | Vanea | 12000 EXP Monado Dogma |
| Replica Monado 5 | Junks Ship | Vanea | 12000 EXP Monado Saga |
| Melancholy Tyrea | Watchpoint Junction | Surprise Quest | 58500 EXP Empress Staff, Auto-Atk Stealth VI |
| Defend Colony 6 - Ancient | Reconstruction HQ | Colony 6 Residents | +100 Reputation 15000 G 10000 EXP |
| Defend Colony 6 - Demon | Reconstruction HQ | Colony 6 Residents | +100 Reputation 20000 G 30000 EXP |
Quests in Red Text indicate Timed Quests. As these quests will expire after progressing to a certain part of the game, be sure to complete them while they are still available!
Satorl Marsh Side Quests
| Quest | Location | Giver | Rewards |
|---|---|---|---|
| Challenge | Sororal Statues | High Entia Refugee | +50 Reputation 58000 G 52000 EXP |
| For a Friend | Sororal Statues | Rozeal | +300 Reputation 20000 G 25000 EXP |
| A Merciful End | Sororal Statues | Rozeal | +500 Reputation 38000 G 40000 EXP Debuff Plus VI |
| A Release from Duty | Sororal Statues | Rozeal | +700 Reputation 72000 G 85000 EXP Aggro Down V |
| The Imperial Ceremony | Sororal Statues | Scarlen | 66000 G 90000 EXP High Entia Emblem |
| Imperial Ceremony Offerings | Sororal Statues | Scarlen | - |
Quests in Red Text indicate Timed Quests. As these quests will expire after progressing to a certain part of the game, be sure to complete them while they are still available!
Makna Forest Side Quests
| Quest | Location | Giver | Rewards |
|---|---|---|---|
| Final Challenge of the Sage | Divine Sanctuary | Nopon Sage | +250 Reputation 38000 G 73500 EXP Meteor Nibbler, Riki Skill Tree - Heroism |
Quests in Red Text indicate Timed Quests. As these quests will expire after progressing to a certain part of the game, be sure to complete them while they are still available!
Frontier Village Side Quests
| Quest | Location | Giver | Rewards |
|---|---|---|---|
| Restoring the Capital | Nopon Tower | Nelo | +200 Reputation 13000 G 22000 EXP Power V Goggles, HP Up V |
| Restoring the Capital 2 | Nopon Tower | Nelo | +250 Reputation 16800 G 28000 EXP Power V Arms, Agility Up VI |
| Broken Ether Furnace | Nopon Tower | Kaleka | +300 Reputation 20000 G 43500 EXP Power V Boosters, Strength Up VI |
| Broken Ether Furnace 2 | Nopon Tower | Kaleka | +500 Reputation 42000 G 72000 EXP Power V Frame, Sedna Drones, Ether Up VI |
| A Memento of Daddy | Reservoir | Atael | +300 Reputation 38000 G 40000 EXP Will-o'-Wisp Staff, Physical Protect VI |
| Bana the Betrayer | Pollen Works | Gadada | +500 Reputation 100000 G 200000 EXP Haste VI, Double Attack V, EXP Up VI |
| Presents for Priceless Pupils | Pollen Orb Storehouse | Dobadoba | +150 Reputation 30000 G 35000 EXP Aggro Up V |
| Safer Energy | Pollen Works | Gadada | +100 Reputation 30000 G 50000 EXP Slow IV |
| Distilling Active Ingredients | Pollen Orb Storehouse | Cherri | +100 Reputation 30000 G 50000 EXP Paralysis IV |
Quests in Red Text indicate Timed Quests. As these quests will expire after progressing to a certain part of the game, be sure to complete them while they are still available!
Eryth Sea Side Quests
| Quest | Location | Giver | Rewards |
|---|---|---|---|
| Investigating Satorl | Ether Plant | Miriall | +100 Reputation 20000 G 42000 EXP Poison Defence VI |
| Ancient High Entia Mystery | Ether Plant | Talia | +700 Reputation 59500 G 93000 EXP Meteor Staff, Talent Boost V, Melia Skill Tree - Passion |
| The Missing Boy | Ether Plant | Miriall | +500 Reputation 23000 G 48000 EXP Ether Protect VI |
| The Only Thing I Can Do | Ether Plant | Vidian | +300 Reputation 31000 G 56000 EXP Rex Arms, Rex Greaves |
| I Will Never Forget You | Ether Plant | Vidian | +300 Reputation 43000 G 72000 EXP Rafaga Armour, Rafaga Leggings |
| Secret Research | Ether Plant | Teelan | +300 Reputation 41000 G 68000 EXP Rex Helm |
Quests in Red Text indicate Timed Quests. As these quests will expire after progressing to a certain part of the game, be sure to complete them while they are still available!
Alcamoth Side Quests
| Quest | Location | Giver | Rewards |
|---|---|---|---|
| Vidian Rescue Mission | ------ | Surprise Quest | +700 Reputation 58000 G 97500 EXP Gracielle Helm, Gracielle Arms, Gracielle Greaves |
Quests in Red Text indicate Timed Quests. As these quests will expire after progressing to a certain part of the game, be sure to complete them while they are still available!
Valak Mountain Side Quests
| Quest | Location | Giver | Rewards |
|---|---|---|---|
| The Missing Partner | Harict Chapel | Kurralth | +100 Reputation 24000 G 30000 EXP Empire Pike, Night Vision IV |
| The Final Giants' Ruins | Harict Chapel | Zain | +700 Reputation 88000 G 1750000 EXP Damage Heal VI, Arts Stealth VI |
| The Giants' Treasures | Harict Chapel | Zain | - |
Quests in Red Text indicate Timed Quests. As these quests will expire after progressing to a certain part of the game, be sure to complete them while they are still available!
Fallen Arm Side Quests
| Quest | Location | Giver | Rewards |
|---|---|---|---|
| Stunted Growth | Junks | Orkatix | +700 Reputation 44000 G 51500 EXP Agility Up IV, Dunban Skill Tree - Enthusiasm |
| Transmission Bypass | Junks | Orkatix | - |
| The Exhaust Pump | Junks | Orkatix | - |
| The Mini Reactor | Junks | Orkatix | - |
Quests in Red Text indicate Timed Quests. As these quests will expire after progressing to a certain part of the game, be sure to complete them while they are still available!
Prison Island Side Quests
| Currently no side quests to display. Please check back soon. |
Maps and Collectopaedia
Bionis' Interior Map
Lower Level |
Upper Level |
Bionis' Interior Landmarks and Locations
Landmarks
| A | Terminal Trachea |
|---|---|
| B | Interior Landing Site |
| C | Spinal Nerve Tower |
| D | Pars Sympathica Tower |
| E | Terminal Nerve Tower |
| F | Upper Trachea |
| G | Heart Entrance |
Locations
| 1 | Third Lung |
|---|---|
| 2 | First Lung |
| 3 | Vein Crossroad |
| 4 | Terminal Vein |
| 5 | Venous Plexus |
| 6 | Third Lung Bronchus |
| 7 | Second Lung |
| 8 | Aortic Pathway |
Heart-to-Hearts
| Title | Location | Char. 1 | Char. 2 | Affinity |
|---|---|---|---|---|
| Fiora's Body | Spinal Nerve Tower | Fiora | Sharla | Pink |
| Kind Words | Terminal Nerve Tower | Riki | Melia | Pink |
Bionis' Interior Collectopaedia
| Veg | Sarsaparilla | Black Liver Bean | - | - | - |
|---|---|---|---|---|---|
| Animal | Blood Worm | Azure Mouse | Happy Duck | - | - |
| Strange | Tap Tap Tap | High Entia Jewel | - | - | - |
Collection Rewards
| Vegetables | Haste V |
|---|---|
| Animals | Aggro Down IV |
| Strange | Strength Down V |
| 100% Completion | Z Speed Goggles |
Prison Island Map
Currently unavailable.
Prison Island Landmarks and Locations
Landmarks
| A | Bridge of Grief |
|---|---|
| B | Prison Gate |
| C | Empty Throne |
| D | Gondorl Cathedral |
| E | Prison Terrace |
Locations
| 1 | Damaged Transporter |
|---|---|
| 2 | Central Hall |
| 3 | First Sanctum |
| 4 | Second Sanctum |
| 5 | Banquet Hall |
| 6 | Kitchen |
| 7 | Behemoth Nest |
| 8 | Battle Arena |
| 9 | Arena |
| 10 | Great Canyon |
| 11 | Gravina Bridge |
| 12 | Corridor of Silence |
| 13 | Travalga Bridge |
| 14 | Basverg Belfry |
Heart-to-Hearts
| Title | Location | Char. 1 | Char. 2 | Affinity |
|---|---|---|---|---|
| Before the Final Battle | Corridor of Silence | Shulk | Fiora | Pink |
| Journey's End | Empty Throne | Reyn | Riki | Pink |
| Untold Feelings | Gravina Bridge | Sharla | Melia | Pink |
Prison Island Collectopaedia
| Fruit | Dry Lemon | Death Lychee | Hell Raspberry | Deadly Kiwi | - |
|---|---|---|---|---|---|
| Animal | Dancing Squirrel | Lightning Weasel | Angry Monkey | - | - |
| Bug | Señorita Scarab | Emperor Beetle | - | - | - |
| Nature | Absurd Branch | Insanity Moss | - | - | - |
| Parts | White Cover | Modern Resistor | Green Cam | Strong Screw | - |
| Strange | Blue Glow | Blue Blood | - | - | - |
Collection Rewards
| Fruit | Break V |
|---|---|
| Animals | Good Footing V |
| Bugs | Agility Up V |
| Nature | Strength Up V |
| Parts | Ledios Cuisses |
| Strange | Ether Up V |
| 100% Completion | Ledios Plate |
Tips and Strategies
Area Map
It might be obvious already at this point in the game, but you can fast travel to previously visited landmarks (except landmarks on the Mechonis due to story events). There will be several sidequests that will become available in Chapter 17, and it is highly suggested to just warp to said locations instead of walking around and visiting each area one by one.
The Replica Monados
You will be given a quest by Vanea that makes you look for materials to craft 5 different Monados. This is a good time to invest powering Shulk up before heading to the last parts of the game.
Rebuilding Colony 6
This is one of the best ways to spend your time with before ending the game. Rebuilding Colony 6 will unlock several new quests and shops for you to use that can further strengthen your party.
Boss Strategy Guide
Sureny Telethia
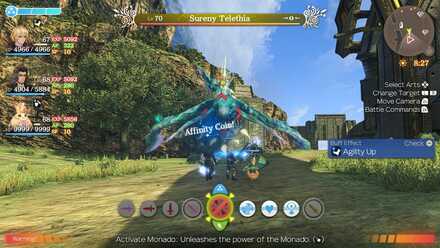
Watch out for Soul Read! Disable the Telethia's Soul Read to defeat it. Aura removal arts is a must-have in this fight. The Telethia can use Ether Particles, which is an Ether-based attack and also inflicts Ether Down. Getting hit with the ability twice in succession will prove fatal to your party.
Sureny Telethia Recommended Characters
|
|
|
|
Shulk is back in action! He has the best aura removal ability in the game, which is a much-needed move against the Telethia. Just don't forget to equip some gems to Shulk's new weapon. Sharla is also good to have with her Cure Bullet or Cure Round to remove the debuff caused by Ether Particles.
Sani Telethia
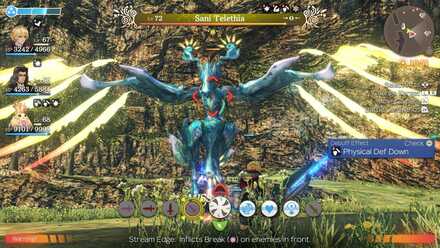
The 2nd Telethia fight in succession. This fight is completely different than the first one, as Sani Telethia won't even use Soul Read to defend itself. It has several area attacks that deal heavy damage to units in front of it. Take note of the weather, Sani Telethia will change it at will and its moves will vary depending on the current weather.
Aside from Telethia Buster VII, which is a physical attack, all of it's other moves are ether types. Thunder Bolt and Bolt from the Blue can inflict paralysis, but there are no notable moves that can cause too much trouble to a well prepared party.
Sunny Weather Attacks
Shock Wave and Thunderbolt.
Rainy Weather Attacks
Splash Wave, Sunlight Scatter, and Thunderbolt.
Thunderstorms Attacks
Sunlight Scatter, Bolt from the Blue.
Sani Telethia Recommended Characters
|
|
|
|
Not many debuffs to take note of so Sharla isn't a must-have. Riki and Shulk's heal will be enough to sustain your party's HP in the battle. A good chain attack can also end the fight rather quickly.
1st Disciple (Lorithia)
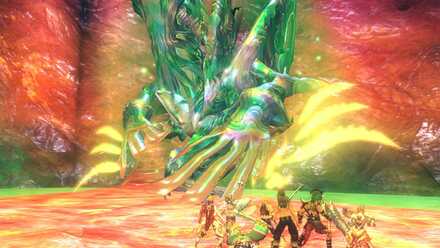
Lorithia will summon Nova enemies during the fight. Lorithia's defenses will change depending on the number of enemies alive. Reducing the number of enemies to 2 will allow you to damage her while reducing them further will make her take more damage than usual. Build up your party gauge by using Burst Affinities. When a Chain Attack becomes available, dispatch all enemies, then use it on Lorithia to bring her down.
Lorithia Recommended Characters
|
|
|
|
Lorithia will be summoning Nova type enemies, so adding Melia in the party is a must (setting her as your leader will be even better). Also, make sure to add Blaze, Wind, and Ice to your art arsenal, as attacking the Nova with Area attacks will allow you to dispatch them rather quickly.
Have Dunban take the frontline, then have Sharla take the back and equip her with Thunder Bullet to give your party a good way to dispatch the Novas. Fiora can replace Dunban if you wish to do so, but using Dunban's Blossom Dance during a chain attack can allow you to defeat Lorithia with a single chain attack from full health if you destroy all novas and the multiplier is maxed out.
Master Obart
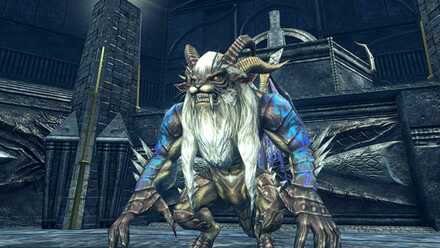
It can use the Talent Arts Annihilation V and Legendary Claw VII. Blocking these moves with Shield is a must, since Annihilation can inflict topple, while Legendary Claw inflicts high damage and can potentially KO all the targets hit. Do not topple Master Obart, as it will activate its, spike abilities which will damage you whenever you hit it.
Master Obart Recommended Characters
|
|
|
|
Shulk is the only recommended character, and the other two depends on the player. Just avoid toppling it and keeping Shield up, and the fight will prove effortless to beat.
Dragon King Alcar
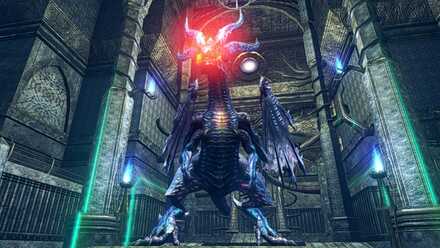
A big guy with a counter spike ability. Everytime you hit Dragon King Alcar, you will suffer 450 damage. The way to approach this fight will vary depending on the chosen characters for the fight which will be detailed below.
Strategy 1 Spike Defense
If you have the necessary materials, crafting spike defense gems and equipping them to your characters will allow you to approach this fight normally. You can get a maximum of 100% spike defense if you have the necessary gems, so you can ignore Alcar's counter spike ability with this setup and just lay havoc on him.
Strategy 2 Topple Lock
|
|
|
|
Alcar's counter spike will disappear if he gets toppled. Utilizing a topple lock party will allow you to beat him up without him being able to counter you at all. This requires a high affinity and high skill levels for your characters, as well as some topple plus gems to be executed properly.
How to Topple | Topple Lock Guide
Strategy 3 Purge
|
|
|
|
The default strategy. Purging Alcar's spike ability will allow you to hit him without worry. Just make sure to keep on reapplying purge whenever Alcar recovers it. Adding Sharla to your team will allow you to avoid accidental death with this strategy.
Dickson (2nd Disciple)
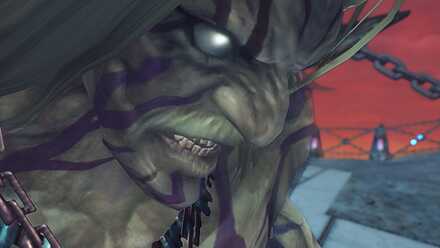
A two-phase fight. You'll have to bring Dickson's HP down to 50%, then fight him again to defeat him. He has a paralysis spike ability, and is immune to Purge, so using art heavy characters is recommended for the fight. He also becomes immune to topple at low health, so using a topple lock setup might prove disadvantageous in the long run.
Dickson Recommended Characters
|
|
|
|
Sharla is the chosen healer in this fight due to dickson's ability to remove debuffs, making Riki's value lower. Sharla can also focus on healing, so paralysis won't be too much of an issue for her. Make sure to position Shulk away from your party to avoid Dickson's Chaos Punish so you can remove the daze from your allies that get hit.
Story Walkthrough Related Links
Xenoblade Chronicles Story Walkthrough
| Prologue | The Battle of Sword Valley |
|---|---|
| Chapter 1 | Colony 9 and Tephra Cave |
| Chapter 2 | Colony 9 (Mechon Invasion) |
| Chapter 3 | Tephra Cave (Revisited) |
| Chapter 4 | Bionis' Leg |
| Chapter 5 | Colony 6 and Ether Mine |
| Chapter 6 | Satori Marsh and Bionis' Interior (1st Time) |
| Chapter 7 | Makna Forest and Frontier Village |
| Chapter 8 | Eryth Sea, Alcamoth, and High Entia Tomb |
| Chapter 9 | Prison Island (1st Time) |
| Chapter 10 | Valak Mountain |
| Chapter 11 | Sword Valley and Galahad Fortress |
| Chapter 12 | Fallen Arm |
| Chapter 13 | Mechonis Field |
| Chapter 14 | Central Factory and Agniratha |
| Chapter 15 | Mechonis Core |
| Chapter 16 | Central Factory (Revisited) |
| Chapter 17 | Bionis' Interior and Prison Island (Revisited) |
| Final Boss | Memory Space |
Author

Xenoblade Chronicles: Definitive Edition Walkthrough & Guides Wiki
Chapter 17: Bionis' Interior and Prison Island (Revisited) Walkthrough
Rankings
Gaming News
![Animal Crossing: New Horizons Review [Switch 2] | Needlessly Crossing Over to a New Generation](https://img.game8.co/4391759/47d0408b0b8a892e453a0b90f54beb8a.png/show)


Popular Games

Genshin Impact Walkthrough & Guides Wiki
Honkai: Star Rail Walkthrough & Guides Wiki
Monster Hunter Wilds Walkthrough & Guides Wiki
Arknights: Endfield Walkthrough & Guides Wiki
Umamusume: Pretty Derby Walkthrough & Guides Wiki
Wuthering Waves Walkthrough & Guides Wiki
Pokemon TCG Pocket (PTCGP) Strategies & Guides Wiki
Digimon Story: Time Stranger Walkthrough & Guides Wiki
Palworld Walkthrough & Guides Wiki
Zenless Zone Zero Walkthrough & Guides Wiki


Recommended Games
Fire Emblem Heroes (FEH) Walkthrough & Guides Wiki
Pokemon Brilliant Diamond and Shining Pearl (BDSP) Walkthrough & Guides Wiki
Diablo 4: Vessel of Hatred Walkthrough & Guides Wiki
Super Smash Bros. Ultimate Walkthrough & Guides Wiki
Yu-Gi-Oh! Master Duel Walkthrough & Guides Wiki
Elden Ring Shadow of the Erdtree Walkthrough & Guides Wiki
Monster Hunter World Walkthrough & Guides Wiki
The Legend of Zelda: Tears of the Kingdom Walkthrough & Guides Wiki
Persona 3 Reload Walkthrough & Guides Wiki
Cyberpunk 2077: Ultimate Edition Walkthrough & Guides Wiki


All rights reserved
© 2010 - 2020 Nintendo / MONOLITHSOFT. Xenoblade Chronicles and Nintendo Switch are trademarks of Nintendo. © 2020 Nintendo.
The copyrights of videos of games used in our content and other intellectual property rights belong to the provider of the game.
The contents we provide on this site were created personally by members of the Game8 editorial department.
We refuse the right to reuse or repost content taken without our permission such as data or images to other sites.