Chapter 11: Sword Valley and Galahad Fortress Walkthrough
This is a walkthrough for the Sword Valley and Galahad Fortress section of Xenoblade Chronicles Definitive Edition for Nintendo Switch. For a map of Sword Valley and Galahad Fortress Landmarks and Locations, as well as boss strategy and other tips and tricks, read on!
List of Contents
| Previous Section | Next Section |
|---|---|
| Valak Mountain | Fallen Arm |
Chapter 11: Sword Valley and Galahad Fortress Walkthrough
Sword Valley
| Objectives | |
|---|---|
| 1 | 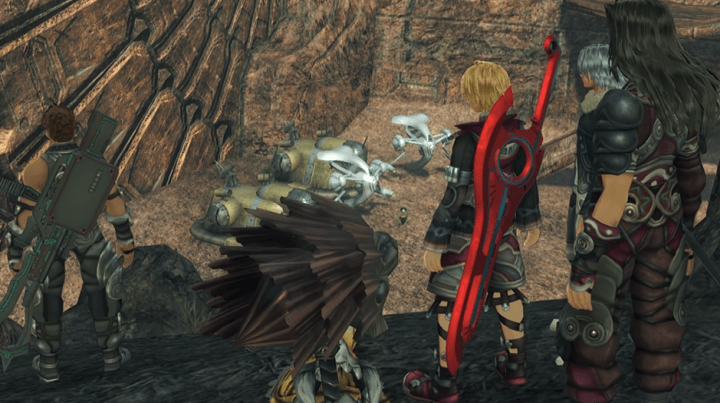 Proceed to the Base and Stock up Upon arriving in Sword Valley, follow the quest path towards the supply convoy. There's a shop here that sells Anti-Mechon Weapons. Buy and equip these so you can damage Mechon enemies without relying on Shulk's Monado Enchant Art. |
| 2 | Head inside Ged's Fortress and activate the gate lock. After speaking with Dickson, you'll need to proceed through the valley, fighting or avoiding enemies to reach the Ged Fortress section. Once there, use the switch inside the structure to unlock the 6th Gate's access panel. |
| 3 | 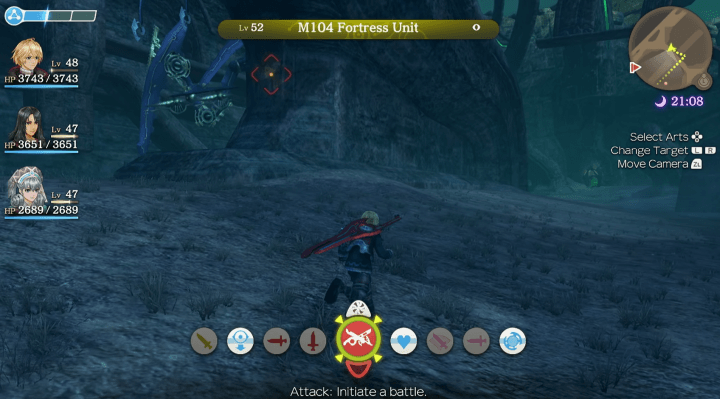 Proceed to the 6th gate. Proceed to the 6th Gate and open it using the unlocked access panel. You may see the massive M104 Fortress Unit Mechon patrolling. Beware of engaging it, as it's very tough if you're under Level 50. |
| 4 | 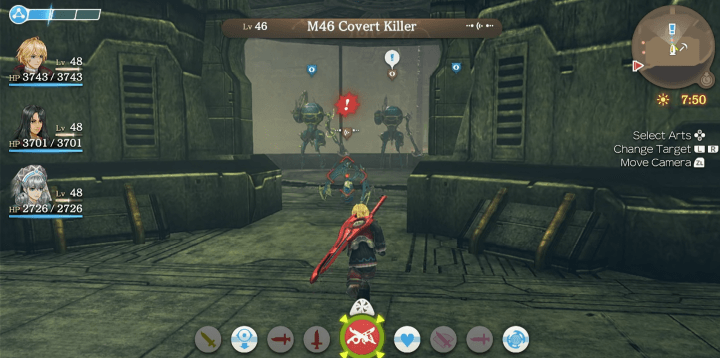 Head to Dolgan outpost. Proceed through the valley, using the high ground to avoid fights if necessary, and activate the gate locks to proceed. The Unique Mechon Prudent Purson can be defeated here, but it's not necessary to do so if you just want to proceed. |
| 5 | 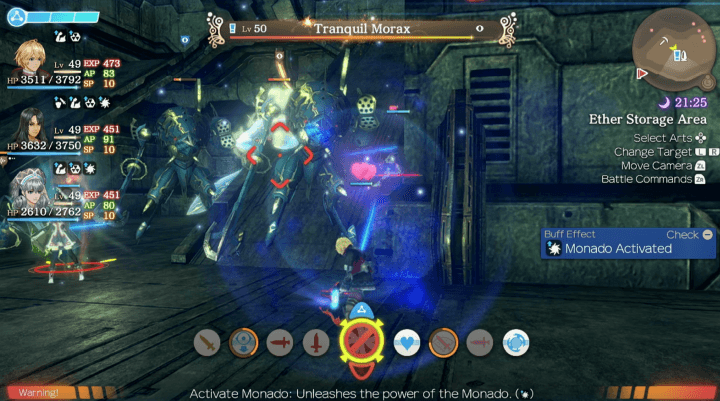 Head to the Enalda Control Base As you pass through the Ether Storage Area you'll receive a surprise quest to kill a powerful Mechon, so head to the Enalada Control Base area, and find the Unique Mechon Tranquil Morax guarding the gate controls. |
| 6 |  Defeat Mumkhar Eventually you'll pass through the **Port Access Pathway, and encounter Mumkhar for your final showdown. Defeat him in his Face Mechon form, then proceed deeper into Sword Valley and Galahad Fortress. |
Galahad Fortress
| Objectives | |
|---|---|
| 1 | 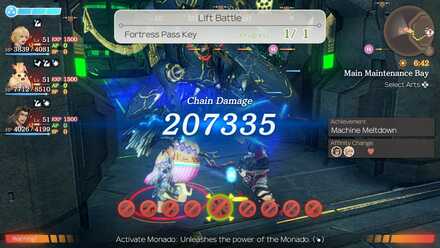 Head to the 2nd Fuel Room After the cutscenes, you'll enter the facility proper through the Fortress Rear Entrance. To obtain the Fortress Pass Key needed to unlock the lift, you'll need to defeat the Mechons in the 2nd Fuel Room by using AOE attacks to dispatch them while they're bunched up. |
| 2 | Return to the lift, and use it to descend the fortress. The unlocked lift will take you into the Blast Furnace Conduit. After proceeding across the pipes and walkways, you'll be able to access the central room by pushing the panel nearby. Enter the room for a cutscene. |
| 4 | Stop the Turbines. You'll need to shut down the turbines in the northern and southern rooms to cut off the Mechon fuel supply. Prepare for fights with elite Mechon units as you enter each room. |
| 5 | 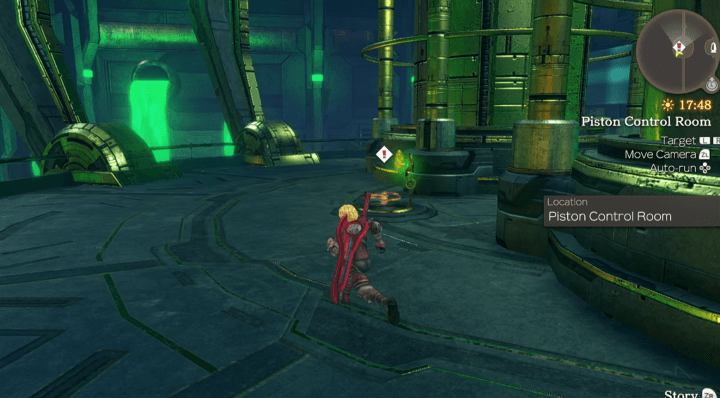 Stop the Ether Blast Furnace You'll also need to stop the furnace itself by proceeding to the westernmost room and using the device there. |
| 6 | Get to the Preparation Bay lift. Enter the next area. You'll have to fight on a narrow walkway against elite Mechons and the unique Glorious Jurom, so be careful not to fall into the green sludge. |
| 7 | 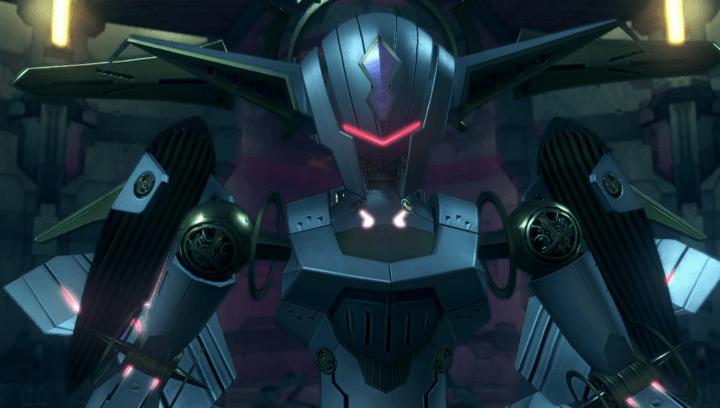 Defeat all the Defender Mechons protecting Nemesis Face. You will encounter Nemesis Face defended by many Face Mechon.Do not attack Nemesis Face! Focus your attacks on the escorts and take them down. |
| 8 | 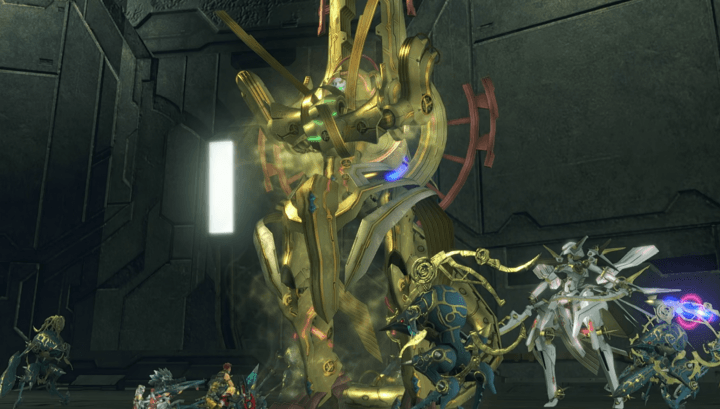 Survive the Fight! After downing Nemesis Face's escorts, Gold Face will intervene. The battle is unwinnable, so simply stay alive. It may help if you have a healer available and use Monado Speed to boost evasion rates. Eventually the battle will end and you'll move to the next chapter. |
Chapter 12: Fallen Arm Walkthrough
Side Quests
The following side quests are available from this chapter:
Sword Valley Side Quests
| Quest | Location | Giver | Rewards |
|---|---|---|---|
| Secure Dolgan Outpost | Dolgan Outpost | Surprise Quest | 28000 G 5000 EXP Orion Cap |
| Secure Enalda Control Base | Enalda Control Base | Surprise Quest | 32000 G 8000 EXP Orion Gloves |
| 3rd Gate Front Line | 3rd Gate | Surprise Quest | 40000 G 15000 EXP Orion Shoes |
| Secure the Radio Tower | Radio Tower | Surprise Quest | 45000 G 22000 EXP Topple Resist IV, Daze Resist IV |
Quests in Red Text indicate Timed Quests. As these quests will expire after progressing to a certain part of the game, be sure to complete them while they are still available!
Galahad Fortress Side Quests
There are no Side Quests in this area.
Maps and Collectopaedia
Sword Valley Map
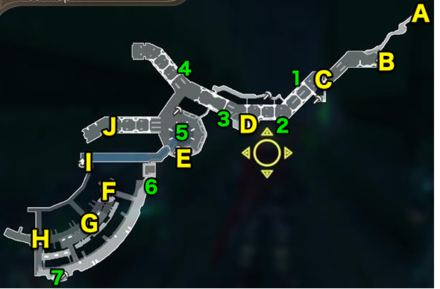
Sword Valley Landmarks and Locations
Landmarks
| A | Bionis' Thumb |
|---|---|
| B | Supply Convoy |
| C | Ged Fortress |
| D | Dolgan Outpost |
| E | Enalda Control Base |
| F | Heavy Machine Depot |
| G | Control Tower |
| H | Radio Tower |
| I | Fortress Rear Entrance |
| J | Monado Wound |
Locations
| 1 | 6th Gate |
|---|---|
| 2 | 5th Gate |
| 3 | 4th Gate |
| 4 | 3rd Gate |
| 5 | Ether Storage Area |
| 6 | Port Access Pathway |
| 7 | Port Maintenance Bay |
Heart-to-Hearts
There are no available Heart-to-Hearts in this area.
Sword Valley Collectopaedia
| Veg | Fire Pepper | Meaty Carrot | Bitter Broccoli | - | - |
|---|---|---|---|---|---|
| Fruit | Bitter Melon | Citron Gooseberry | Juicy Melon | Amethyst Melon | - |
| Flower | Jujube Silver | Black Blossom | Abyss Heather | Delerium Foxglove | - |
| Parts | Gold Condenser | Purple Lamp | Crimson Gear | - | - |
| Strange | Red Frontier | Darkness Bottle | Bud of Eternity | - | - |
Collection Rewards
| Vegetables | Good Footing III |
|---|---|
| Fruit | HP Steal III |
| Flowers | Auto-Heal Up III |
| Parts | First Attack Plus III |
| Strange | Art Seal Resist III |
| 100% Completion | Cosmic Nibbler |
Galahad Fortress Map
GF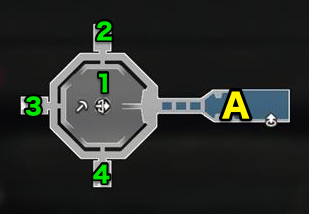 |
B1F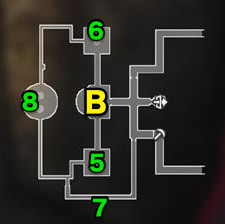 |
B2F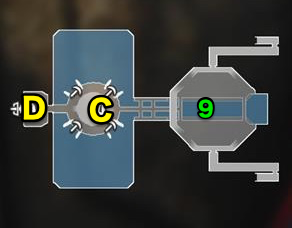 |
B3F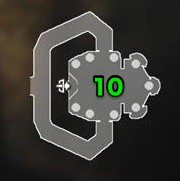 |
B4F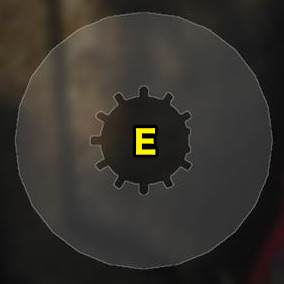 |
Galahad Fortress Landmarks and Locations
Landmarks
| A | Ether Influx Conduit |
|---|---|
| B | Main Control Room |
| C | Ether Blast Furnace |
| D | Preparation Bay |
| E | Fortress Depths |
Locations
| 1 | Main Maintenance Bay |
|---|---|
| 2 | 1st Fuel Supply Room |
| 3 | 2nd Fuel Supply Room |
| 4 | 3rd Fuel Supply Room |
| 5 | 1st Turbine Room |
| 6 | 2nd Turbine Room |
| 7 | Blast Furnace Conduit |
| 8 | Piston Control Room |
| 9 | Ether Input Stream |
| 10 | Face Maintenance Bay |
Heart-to-Hearts
There are no available Heart-to-Hearts in this area.
Galahad Fortress Collectopaedia
| Bug | Wheel Lurker | Ultramarine Ant | - | - | - |
|---|---|---|---|---|---|
| Parts | Locust Spring | Art Core Coil | Tail Antenna | - | - |
| Strange | Hunger Crash | Splish Splash | - | - | - |
Collection Rewards
| Bugs | Terrain Defence II |
|---|---|
| Parts | Agility Down III |
| Strange | Ether Up III |
| 100% Completion | Arkose Pike |
Tips and Strategies
Both Areas Become Inaccessible Later
Make sure to get all collectables, and attempt to complete the map as much as possible before leaving, as you cannot return to Sword Valley/Galahad Fortress again later in the game, so you might as well do so during this chapter.
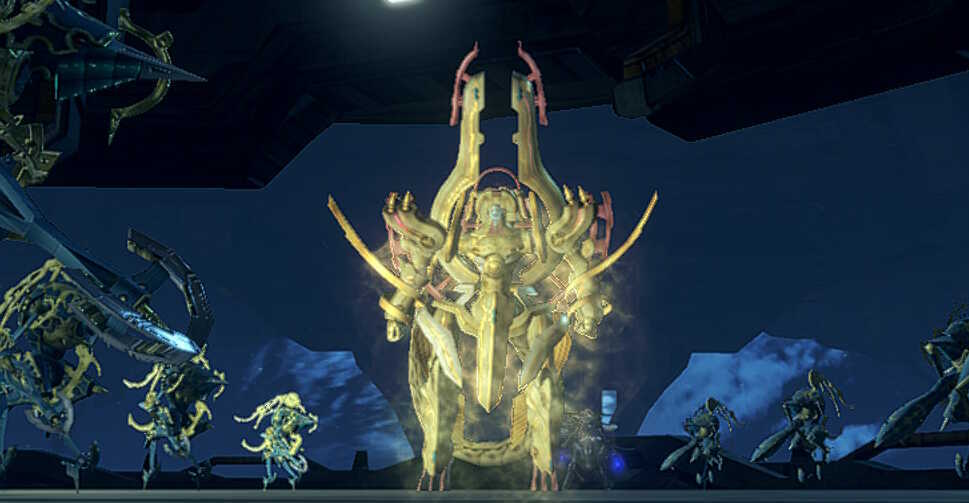
M104 Fortress Unit
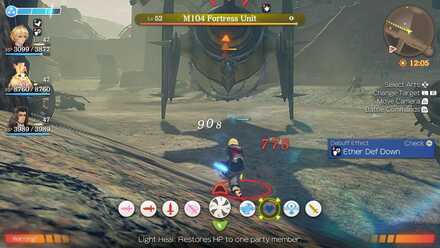
A fortress sized Mechon. It's so big, the whole thing can't even fit in the screenshot.
There are some huge mechons here, and the name Fortress Unit suits them extremely well. Unfortunately for you, these Mechons don't just have size at their disposal, but power as well. Make sure to avoid these Mechons!
Fighting M104 Fortress Unit
If however, you truly wish to fight against the M104, there are a few key points to know beforehand.
- M104 can hit all your units with its titan stomp, and it can deal around 3,000 damage to each member. This can be dodged using Monado Speed but only one character will be able to do so.
- M104 can also use a rank 5 and rank 7 move called Titan Laser, which is as frightening as it sounds.
- Its Dark Matter move is an ether-based attack, so improving your Ether Defense is going to help greatly in this fight.
- With its high Agility, this beast can be hard to even hit if you are underleveled. It is at level 52, so ideally you should get up to at least level 50 or higher.
Boss Strategy Guide
Mumkhar
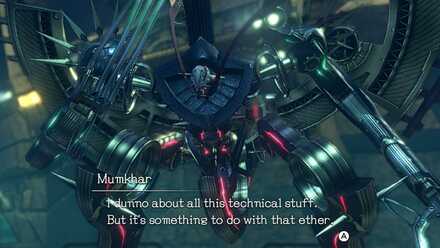
Mumkhar is going to fight you while in his Mechon, and he's accompanied by two other faced mechons as well. The other Mechons aren't that durable, so prioritize finishing them off first. He has several AOE attacks like Hell Spin Venom and Custom Grand Shot, so avoid letting anyone fall to low HP. He also has a shieldable talent art called Hell Talon Venom IV. Having a shield rank equivalent to 4 can let you avoid a possible fatal blow from this move.
Mumkhar Recommended Characters
|
|
|
|
Mumkhar has several high damaging moveset that hits a wide range, regardless of aggro. Deploying low HP characters like Melia and Sharla is not recommended in this battle.
Nemesis Face
This is a reverse hostage battle where you need to defeat all the boss' allies while keeping the main boss alive. A good party setup is enough to win this battle easily.
Gold Face
A survival battle. It is highly similar to your first fight with Xord. Simply delaying the fight and healing your party is necessary to end this battle.
Gold Face Recommended Characters
|
|
|
|
This 3 party member setup is focused on healing each other. This should be enough for you to survive the enemy assault until the battle ends.
Story Walkthrough Related Links
Xenoblade Chronicles Story Walkthrough
| Prologue | The Battle of Sword Valley |
|---|---|
| Chapter 1 | Colony 9 and Tephra Cave |
| Chapter 2 | Colony 9 (Mechon Invasion) |
| Chapter 3 | Tephra Cave (Revisited) |
| Chapter 4 | Bionis' Leg |
| Chapter 5 | Colony 6 and Ether Mine |
| Chapter 6 | Satori Marsh and Bionis' Interior (1st Time) |
| Chapter 7 | Makna Forest and Frontier Village |
| Chapter 8 | Eryth Sea, Alcamoth, and High Entia Tomb |
| Chapter 9 | Prison Island (1st Time) |
| Chapter 10 | Valak Mountain |
| Chapter 11 | Sword Valley and Galahad Fortress |
| Chapter 12 | Fallen Arm |
| Chapter 13 | Mechonis Field |
| Chapter 14 | Central Factory and Agniratha |
| Chapter 15 | Mechonis Core |
| Chapter 16 | Central Factory (Revisited) |
| Chapter 17 | Bionis' Interior and Prison Island (Revisited) |
| Final Boss | Memory Space |
Author

Xenoblade Chronicles: Definitive Edition Walkthrough & Guides Wiki
Chapter 11: Sword Valley and Galahad Fortress Walkthrough
Rankings
- We could not find the message board you were looking for.
Gaming News


Popular Games

Genshin Impact Walkthrough & Guides Wiki
Honkai: Star Rail Walkthrough & Guides Wiki
Monster Hunter Wilds Walkthrough & Guides Wiki
Arknights: Endfield Walkthrough & Guides Wiki
Umamusume: Pretty Derby Walkthrough & Guides Wiki
Wuthering Waves Walkthrough & Guides Wiki
Pokemon TCG Pocket (PTCGP) Strategies & Guides Wiki
Digimon Story: Time Stranger Walkthrough & Guides Wiki
Palworld Walkthrough & Guides Wiki
Zenless Zone Zero Walkthrough & Guides Wiki


Recommended Games
Fire Emblem Heroes (FEH) Walkthrough & Guides Wiki
Pokemon Brilliant Diamond and Shining Pearl (BDSP) Walkthrough & Guides Wiki
Diablo 4: Vessel of Hatred Walkthrough & Guides Wiki
Super Smash Bros. Ultimate Walkthrough & Guides Wiki
Yu-Gi-Oh! Master Duel Walkthrough & Guides Wiki
Elden Ring Shadow of the Erdtree Walkthrough & Guides Wiki
Monster Hunter World Walkthrough & Guides Wiki
The Legend of Zelda: Tears of the Kingdom Walkthrough & Guides Wiki
Persona 3 Reload Walkthrough & Guides Wiki
Cyberpunk 2077: Ultimate Edition Walkthrough & Guides Wiki


All rights reserved
© 2010 - 2020 Nintendo / MONOLITHSOFT. Xenoblade Chronicles and Nintendo Switch are trademarks of Nintendo. © 2020 Nintendo.
The copyrights of videos of games used in our content and other intellectual property rights belong to the provider of the game.
The contents we provide on this site were created personally by members of the Game8 editorial department.
We refuse the right to reuse or repost content taken without our permission such as data or images to other sites.
This guide is very helpful and good