Chapter 8: Eryth Sea, Alcamoth, and High Entia Tomb Walkthrough
This is a walkthrough for the Eryth Sea, Alcamoth, and High Entia Tomb section of Xenoblade Chronicles Definitive Edition for Nintendo Switch. For a map of Eryth Sea, Alcamoth, and High Entia Tomb Landmarks and Locations, as well as boss strategy and other tips and tricks, read on!
List of Contents
| Previous Section | Next Section |
|---|---|
| Makna Forest and Frontier Village | Prison Island |
Chapter 8: Eryth Sea, Alcamoth, and High Entia Tomb Walkthrough
Eryth Sea
| Objectives | |
|---|---|
| 1 | 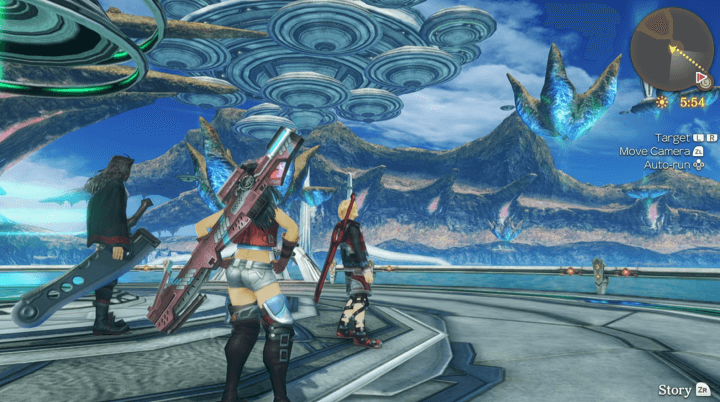 Head to the teleporter platform. Upon arriving at Eryth Sea's shore, you'll need to make your way to the High Entia-built teleporter nearby. |
| 2 | 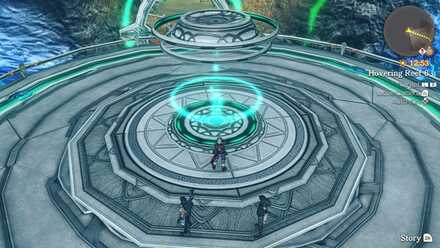 Step into the glowing light to be teleported. The platforms work by teleporting you when you step on the glowing light. The network of platforms leads to various locations around the map. |
| 3 | 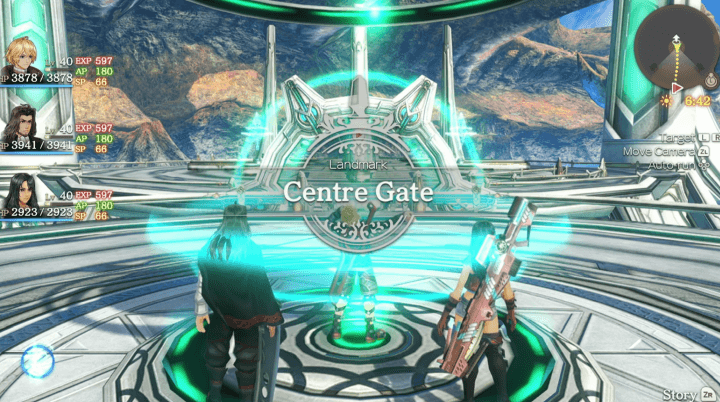 Proceed to the Centre Gate. Different platforms link to each other. You'll be able to follow the quest line to find the correct platform-to-platform link to bring you to Centre Gate, the main platform for Alcamoth. |
Alcamoth
| Objectives | |
|---|---|
| 1 | 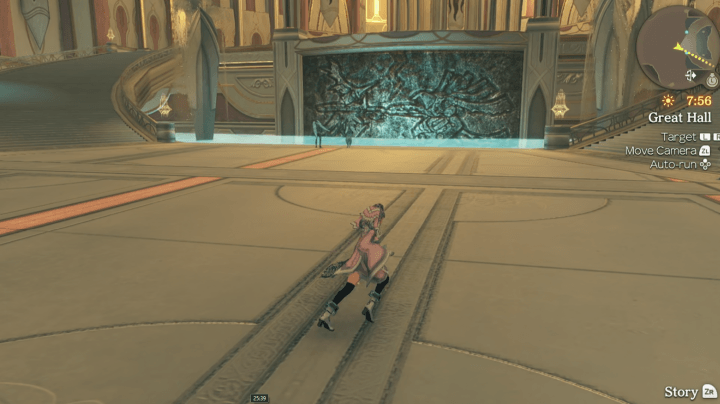 Head to the Audience Chamber as Melia. Upon arriving at Alcamoth, Melia will be separated from the party. Proceed to the objective marker to see some cutscenes and learn of your next destination. |
| 2 | 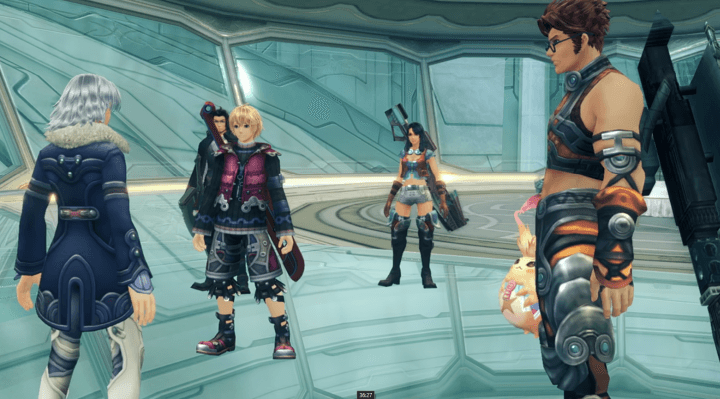 Talk to each party member as Shulk. While awaiting Melia, Shulk and the gang will take on a new task to help out with some monsters. |
| 3 | Head back to Eryth Sea. Reform your party and head out into the capital proper. If you need to, you'll find stores and side quests available, as well. |
Revisiting Eryth Sea
| Objectives | |
|---|---|
| 1 | 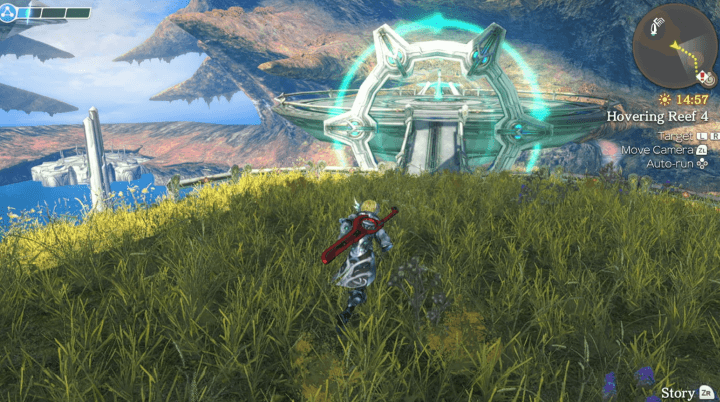 Talk to the Alcamoth citizen in Hovering Reef 4. Follow the quest marker to Hovering Reef 4 to begin your hunt for the missing NPC. |
| 2 | Follow the dotted line to the missing Transport worker. As you follow the quest marker, you'll eventually land near the Ether Crystal Deposit, where the citizen is being menaced by some Kromar. |
| 3 | 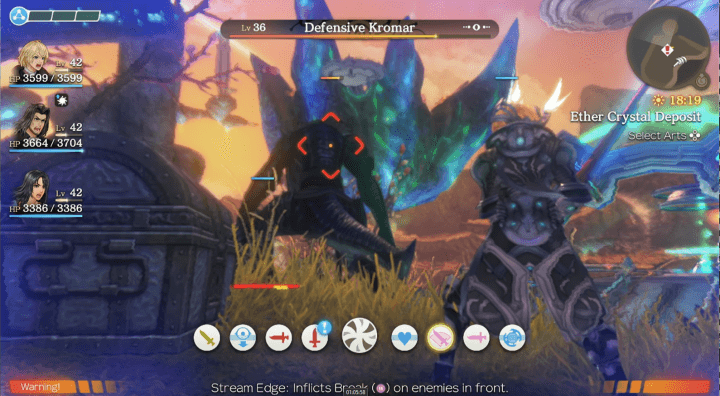 Defeat the four Kromar surrounding the worker. Defeat the Kromar. Be careful, as the fight can be difficult if your party is under level 38. |
| 4 | 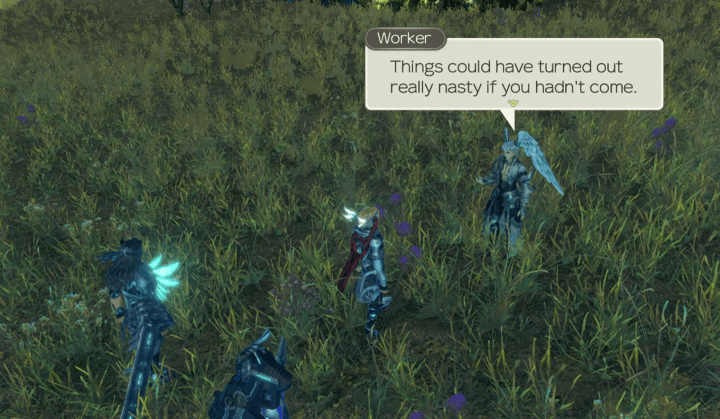 Return to Alcamoth. Speak to the worker to complete the quest and kick off a cutscene, after which you can return to Alcamoth when you're ready to proceed with the story. |
Revisiting Alcamoth
| Objectives | |
|---|---|
| 1 | Speak to the Caretaker in the Whitewing Palace. |
| 2 | 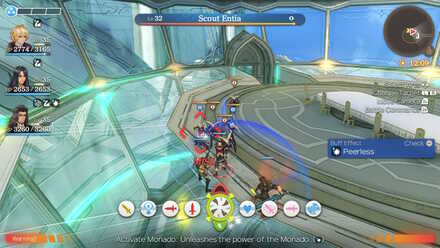 Defeat the Entia. After the cutscene you'll be ambushed by a group of assassins! Defeat them to proceed. |
| 3 | Go back to Eryth Sea. You'll be tasked with following Melia to the High Entia Tomb, so leave Alcamoth and head to the tomb via the Eryth Sea teleporters, where you will switch to Melia automatically. |
High Entia Tomb
| Objectives | |
|---|---|
| 1 | 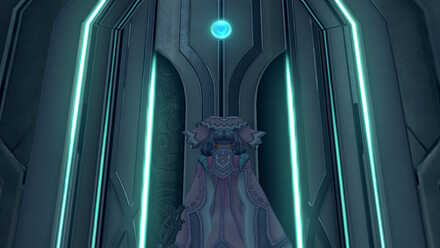 As Melia, activate the Verification Device.Simply proceed down the hall and activate the marked switch to trigger a cutscene. After the cutscene, follow the marked path as Melia towards the Ceremony Hall. |
| 2 | 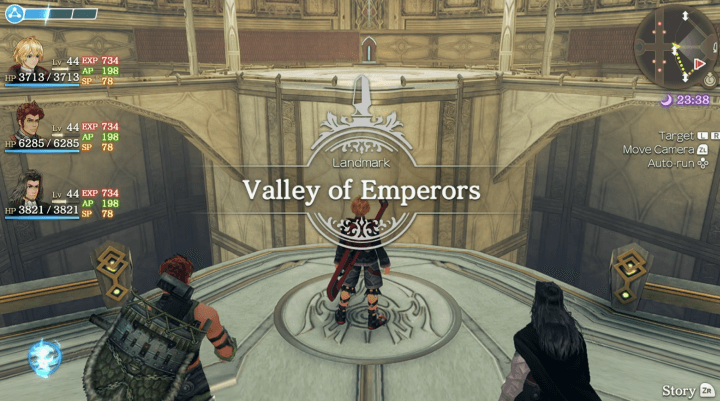 As the rest of the party, head to the Valley of Emperors. You'll be given control of the party again, and will need to make your way past High Entia Andos foes towards the Valley of Emperors location, where you'll climb across the wall to reach the objective. |
| 3 | Defeat the first Orluga Rufuses. After a cutscene you'll fight an Orluga Rufus foe, who won't be too tough if you're at or above Level 40. |
| 4 | 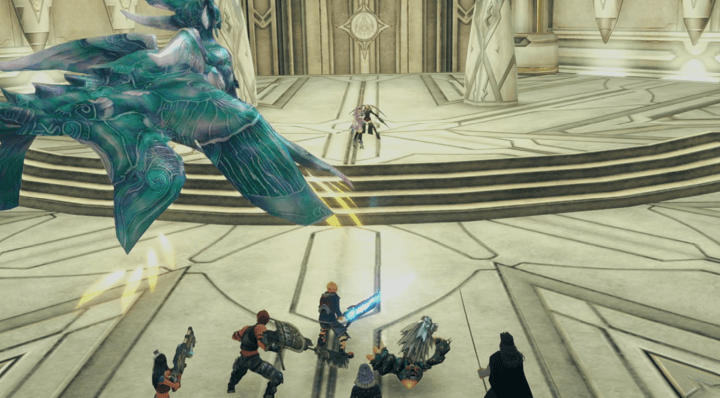 Defeat Tyrea and the Solidum Telethia. After fighting your way to Melia's location, you'll have to defeat Tyrea and the Solidum Telethia bosses. Focus on defeating the Telethia first, then Tyrea. |
Return to Alcamoth
| Objectives | |
|---|---|
| 1 | Go to the Audience Chamber. After returning to Alcamoth, you'll be summoned to the Audience Chamber for a series of cutscenes, and proceed to the next chapter. |
Chapter 9: Prison Island (1st Time) Walkthrough
Side Quests
The following side quests are available from this chapter:
Eryth Sea Side Quests
| Quest | Location | Giver | Rewards |
|---|---|---|---|
| Trouble at the Plant | Ether Plant | Jarack | +200 Reputation 7700 G 4700 EXP Shell Gauntlets, Good Footing II |
| Punish the Hodes | Ether Plant | Jarack | - |
| Mend the Plant | Ether Plant | Jarack | - |
| Hode Attack | Ether Plant | Jarack | +100 Reputation 5400 G 3000 EXP Buff Time Plus II, Divine Protect II |
| Trouble at the Lighthouse | Syrath Lighthouse | Shalen | +500 Reputation 5700 G 3800 EXP Nightglow Staff, Melia Skill Tree - Reticence |
| Monster Quest 1 | Syrath Lighthouse | Lighthouse Keeper | +50 Reputation 13000 G |
| Monster Quest 2 | Syrath Lighthouse | Lighthouse Keeper | +50 Reputation 15000 G |
| Challenge | Syrath Lighthouse | Lighthouse Keeper | +50 Reputation 32000 G |
| Collect Quest 1 | Syrath Lighthouse | Alcamoth Citizen | +50 Reputation 12000 G |
| Collect Quest 2 | Syrath Lighthouse | Alcamoth Citizen | +50 Reputation 20000 G |
Quests in Red Text indicate Timed Quests. As these quests will expire after progressing to a certain part of the game, be sure to complete them while they are still available!
Alcamoth Side Quests
| Quest | Location | Giver | Rewards |
|---|---|---|---|
| The Deciphering Machine | Imperial Palace | Ruthan | +100 Reputation 5500 G 1500 EXP Slow Resist III |
| A Necessary Upgrade | Imperial Palace | Naroth | +150 Reputation 6500 G 1800 EXP Shell Gauntlets |
| Talia's Research | Imperial Palace | Talia | +200 Reputation 6800 G 2250 EXP Ether Def Up IV, Arts Seal Resist III |
| Bring Back My Son! | Imperial Palace | Merisa | +100 Reputation 3500 G 1800 EXP Weapon Power IV |
| Teaching Materials | Imperial Palace | Mir'leiz | +150 Reputation 4300 G 2000 EXP Shell Boots |
| Brave Actions | Imperial Palace | Mir'leiz | +200 Reputation 5600 G 2400 EXP Unbeatable III |
| Protect the Capital! | Ascension Hall | Lecrough | +100 Reputation 4400 G 2100 EXP Panther Top, Panther Shoes |
| How Do They Feel? | Main Entrance | Scarlen | +50 Reputation 3800 G 1300 EXP Spike Defence II |
| How Do I Feel? | Main Entrance | Scarlen | +50 Reputation 4200 G 1700 EXP Strength Down III, Phys Def Down III |
| Together Forever | Main Entrance | Scarlen | +200 Reputation 4800 G 2100 EXP Physical Protect IV |
| I Love You No Matter What | Main Entrance | Scarlen | +200 Reputation 4800 G 2100 EXP Ether Protect IV |
| A Friend in Need | Ascension Hall | Lecrough | +100 Reputation 7500 G 2500 EXP Arts Stealth III |
| Preparing for Adventure | Fountain of Eternity | Zain | +200 Reputation 4200 G 1600 EXP Strength Up III, Ether Up III, Agility Up III |
| Preparing for Adventure 2 | Fountain of Eternity | Kurralth | +100 Reputation 4700 G 1800 EXP Muscle Up III, Ether Def Up III |
| Preparing for Adventure 3 | Fountain of Eternity | Zain | +150 Reputation 6600 G 2500 EXP Mithril Gear, Mithril Gauntlets, Mithril Boots |
| Building Bridges | Fountain of Eternity | Arielle | +100 Reputation 5300 G 1750 EXP Building Bridges |
| Starlight Seeker | Fountain of Eternity | Elior | +100 Reputation 5600 G 2000 EXP Daze Resist III |
| Starlight Gazer | Fountain of Eternity | Elior | +200 Reputation 6900 G 2700 EXP Amethyst Leggings |
| Back Pain | Ascension Hall | Galdo | +150 Reputation 5500 G 1800 EXP Bind II |
| Looking for Gold Bugs | Imperial Palace | Teelan | +100 Reputation 5100 G 1950 EXP Fall Defence II |
| Losing the Taste for Alcohol | Fountain of Hope | Nelo | +150 Reputation 4750 G 1800 EXP Confuse Resist III |
| Looking for a Lost Son | Fountain of Hope | Vol'aren | +50 Reputation 6750 G 2300 EXP Tension Swing III |
| Looking for a Lost Daughter | Fountain of Hope | Vol'aren | +50 Reputation 7200 G 2500 EXP Strength Up IV |
| Going Out to Play | Main Entrance | Popipo | +100 Reputation 6400 G 1600 EXP Paralysis Resist III |
| Getting a Member's Card | ------ | Surprise Quest | - |
| Monster Quest 1 - Part 1 | Imperial Palace | Alcamoth Citizen | +50 Reputation 16000 G |
| Monster Quest 1 - Part 2 | Imperial Palace | Alcamoth Citizen | +50 Reputation 14500 G |
| Monster Quest 1 - Part 3 | Imperial Palace | Alcamoth Citizen | +50 Reputation 17000 G |
| Monster Quest 2 - Part 1 | Imperial Palace | Alcamoth Imperial Guard | +50 Reputation 14000 G |
| Monster Quest 2 - Part 2 | Imperial Palace | Alcamoth Imperial Guard | +50 Reputation 22500 G |
| Monster Quest 2 - Part 3 | Imperial Palace | Alcamoth Imperial Guard | +50 Reputation 27000 G |
| Monster Quest 3 - Part 1 | Imperial Palace | Alcamoth Citizen | +50 Reputation 18000 G |
| Monster Quest 3 - Part 2 | Imperial Palace | Alcamoth Citizen | +50 Reputation 25000 G |
| Monster Quest 3 - Part 3 | Imperial Palace | Alcamoth Citizen | +50 Reputation 28000 G |
| Monster Quest 4 - Part 1 | Ascension Hall | Alcamoth Imperial Guard | +50 Reputation 18000 G |
| Monster Quest 4 - Part 2 | Ascension Hall | Alcamoth Imperial Guard | +50 Reputation 16000 G |
| Monster Quest 4 - Part 3 | Ascension Hall | Alcamoth Imperial Guard | +50 Reputation 15000 G |
| Challenge 1 | Fountain of Hope | Alcamoth Citizen | +50 Reputation 45000 G |
| Challenge 2 | Fountain of Eternity | Alcamoth Citizen | +50 Reputation 38000 G |
| Challenge 3 | Ascension Hall | Alcamoth Imperial Guard | +50 Reputation 35000 G |
| Challenge 4 | Fountain of Eternity | Alcamoth Citizen | +50 Reputation 50000 G |
| Material Quest 1 | Main Entrance | Alcamoth Citizen | +50 Reputation 20000 G |
| Material Quest 2 | Imperial Palace | Alcamoth Citizen | +50 Reputation 23500 G |
| Material Quest 3 | Main Entrance | Alcamoth Imperial Guard | +50 Reputation 27000 G |
| Material Quest 4 | Imperial Palace | Alcamoth Citizen | +50 Reputation 22000 G |
| Collection Quest 1 | Imperial Palace | Alcamoth Citizen | +50 Reputation 15000 G |
| Collection Quest 2 | Main Entrance | Alcamoth Citizen | +50 Reputation 22000 G |
| Collection Quest 3 | Fountain of Hope | Alcamoth Citizen | +50 Reputation 22500 G |
| Collection Quest 4 | Imperial Palace | Alcamoth Citizen | +50 Reputation 21000 G |
| Search Quest 1 | Main Entrance | Alcamoth Citizen | +50 Reputation 12000 G 2000 EXP |
| Search Quest 2 | Fountain of Hope | Alcamoth Citizen | +50 Reputation 9000 G 3000 EXP |
| Search Quest 3 | Fountain of Eternity | Alcamoth Citizen | +50 Reputation 11000 G 2500 EXP |
| Search Quest 4 | Fountain of Hope | Alcamoth Citizen | +50 Reputation 10000 G 2800 EXP |
Quests in Red Text indicate Timed Quests. As these quests will expire after progressing to a certain part of the game, be sure to complete them while they are still available!
Colony 6 Side Quests
| Quest | Location | Giver | Rewards |
|---|---|---|---|
| Cook-Off Counter Attack! | Reconstruction HQ | Hoko | +100 Reputation 5000 G 1800 EXP Sleep Resist IV |
| Cook-Off Comeback? | Reconstruction HQ | Hoko | +100 Reputation 5450 G 2000 EXP Heavy Gauntlets |
| Cook-Off Showdown! | Reconstruction HQ | Ma'crish | +250 Reputation 7500 G 2200 EXP HP Steal II OR Brave Top, Reyn's Skill Tree - Impatience |
| A Tantalising Treat | Reconstruction HQ | Pokapoka | +100 Reputation 6800 G 2300 EXP Daze Resist IV |
| Missing Lodger | Reconstruction HQ | Ma'crish | +100 Reputation 4500 G 2000 EXP Daze Resist IV |
| Defend Colony 6 - Reptile | Reconstruction HQ | Colony 6 Residents | +100 Reputation 6000 G 4000 EXP |
Quests in Red Text indicate Timed Quests. As these quests will expire after progressing to a certain part of the game, be sure to complete them while they are still available!
Makna Forest Side Quests
| Quest | Location | Giver | Rewards |
|---|---|---|---|
| Legend of the Sage | Divine Sanctuary | Nopon Sage | +150 Reputation 4500 G 1500 EXP Poison Plus V, Revival HP Up III |
| Challenge of the Sage | Divine Sanctuary | Nopon Sage | +100 Reputation 6000 G 2500 EXP Debuff Plus II, HP Steal III |
Quests in Red Text indicate Timed Quests. As these quests will expire after progressing to a certain part of the game, be sure to complete them while they are still available!
Frontier Village Side Quests
| Quest | Location | Giver | Rewards |
|---|---|---|---|
| A Tormented Bug-Lover | Nopon Tower | Deki | +100 Reputation 3000 G 2700 EXP General Driver |
| Avenge a Mamapon's Death | Sacred Altar | Rasha | +150 Reputation 5200 G 3600 EXP Shell Leggings, Sharla Skill Tree - Reliance |
| Honouring the Nopon Sage | Sacred Altar | Pipiki | +50 Reputation 3000 G 2500 EXP Aggro Up III |
| Meeting the Nopon Sage | Sacred Altar | Pipiki | +150 Reputation 3500 G 3500 EXP Aggro Down III |
| Dangerous Ambition | Pollen Orb Storehouse | Cherri | +100 Reputation 8000 G 3000 EXP Bleed Attack II, Bleed Defence IV |
| Find the Kingpin | Pollen Works | Gadada | +50 Reputation 10000 G 5000 EXP Poison Attack II, Poison Defence IV |
| Adviser Hunt | Pollen Works | Gadada | +50 Reputation 11000 G 5500 EXP Double Attack II, Daze Resist III |
| Evidence Collection | Pollen Works | Gadada | +50 Reputation 13000 G 7500 EXP Bind Resist III |
| Destroying the City Trade | Pollen Works | Gadada | +300 Reputation 15000 G 8000 EXP Agility Up III, Recovery Up IV, AP Up III |
Quests in Red Text indicate Timed Quests. As these quests will expire after progressing to a certain part of the game, be sure to complete them while they are still available!
Maps and Collectopaedia
Eryth Sea Map
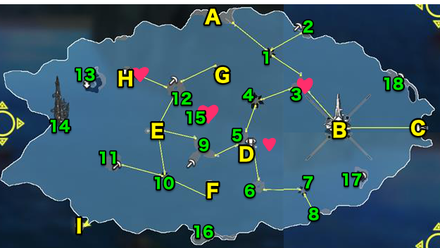 |
Eryth Sea Landmarks and Locations
Landmarks
| A | Latael Shore |
|---|---|
| B | Centre Gate |
| C | High Entia Tomb |
| D | Syrath Lighthouse |
| E | Central Seal Island |
| F | Soltnar Seal Island |
| G | Khatorl Seal Island |
| H | Ether Plant |
| I | Faras Cave |
Locations
| 1 | Hovering Reef 1 |
|---|---|
| 2 | Showdown Cliff |
| 3 | Hovering Reef 2 |
| 4 | Hovering Reef 3 |
| 5 | Hovering Reef 4 |
| 6 | Hovering Reef 5 |
| 7 | Hovering Reef 6 |
| 8 | Ether Crystal Deposit |
| 9 | Hovering Reef 7 |
| 10 | Hovering Reef 8 |
| 11 | Hovering Reef 9 |
| 12 | Hovering Reef 10 |
| 13 | Hode Refuge |
| 14 | Bionis' Occipital |
| 15 | Sleeping Dragon Isle |
| 16 | Kromar Coast |
| 17 | Secluded Island |
| 18 | Anu Shore |
Heart-to-Hearts
| Title | Location | Char. 1 | Char. 2 | Affinity |
|---|---|---|---|---|
| Fish Fly! Fish Fly! | Sleeping Dragon Isle | Reyn | Riki | Green |
| Riki Have Question | Syrath Lighthouse | Fiora | Riki | Pink |
| A Gift for a Loved One | Ether Plant | Sharla | Dunban | Green |
| Flowers of Eryth Sea | Hovering Reef 2 | Sharla | Riki | Green |
Eryth Sea Collectopaedia
| Veg | Pink Asparagus | Tropical Radish | Dolphin Carrot | Gold Burdock | - |
|---|---|---|---|---|---|
| Flower | Sea Berry | Despair Clover | Doomsday Poppy | Night Lily | Razor Teasel |
| Animal | Sea Frog | Mane Cat | - | - | - |
| Nature | White Tail | Marine Marble | Oil Branch | Dilemma Rock | - |
| Strange | High Violet | Steel Hauyne | - | - | - |
Collection Rewards
| Vegetables | Critical Up II |
|---|---|
| Flowers | Mithril Armour |
| Animals | Aerial Cloak II |
| Nature | Mithril Leggings |
| Strange | Ether Up III |
| 100% Completion | Heavy Armour |
Alcamoth Map
GF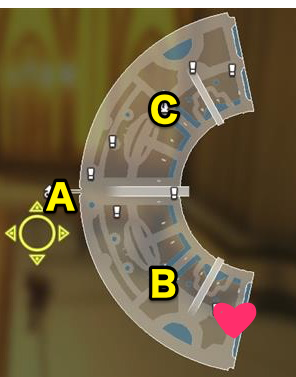 |
1F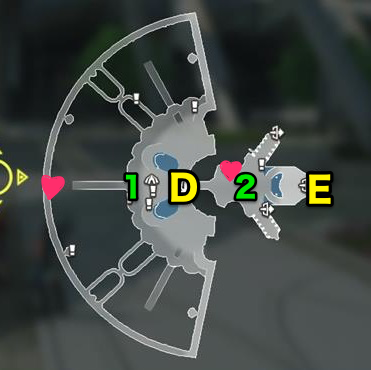 |
2F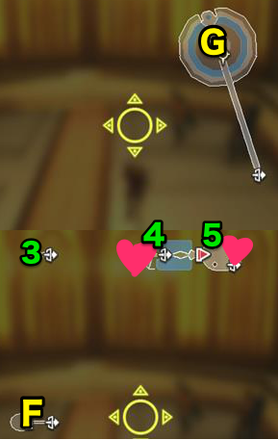 |
- |
Alcamoth Landmarks and Locations
Landmarks
| A | Main Entrance |
|---|---|
| B | Fountain of Hope |
| C | Fountain of Eternity |
| D | Imperial Palace |
| E | Ascension Hall |
| F | Whitewing Palace |
| G | Imperial Villa |
Locations
| 1 | Melfica Road |
|---|---|
| 2 | Great Hall |
| 3 | Revelation Hall |
| 4 | Sky Terrace |
| 5 | Audience Chamber |
Heart-to-Hearts
| Title | Location | Char. 1 | Char. 2 | Affinity |
|---|---|---|---|---|
| So Close, Yet So Far | Audience Chamber | Shulk | Melia | Purple |
| A Breathtaking Sight | Sky Terrace | Reyn | Melia | Pink |
| Brother and Sister | Fountain of Hope | Fiora | Dunban | Green |
| The Forefathers | Great Hall | Fiora | Riki | Green |
| Melia's Imperial Villa | Imperial Villa | Fiora | Melia | Green |
| Ancient Astrology | 1F West | Sharla | Melia | Purple |
Alcamoth Collectopaedia
| Fruit | Cool Lemon | Heart Peach | - | - | - |
|---|---|---|---|---|---|
| Flower | Mystic Dahlia | Stardrop | - | - | - |
| Strange | Ha Ha Ha | Thunder Atmos | - | - | - |
Collection Rewards
| Fruit | Blaze Plus III |
|---|---|
| Flowers | Muscle Up III |
| Strange | Paralysis Resist III |
| 100% Completion | Gust Shot |
High Entia Tomb Map
GF |
|
B1F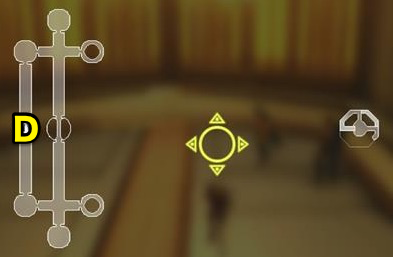 |
B2F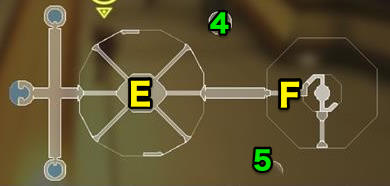 |
High Entia Tomb Landmarks and Locations
Landmarks
| A | Tomb Approach |
|---|---|
| B | Sealed Chamber |
| C | Ceremony Hall |
| D | Tomb Robber Pool |
| E | Valley of Emperors |
| F | Tower of Trials - Bridge |
Locations
| 1 | Hall of Spirits |
|---|---|
| 2 | Hall of Trials |
| 3 | Telethia Laboratory |
| 4 | Imperial Treasury |
| 5 | Second Treasury |
Heart-to-Hearts
| Title | Location | Char. 1 | Char. 2 | Affinity |
|---|---|---|---|---|
| Hopes and Plans | Hall of Trials | Shulk | Melia | Pink |
| Echoes of Ancient Times | Valley of Emperors | Reyn | Melia | Green |
High Entia Tomb Collectopaedia
| Bug | Green Earwig | Blue Ladybird | - | - | - |
|---|---|---|---|---|---|
| Parts | White Tube | Green Diode | Spiral Lamp | - | - |
| Strange | Tasty Sausage | Macro Passion | - | - | - |
Collection Rewards
| Bugs | Ether Up III |
|---|---|
| Parts | Electric Plus III |
| Strange | Ether Def Up III |
| 100% Completion | Shell Armour |
Tips and Strategies
Step Into The Light To Be Teleported
The main mode of transportation will be the teleporters in the Eryth Sea. To use them, step in the center light of the circle and you will be teleported. Take note that this will teleport you even in the middle of combat, so you can use it to skip fights.
Watch Out for Nebulas
There are a great number of Nebulas in the area, and they are attracted by Ether attacks. Be wary of them as you starts fights, as your allies using Ether skills may bring them into the battle and cause you to be more outnumbered than you expected.
The Four Kromar Do Not Respawn When You Die
When you fight the four Kromar surrounding the Transport Worker, they do not respawn when you die. You can simply keep battling them, leaving, then going back if you wish, killing them off one by one every battle.
Do Not Play As Shulk During the Entia Ambush
The Monado cannot hurt Entia, so Shulk will only ever deal 1 damage to the Entia. Switch to one of your other party members instead of Shulk, and make sure he isn't in your party!
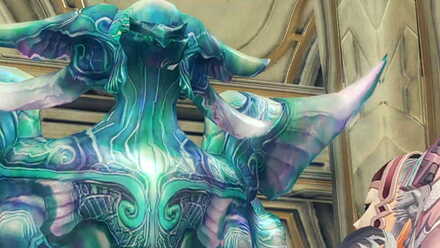
Boss Strategy Guide
Tyrea and the Solidum Telethia
 |
 |
Recommended Characters
|
|
|
|
You can use Shulk as your controlled character, but using Melia as a controlled character is also a good choice, as she can use her Mind Blast Art to remove the Telethia's aura, and she can damage Tyrea as well. The suggestion to use Reyn is because he has a higher health than Dunban, and you're fighting not one, but two bosses. Sharla can be interchanged with Riki in this case as your support.
Tyrea Cannot Be Hurt By The Monado
As Tyrea is a High Entia, she cannot be hurt by the Monado and Shulk only does one damage to her. This is why Melia is a good choice for this battle in his place, since using Shulk makes it a bit tougher.
Focus on the Telethia First
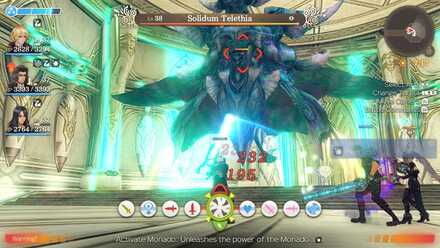
Tyrea buffs the Telethia, so spreading your party would just be spreading yourselves thin. Additionally, the Telethia can attract your party members, so attacking Tyrea might cause your party to split. Use the Command function and force your allies to focus on the Telethia.
Use Monado's Purge Art
Like other Telethia, the Solidum can use an Art that has you miss every attack. If you are playing Shulk, the Monado's Purge Art removes this effect and allows you to hit it. Melia's Mind Blast will also remove this aura.
Story Walkthrough Related Links
Xenoblade Chronicles Story Walkthrough
| Prologue | The Battle of Sword Valley |
|---|---|
| Chapter 1 | Colony 9 and Tephra Cave |
| Chapter 2 | Colony 9 (Mechon Invasion) |
| Chapter 3 | Tephra Cave (Revisited) |
| Chapter 4 | Bionis' Leg |
| Chapter 5 | Colony 6 and Ether Mine |
| Chapter 6 | Satori Marsh and Bionis' Interior (1st Time) |
| Chapter 7 | Makna Forest and Frontier Village |
| Chapter 8 | Eryth Sea, Alcamoth, and High Entia Tomb |
| Chapter 9 | Prison Island (1st Time) |
| Chapter 10 | Valak Mountain |
| Chapter 11 | Sword Valley and Galahad Fortress |
| Chapter 12 | Fallen Arm |
| Chapter 13 | Mechonis Field |
| Chapter 14 | Central Factory and Agniratha |
| Chapter 15 | Mechonis Core |
| Chapter 16 | Central Factory (Revisited) |
| Chapter 17 | Bionis' Interior and Prison Island (Revisited) |
| Final Boss | Memory Space |
Author

Xenoblade Chronicles: Definitive Edition Walkthrough & Guides Wiki
Chapter 8: Eryth Sea, Alcamoth, and High Entia Tomb Walkthrough
Rankings
Gaming News


![Monster Hunter Stories 3 Review [First Impressions] | Simply Rejuvenating](https://img.game8.co/4438641/2a31b7702bd70e78ec8efd24661dacda.jpeg/thumb)
Popular Games

Genshin Impact Walkthrough & Guides Wiki
Honkai: Star Rail Walkthrough & Guides Wiki
Umamusume: Pretty Derby Walkthrough & Guides Wiki
Pokemon Pokopia Walkthrough & Guides Wiki
Resident Evil Requiem (RE9) Walkthrough & Guides Wiki
Monster Hunter Wilds Walkthrough & Guides Wiki
Wuthering Waves Walkthrough & Guides Wiki
Arknights: Endfield Walkthrough & Guides Wiki
Pokemon FireRed and LeafGreen (FRLG) Walkthrough & Guides Wiki
Pokemon TCG Pocket (PTCGP) Strategies & Guides Wiki


Recommended Games
Diablo 4: Vessel of Hatred Walkthrough & Guides Wiki
Cyberpunk 2077: Ultimate Edition Walkthrough & Guides Wiki
Fire Emblem Heroes (FEH) Walkthrough & Guides Wiki
Yu-Gi-Oh! Master Duel Walkthrough & Guides Wiki
Super Smash Bros. Ultimate Walkthrough & Guides Wiki
Pokemon Brilliant Diamond and Shining Pearl (BDSP) Walkthrough & Guides Wiki
Elden Ring Shadow of the Erdtree Walkthrough & Guides Wiki
Monster Hunter World Walkthrough & Guides Wiki
The Legend of Zelda: Tears of the Kingdom Walkthrough & Guides Wiki
Persona 3 Reload Walkthrough & Guides Wiki


All rights reserved
© 2010 - 2020 Nintendo / MONOLITHSOFT. Xenoblade Chronicles and Nintendo Switch are trademarks of Nintendo. © 2020 Nintendo.
The copyrights of videos of games used in our content and other intellectual property rights belong to the provider of the game.
The contents we provide on this site were created personally by members of the Game8 editorial department.
We refuse the right to reuse or repost content taken without our permission such as data or images to other sites.