Chapter 4: Bionis' Leg Walkthrough
This is a walkthrough for the Bionis' Leg section of Xenoblade Chronicles Definitive Edition for Nintendo Switch. For a map of Bionis' Leg Landmarks and Locations, as well as boss strategy and other tips and tricks, read on!
List of Contents
| Previous Section | Next Section |
|---|---|
| Tephra Cave (Revisited) | Colony 6 and Ether Mine |
Chapter 4: Bionis' Leg Walkthrough
Bionis' Leg
| Objectives | |
|---|---|
| 1 | 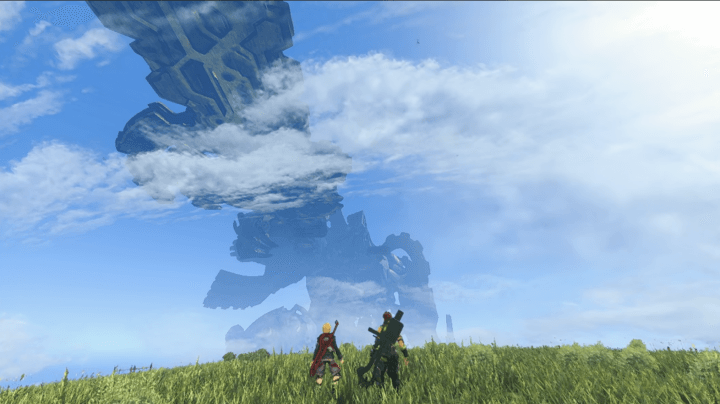 Go to the source of the smoke After emerging on the Bionis' Kneecap, proceed to the main area of Bionis' Leg, where you'll see some smoke. Head there to see a cutscene. |
| 2 | 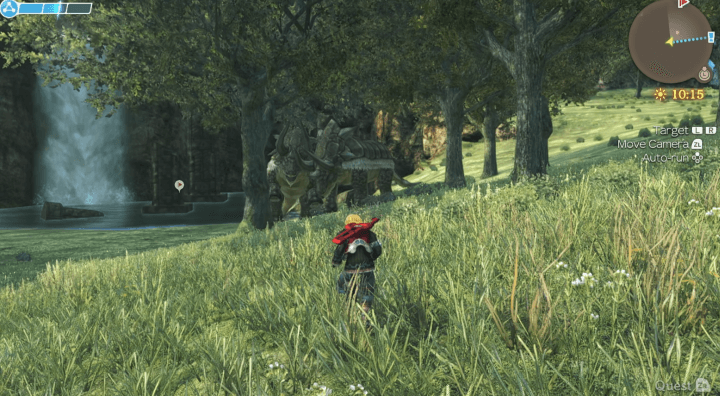 Head towards the waterfalls in the Bionis' Leg Track the owner of the mysterious vehicle towards the area of several waterfalls. |
| 3 | 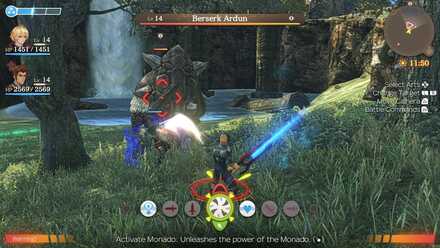 Defeat the Berserk Arduns You'll need to defeat a pair of Berserk Arduns to rescue the child. After defeating them, you'll be directed to the Refugee Camp. |
| 4 | Visit the camp near Kamos Guidepost Follow Juju's directions to unlock the Kamos Guidepost, then proceed through the woods to the Refugee Camp. |
| 5 | 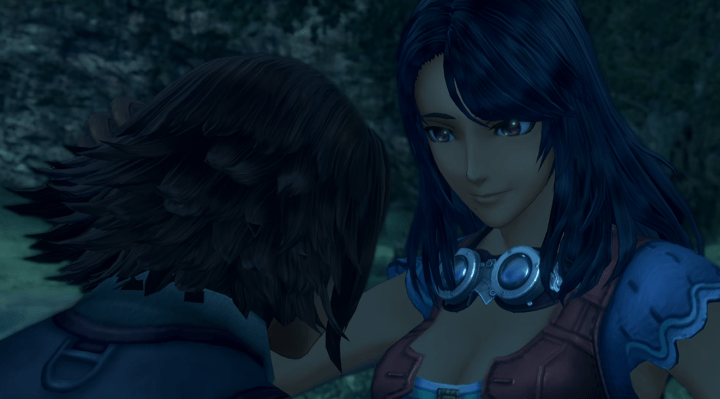 Talk to Sharla You'll meet Sharla, your next party member, at the camp, as well as unlock some side quests. Note that some of these side quests are timed, so you will need to complete them before clearing the next chapter to claim their rewards. |
| 6 |  Pursue Juju Sharla will join your team as a long-range healer and support character with the unique Cool Off talent art. Follow the quest marker to the Spiral Valley area and encounter a new boss. |
| 7 | 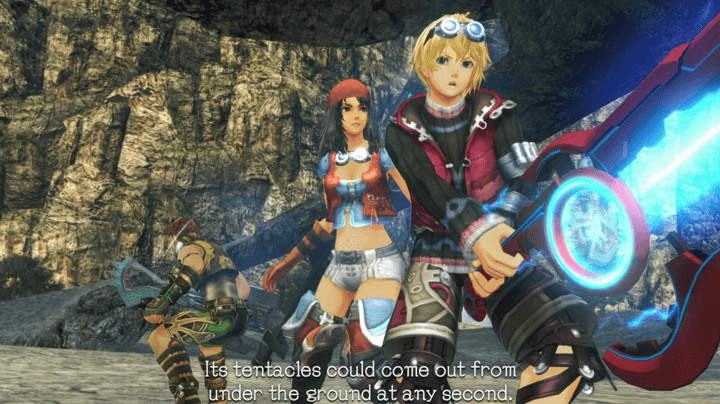 Defeat the Mechon M71 You'll unlock a new power, Monado Speed, to defeat this boss and avoid its tentacle attacks. After defeating it, it will retreat to the top of the structure. |
| 8 |  Fight Mysterious Face Pursue the defeated Mechon up to the top to encounter a second boss, Mysterious Face. Simply fight it briefly to have it withdraw in a cutscene. From there you'll proceed to the next chapter. |
Chapter 5: Colony 6 and Ether Mine Walkthrough
Side Quests
The following side quests are available from this chapter:
Bionis' Leg Side Quests
| Quest | Location | Giver | Rewards |
|---|---|---|---|
| Emergency Treatment | Refugee Camp | Olga | +50 Reputation 750 G 300 EXP Quark Gear |
| Being a Good Grandfather | Refugee Camp | Satata | +50 Reputation 1000 G 220 EXP Initial Tension III |
| A Thoughtful Idea | Refugee Camp | Matryona | +50 Reputation 1200 G 280 EXP Quark Armour |
| A Dash of Colour | Refugee Camp | Ewan | +100 Reputation 750 G 200 EXP Lime Bangle |
| Imaginations Tempered | Refugee Camp | Matryona | +150 Reputation 1500 G 250 EXP Damage Heal II |
| Spirits Raised | Refugee Camp | Arda | +150 Reputation 800 G 400 EXP Arts Heal II |
| Thieving Monsters | Refugee Camp | Gorman | +50 Reputation 950 G 300 EXP Grand Armour, Grand Leggings |
| The Greedy Monster | Refugee Camp | Satata | +50 Reputation 1100 G 400 EXP Sleep Resist II |
| Save the Girl! | Refugee Camp | Surprise Quest | +50 Reputation 1200 G 300 EXP Diver Top, Diver Bottoms |
| Earnest's Fibs | Refugee Camp | Earnest | +50 Reputation 750 G 300 EXP Lime Bangle |
| Earnest's Mischief | Refugee Camp | Earnest | +50 Reputation 1000 G 500 EXP Earth Cloak II |
| Earnest's Solitude | Refugee Camp | Earnest | +150 Reputation 1200 G 750 EXP Grand Boots |
| The Lost Nopon | Spiral Valley | Gerugu | +50 Reputation 750 G 300 EXP Point Rifle |
| With Much Gratitude | Spiral Valley | Batubatu | +100 Reputation 1000 G 450 EXP Spike II |
| With Even More Gratitude | Spiral Valley | Gerugu | +150 Reputation 1200 G 750 EXP Grand Gear, Electric Plus III |
| Legend of Mythical Empress | Spiral Valley | Gerugu | +200 Reputation 6500 G 3000 EXP Haste II |
| Monster Quest 1 - Part 1 | Ragrinar Canyon Path | Homs Traveller | +50 Reputation 1500 G |
| Monster Quest 1 - Part 2 | Ragrinar Canyon Path | Homs Traveller | +50 Reputation 1200 G |
| Monster Quest 1 - Part 3 | Ragrinar Canyon Path | Homs Traveller | +50 Reputation 2500 G |
| Monster Quest 1 - Part 4 | Ragrinar Canyon Path | Homs Traveller | +50 Reputation 1800 G |
| Monster Quest 2 | Refugee Camp | Refugee | +50 Reputation 2000 G |
| Monster Quest 3 - Part 1 | Refugee Camp | Refugee | +50 Reputation 2500 G |
| Monster Quest 3 - Part 2 | Refugee Camp | Refugee | +50 Reputation 5000 G |
| Challenge 1 - Part 1 | Refugee Camp | Refugee | +50 Reputation 5500 G |
| Challenge 1 - Part 2 | Refugee Camp | Refugee | +50 Reputation 3800 G |
| Challenge 2 - Part 1 | Refugee Camp | Refugee | +50 Reputation 4200 G |
| Challenge 2 - Part 2 | Refugee Camp | Refugee | +50 Reputation 4800 G |
| Material Quest 1 | Refugee Camp | Refugee | +50 Reputation 1000 G |
| Material Quest 2 | Refugee Camp | Refugee | +50 Reputation 1500 G |
| Material Quest 3 | Refugee Camp | Refugee | +50 Reputation 1200 G |
| Material Quest 4 | Refugee Camp | Refugee | +50 Reputation 1200 G |
| Collection Quest 1 | Refugee Camp | Refugee | +50 Reputation 1000 G |
| Collection Quest 2 | Refugee Camp | Refugee | +50 Reputation 1500 G |
| Search Quest 1 | Refugee Camp | Refugee | +50 Reputation 2500 G 200 EXP |
| Search Quest 2 | Refugee Camp | Refugee | +50 Reputation 2000 G 200 EXP |
Quests in Red Text indicate Timed Quests. As these quests will expire after progressing to a certain part of the game, be sure to complete them while they are still available!
Maps and Collectopaedia
Bionis' Leg Maps
Upper Level |
Lower Level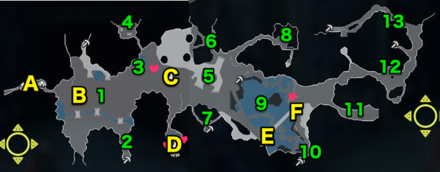 |
Bionis' Leg Landmarks and Locations
Landmarks
| A | Raginar Canyon Path |
|---|---|
| B | Jabo Rock Rest Area |
| C | Kamos Guidepost |
| D | Refugee Camp |
| E | Raguel Bridge - South |
| F | Raguel Bridge - North |
| G | Spiral Valley |
| H | Zax Guidepost |
| I | Bask Cave Passage |
| J | Observation Platform |
| K | Believer's Paradise |
Locations
| 1 | Gaur Plain |
|---|---|
| 2 | Volff Lair |
| 3 | Rho Oasis |
| 4 | Tirkin Headquarters |
| 5 | Viliera Hilla |
| 6 | Sky Stage |
| 7 | Kisk Cave |
| 8 | Daksha Shrine |
| 9 | Raguel Lake |
| 10 | Tranquil Grotto |
| 11 | Maguel Road |
| 12 | Windy Cave |
| 13 | Crevasse Waterfall |
| 14 | Traveller's Rest |
| 15 | Kasharpa Falls |
Heart-to-Hearts
| Title | Location | Char. 1 | Char. 2 | Affinity |
|---|---|---|---|---|
| Geography Lesson | Believer's Paradise | Shulk | Dunban | Purple |
| What Visions May Bring | Raguel Bridge - North | Shulk | Sharla | Green |
| Heir to the Monado | Refugee Camp (Outside) | Reyn | Dunban | Green |
| What's on Reyn's Mind | Refugee Camp (Inside) | Reyn | Sharla | Green |
| Revisiting the Past | Rho Oasis | Dunban | Sharla | Pink |
Bionis' Leg Collectopaedia
| Veg | Hot Taro | Juicy Broccoli | Spicy Cabbage | Hard Lotus | - |
|---|---|---|---|---|---|
| Fruit | Sour Gouseberry | Red Durian | Walnut Grape | Humming Plum | - |
| Bug | White Ladybird | Hill Firefly | Moth Crawler | Queen Locust | Fire Tarantula |
| Nature | Mat Ice | Bluesky Bark | Pione Stone | - | - |
| Parts | Rusty Bolt | Winding Gear | - | - | - |
| Strange | Gold Dust Illusion | Devious Gravity | White Songbird | Death Bangle | - |
Collection Rewards
| Vegetables | Pelt Top |
|---|---|
| Fruit | Paralysis II |
| Bugs | Grand Gauntlets |
| Nature | Bind Resist II |
| Parts | Strength Up II |
| Strange | Pelt Bottoms |
| 100% Completion | White Cluster |
Tips and Strategies
Avoid the Higher Level Enemies

The Bionis' Leg is vast, and it holds many enemies that are a much higher level than your party. You don't need to fight them, and fighting them will most likely end with multiple demises, so just avoid them.
Monado Speed
Upon fighting the boss of this level, you unlock the Monado Art called Monado Speed, which grants Shulk and his party evasion against physical attacks. Use it to increase survivability. When Shulk gets a vision of an enemy Physical Art (in Red Text), this is the go-to move for countering that Art, by applying it to whoever is being targeted.
Boss Strategy Guide
Mechon M71 (Level 18)

Two Phase Battle
You'll fight the Mechon M71 twice, once under the rock formation and another time on it. Be prepared, as the phase change happens at about half health, and the switch from Phase 1 to 2 resets its health.
Kill the Tentacles in Phase 1
There are three tentacles considered as separate Level 15 enemies alongside the Mechon M71. Take them out first, as they do a lot of damage, but are very easy to kill. One Back Slash and a few hits are enough to get rid of them.
Use Positional Attacks In Phase 1
In Phase 1, the orientation of the Mechon and its tentacles do not shift, so if you're behind it, you'll remain behind it for the whole battle. This makes it easy to land hits like Back Slash.
Make sure you are leveled enough
This is one of the tougher bosses in the early game if you are under leveled. Ideally, you will be at the same level as Mechon M71, but at the very least, you should not be more than 2 levels less than it.
Story Walkthrough Related Links
Xenoblade Chronicles Story Walkthrough
| Prologue | The Battle of Sword Valley |
|---|---|
| Chapter 1 | Colony 9 and Tephra Cave |
| Chapter 2 | Colony 9 (Mechon Invasion) |
| Chapter 3 | Tephra Cave (Revisited) |
| Chapter 4 | Bionis' Leg |
| Chapter 5 | Colony 6 and Ether Mine |
| Chapter 6 | Satori Marsh and Bionis' Interior (1st Time) |
| Chapter 7 | Makna Forest and Frontier Village |
| Chapter 8 | Eryth Sea, Alcamoth, and High Entia Tomb |
| Chapter 9 | Prison Island (1st Time) |
| Chapter 10 | Valak Mountain |
| Chapter 11 | Sword Valley and Galahad Fortress |
| Chapter 12 | Fallen Arm |
| Chapter 13 | Mechonis Field |
| Chapter 14 | Central Factory and Agniratha |
| Chapter 15 | Mechonis Core |
| Chapter 16 | Central Factory (Revisited) |
| Chapter 17 | Bionis' Interior and Prison Island (Revisited) |
| Final Boss | Memory Space |
Author
Xenoblade Chronicles: Definitive Edition Walkthrough & Guides Wiki
Chapter 4: Bionis' Leg Walkthrough
Rankings
- We could not find the message board you were looking for.
Gaming News

![Monster Hunter Stories 3 Review [First Impressions] | Simply Rejuvenating](https://img.game8.co/4438641/2a31b7702bd70e78ec8efd24661dacda.jpeg/show)

![Monster Hunter Stories 3 Review [First Impressions] | Simply Rejuvenating](https://img.game8.co/4438641/2a31b7702bd70e78ec8efd24661dacda.jpeg/thumb)
![The Seven Deadly Sins: Origin Review [First Impressions] | A Promising Start](https://img.game8.co/4440581/584e0bfb87908f12c4eab6e846eb1afd.png/thumb)
Popular Games

Genshin Impact Walkthrough & Guides Wiki
Umamusume: Pretty Derby Walkthrough & Guides Wiki
Pokemon Pokopia Walkthrough & Guides Wiki
Honkai: Star Rail Walkthrough & Guides Wiki
Monster Hunter Stories 3: Twisted Reflection Walkthrough & Guides Wiki
Arknights: Endfield Walkthrough & Guides Wiki
Wuthering Waves Walkthrough & Guides Wiki
Zenless Zone Zero Walkthrough & Guides Wiki
Pokemon TCG Pocket (PTCGP) Strategies & Guides Wiki
Monster Hunter Wilds Walkthrough & Guides Wiki


Recommended Games
Fire Emblem Heroes (FEH) Walkthrough & Guides Wiki
Diablo 4: Vessel of Hatred Walkthrough & Guides Wiki
Cyberpunk 2077: Ultimate Edition Walkthrough & Guides Wiki
Yu-Gi-Oh! Master Duel Walkthrough & Guides Wiki
Super Smash Bros. Ultimate Walkthrough & Guides Wiki
Pokemon Brilliant Diamond and Shining Pearl (BDSP) Walkthrough & Guides Wiki
Elden Ring Shadow of the Erdtree Walkthrough & Guides Wiki
Monster Hunter World Walkthrough & Guides Wiki
The Legend of Zelda: Tears of the Kingdom Walkthrough & Guides Wiki
Persona 3 Reload Walkthrough & Guides Wiki


All rights reserved
© 2010 - 2020 Nintendo / MONOLITHSOFT. Xenoblade Chronicles and Nintendo Switch are trademarks of Nintendo. © 2020 Nintendo.
The copyrights of videos of games used in our content and other intellectual property rights belong to the provider of the game.
The contents we provide on this site were created personally by members of the Game8 editorial department.
We refuse the right to reuse or repost content taken without our permission such as data or images to other sites.