Chapter 6: Satorl Marsh and Bionis' Interior (1st Time)
This is a walkthrough for the Satorl Marsh and Bionis' Interior (1st Time) section of Xenoblade Chronicles Definitive Edition for Nintendo Switch. For a map of Satorl Marsh and Bionis' Interior Landmarks and Locations, as well as boss strategy and other tips and tricks, read on!
List of Contents
| Previous Section | Next Section |
|---|---|
| Colony 6 and Ether Mine | Makna Forest and Frontier Village |
Chapter 6: Satorl Marsh and Bionis' Interior (1st Time) Walkthrough
Colony 6
| Objectives | |
|---|---|
| 1 | Head South to the Misty Path in order to enter Satorl Marsh. You'll start in Colony 6. You won't be able to unlock Colony 6 Reconstruction just yet, so for now, follow the quest path into the marsh. |
Satorl Marsh
| Objectives | |
|---|---|
| 1 | 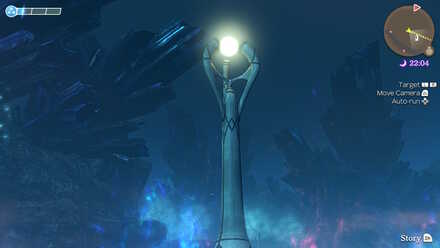 Trek to the Glowing Obelisk. You'll find a small Nopon trader outpost near the entrance, as well as many enemies poisoned water, and other hazards. Continue following the path until you freach the large glowing spire to unlock a landmark. |
| 2 |  Go to the Sororal Statues. After the cutscenes at the landmark, you'll need to move on, following the trail northeast to the Sororal Statues area. After the cutscene here, you'll unlock Colony 6 Reconstruction and can fast travel back to begin the quest, or move on with the main story. |
| 3 | 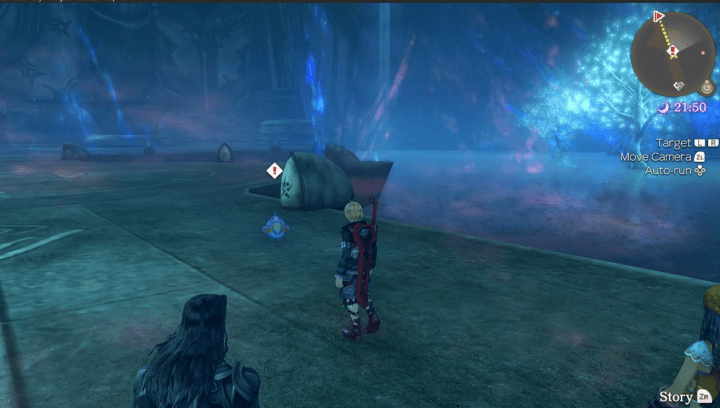 Talk to the nearby Nopon Merchant. Speak with the Nopon Merchant to learn what to do to unlock the access to the next area. |
| 4 | Pick Up The Four Offerings. The Nopon Merchant will instruct you to retrieve some offerings located around the map. Simply follow the quest line to find them in the listed locations.
|
| 5 | 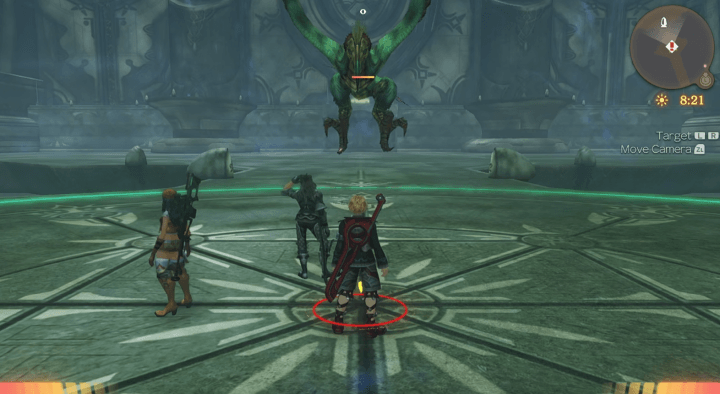 Defeat the Satorl Guardian. Summon the Satorl Guardian by making the offerings at the Adulthood Emblem, then defeat it in battle to move on. |
| 6 |  Climb up the walls to the Bionis' Interior, taking the left side. The strange teleporter doesn't work! You'll hae to climb up the sides of the large statues by following the overgrown sections of wall. |
| 7 | Go through the Statue Summit. After climbing over the statues, head to the objective marker to climb inside the Bionis itself. |
Bionis' Interior
| Objectives | |
|---|---|
| 1 | Head through the Third Lung. You'll arrive inside the Bionis at the Third Lung area. Proceed through, fighting enemies along the way if you wish. |
| 2 | 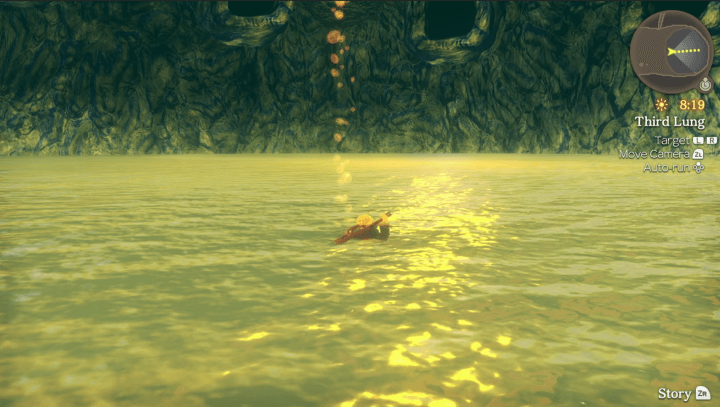 Swim into the pool and head to the bubbly area. Once you emerge into the Terminal Trachea area, speak to the Nopon to learn how to get up. Swim to the stream of bubbles to be pushed higher, then head towards the objective marker. |
| 3 | Cross the Upper Trachea.After arriving at the Upper Trachea, all that's left is to continue to the objective, entering Makna Forest. |
Chapter 7: Makna Forest and Frontier Village Walkthrough
Side Quests
The following side quests are available from this chapter:
Satorl Marsh Side Quests
| Quest | Location | Giver | Rewards |
|---|---|---|---|
| Preventing Starvation | Glowing Obelisk | Zazadan | +100 Reputation 2400 G 400 EXP Mist Gel, Mist Cream, Mist Sandals |
| Zazadan in Danger | Glowing Obelisk | Zazadan | +150 Reputation 3200 G 680 EXP Swep Gear, Agility Up II |
| Zazadan Still in Danger | Glowing Obelisk | Zazadan | +150 Reputation 4500 G 850 EXP Swep Gauntlets, HP Up II |
| It's All in the Mind | Glowing Obelisk | Zazadan | +150 Reputation 5100 G 1000 EXP Swep Boots, Ether Up II |
| A Mysterious Delicacy | Glowing Obelisk | Zazadan | +250 Reputation 5800 G 1500 EXP Pioneer |
| A Gift? | Glowing Obelisk | Zazadan | +200 Reputation 7800 G 2500 EXP |
| Gather Information | Nopon Refuge | Surprise Quest | - |
| Kacha's Kidnapping | Nopon Merchant Camp | Bokoko | +150 Reputation 3500 G 410 EXP Jungle Cap, Jungle Gloves, Jungle Shoes |
| The Giants' Key | Nopon Merchant Camp | Kacha | +200 Reputation 5900 G 2200 EXP Recovery Up IV |
| The Giants' Treasure | Nopon Merchant Camp | Kacha | +250 Reputation 9100 G 3100 EXP Double Attack IV |
| Making Camp | Nopon Merchant Camp | Bokoko | +100 Reputation 10500 G 1000 EXP Iron Armour, Nopol Boots |
| Monster Quest 1 | Nopon Merchant Camp | Nopon Merchant | +50 Reputation 5800 G 5800 EXP |
| Monster Quest 2 | Nopon Merchant Camp | Nopon Merchant | +50 Reputation 6200 G 6200 EXP |
| Monster Quest 3 | Nopon Merchant Camp | Nopon Merchant | +50 Reputation 6800 G 6800 EXP |
| Monster Quest 4 | Nopon Merchant Camp | Nopon Merchant | +50 Reputation 6500 G 6500 EXP |
Quests in Red Text indicate Timed Quests. As these quests will expire after progressing to a certain part of the game, be sure to complete them while they are still available!
Bionis' Interior
There are no side quests in this area.
Maps and Collectopaedia
Satorl Marsh Maps
Satorl Marsh Area |
Satorl Marsh Landmarks and Locations
Landmarks
| A | Keshler Wetland |
|---|---|
| B | Nopon Merchant Camp |
| C | Crown Tree |
| D | Silent Obelisk |
| E | Glowing Obelisk |
| F | Sororal Statues |
| G | Statue Summit |
| H | Shining Pond |
Locations
| 1 | Lacus Swamp |
|---|---|
| 2 | Zaldania Waterfall |
| 3 | Poison Swamp |
| 4 | Altar of Fate |
| 5 | Barren Moor |
| 6 | Dark Swamp |
| 7 | Igna Territory |
| 8 | Exile Fortress |
| 9 | Nopon Refuge |
| 10 | Soter Ruins |
| 11 | Place of Judgment |
| 12 | Oath Sanctuary |
| 13 | Mauk Floodgate |
| 14 | Basin Cave |
Heart-to-Hearts
| Title | Location | Char. 1 | Char. 2 | Affinity |
|---|---|---|---|---|
| The Shimmering Marsh | Zaldania Waterfall | Shulk | Dunban | Green |
| High Entia History | Sororal Statues | Dunban | Melia | Purple |
| Atop the Crown Tree | Crown Tree | Sharla | Riki | Pink |
Satorl Marsh Collectopaedia
| Veg | Blue Turnip | Cute Parsnip | Poisonous Gourd | Humming Cabbage | - |
|---|---|---|---|---|---|
| Flower | Sunflower Rogue | Merry Coronation | Ether Rose | Orb Daisy | Forget-You-Not |
| Animal | Chimera Rabbit | Venom Platypus | Humming Cat | - | - |
| Nature | Mist Tree | Lemon Stone | Feather Leaf | Water Log | Wool Rock |
| Parts | Blue Gear Shard | Rumble Part | - | - | - |
| Strange | Pauper's Cup | Happy Carnival | Dawn Dice | - | - |
Collection Rewards
| Vegetables | Nopol Gear |
|---|---|
| Flowers | Jungle Shoes |
| Animals | Lock-On Resist II |
| Nature | Nopol Gauntlets |
| Parts | Strength Up II |
| Strange | Haste II |
| 100% Completion | Panther Top |
Bionis' Interior Maps
Lower Level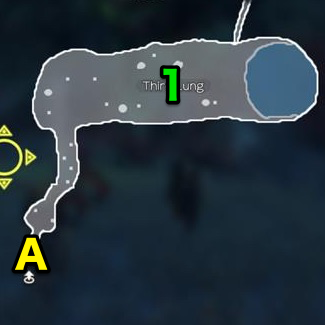 |
Upper Level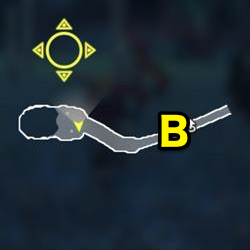 |
Note: This is the map of the first time visiting Bionis' Interior. More areas become available in Chapter 17.
Bionis' Interior Landmarks and Locations
Landmarks
| A | Termina Trachea |
|---|---|
| B | Upper Trachea |
Locations
| 1 | Third Lung |
|---|
Bionis' Interior Collectopaedia
No Collectables at this time!
Bionis' Interior has no obtainable collectables until you revisit in Chapter 17.
Heart-to-Hearts
There are no available Heart-to-Hearts in this area
Tips and Strategies
Beware of Patrolling Enemies
There are large groups of enemies patrolling the area. Be careful that you don't walk into them and start a fight you can't finish.
Check the Trees for Enemies
In the trees above, there are Quadwings that are vision-triggered. Be aware of them in case they join a fight you weren't expecting them to so they don't overwhelm you.
Look Out for the Poison Water
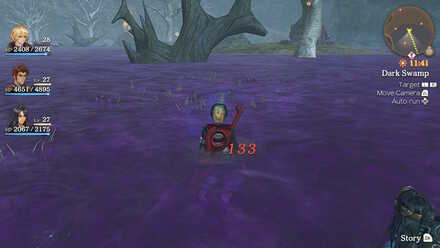
The purple water is poison that will damage your characters over time as they stand in it. Get through it quickly and find a place to rest before engaging enemies, or you'll enter combat below full health.
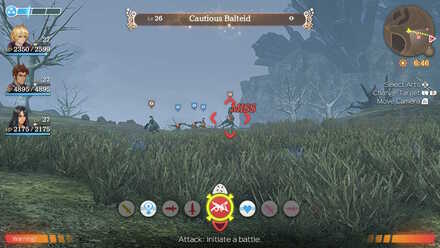
Boss Strategy Guide
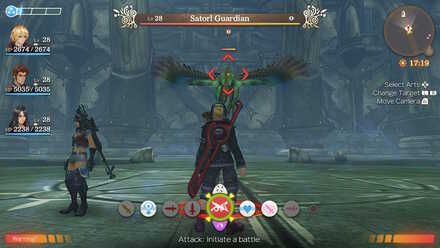
Satorl Guardian
Satorl Guardian Recommended Characters
|
|
|
|
With four playable characters now, someone will have to sit this fight out. We recommend picking Shulk as your controllable character, and Sharla for support, since she can remove enemy debuffs. We recommend Dunban for drawing the boss's aggro, although Reyn fills this role nicely as well.
Watch Out For Poison Attacks
The Satorl Guardian uses a lot of poison attacks that deal damage over time. Beware of them, and make sure Sharla has the Cure Bullet Art to heal your characters.
Use Sharla's Thunder Bullet
Sharla's Thunder Bullet Art is extra effective against fliers, and will come in handy against the Satorl Guardian. Make sure to select it in a Chain Attack. Since it is Purple Colored, you likely won't have any other arts to chain it to, but you can make use of Talent Arts in a chain, which are Black Colored and combo with anything.
Keep Repositioning to Get Good Positioning
Satorl Guardian, like the other fliers, moves a lot, and and you must keep moving to get the right positions for your Battle Arts.
Story Walkthrough Related Links
Xenoblade Chronicles Story Walkthrough
| Prologue | The Battle of Sword Valley |
|---|---|
| Chapter 1 | Colony 9 and Tephra Cave |
| Chapter 2 | Colony 9 (Mechon Invasion) |
| Chapter 3 | Tephra Cave (Revisited) |
| Chapter 4 | Bionis' Leg |
| Chapter 5 | Colony 6 and Ether Mine |
| Chapter 6 | Satori Marsh and Bionis' Interior (1st Time) |
| Chapter 7 | Makna Forest and Frontier Village |
| Chapter 8 | Eryth Sea, Alcamoth, and High Entia Tomb |
| Chapter 9 | Prison Island (1st Time) |
| Chapter 10 | Valak Mountain |
| Chapter 11 | Sword Valley and Galahad Fortress |
| Chapter 12 | Fallen Arm |
| Chapter 13 | Mechonis Field |
| Chapter 14 | Central Factory and Agniratha |
| Chapter 15 | Mechonis Core |
| Chapter 16 | Central Factory (Revisited) |
| Chapter 17 | Bionis' Interior and Prison Island (Revisited) |
| Final Boss | Memory Space |
Author

Xenoblade Chronicles: Definitive Edition Walkthrough & Guides Wiki
Chapter 6: Satorl Marsh and Bionis' Interior (1st Time)
Rankings
Gaming News

![Monster Hunter Stories 3 Review [First Impressions] | Simply Rejuvenating](https://img.game8.co/4438641/2a31b7702bd70e78ec8efd24661dacda.jpeg/show)
![Marathon Cryo Archive Map Teased as [REDACTED] on Selection Screen](https://img.game8.co/4442236/6357203e58172f6de57f1991e7c39b22.png/thumb)


Popular Games

Genshin Impact Walkthrough & Guides Wiki
Umamusume: Pretty Derby Walkthrough & Guides Wiki
Pokemon Pokopia Walkthrough & Guides Wiki
Honkai: Star Rail Walkthrough & Guides Wiki
Monster Hunter Stories 3: Twisted Reflection Walkthrough & Guides Wiki
Arknights: Endfield Walkthrough & Guides Wiki
Wuthering Waves Walkthrough & Guides Wiki
Zenless Zone Zero Walkthrough & Guides Wiki
Pokemon TCG Pocket (PTCGP) Strategies & Guides Wiki
Monster Hunter Wilds Walkthrough & Guides Wiki


Recommended Games
Diablo 4: Vessel of Hatred Walkthrough & Guides Wiki
Cyberpunk 2077: Ultimate Edition Walkthrough & Guides Wiki
Fire Emblem Heroes (FEH) Walkthrough & Guides Wiki
Yu-Gi-Oh! Master Duel Walkthrough & Guides Wiki
Super Smash Bros. Ultimate Walkthrough & Guides Wiki
Pokemon Brilliant Diamond and Shining Pearl (BDSP) Walkthrough & Guides Wiki
Elden Ring Shadow of the Erdtree Walkthrough & Guides Wiki
Monster Hunter World Walkthrough & Guides Wiki
The Legend of Zelda: Tears of the Kingdom Walkthrough & Guides Wiki
Persona 3 Reload Walkthrough & Guides Wiki


All rights reserved
© 2010 - 2020 Nintendo / MONOLITHSOFT. Xenoblade Chronicles and Nintendo Switch are trademarks of Nintendo. © 2020 Nintendo.
The copyrights of videos of games used in our content and other intellectual property rights belong to the provider of the game.
The contents we provide on this site were created personally by members of the Game8 editorial department.
We refuse the right to reuse or repost content taken without our permission such as data or images to other sites.