Chapter 9: Prison Island (1st Time) Walkthrough
This is a walkthrough for the Prison Island (1st Time) section of Xenoblade Chronicles Definitive Edition for Nintendo Switch. For a map of Prison Island (1st Time) Landmarks and Locations, as well as boss strategy and other tips and tricks, read on!
List of Contents
| Previous Section | Next Section |
|---|---|
| Eryth Sea, Alcamoth, and High Entia Tomb | Valak Mountain |
Chapter 9: Prison Island (1st Time) Walkthrough
Alcamoth and Eryth Sea
| Objectives | |
|---|---|
| 1 | Follow the dotted line until you find Melia. After your audience, you'll be prompted to pay Melia a visit. Do so by following the quest path to the Imperial Villa. After the cutscenes, you'll need to return to the Audience Chamber for more cutscenes. |
| 2 | Head to the entrance of Alcamoth. After the cutscenes, you'll need to leave the city to prepare to unlock Prison Island's seal. Buy Arts books for Melia at Alcamoth's store to power up her potent Ether abilities. |
| 3 |  Activate both the Seal on Khatorl Seal Island and Soltnar Seal Island to proceed the story Visit both Soltnar and Khatorl Seal islands and defeat the enemies there to unlock the Seals. Take care, as the monsters can be tough if you are below Level 40. |
| 4 | 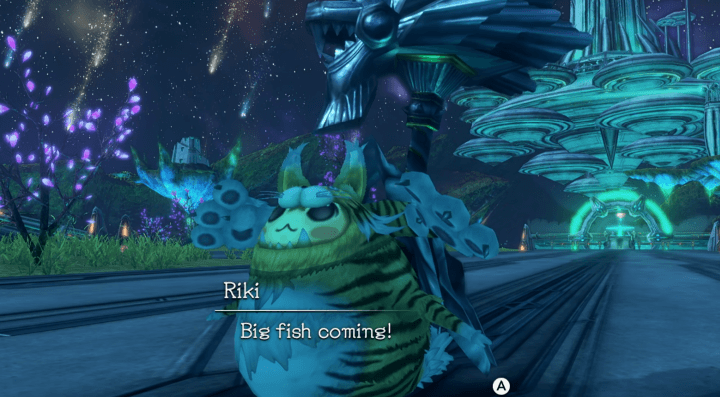 Head to Central Seal Island and break the seal on the transporter. At the Central Seal Island, you'll need to defeat the Skyray monster before using the teleport to visit Prison Island. |
Prison Island
| Objectives | |
|---|---|
| 1 | Make yourway to Prison Gate. Proceed through Prison Island. You'll fight Skyrays with Ether Meteor here, so keep Monado Shield handy for protection. |
| 2 | 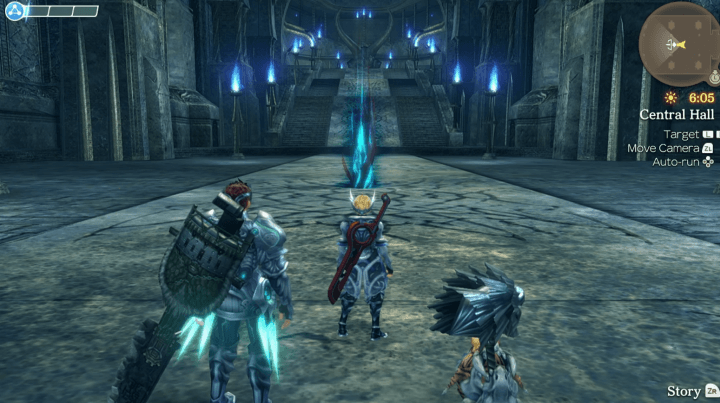 Stand on the flame to teleport to your next destination. You'll see flame-shaped beacons that work like teleporters on the island. Step into them to proceed forward, and continue following the path to emerge on top of the island. |
| 4 | 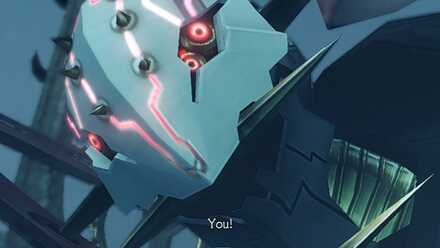 Defeat Metal Face! It's time for a showdown with Metal Face! Defeat him to set off more cutscenes and move on to the next chapter. |
Chapter 10: Valak Mountain Walkthrough
Side Quests
The following side quests are available from this chapter:
Alcamoth Side Quests
| Currently no side quests to display. Please check back soon. |
Eryth Sea Side Quests
| Currently no side quests to display. Please check back soon. |
Prison Island Side Quests
There are no side quests in this area.
Maps and Collectopaedia
Prison Island Maps
1st Floor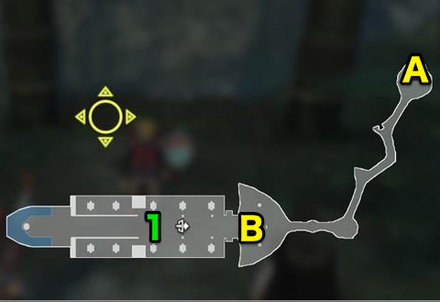 |
5th Floor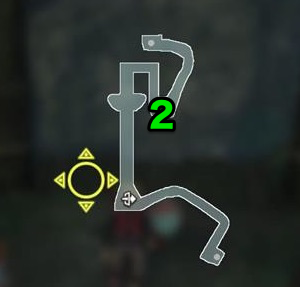 |
7th Floor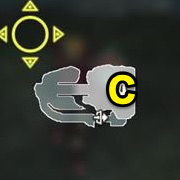 |
Prison Island (1st Time) Landmarks and Locations
Landmarks
| A | High Entia Transporter |
|---|---|
| B | Prison Gate |
| C | Prison Terrace |
Locations
| 1 | Central Hall |
|---|---|
| 2 | Great Canyon |
Heart-to-Hearts
There are no new Heart-to-Hearts available in this chapter. Prison Island has no Heart-to-Hearts until you revisit in Chapter 17.
Prison Island Collectopaedia
No Collectables at this time!
Prison Island has no obtainable collectables until you revisit in Chapter 17.
Tips and Strategies
The Monado Unbound
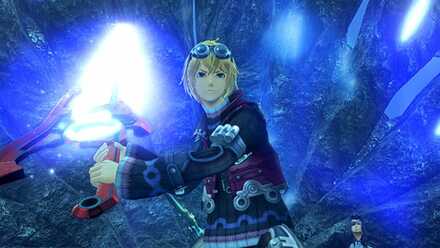
After unlocking the power of the Monado, Shulk can now deal damage to Mechons with faces! There is no longer a need to topple Faced Mechons to do damage. This will also allow you to further level up your Monado arts to 10!
Shield
Remember that the Shield art is capable of blocking Enemy Talent Arts. To easily know if the ability can be blocked, check if their ability name has a roman numeral. This indicates the rank and your shield art's level must be equal or greater to block the art.
Speed
Not all enemy arts can be shielded, so using Speed to dodge these assaults is often necessary. Do not panic, and make sure to assess which of the two defensive arts you need to use to surpass the obstacles you face.
Shield VS Speed
A summary note on when to use Shield and Speed:
- Use Shield against Talent Arts (White Text) with ranks - This is easier because the shield art only consumes half the talent gauge and is more readily available than the other arts.
- Use Speed to your enemy's target - Speed allows the enchanted unit to dodge attacks that are used against that unit. Using Speed on your party member that is taking all agro is a good way to increase their survivability.
- Use Speed against enemies with high single target abilities (Physical Arts - Red Text) - These enemies are oftentimes, capable of landing high damaging moves which can instantly incapacitate a party member. This will cause you to lose tension and force you to revive them using a whole bar from your party gauge. Avoid this situation by using Monado Speed to avoid the attack!
Boss Strategy Guide
Skyray

Skyray seems easy at first glance, until it surprises you with Ether Meteor II, which greatly damages everyone and dazes them. Aside from Ether Meteor, none of Skyray's arsenal will prove fatal to a well-prepared party. Always have the Monado Shield buff for your party, and keep the assault on it and Skyray will fall shortly.
Make sure that Shield is at least rank 2 before fighting Skyray as a rank 1 Shield will not be able to block Ether Meteor II.
Skyray Recommended Characters
|
|
|
|
This is a party that doesn't consist of any aggro taking character such as Dunban or Reyn. Shulk, however, has the support from Sharla's healing and Melia's buffs, which will greatly increase Shulk's battle potential. Keep Shulk offensive to steer away Skyray's aggro from your two support characters.
Melia and Sharla are also chosen since Ether Meteor's range hits all characters near it, so Sharla and Melia's range should keep them safe from harm. It is also safe to substitute Riki for Sharla since Riki's HP pool is massive enough for him to survive Ether Meteor.
Skyray Recommended Characters 2
|
|
|
|
A tankier setup. This allows your party to go full on aggressive in Skyray's face and ignore all of its assault. A durable party setup that makes use of everyone's damage to not extend the duration of the fight.
Metal Face

This fight is pretty much a demo for the new powers you unlocked. His durability isn't that high, and the fight will end when Metal Face's HP falls to 30%. Make sure to use Monado Enchant, and a good Chain Attack should be able to end the fight quickly.
Metal Face Recommended Characters
|
|
|
|
A high damaging party is recommended for this fight. Utilize Metal Face's low durability with high damaging combos and arts. Linking a good X3 or X4 chain multiplier with physical arts should be enough to defeat Metal Face in a few seconds.
Story Walkthrough Related Links
Xenoblade Chronicles Story Walkthrough
| Prologue | The Battle of Sword Valley |
|---|---|
| Chapter 1 | Colony 9 and Tephra Cave |
| Chapter 2 | Colony 9 (Mechon Invasion) |
| Chapter 3 | Tephra Cave (Revisited) |
| Chapter 4 | Bionis' Leg |
| Chapter 5 | Colony 6 and Ether Mine |
| Chapter 6 | Satori Marsh and Bionis' Interior (1st Time) |
| Chapter 7 | Makna Forest and Frontier Village |
| Chapter 8 | Eryth Sea, Alcamoth, and High Entia Tomb |
| Chapter 9 | Prison Island (1st Time) |
| Chapter 10 | Valak Mountain |
| Chapter 11 | Sword Valley and Galahad Fortress |
| Chapter 12 | Fallen Arm |
| Chapter 13 | Mechonis Field |
| Chapter 14 | Central Factory and Agniratha |
| Chapter 15 | Mechonis Core |
| Chapter 16 | Central Factory (Revisited) |
| Chapter 17 | Bionis' Interior and Prison Island (Revisited) |
| Final Boss | Memory Space |
Author
Xenoblade Chronicles: Definitive Edition Walkthrough & Guides Wiki
Chapter 9: Prison Island (1st Time) Walkthrough
Rankings
- We could not find the message board you were looking for.
Gaming News

![Monster Hunter Stories 3 Review [First Impressions] | Simply Rejuvenating](https://img.game8.co/4438641/2a31b7702bd70e78ec8efd24661dacda.jpeg/show)


![Monster Hunter Stories 3 Review [First Impressions] | Simply Rejuvenating](https://img.game8.co/4438641/2a31b7702bd70e78ec8efd24661dacda.jpeg/thumb)
Popular Games

Genshin Impact Walkthrough & Guides Wiki
Honkai: Star Rail Walkthrough & Guides Wiki
Umamusume: Pretty Derby Walkthrough & Guides Wiki
Pokemon Pokopia Walkthrough & Guides Wiki
Resident Evil Requiem (RE9) Walkthrough & Guides Wiki
Monster Hunter Wilds Walkthrough & Guides Wiki
Wuthering Waves Walkthrough & Guides Wiki
Arknights: Endfield Walkthrough & Guides Wiki
Pokemon FireRed and LeafGreen (FRLG) Walkthrough & Guides Wiki
Pokemon TCG Pocket (PTCGP) Strategies & Guides Wiki


Recommended Games
Diablo 4: Vessel of Hatred Walkthrough & Guides Wiki
Cyberpunk 2077: Ultimate Edition Walkthrough & Guides Wiki
Fire Emblem Heroes (FEH) Walkthrough & Guides Wiki
Yu-Gi-Oh! Master Duel Walkthrough & Guides Wiki
Super Smash Bros. Ultimate Walkthrough & Guides Wiki
Pokemon Brilliant Diamond and Shining Pearl (BDSP) Walkthrough & Guides Wiki
Elden Ring Shadow of the Erdtree Walkthrough & Guides Wiki
Monster Hunter World Walkthrough & Guides Wiki
The Legend of Zelda: Tears of the Kingdom Walkthrough & Guides Wiki
Persona 3 Reload Walkthrough & Guides Wiki


All rights reserved
© 2010 - 2020 Nintendo / MONOLITHSOFT. Xenoblade Chronicles and Nintendo Switch are trademarks of Nintendo. © 2020 Nintendo.
The copyrights of videos of games used in our content and other intellectual property rights belong to the provider of the game.
The contents we provide on this site were created personally by members of the Game8 editorial department.
We refuse the right to reuse or repost content taken without our permission such as data or images to other sites.