Epilogue: Future Connected Walkthrough Part 2
This is a walkthrough for the second area of Future Connected, the epilogue of Xenoblade Chronicles Definitive Edition for Nintendo Switch. For a map of the area, as well as boss strategy and other tips and tricks, read on!
List of Contents
| Previous Section | Next Section |
|---|---|
| Part 1 | Part 3 |
Epilogue: Future Connected Walkthrough - Part 2
Shoulderstone Scree
| Objectives | |
|---|---|
| 1 | Teleport to a Landmark nearest to Cragmaw's Caverns and head north towards Xen's Thoroughfare. If you haven't already, accept and complete Fofora's quest to add another Ponspector to your team. |
| 2 | Head through the Thoroughfare to arrive in Shoulderstone Scree and continue making your way to Teelan's laboratory. |
| Optional 1 | Heading south and to the east past the Abasaay's Dorsum landmark will lead you to Ponspector Faifa. Complete her quest to add more allies to your team. |
| 4 | With the Ponspector quests out of the way, keep going west in Shoulderstone Scree and take a right across the bridge to find the lab. |
| 5 | After the cutscenes you will have a new destination, Gran Dell. Teleport to the Barouh Plaza landmark and head southwest to the Thulles Way landmark. |
| Optional 2 | By continuing southeast from Barouh Plaza, you will reach the Thulles Way Landmark. You will find a ponspector by tracing the tall cliff eastward. Enter the ruin to enter the Old King's Testament. |
| Optional 3 | Climb the ruins by jumping to the fallen beams on the edge of the room. You will find Ponspector Setset atop the ruins. Accept his quest. Return to Soltnar Seal Island then head south to find the Roguls. Defeat them then return to Setset to complete his quest. |
| Optional 4 | From Thulles Way, head north then follow the long path. You will be encountering level 70 enemies so prepare for battle. Upon reaching Gamaro Hollow, you will find Inspector Nonona. Complete his quest by heading west and entring Zekr Marga Quarry. Remember to lure enemies to avoid fighting hordes of enemies. |
| Optional 5 | Return to Xen's Thoroughfare then head north to reach the Lamentation Bridge. follow the Lamentation Bridge path. You will find Hekasa on the split land pointing at Junks. First, you must put Hekasa's stake at the area depicted on the map near the Junks. Return to Hekasa then eliminate the Stake thief near Navir Highland. Return to Hekasa again to complete the quest. |
Hekasa's Position
Hekasa's position is revealed to be somewhere near Junks and Xen's Thoroughfare but you'll actually need to take a detour to reach him. 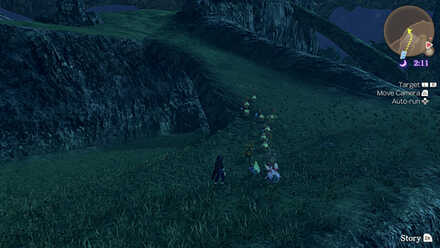
From Xen's Thoroughfare, head north until you see a land connecting to a higher area. This path leads to the Lamentation Ridge.
Follow the path until you need to jump down. After jumping, head right to see a path seemingly leading to a lower area. Hekasa is found in the end of this path.
Halcyon Wheats and Gran Dell
| Objectives | |
|---|---|
| 1 | You will pass a gate and arrive in Halcyon Wheats, right outside of Gran Dell. Follow the path to reach the city proper. |
| 2 | Once you reach the Gran Dell Approach landmark, view the scene and head to the Grand Arch and speak with Radzam. |
| Optional 1 | Ponspector Wunwun can be found near Grandell. He will ask you to bring the 11 Ponspectors to him. You should have 10 Ponspectors by this time so it's time to fetch the last one. |
| Optional 2 | Head south of Grandell to find Ponspector Tutu. He is surrounded by Flamii's so you might want to eliminate them first. Talk to him to accept his quest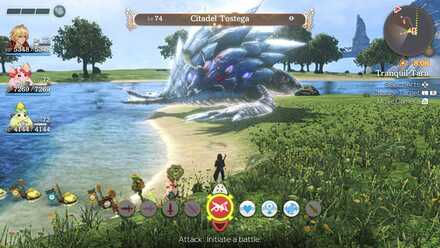 Tutu's item is found at the landmass at the center of the lake. It's guarded by an elite monster so defeat it first to claim the quest item. Tutu's item is found at the landmass at the center of the lake. It's guarded by an elite monster so defeat it first to claim the quest item. |
| Optional 3 | Return to Ponspector Wunwun to accept his 2nd part of the quest.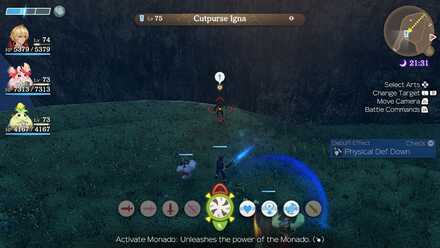 Return to Navir Highland then head northwest to find your quarry. Eliminate him then return to Wunwun to collect all the Ponspectors. Return to Navir Highland then head northwest to find your quarry. Eliminate him then return to Wunwun to collect all the Ponspectors. |
Soltnar Seal Island (Revisited)
| Objectives | |
|---|---|
| 1 | After the cutscene, teleport to Soltnar Seal Island to get a closer look at Alcamoth. |
| 2 | As you approach, a scene will occur, and you will fight two Field Ponios. |
| 3 | After the scene head back to Gran Dell for another boss fight with two Leg Armu, closing out part 2. |
Epilogue: Future Connected Walkthrough Part 3
Side Quests
The following side quests are available at this time:
| Quest | Location | Giver | Rewards |
|---|---|---|---|
| Sweetest Debt | Grand Arch 6:00-18:00 |
Arara |
45000 G 0 EXP Pointed Sleeves D, Princess Bottoms D, Knee-High Boots D |
| No Armu Done | Thulles Way | Laffaelle |
0 G 38000 EXP |
| Favour for Fofora | Xen's Thoroughfare | Fofora |
0 G 40000 EXP Agility Down IV |
| Laennar's Worries | Companion's Cape 5:00-19:00 |
Laennar |
0 G 30000 EXP |
| Plump Pickings | Navvir Crossroads | Laennar |
20000 G 0 EXP |
| Praying Caterpile Control | Navvir Crossroads | Laennar |
28000 G 0 EXP |
| Supplant the Noble Brogs | Navvir Crossroads | Laennar |
28000 G 0 EXP |
| Hekasa's Labour at Stake | Abaasy's Dorsum | Hekasa |
0 G 40000 EXP Recovery Up IV |
| Riddle Faifa This | Abaasy's Dorsum | Faifa |
0 G 40000 EXP Debuff Resist II |
| Lost & Found | Skybridge | Pororo |
50000 G 0 EXP Debuff Resist V |
| Ready, Setset, Go! | Old King's Testament | Setset |
0 G 40000 EXP Bleed Attack IV |
| New Way of Life | Agni's Birthplace | Ines |
30000 G 0 EXP Sapling Amulet, Sapling Knapsack, Sapling Anklet |
| Inclined to Climb | Agni's Birthplace | Shoo-Shoo |
32000 G 0 EXP Jubilant Amulet, Jubilant Rucksack, Jubilant Anklet |
| Tutu's Lost Property | Prayer Rock | Tutu |
0 G 50000 EXP Bind IV |
| Priority Wunwun | Gran Dell Approach | Wunwun |
0 G 0 EXP Strength Up IV |
| Wallflower | Grand Arch 6:00-18:00 |
Angela |
15000 G 0 EXP Redwood Hair Tie, Redwood Vest |
| Finding Happiness | Grand Arch | Lott |
0 G 0 EXP Improved Ether Pick |
| Rubble Trouble | Grand Arch | Selsetana |
48000 G 0 EXP |
| Fixing Up the Junks | Grand Arch 6:00-18:00 |
Helmaline |
20000 G 0 EXP Rudra Wristband, Rudra Bottoms, Rudra Shoes |
| Brother's Keepsake | Xen's Thoroughfare | Lavean |
28000 G 0 EXP Sapling Hair Tie, Sapling Vest |
Quests in Red Text indicate Timed Quests. As these quests will expire after progressing to a certain part of the game, be sure to complete them while they are still available!
Maps and Collectopaedia
Bionis' Shoulder Maps
| List of Maps | |
|---|---|
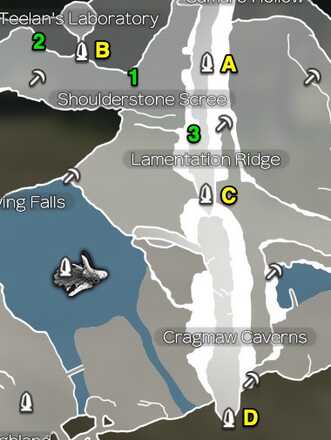 |
 |
Bionis' Shoulder Landmarks and Locations
Landmarks
| A | Xen's Thoroughfare |
|---|---|
| B | Skybridge |
| C | Abasaay's Dorsum |
| D | Cloudtop Lookout |
| E | Thulles Way |
| F | Old King's Testament |
| G | Gran Dell Ramparts |
| H | Agni's Birthplace |
| I | Prayer Rock |
| J | Gran Dell Approach |
| K | Grand Arch |
| L | Eternal Zenith |
Locations
| 1 | Shoulderstone Scree |
|---|---|
| 2 | Teelan's Laboratory |
| 3 | Lamentation Ridge |
| 4 | Agni's Skygarden Ruins |
| 5 | Halcyon Wheats |
| 6 | Tranquil Tarn |
| 7 | Gran Dell |
| 8 | Heroes' Rest |
Bionis' Shoulder Collectopaedia
| Veg | Rainbow Carrot | High Leaf | Cream Wheat | Morrow Cob | Kilopumpkin |
|---|---|---|---|---|---|
| Animal | Angel Bream | Gentleclam | Sky Mole | Blade Bird | Palmtop Elephant |
| Parts | Half Part | Snare Wire | Subzero Steel | Blaze Chain | Congenial Cogs |
| Strange | Swirly Slash | Hero Nipper | Highlightning | Dubious Sculpture | Shimmertumble |
Rewards
| Veg | Valak Corsage |
|---|---|
| Animal | Valak Bracelets |
| Parts | Valak Skirt |
| Strange | Valak Sandals |
| 100% Completion | Valak Top |
Tips and Strategies
Get the Reinforced Ether Pick

Lett can be found on the 2nd floor of Gran Dell. Completing his quest rewards you with the Reinforced Ether Pick.
Completing the side quest Finding Happiness in Gran Dell will improve your Ether Pick, allowing you to always collect rank IV Gems from Ether Deposits.
Boss Strategy Guide
Field Ponio x2

You will be up against 2 level 67 Field Ponios. If you've been doing sidequests up to this point, they should be no match against your party. Let Nene take aggro as usual and, if controlling Shulk, use Shadow Eye when necessary. They aren't immune to Break so Topple and Daze them to make short work of these angry ponies.
Leg Armu x2

At level 63, these Leg Armu should be far beneath your level and go down quickly. Break, Topple, and Back Slash your way to victory.
Story Walkthrough Related Links
Epilogue: Future Connected Walkthrough
| Part 1 | Navvir Highlands~Alcamoth |
|---|---|
| Part 2 | Shoulderstone Scree~Gran Dell |
| Part 3 | Teelan's Laboratory~Zekr Marga Quarry |
| Part 4 | Alcamoth (Revisited) |
Author
Xenoblade Chronicles: Definitive Edition Walkthrough & Guides Wiki
Epilogue: Future Connected Walkthrough Part 2
Rankings
- We could not find the message board you were looking for.
Gaming News
Popular Games

Genshin Impact Walkthrough & Guides Wiki

Honkai: Star Rail Walkthrough & Guides Wiki

Umamusume: Pretty Derby Walkthrough & Guides Wiki

Pokemon Pokopia Walkthrough & Guides Wiki

Resident Evil Requiem (RE9) Walkthrough & Guides Wiki

Monster Hunter Wilds Walkthrough & Guides Wiki

Wuthering Waves Walkthrough & Guides Wiki

Arknights: Endfield Walkthrough & Guides Wiki

Pokemon FireRed and LeafGreen (FRLG) Walkthrough & Guides Wiki

Pokemon TCG Pocket (PTCGP) Strategies & Guides Wiki
Recommended Games

Diablo 4: Vessel of Hatred Walkthrough & Guides Wiki

Cyberpunk 2077: Ultimate Edition Walkthrough & Guides Wiki

Fire Emblem Heroes (FEH) Walkthrough & Guides Wiki

Yu-Gi-Oh! Master Duel Walkthrough & Guides Wiki

Super Smash Bros. Ultimate Walkthrough & Guides Wiki

Pokemon Brilliant Diamond and Shining Pearl (BDSP) Walkthrough & Guides Wiki

Elden Ring Shadow of the Erdtree Walkthrough & Guides Wiki

Monster Hunter World Walkthrough & Guides Wiki

The Legend of Zelda: Tears of the Kingdom Walkthrough & Guides Wiki

Persona 3 Reload Walkthrough & Guides Wiki
All rights reserved
© 2010 - 2020 Nintendo / MONOLITHSOFT. Xenoblade Chronicles and Nintendo Switch are trademarks of Nintendo. © 2020 Nintendo.
The copyrights of videos of games used in our content and other intellectual property rights belong to the provider of the game.
The contents we provide on this site were created personally by members of the Game8 editorial department.
We refuse the right to reuse or repost content taken without our permission such as data or images to other sites.




![Monster Hunter Stories 3 Review [First Impressions] | Simply Rejuvenating](https://img.game8.co/4438641/2a31b7702bd70e78ec8efd24661dacda.jpeg/show)


![Monster Hunter Stories 3 Review [First Impressions] | Simply Rejuvenating](https://img.game8.co/4438641/2a31b7702bd70e78ec8efd24661dacda.jpeg/thumb)


