Chapter 13: Mechonis Field Walkthrough
This is a walkthrough for the Mechonis Field section of Xenoblade Chronicles Definitive Edition for Nintendo Switch. For a map of Mechonis Field Landmarks and Locations, as well as boss strategy and other tips and tricks, read on!
List of Contents
| Previous Section | Next Section |
|---|---|
| Fallen Arm | Central Factory and Agniratha |
Chapter 13: Mechonis Field Walkthrough
Fallen Arm
| Objectives | |
|---|---|
| 1 | 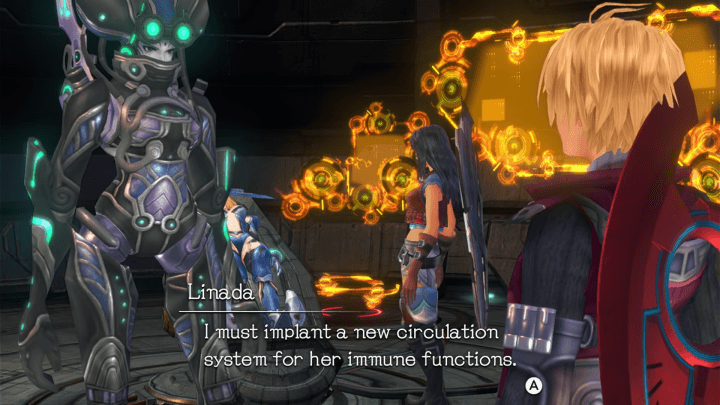 Retrieve the Piezoelectric Unit. Linada needs your help to stabilize Seven's condition. Head north of the village, following the quest marker, to find the needed Piezoelectric Unit. An elite Mechon guards the loot, so take care before engaging. |
| 2 |  Return to Linada and rest. After returning the Piezoelectric Unit to Linada, speak to the nearby NPC and choose to rest. After the cutscenes, leave the village and proceed to **Mechonis Field. |
Mechonis Field
| Objectives | |
|---|---|
| 1 | 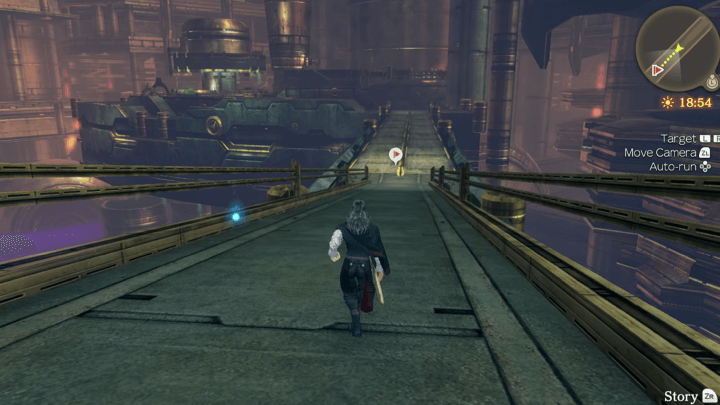 Use the conveyor belts to traverse the Mechonis. Get around the Mechonis field using conveyor belts and lifts. Keep Shulk in the party and equip your members with Anti-Mechon weapons as nearly all enemies here are Mechon-type. |
| 2 | 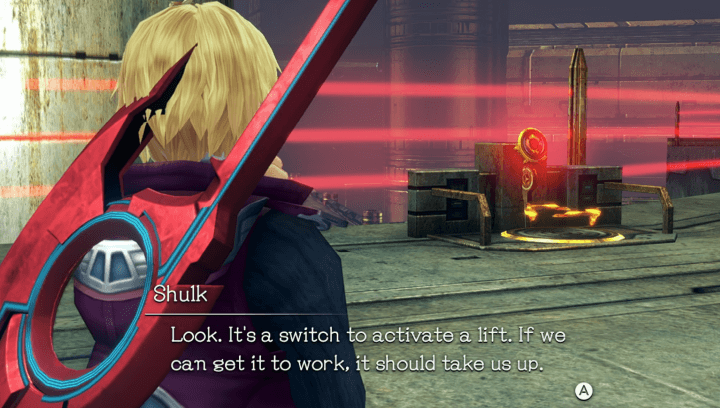 Repower the Lift. You will eventually encounter an unpowered lift red-lit switch. Find the GF Main Power Switch, and later, the 1F Master Power Panel to continue ascending on the unpowered lifts through the area. |
| 6 | Find the Cylinder Activation Panel. Another switch prevents you from ascending further, and this time it's in an area guarded by groups of Mechons. Defeat them and activate the panel. |
| 7 | Reactivate the 3rd Lift Yet more lifts need repowering. Activate the panel in the 3rd Lift Engine Room, then follow the quest guide to the 3F Master Power Panel. You'll also have to climb the walls a bit. |
| 10 | Release the Bulkhead As you ascend further, you'll find an Elite Mechon guarding a Master Power Panel. Defeat it and activate the switch to release the Bulkhead, then proceed to the Lower Bulkhead Bridge to ride the conveyor belt to the outside of the Mechonis. |
| 13 | 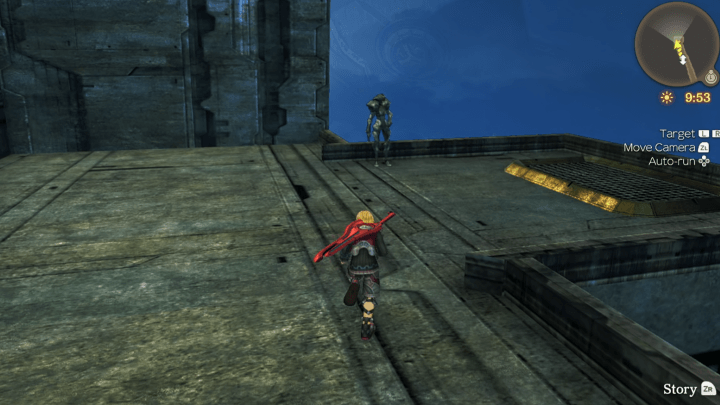 Ascend via the Air Ducts Keep following the path and you'll see a Machina that explains how to use air ducts to travel upwards. Do this and continue ascending until triggering a cutscene where the party takes a break. |
| 14 | 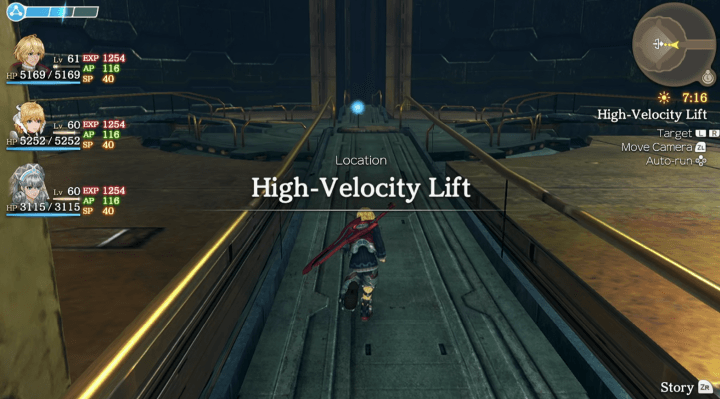 Reenter the Mechonis. Pass through the Patella Exhaust and the Upper Bulwark Bridge to reenter the Mechonis. You'll need to climb down to reactivate switches in two Power Supply Areas, then hit the final Main Power Panel Switch to reactivate the High-Velocity Lift. |
| 16 | 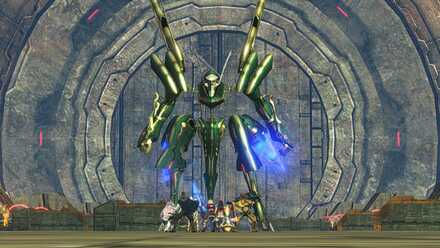 Defeat Jade Face. After entering the massive room you'll be attacked by Jade Face, who will use powerful sniping attacks. Take cover and advance forward until it's in range. |
Chapter 14: Central Factory and Agniratha Walkthrough
Side Quests
The following side quests are available from this chapter:
Colony 6
| Currently no side quests to display. Please check back soon. |
Frontier Village
| Quest | Location | Giver | Rewards |
|---|---|---|---|
| Even in the Chief's Absence | Prophecy Hut | Miko | +100 Reputation 13500 G 8200 EXP Protector Daggers |
| Bored Pelupelu | Prophecy Hut | Pelupelu | +50 Reputation 7800 G 5000 EXP Gemini Gear, Gemini Gauntlets |
| A Gift for Miko | Prophecy Hut | Pelupelu | +100 Reputation 22000 G 12000 EXP Sleek Oil, Sleek Trunks |
Quests in Red Text indicate Timed Quests. As these quests will expire after progressing to a certain part of the game, be sure to complete them while they are still available!
Fallen Arm
| Quest | Location | Giver | Rewards |
|---|---|---|---|
| The History of Mechonis | Junks | Zilex | +500 Reputation 15000 G 11000 EXP Paralysis IV |
| The Oath Sword | Junks | Karlos | +700 Reputation 15200 G 11000 EXP Jack Daggers, Fiora Skill Tree - Rashness |
| A Weapon Just For Me | Junks | Kazat | +700 Reputation 17000 G 15000 EXP Devil Cannon |
| Mending Memories | Junks | Mixik | +500 Reputation 12700 G 9300 EXP Amber Rod |
| Resolution - Father | Junks | Kazat | +4300 Reputation 4700 G 4700 EXP Blaze Plus III |
| Resolution - Mother | Junks | Qofaria | +4300 Reputation 4700 G 4700 EXP Chill Plus III |
Quests in Red Text indicate Timed Quests. As these quests will expire after progressing to a certain part of the game, be sure to complete them while they are still available!
Mechonis Field Side Quests
| Quest | Location | Giver | Rewards |
|---|---|---|---|
| Best Boots | Machina Refuge | Bozatrox | +700 Reputation 20500 G 18000 EXP M100 Greaves , Quick Step V |
| Monster Quest | Machina Refuge | Garrisoned Troop | +50 Reputation 35000 G |
| Challenge Quest 1 | Machina Refuge | Garrisoned Troop | +50 Reputation 65000 G |
| Challenge Quest 2 | Machina Refuge | Garrisoned Troop | +50 Reputation 62000 G |
Quests in Red Text indicate Timed Quests. As these quests will expire after progressing to a certain part of the game, be sure to complete them while they are still available!
Maps and Collectopaedia
Mechonis Field Maps
BF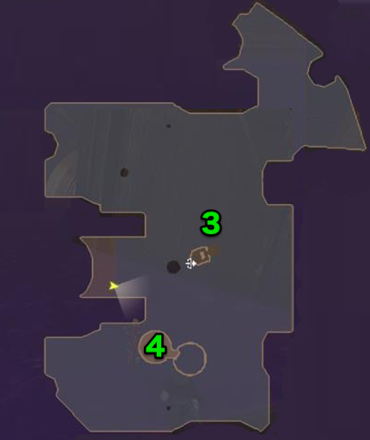 |
GF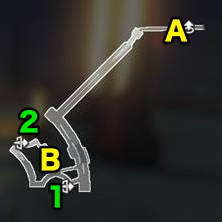 |
1F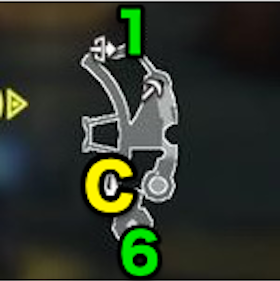 |
2F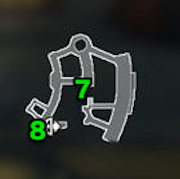 |
3F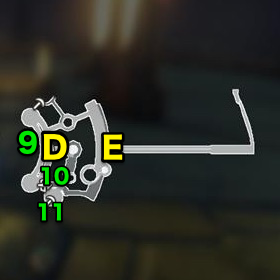 |
4F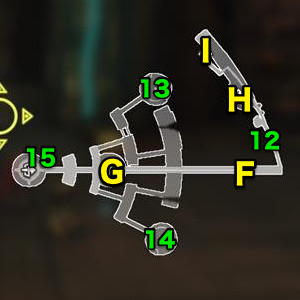 |
5F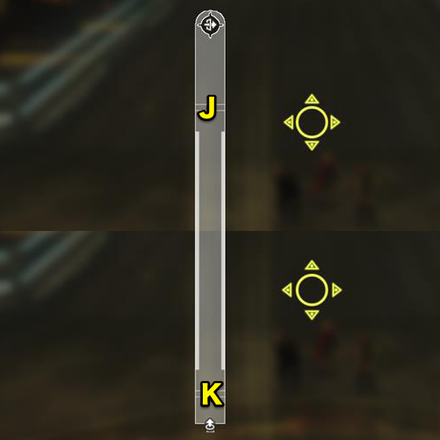 |
Mechonis Field Landmarks and Locations
Landmarks
| A | Left Leg Cooling Outlet |
|---|---|
| B | GF Main Power Switch |
| C | 1F Main Power Switch |
| D | 3F Main Power Switch |
| E | Lower Bulkhead Bridge |
| F | Upper Bulkhead Bridge |
| G | 4F Main Power Switch |
| H | Great Battle Scar |
| I | Machina Refuge |
| J | 1st Zebrai Bulkhead |
| K | 2nd Gamalt Bulkhead |
Locations
| 1 | 1st Lift - GF |
|---|---|
| 2 | 2nd Lift - GF |
| 3 | 1st Lift - B1F |
| 4 | Spent Fuel Tank |
| 5 | 2nd Lift - 1F |
| 6 | 3rd Lift Engine Room |
| 7 | 2F Observation Post |
| 8 | 3rd Lift - 2F |
| 9 | Bulkhead Controls |
| 10 | 3rd Lift - 3F |
| 11 | Ether Gear Store |
| 12 | Patella Exhaust |
| 13 | Power Supply Area 1 |
| 14 | Power Supply Area 2 |
| 15 | High-Velocity Lift |
Heart-to-Hearts
There are no available Heart-to-Hearts in this area.
Mechonis Field Collectopaedia
| Veg | Juicy Steakplant | Acerola Pea | Energy Aubergine | Sweet Pepper | - |
|---|---|---|---|---|---|
| Flower | Azure Hollyhock | Utopia Crocus | - | - | - |
| Bug | Scarlet Crawler | Shiny Scarab | Water Boatman | - | - |
| Nature | Ivy Nest | Mossy Panel | Bronze Wood | - | - |
| Parts | Retro Diode | Modern Blue Gear | Snow Transistor | - | - |
| Strange | Tweet Tweet | Flame Frame | - | - | - |
Collection Rewards
| Vegetables | Taurus Arms |
|---|---|
| Flowers | Agility Up IV |
| Bugs | Daze Up IV |
| Nature | First Attack Plus III |
| Parts | Lightning Attack IV |
| Strange | Fall Defence IV |
| 100% Completion | Taurus Helm |
Tips and Strategies
Anti-Mechon Weapons
Weapons with Anti-Mechon in their names can dish out damage against Mechons without the Monado Art Enchant. This type of weapon is really helpful, and can allow Shulk to focus on damaging enemies without worrying about buffing his friends.
Mechon Weapons
Fiora's weapons can deal damage to other mechons without enchant (similar to Anti-Mechon weapons). Keep this in mind if you're going to include her in your party.
Boss Strategy Guide
Jade Face

A long-range boss that uses Sniper against the party. The battle ends as soon as Jade Face's HP falls to around 75%. Try to get in range with your attacks against Jade Face to end the fight quickly.
Build up the Party Gauge
The Party Gauge can be built up by attacking the Mechons in the vicinity. This will be extremely helpful when approaching Jade Face.
Hide Behind the Walls
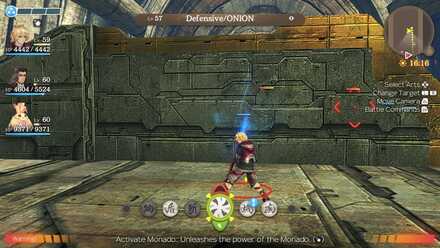
Hiding behind the walls will prevent Jade Face from sniping its target. Use the command feature to make your allies follow you if Jade Face targets them.
Use a Chain Attack to Approach Jade Face
Once a Chain Attack initiates, all characters will immediately approach the enemy regardless of distance. Once you can target Jade Face, initiate a Chain Attack and all your party members will surround Jade Face.
Boss Recommended Characters
|
|
|
|
The main problem with this fight is his long range sniper, which can slowly whittle down your party, or worse, defeat it. Tankers would be sitting ducks with their HP slowly going down against Jade Face's snipe attacks. It is better to rely on party members that have healing capabilities to sustain your party against his long range attacks.
Story Walkthrough Related Links
Xenoblade Chronicles Story Walkthrough
| Prologue | The Battle of Sword Valley |
|---|---|
| Chapter 1 | Colony 9 and Tephra Cave |
| Chapter 2 | Colony 9 (Mechon Invasion) |
| Chapter 3 | Tephra Cave (Revisited) |
| Chapter 4 | Bionis' Leg |
| Chapter 5 | Colony 6 and Ether Mine |
| Chapter 6 | Satori Marsh and Bionis' Interior (1st Time) |
| Chapter 7 | Makna Forest and Frontier Village |
| Chapter 8 | Eryth Sea, Alcamoth, and High Entia Tomb |
| Chapter 9 | Prison Island (1st Time) |
| Chapter 10 | Valak Mountain |
| Chapter 11 | Sword Valley and Galahad Fortress |
| Chapter 12 | Fallen Arm |
| Chapter 13 | Mechonis Field |
| Chapter 14 | Central Factory and Agniratha |
| Chapter 15 | Mechonis Core |
| Chapter 16 | Central Factory (Revisited) |
| Chapter 17 | Bionis' Interior and Prison Island (Revisited) |
| Final Boss | Memory Space |
Author

Xenoblade Chronicles: Definitive Edition Walkthrough & Guides Wiki
Chapter 13: Mechonis Field Walkthrough
Rankings
- We could not find the message board you were looking for.
Gaming News


![Death Stranding 2: On The Beach [PC] Review | A Port That Delivers](https://img.game8.co/4447392/15310a0c9aa1b6843bb713b2ea216930.jpeg/thumb)

Popular Games

Genshin Impact Walkthrough & Guides Wiki
Umamusume: Pretty Derby Walkthrough & Guides Wiki
Pokemon Pokopia Walkthrough & Guides Wiki
Honkai: Star Rail Walkthrough & Guides Wiki
Monster Hunter Stories 3: Twisted Reflection Walkthrough & Guides Wiki
Arknights: Endfield Walkthrough & Guides Wiki
Wuthering Waves Walkthrough & Guides Wiki
Zenless Zone Zero Walkthrough & Guides Wiki
Pokemon TCG Pocket (PTCGP) Strategies & Guides Wiki
Monster Hunter Wilds Walkthrough & Guides Wiki


Recommended Games
Fire Emblem Heroes (FEH) Walkthrough & Guides Wiki
Diablo 4: Vessel of Hatred Walkthrough & Guides Wiki
Cyberpunk 2077: Ultimate Edition Walkthrough & Guides Wiki
Yu-Gi-Oh! Master Duel Walkthrough & Guides Wiki
Super Smash Bros. Ultimate Walkthrough & Guides Wiki
Pokemon Brilliant Diamond and Shining Pearl (BDSP) Walkthrough & Guides Wiki
Elden Ring Shadow of the Erdtree Walkthrough & Guides Wiki
Monster Hunter World Walkthrough & Guides Wiki
The Legend of Zelda: Tears of the Kingdom Walkthrough & Guides Wiki
Persona 3 Reload Walkthrough & Guides Wiki


All rights reserved
© 2010 - 2020 Nintendo / MONOLITHSOFT. Xenoblade Chronicles and Nintendo Switch are trademarks of Nintendo. © 2020 Nintendo.
The copyrights of videos of games used in our content and other intellectual property rights belong to the provider of the game.
The contents we provide on this site were created personally by members of the Game8 editorial department.
We refuse the right to reuse or repost content taken without our permission such as data or images to other sites.