Bunny Builds, Quests, and How to Unlock
Please note that the First Descendant Team has stopped covering the game as of October 2024. Information on certain pages may not be up-to-date.

This is a Bunny build for normal and hard mode in The First Descendant. Read on to learn Bunny's best builds, how to unlock, basic info, skills, as well as Bunny's exclusive equipment and skins!
| All Bunny Guides | ||
|---|---|---|
| Bunny Builds | Ultimate Bunny Builds | Bunny Questline |
List of Contents
Best Bunny Build for Hard Mode
| Bunny Hard Mode Builds | |
|---|---|
| Descendant Modules | Weapons and Modules |
| Reactor and External Components | Playstyle Tips |
| ▼Jump to Normal Mode Builds▼ | |
Bunny Hard Mode Build Showcase
Check out how fast you can clear out mobs using our Bunny Hard Mode Build!
Best Bunny Modules (Hard)
More Modules can be seen by scrolling horizontally on mobile.
For Bunny's Hard mode build, we'll be focusing on modules that will allow you to continuously spam Bunny's Lightning Emission skill for massive DPS. This is possible with Focus on Electric and Singular Specialist for increased Skill Power, and Nimble Fingers for reduced Skill Cooldowns.
You can also prolong the duration of her sprint skill, Speed of Light, by getting the MP Collector, since this module grants you the ability to recover MP upon killing an enemy. In addition, the Electric Transition, Increased HP, and Increased DEF modules should be enough to increase your survivability out on the battlefield.
Modules Guide: List of Modules
Alternative Descendant Module for Bosses
| Module Change | Explanation | ||
|---|---|---|---|
 MP Collector MP Collector
|
> |
 An Iron Will An Iron Will
|
Replace MP Collector with An Iron Will for more survivability. |
 Nimble Fingers Nimble Fingers
|
> |
 Lethal Infection Lethal Infection
|
Replace Nimble Fingers with Lethal Infection for additional Skill Power Modifier. |
For bossing, MP Collector may not be that handy as there won't be a lot of mobs in the colossus, save for a few KingFishers. With that said, it may be worth replacing it with An Iron Will, as you'll need all the durability you can get when taking on the most powerful bosses in Hard Mode.
It is also recommended to replace Nimble Fingers with Lethal Infection to get bonus Skill Power Modifiers upon landing Firearm Critical Hits. This is particularly useful since you'll mostly be relying on weapons to deal damage rather than skills in boss fights.
Descendant Module Substitutes for Mobbing
| Module Change | Explanation | ||
|---|---|---|---|
 Nimble Fingers Nimble Fingers
|
> |
 MP Accelerant MP Accelerant
|
Replace Nimble Fingers with MP Accelerant for longer Skill Duration. |
If you want to use Lightning Emission for a longer period of time, you can swap out Nimble Fingers with MP Accelerant to increase Skill Duration.
All in all, it still depends on whether you want to use Bunny's skills for an extended period of time, or if you prefer reduced skill cooldowns. If it's the latter, then you can stick with Nimble Fingers.
Best Bunny Weapons and Weapon Modules (Hard)
| Weapon | Substat Priority |
|---|---|
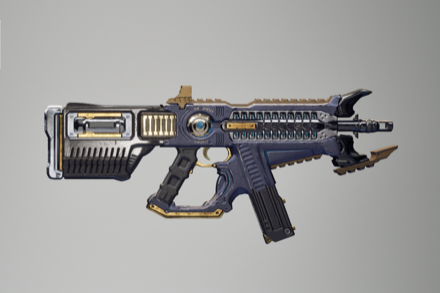 Thunder Cage Thunder Cage
(For Mobbing) |
• Skill Critical Hit Rate • Skill Critical Hit Damage • Skill Effect Range • Skill Cost |
 Tamer Tamer
(For Bossing) |
• Round Per Magazine
• Bonus Firearm ATK Colossus (vs. Colossus) • Firearm ATK • Weak Point Damage |
Best Weapon Modules
 Electric Conductor Electric Conductor
|
 Reload Expert Reload Expert
|
 Insight Support Ammo Insight Support Ammo
|
 Action and Reaction Action and Reaction
|
 Weak Point Sight Weak Point Sight
|
 Better Concentration Better Concentration
|
 Expand General Magazine Expand General Magazine
|
 Better Insight Better Insight
|
 Fire Rate UP Fire Rate UP
|
 Rifling Reinforcement Rifling Reinforcement
|
More Modules can be seen by scrolling horizontally on mobile.
For weapon modules, you'll want to equip modules that will improve Critical Rate and Damage, as well as your Firearm ATK to boost the overall power of your weapon.
As Bunny, the Electric Conductor is also a must-have module, since it adds bonus damage when firing on enemies affected by her electricity skills.
Best Bunny Equipment (Hard)
| Equipment | Substat Priority |
|---|---|
 Tingling Mechanics Reactor Tingling Mechanics Reactor
|
• Electric Skill Power Boost Ratio • Fusion Skill Power Boost Ratio • HP Heal Modifier |
 Supernova Auxiliary Power Supernova Auxiliary Power
|
• Max HP • MP Recovery Out of Combat |
 Supernova Sensor Supernova Sensor
|
• Max MP • HP Recovery Modifier |
 Supernova Memory Supernova Memory
|
• DEF • Electric Resistance |
 Supernova Processor Supernova Processor
|
• Max Shield • Shield Recovery Modifier |
Note that External Components with set bonuses have fixed main stats.
The Tingling Mechanics Reactor is the best Reactor to use for Bunny in Hard Mode due to the Electric Skill Power Boost Ratio that it has to strengthen your Electric skills, particularly the Lightning Emission skill, which you will often use as Bunny.
Equipping the Supernova Set will further empower Bunny's Electric damage output as the set increases the Electric Skill Power Modifier. You will also be able to activate the Executioner's Thunderbolt to deal additional damage to your target upon hitting them with your Electricity skills.
Bunny Playstyle Tips
| Bunny Playstyle Tips |
|---|
|
|
Charge Electricity by Moving Around
Bunny relies on her Electricity skills, but before you can cast any of them out, you'll have to build up Electricity by running around.
Try to make it a habit of moving around in circles even when you have to stay and defend one area so that you'll always have some Electricity charged up in case you have to use them.
Use Lightning Emission and Speed of Light at the Same Time
The time it takes to release each wave of the Lightning Emission skill depends on how fast you are moving around. With Speed of Light active, you'll be able to sprint faster and this will constantly unleash waves of electricity a lot quicker!
Use Reload Cancel
You can cut the reload time in half by reloading, then wait for the reload meter to reach halfway, and then use any of Bunny's skills (except Lightning Emission) to instantly reload your weapon. This isn't only limited to skills, but you can also perform actions such as rolling or using the grappling hook.
Best Bunny Builds for Normal Mode
| Jump to a Section! | |
|---|---|
| Best Modules | Best Weapon and Modules |
| Best Reactor | Best External Components |
| ▲Jump to Hard Mode Builds▲ | |
Best Bunny Modules (Normal)
| Best Bunny Modules | |
|---|---|
 MP Collector MP Collector
|
When defeating an enemy, instantly recovers X% of Max MP at a X% chance. |
 Front Lines Front Lines
|
Skill Critical Hit Damage +X%, Skill Critical Hit Rate +X% |
 Frugal Mindset Frugal Mindset
|
Skill Cost -X%, Skill Effect Range +X% |
 MP Accelerant MP Accelerant
|
Skill Duration +X%, Max MP +X% |
 Focus on Electric Focus on Electric
|
Electric Skill Power +X%, Skill Cooldown -X% |
 Focus on Singular Focus on Singular
|
Singular Skill Power Modifier +X%, Skill Cooldown -X% |
 Shock Punch Shock Punch
|
Modifies the Charged Sub Attack. Use a Shock Punch to attack when performing a Charged Sub Attack. As the Enhancement Level increases, Max Module Capacity increases. (Currently +X) |
 Skill Extension Skill Extension
|
Skill Duration +X%, applies only to certain skills for each Descendant |
 Skill Expansion Skill Expansion
|
Skill Effect Range +X%, applies only to certain skills for each Descendant |
 Nimble Fingers Nimble Fingers
|
Skill Cooldown -X% |
These modules are chosen to improve your Skill Damage, reduce Skill Cooldown, help you manage Skill Cost, and extend your skill's Range. Since Bunny's Lightning Emission covers a large area, it's highly recommended to focus on boosting your skill damage and reducing cooldown to make it more spammable and effective for area clearing.
Additionally, decreasing your Skill Cost will help you sustain the Speed of Light, as it rapidly depletes your MP pool.
Modules Guide: List of Modules
Best Bunny Weapon and Modules (Normal)
| Weapon | Substat Priority | ||
|---|---|---|---|
 Thunder Cage Thunder Cage
|
・Skill Critical Hit Rate ・Skill Critical Hit Damage ・Skill Effect Range ・Skill Cost |
||
| Best Modules for Thunder Cage | |||
 Electric Conductor Electric Conductor
|
When attacking enemies inflicted with Electrocution, Firearm ATK +X%. | ||
 Reload Insight Reload Insight
|
Reload Time Modifier +X%, Firearm Critical Hit Rate +X% | ||
 Insight Support Ammo Insight Support Ammo
|
Rounds per Magazine +X%, Firearm Critical Hit Rate +X% | ||
 Insight Focus Insight Focus
|
Firearm Critical Hit Rate +X%, Firearm Critical Hit Damage +X% | ||
 Sharpshooter Sharpshooter
|
Firearm ATK +X%, Firearm Critical Hit Rate +X% | ||
 Better Concentration Better Concentration
|
Firearm Critical Hit Damage +X% | ||
 Expand General Magazine Expand General Magazine
|
Max General Rounds +X% | ||
 Better Insight Better Insight
|
Firearm Critical Hit Rate +X% | ||
 Rifling Reinforcement Rifling Reinforcement
|
Firearm ATK +X% | ||
Since the Thunder Cage is a submachine gun, you will face issues with high recoil and low ammo capacity. However, due to the nature of Bunny's kit, you'll be engaging in short to mid-range fights to keep enemies within range of your skills, so recoil control won't be an issue. To address the low ammo capacity, you'll stack magazine capacity upgrades.
Furthermore, this build focuses on increasing your Critical Hit Rate, Critical Hit Damage, and Firearm ATK to maximize overall DPS against any enemy.
Best Bunny Reactor (Normal)
| Reactor | Substat Priority |
|---|---|
 Tingling Singularity Reactor Tingling Singularity Reactor
|
・Skill Critical Hit Rate ・Skill Critical Hit Damage ・Skill Effect Range ・Skill Cost |
Since you will be frequently casting Lightning Emission, which is both an Electric and Singular skill, it is best to use a Tingling Singularity Reactor. This reactor is your best option, as it provides a Skill Power Boost for both of these skill types.
Reactors Guide: List of Reactors
Best Bunny External Components (Normal)
| Set | Set Effect |
|---|---|
    |
2-Set Effect: ・Skill Critical Hit Rate +18% 4-Set Effect: ・Skill Power +4% ・Skill Cost -2.8% |
| Substat Priority | |
| Auxiliary Power | ・Max HP ・DBNO Duration |
| Sensor | ・Max MP ・MP Recovery In Combat |
| Memory | ・DEF ・Shield Recovery In Combat |
| Processor | ・Max Shield ・Shield Recovery Modifier |
The Battle Aesthetics Set complements Bunny's entire kit, as she relies on landing Critical Hits with Lightning Emission to eliminate nearby enemies while using Speed of Light. This set also reduces the MP cost of your skills, which is particularly helpful given the high cost of maintaining Speed of Light.
As for the stat priority, it is highly recommended to prioritize defensive stats to enhance your survivability if you get cornered.
How to Unlock Bunny
Unlock by Completing the Bunny Research Quest
| 1 |
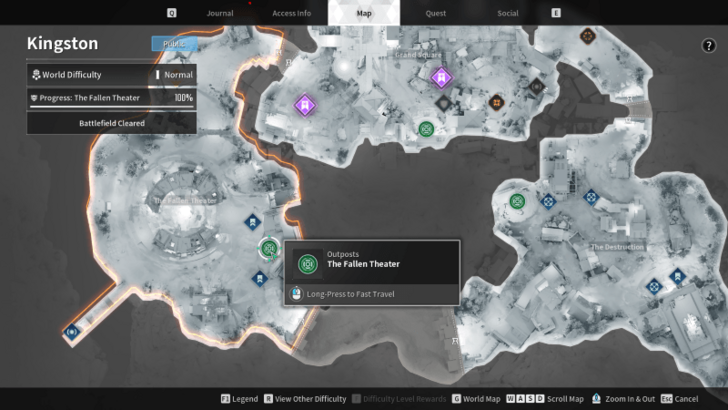 During the Kingston Main Quest called Suspicion, talk to Bunny at the Fallen Theater outpost so you can unlock the Bunny Research Quest and gather the materials needed to unlock her. |
|---|---|
| 2 |
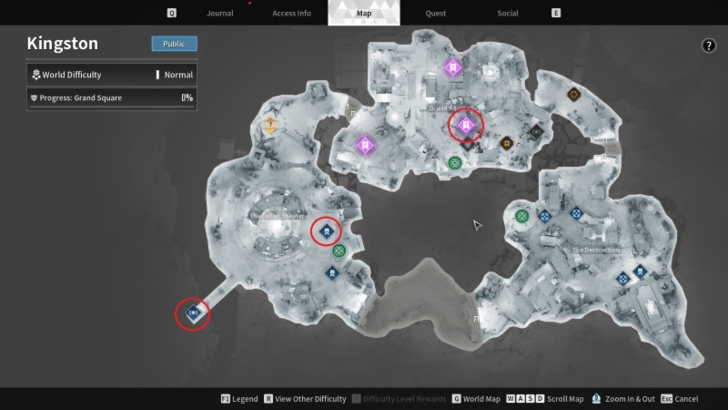 ・Acquire the Bunny Enhanced Cells by completing the Vulgus Field Generator mission in Kingston (Fallen Theater). ・ Acquire the Bunny Stabilizer by completing the Magister's Lab mission in Kingston (Fallen Theater). ・Acquire the Bunny Spiral Catalyst by completing the Vulgus Data Transmitter mission in Kingston (Grand Square). |
| 3 |
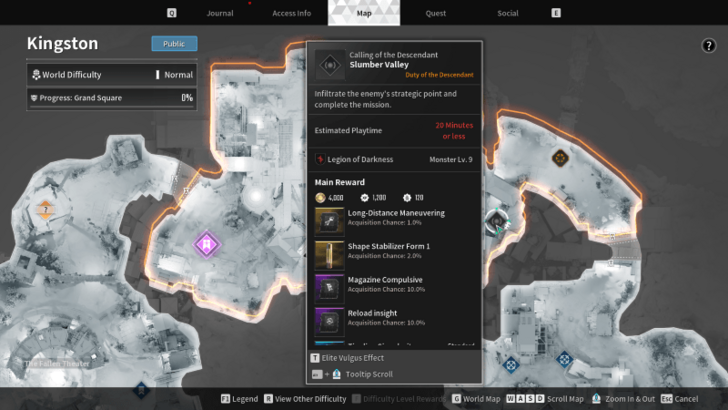 Complete the Slumber Valley mission in Kingston (Grand Square). |
| 4 |
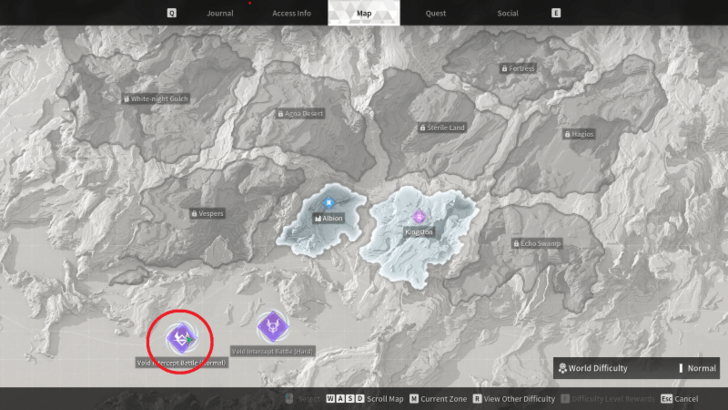 Talk with Seneca in Albion, and defeat the Gravewalker in the Void Intercept Battle in Normal difficulty. After you've won the battle, select the Amorphous Material Pattern: Bunny from the list of rewards. |
| 5 |
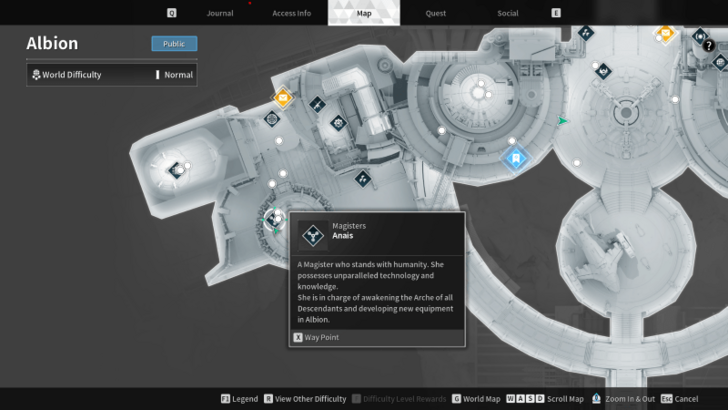 Proceed to Anais' location in the Research Institute (Albion) and interact with her to construct the suit from the materials you've gathered from the steps above. |
You can unlock Bunny through the Research Institute in Albion. Note that to acquire a Descendant using research, you need all the required items and gold to unlock this character.
Purchase Bunny Using Caliber
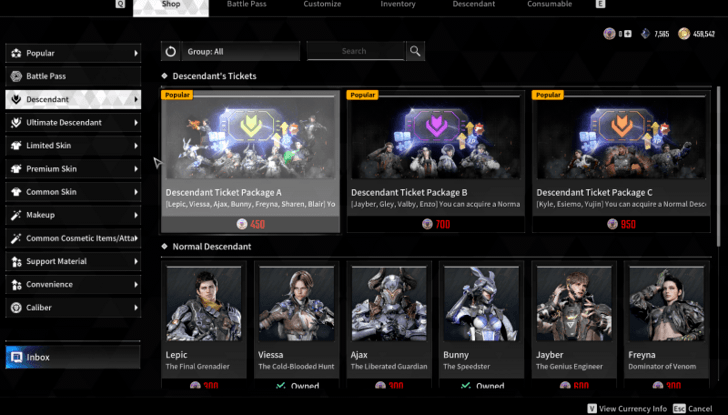
Alternatively, you can unlock Descendants by purchasing them in the Shop. This method only requires Caliber, an in-game currency that you can buy with real money. Purchasing Bunny in the Shop instantly unlocks the Descendant, allowing you to skip the item requirements and research time.
Bunny Quests
All Bunny Exclusive Quests
| Map Location | How to Complete |
|---|---|
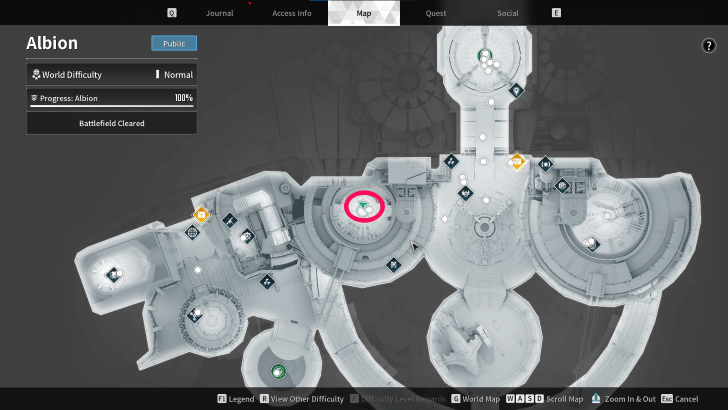 What Kind of Records Are These? |
Open the Records menu and listen to Transcript of Operation Records - Restricted Zone: Level 1 Classification |
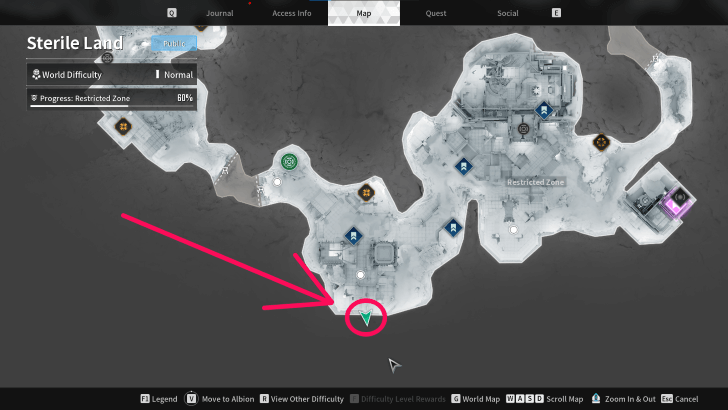 Follow Their Traces |
Go to the cliff near the High-Powered Jammer in the Restricted Zone and interact with the gadget to pick up the journal. |
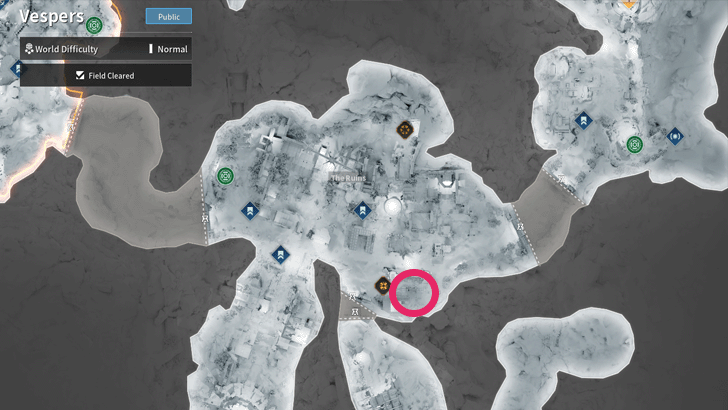 The Traces Continue |
Obtain the journal on top of the stone archway southeast of the Ruins in Vespers. |
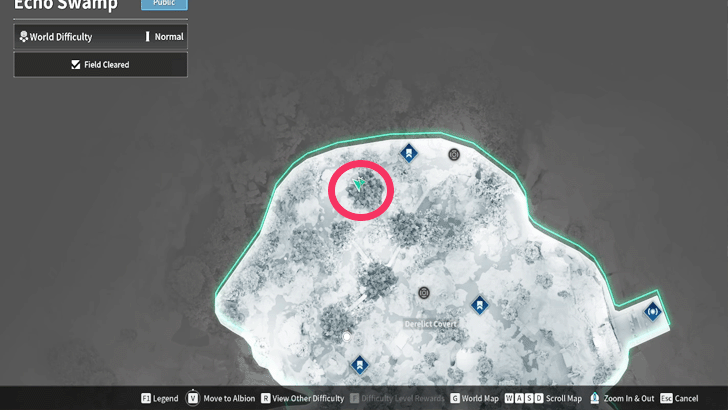 In Search of the Relic |
Proceed to Derelict Covert in Echo Swamp and find the journal on top of the tallest tower to the north. |
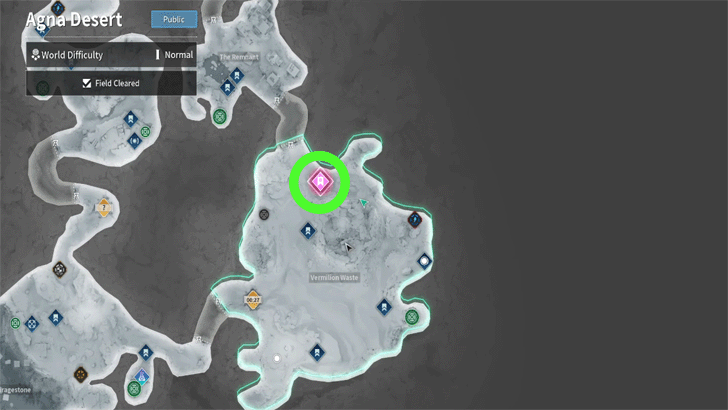 Data Chip Fragments |
Complete the Void Fusion Reactor - Agna Desert Vermilion Waste mission in Agna Desert. |
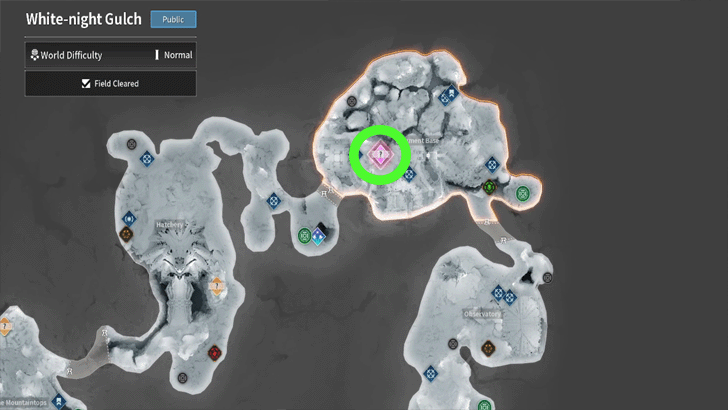 Security Bypass Tool |
Complete the Shipment Base: Vulgus Strategic Outpost Zone Recon mission in White-night Gulch. |
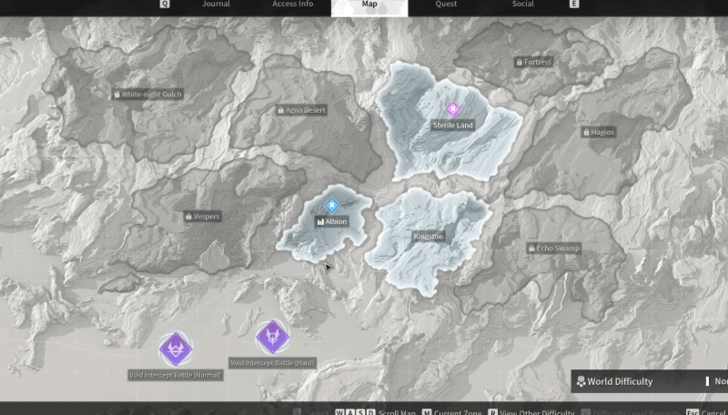 Communications Tracking Component |
Defeat the Pyromaniac in Void Intercept Battles (Normal Difficulty) |
 To Bunny, Our Beloved Daughter |
Defeat Shrieking Verves in the Abandoned Magister Lab. |
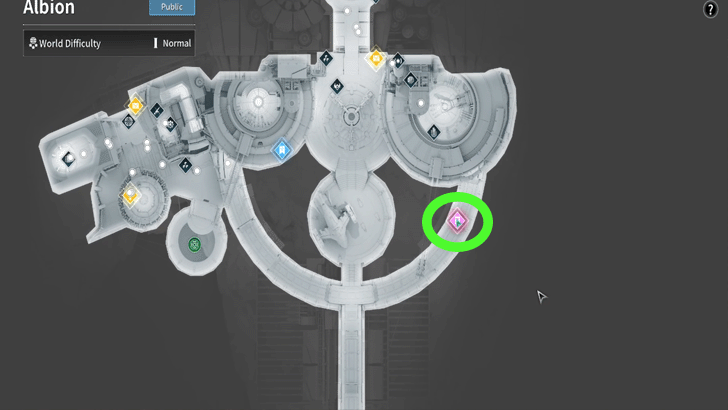 Goods with No Owner |
Speak to Sharen and Gley. |
 Birthday |
Talk to Alpha in the Albion Command Center. |
Bunny Basic Info & Stats
| Bunny Basic Info | ||
|---|---|---|
 Bunny BunnyThe Speedster |
Role | Nuker |
| Element |
|
|
| Description | ||
| "A dealer of continuous damage who sprints while discharging electricity. The more she runs, the greater the electrical energy she accumulates, allowing her to release this energy in a powerful shockwave." | ||
Stats
| DEF | Max Shield | Shield Recovery | Max MP | Max HP |
|---|---|---|---|---|
| 1488 | 380 | 3.96 | 300 | 648 |
Bunny Skills
Passive Skills
| Skill | Type Effect |
|---|---|
 Rabbit Foot Rabbit Foot
|
Charges Electricity when moving. Inflicts damage to nearby enemies when landing after a Double Jump. |
Active Skills
| Skill | Type Effect |
|---|---|
 Thrill Bomb Thrill Bomb
|
Summons an Electro Orb to attack nearby enemies and inflict them with Electrocute effect. |
 Speed of Light Speed of Light
|
Sprint Speed increases significantly and acquires more Electricity. |
 Lightning Emission Lightning Emission
|
Moving around deals damage to nearby enemies and inflicts them with Electrocute effect. |
 Maximum Power Maximum Power
|
Shoots out electricity forward to inflict damage. Damage increases in proportion to skill duration. |
Bunny Exclusive Equipment
Biopower Conversion Device Suit
Simply known as a 'Bio-Cell,' this special suit is a Biopower Conversion Device. It serves as an electric storage device that helps Bunny convert and store electromagnetic force generated by her movements into actual electricity. Thanks to the Bio-Cell, Bunny can store electricity generated within her body and attack enemies by releasing electromagnetic force during combat when necessary.
However, Albion was unable to create a perfect electric transition device with their current technology because the electricity generated by Bunny's Arche and physical activities was very different from the usual current and pattern. As a consequence, the charged electricity decreases immediately if Bunny doesn't move. That's also the reason why this suit is called a Biopower Conversion Device rather than a typical battery."
Bunny Skins
| Jump to a Skin type! | ||
|---|---|---|
| Head | Body | Back |
| Chest | Ecive | Full Body |
| Grappling Hook | Make Up | Spawn |
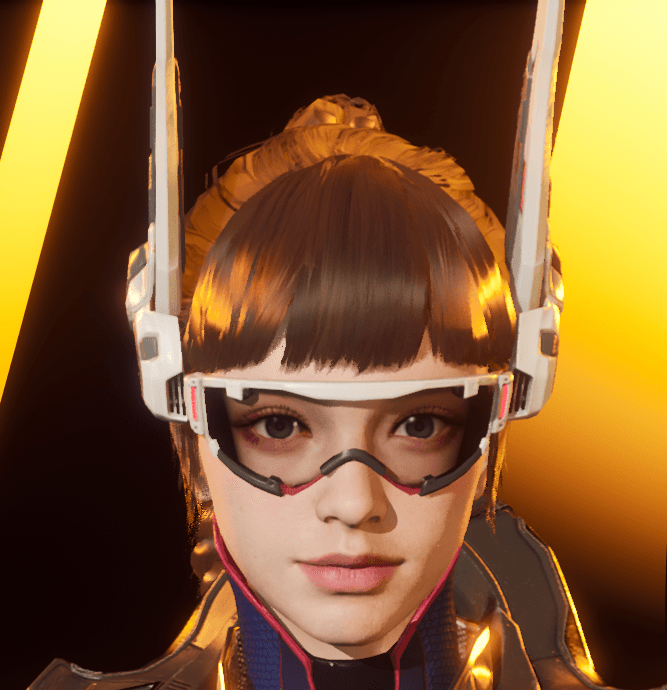
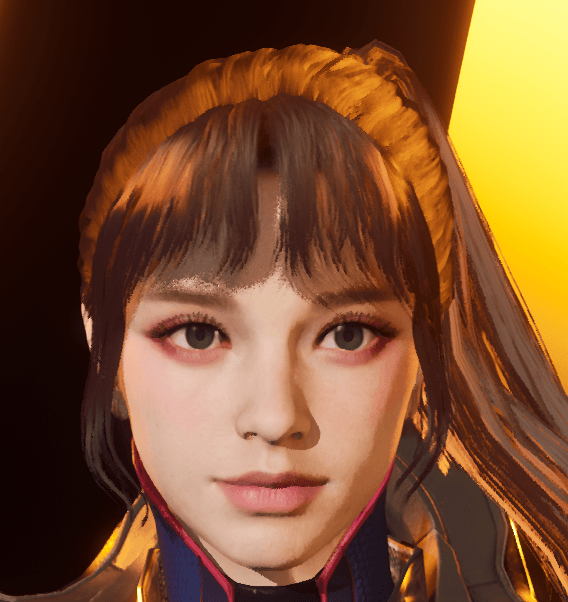
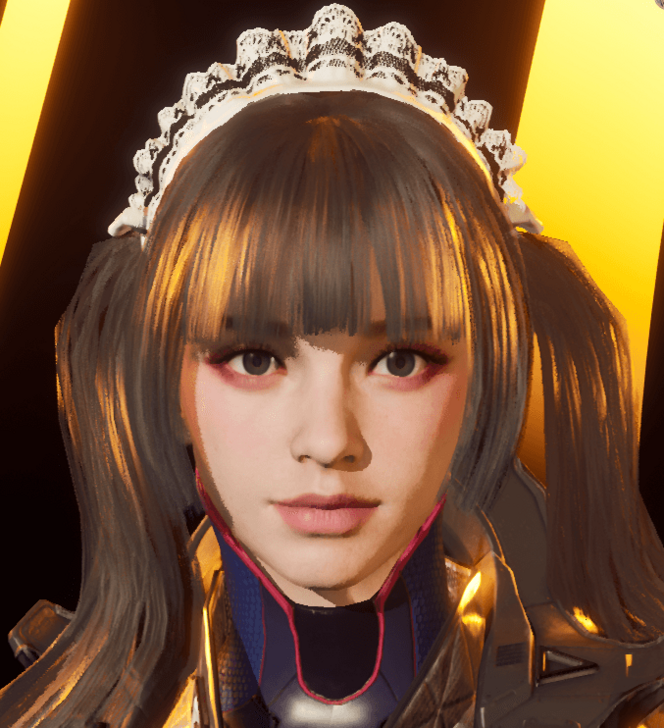
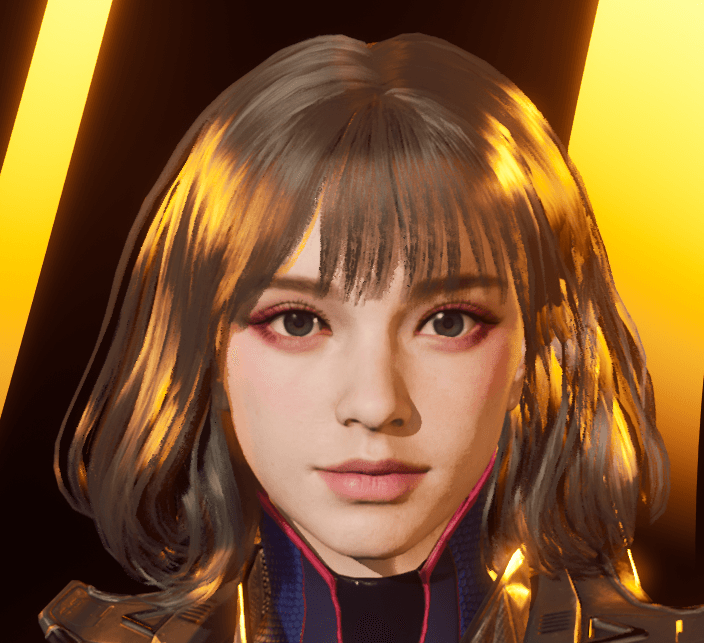
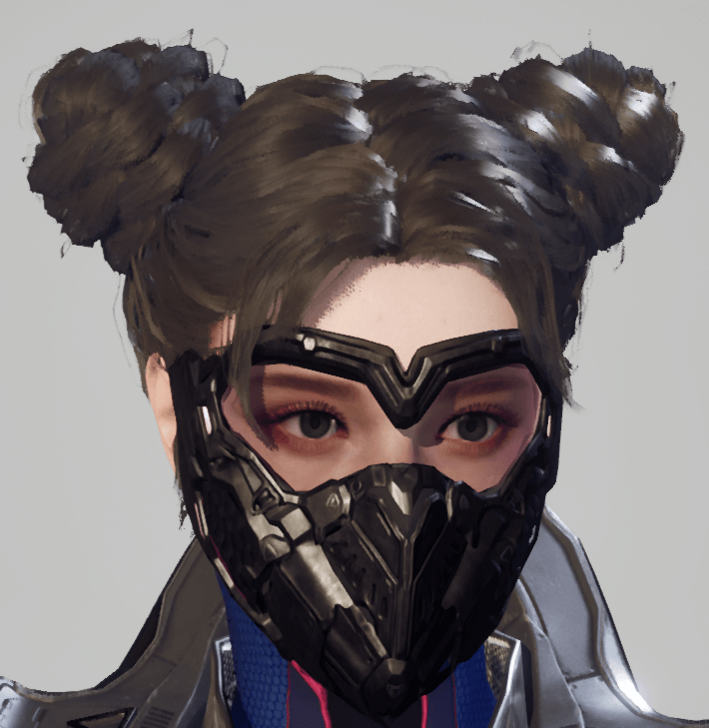
All Bunny Head Skins
 |
 |
 |
 |
 |
 |
 |
 |
 |
 |
 |
 |
All Bunny Body Skins
 |
 |
 |
 |
 |
 |
 |
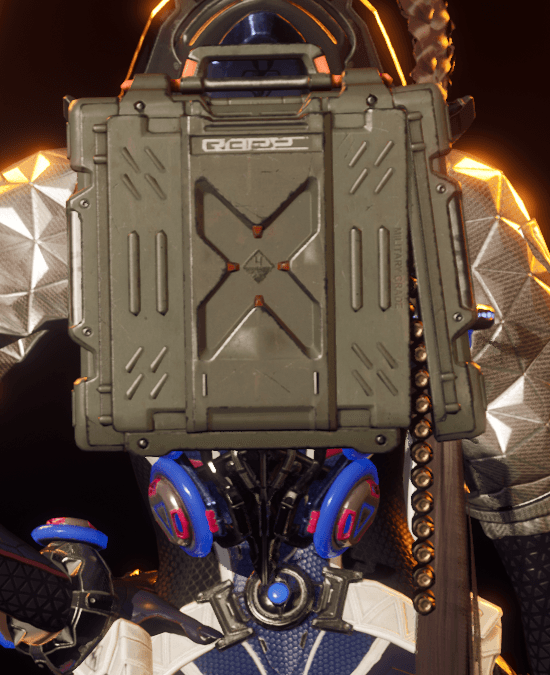
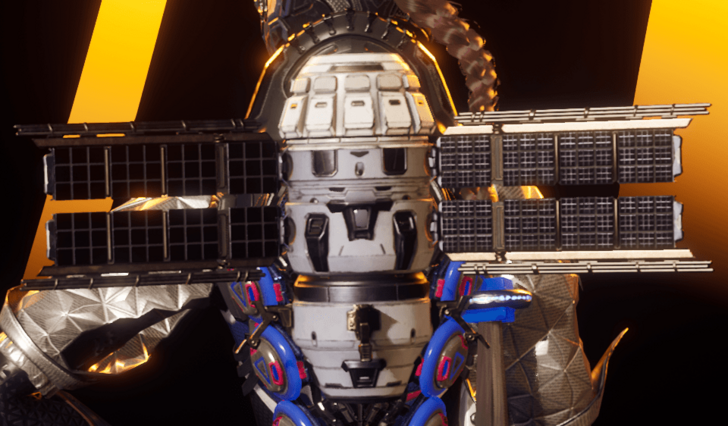
All Bunny Back Skins
 |
 |
 |
 |
 |
 |
 |
 |
 |
 |
 |
 |
 |
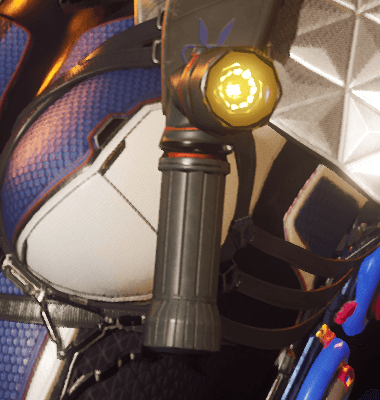
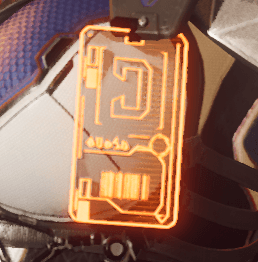
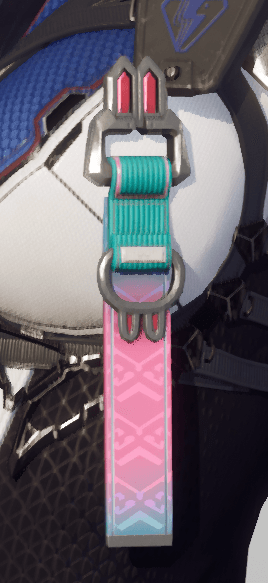
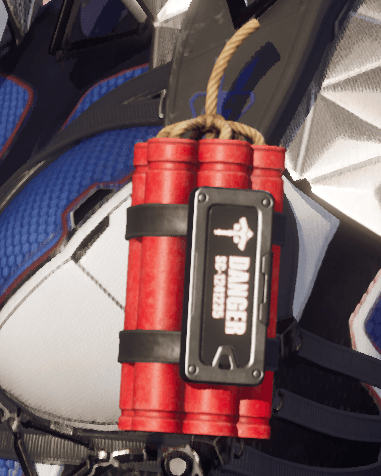
All Bunny Chest Skins
 |
 |
 |
 |
 |
 |
 |
 |
 |
 |
All Bunny Ecive Skins
 |
 |
 |
All Bunny Full Body Skins
 |
 |
All Bunny Grappling Hook Skins
 |
 |
All Bunny Make Up Skins
 |
 |
 |
All Bunny Spawn Skins
 |
 |
 |
 |
 |
 |
 |
 |
 |
The First Descendant Related Guides

All Base Characters
 Ajax Ajax |
 Blair Blair |
 Bunny Bunny |
 Enzo Enzo |
 Esiemo Esiemo |
 Freyna Freyna |
 Gley Gley |
 Hailey Hailey |
 Jayber Jayber |
 Kyle Kyle |
 Lepic Lepic |
 Luna Luna |
 Sharen Sharen |
 Valby Valby |
 Viessa Viessa |
 Yujin Yujin |
- | - |
All Ultimate Characters
 Ultimate Ajax Ultimate Ajax |
 Ultimate Bunny Ultimate Bunny |
 Ultimate Freyna Ultimate Freyna |
 Ultimate Gley Ultimate Gley |
 Ultimate Lepic Ultimate Lepic |
 Ultimate Valby Ultimate Valby |
 Ultimate Viessa Ultimate Viessa |
- | - |
Character Guides
| Character Guides | |
|---|---|
| List of All Builds | List of All Ultimate Descendants |
| All Character Skins | - |
Comment
can you if possible update the singular and fusion icons, please and thank you
Author
Bunny Builds, Quests, and How to Unlock
improvement survey
04/2026
improving Game8's site?

Your answers will help us to improve our website.
Note: Please be sure not to enter any kind of personal information into your response.

We hope you continue to make use of Game8.
Rankings
Gaming News
Popular Games

Genshin Impact Walkthrough & Guides Wiki

Crimson Desert Walkthrough & Guides Wiki

Umamusume: Pretty Derby Walkthrough & Guides Wiki

Honkai: Star Rail Walkthrough & Guides Wiki

Monster Hunter Stories 3: Twisted Reflection Walkthrough & Guides Wiki

Wuthering Waves Walkthrough & Guides Wiki

The Seven Deadly Sins: Origin Walkthrough & Guides Wiki

Pokemon TCG Pocket (PTCGP) Strategies & Guides Wiki

Pokemon Pokopia Walkthrough & Guides Wiki

Zenless Zone Zero Walkthrough & Guides Wiki
Recommended Games

Monster Hunter World Walkthrough & Guides Wiki

Fire Emblem Heroes (FEH) Walkthrough & Guides Wiki

Pokemon Brilliant Diamond and Shining Pearl (BDSP) Walkthrough & Guides Wiki

Super Smash Bros. Ultimate Walkthrough & Guides Wiki

Diablo 4: Vessel of Hatred Walkthrough & Guides Wiki

Cyberpunk 2077: Ultimate Edition Walkthrough & Guides Wiki

Yu-Gi-Oh! Master Duel Walkthrough & Guides Wiki

Elden Ring Shadow of the Erdtree Walkthrough & Guides Wiki

The Legend of Zelda: Tears of the Kingdom Walkthrough & Guides Wiki

Persona 3 Reload Walkthrough & Guides Wiki
All rights reserved
© NEXON Korea Corp. & NEXON Games Co, LTD. All Rights Reserved.
The copyrights of videos of games used in our content and other intellectual property rights belong to the provider of the game.
The contents we provide on this site were created personally by members of the Game8 editorial department.
We refuse the right to reuse or repost content taken without our permission such as data or images to other sites.
 Electric Transition
 Long-Distance Maneuvering
 Skill Concentration
 Singular Specialist
 Increased DEF
 Increased Shield
 Increased HP
 Regeneration Boost
 Strong Mentality




![Forza Horizon 6 Review [Preview] | Beautiful Roads With a Whole Lot of Oversteer](https://img.game8.co/4460981/a7254c24945c43fbdf6ad9bea52b5ce9.png/show)


![Forza Horizon 6 Review [Preview] | Beautiful Roads With a Whole Lot of Oversteer](https://img.game8.co/4460981/a7254c24945c43fbdf6ad9bea52b5ce9.png/thumb)


you have messed up Thunder Cage suggested substats. those are not weapon substats.