


 Best Upcoming Banners (2026)
 Daily Legend Races Schedule
 Best Character (Trainee) Tier List
 Best Support Cards Tier List
 Best Skills Tier List
 Reroll Tier List
 Friend ID Sharing Board
 Upcoming Characters and Support Cards
 Event Choice Checker
 Support Card Comparison Tool
 Umamusume Redeem Codes
 Character Tier List Maker
 Support Card Tier List Maker
 Trainer Aptitude Test
 Racing Carnival Guide
This survey will take about 1 minute.
Your answers will help us to improve our website.
Umamusume: Pretty Derby
Trackblazer (Make a New Track) Scenario Guide
★ Best Characters | Best Support | Best Skills
★ 1st Anni: Kitasan Black | Matikanetannhauser
∟ Narita Top Road | Mejiro Bright | Satono Diamond
★ Champions Meeting: Aquarius Cup | Pisces Cup
★ Friend ID Board | March 2026 Schedule
★ Trackblazer Guide | 1st Anniversary Rewards

Trackblazer: Start of the Climax (Make a New Track/MANT) is the third permanent scenario arriving in Umamusume: Pretty Derby. Here, you'll find a guide on the Trackblazer, its mechanics, and the best cards for Trackblazer!
| Trackblazer (MANT) Guides | |
|---|---|
| Trackblazer Scenario Guide | Trackblazer Race Schedules |
| Trackblazer Items and Tier List | Trackblazer Epithets |
| All Trackblazer Events and Choices | How to Unlock Long TS Climax |
List of Contents
Trackblazer (MANT) Explained
| Trackblazer Explained |
|---|
|
|
|
Quick Summary Trackblazer offers a sandbox-style career where adjusting your training strategy around Races and the Pro Shop gives the best results. There are no more race goal restrictions and secret events in Trackblazer, which has its pros and cons. |
No Race Goals
| Objective | Turf | Dirt |
|---|---|---|
| 1st | 60 | 30 |
| 2nd | 300 | 200 |
| 3rd | 300 | 300 |
Unlike the URA Finale and Unity Cup, Trackblazer has no race goals and no Scenario Link. Every Umamusume will need to get enough Result Points by Late December of each year instead. Excess Result Points are not carried over to the following year.
Unlike the previous two scenarios, Trackblazer gives you the freedom to participate in any race you want without being restricted by a schedule. This also means that you aren't restricted to getting a certain ranking in a race to continue the career.
It will also be easier to collect trophies in this mode since there are no more goal races.
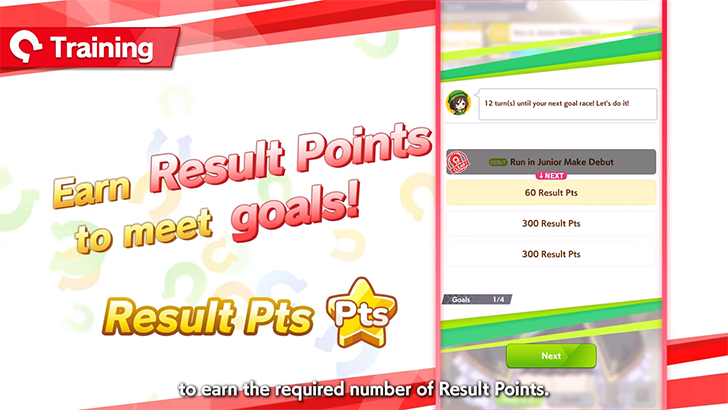
Higher Grades Give More Result Points
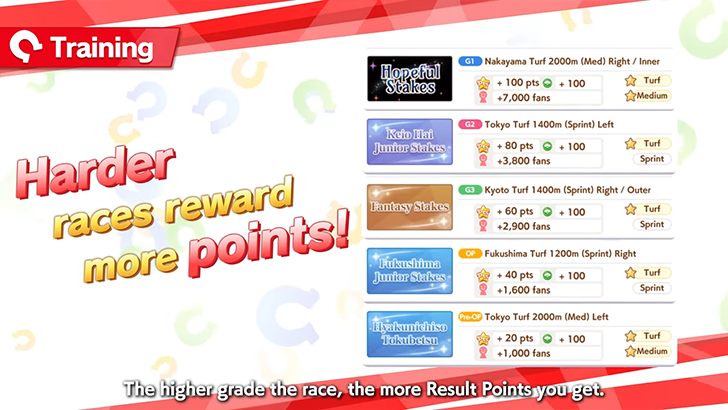
| G1 | G2 | G3 | OP | Pre-OP |
|---|---|---|---|---|
| 100 | 80 | 60 | 40 | 20 |
Result Points are gained by winning races, and you get more points by taking on harder ones. If you don't place first, you gain fewer points from the race, so it's important to win every race you take on.
Can Gain More Fans
Since you can race a lot in this career mode, it is easy to gain a lot of fans for your Umamusume, which can be boosted by Fan Bonus effect from certain Support Cards.
Gain More Stats Using Race Bonus
Since Trackblazer focuses on racing more than training, it is essential to use Support Cards that give high Race Bonus to gain additional stats after each race. Aiming for a minimum of 50 Race Bonus from your Support Cards is recommended. It's also recommended to win at least 25 Races, going for even more, if possible.
Earn Shop Coins and Buy Training Items
| Position | Shop Coins |
|---|---|
| 1st | 100 |
| 2nd-3rd | 60 |
| 4th-5th | 30 |
| 6th~ | 0 |
Trackblazer lets you collect Shop Coins that you can use to buy items in the Pro Shop that will boost your performance within the current run of this career mode. Each race, regardless of grade, will give 100 Shop Coins if you get 1st place, but you will receive fewer coins if you place any lower than that.
Items bought from the shop vary from improving your stats to giving you a certain condition, energy, support card bonds, and much more.
Face Rivals to Gain Skill Hints
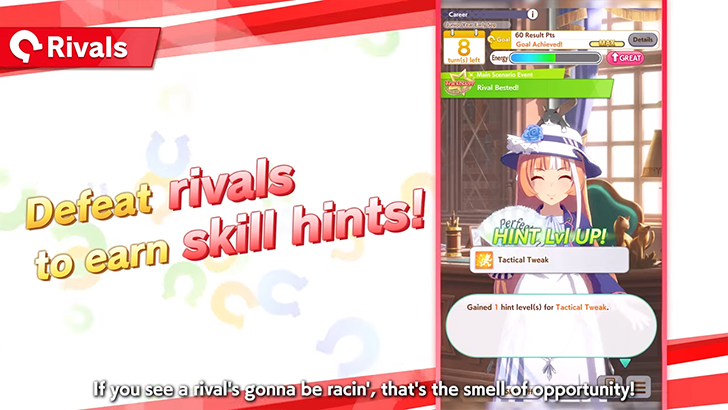
There will be times when races will feature a Rival, which is indicated by the VS icon on the Race button. Winning against a rival by getting 1st place will give you a random skill hint connected to the distance of the race or the running style you used. Rivals will only appear for distances with C aptitude or better.
Placing higher than the Rival but not getting 1st place will be equal to a draw and will not give you a skill hint.
Secret Events Don't Trigger
Secret events of Umamusume don't trigger in the Trackblazer scenario, unlike the previous two scenarios. For example, Silence Suzuka cannot get the Runaway style in this career as it is tied to her secret event.
Twinkle Star Climax Replaces URA Finals
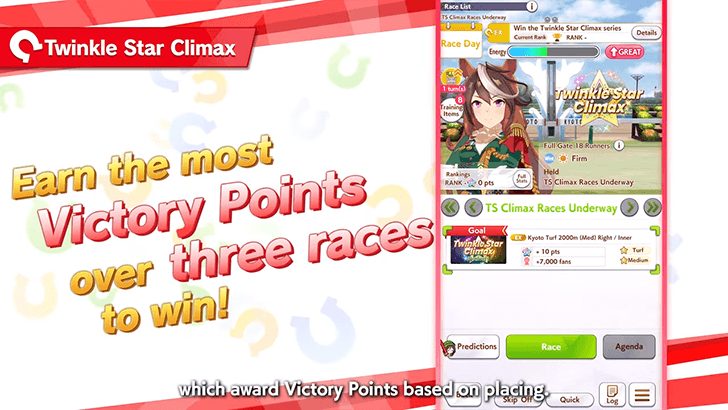
The last three races of the scenario is replaced by the Twinkle Star Climax. For these races, you need to earn enough Victory Points across three to place first. This means it's possible to still get 1st overall even if you don't win all 3 races. You should still aim for 1st with these three races, regardless, to maximize stat gains.
Best Support Cards for Trackblazer
| Support Card Setups | Recommended Support Cards | Support Effect Priorities |
Support Card Setups
For the Trackblazer Scenario, it's recommended to have 2 Wit cards for all decks since these can help with energy management outside of races. For most regular decks, 2 Speed cards will still be needed to easily hit the cap while training Power. Matikane Fukukitaru SSR is the best pick due to the initial stats it provides, while Narita Top Road SSR is also strong for its perk, which gets stronger the more you race.
For the remaining cards, try filling them with strong Race Bonus cards like Admire Vega SR or cards with Speed or Power Bonus. Note that you don't have to actively raise the friendship of the Race Bonus fillers if you're not focused on training their stat type. Aim for at least 50 Race Bonus in total, replacing cards as needed for their rare skills or what you have available.
Guts builds are also viable in Trackblazer as there are several powerful cards that should be easily accessible for F2P players. The general setup is 4 Guts and 2 Wit, but you can replace a Guts card with Speed (3 Guts, 2 Wit, 1 Spd) if you're having difficulty hitting the Speed cap. The reason Guts cards are strong in this scenario is that this is the only facility that raises 3 stats at once, including the all-important Speed stat.
Recommended Support Cards
Trackblazer Best Support Cards
| Support Card | Reason |
|---|---|
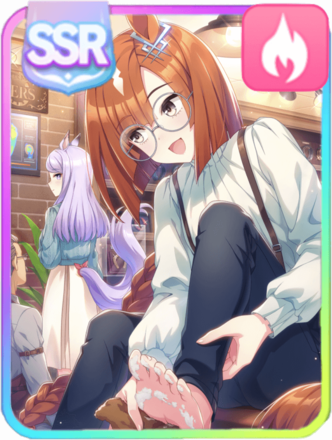
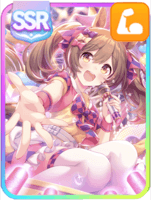
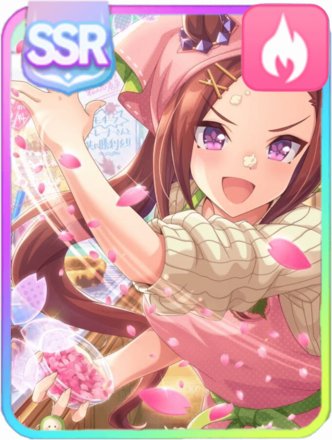
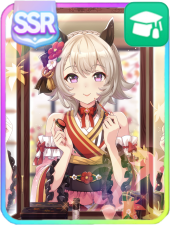
 Matikanefukukitaru (Touching Sleeves Is Good Luck! ♪) Matikanefukukitaru (Touching Sleeves Is Good Luck! ♪)
|
・Gives +30 to all stats at max level, making early races wins more stable. ・Potentially gives +21 additional all stats. ・Has Pal support stats like Failure Protection and Energy Cost Reduction on top of 10% Race Bonus. ・Recommended borrow for most decks. |
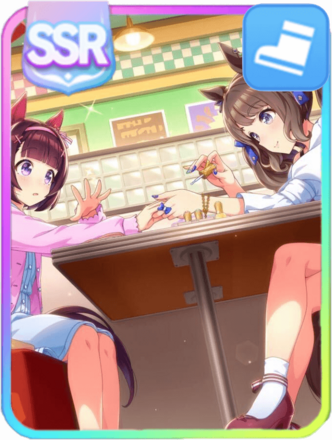
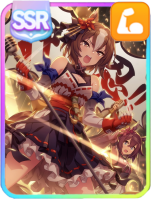
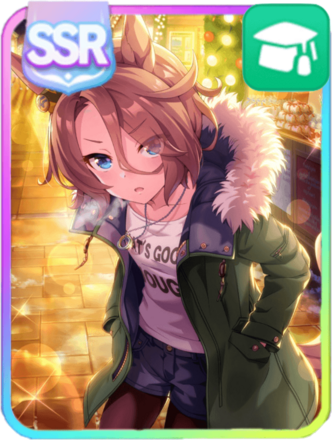
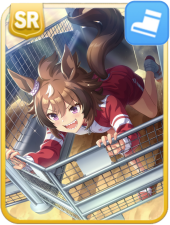
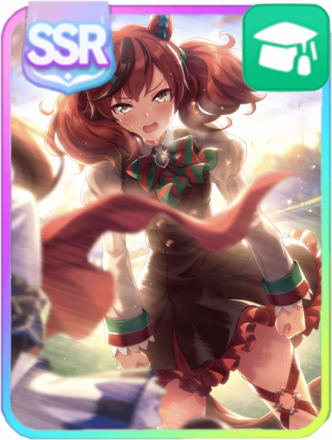
 Narita Top Road (Peachy Silhouette) Narita Top Road (Peachy Silhouette)
|
・Scales very well with Fan Bonus, giving 20% Training Effectiveness at 200,000 Fans. ・10% Race Bonus and has a decent skill selection. |
 Biko Pegasus (Double Carrot Punch!) Biko Pegasus (Double Carrot Punch!)
|
・Unconditional 10% Race Bonus and 20% Training Effectiveness, can substitute or be used with Narita Top Road. ・Remains a solid general Speed card for Trackblazer. |
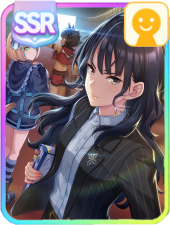
 Kitasan Black (Fire at My Heels) Kitasan Black (Fire at My Heels)
|
・Still one of the best Speed cards during training despite only having 5% Race Bonus. ・Professor of Curvature remains a solid general Gold skill for any Umamusume. ・Great and valid support as long as total race bonus is higher than 50%. |
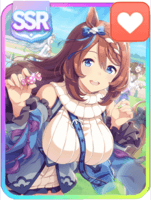
 Special Week (The Setting Sun and Rising Stars) Special Week (The Setting Sun and Rising Stars)
|
・Previously free card with 10% Race Bonus and can provide Gourmand, an excellent recovery skill for Pace Chasers. |
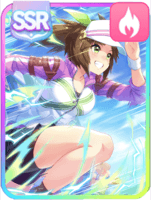
 Shinko Windy (///WARNING GATE///) Shinko Windy (///WARNING GATE///)
|
・Currently the only SR Speed card with 10% Race Bonus. ・Decent stat training similar to Sweep Tosho SR. |
 Super Creek (Piece of Mind) Super Creek (Piece of Mind)
|
・10% Race Bonus, great Stamina training, and gives Swinging Maestro ・Mostly used in Long decks |
 Marvelous Sunday (Dazzling Day in the Snow) Marvelous Sunday (Dazzling Day in the Snow)
|
・Previously free card that provides 15% Race Bonus at max level ・Late Surgers can take Fast and Furious |
 Nishino Flower (Lifting Your Spirits) Nishino Flower (Lifting Your Spirits)
|
・One of two SR cards with 15% Race Bonus ・Friendship training isn't a priority, so you can focus raising other cards |
 Haru Urara (Urara's Day Off!) Haru Urara (Urara's Day Off!)
|
・Free card with 10% Race Bonus and good Specialty Priority ・Events restore Energy |
 Admire Vega (Aim for the Brightest) Admire Vega (Aim for the Brightest)
|
・The only other SR support with 15% Race Bonus ・Has both Speed Bonus and Power Bonus, usable in Guts and Non-Guts decks ・First chain event restores Energy |
 Ines Fujin (Watch My Star Fly!) Ines Fujin (Watch My Star Fly!)
|
・High Guts specialty priority, 15% Training Effectiveness, and Speed Bonus makes up for the 5% Race Bonus ・Generally only used in Guts decks ・Fronts can get Restless |
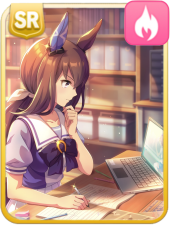
 Fine Motion (Wave of Gratitude) Fine Motion (Wave of Gratitude)
|
・Great general Wit card with 10% Race Bonus ・Pace Chasers can learn Speed Star |
 Nice Nature (Daring to Dream) Nice Nature (Daring to Dream)
|
・The only Wit card with 15% Race Bonus ・Another good Wit card for all styles ・Late Surgers can gain strong acceleration in On Your Left! |
 Mejiro Dober (My Thoughts, My Desires) Mejiro Dober (My Thoughts, My Desires)
|
・Previously free Wit card with 10% Race Bonus, ok as a filler card when maxed out ・The Bigger Picture is a cheap gold skill for Late Surgers in Team Trials |
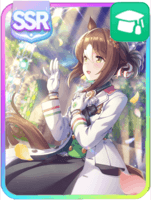
 Agnes Tachyon (Experimental Studies on Subject A) Agnes Tachyon (Experimental Studies on Subject A)
|
・One of 2 Wit SRs currently with 10% Race Bonus ・Also a solid all-around Wit card |
 Marvelous Sunday (A Marvelous ☆ Plan) Marvelous Sunday (A Marvelous ☆ Plan)
|
・The other Wit SR with 10% Race Bonus ・Has good skills like Ramp Up and Tail Held High |
Support Card Alternatives
Above are support cards you can use to fill in a deck to increase Race Bonus. Most of them have at least 10% Race Bonus, but some with 5% Race Bonus and are added due to other factors such as rare skills (Taking the Lead/No Stopping Me!) or stat bonuses.
Support Effect Priorities
| Support Card Samples | |
|---|---|
|
Nice Nature (Daring to Dream)
Race Bonus |
Matikanefukukitaru (Touching Sleeves Is Good Luck! ♪)
Initial Stats |
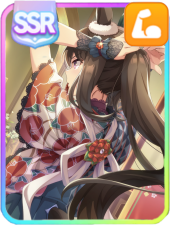
 Yukino Bijin (Dancing Light into the Night) Yukino Bijin (Dancing Light into the Night)
Initial Friendship |
|
| Important Card Effects | |
|
Race Bonus ★★★
Initial Stat Bonuses ★★ Initial Friendship ★ |
|
Race Bonus naturally becomes the most valuable effect due to frequent Races being the primary means of growth in this scenario. A deck with a total Race Bonus of at least 50% is recommended for effective training in the Trackblazer scenario. At the minimum, that is achievable with at least 4 10% RB cards and 2 5% RB cards.
Initial Bonuses are okay to prioritize after. This increase your chances of winning early through naturally higher stat bases, and avoidance of race losses that entail less Shop Currency. It's one of the reasons why Matikane Fukukitaru (SSR Speed) is very useful for its perk of giving +30 Initial Stat Bonus at the beginning of the career.
Initial Friendship can also be considered. This is to make sure that supports can reach Friendship Training as soon as they can (ideally by Summer Camp). Lack of training in this scenario (due to frequent racing) naturally staggers Friendship gauge progress compared to other scenarios.
Trackblazer Strategy and Tips
| Trackblazer Strategies |
|---|
|
|
Race Scheduling and Rotations
| Junior Year | Classic Year | Senior Year |
|---|---|---|
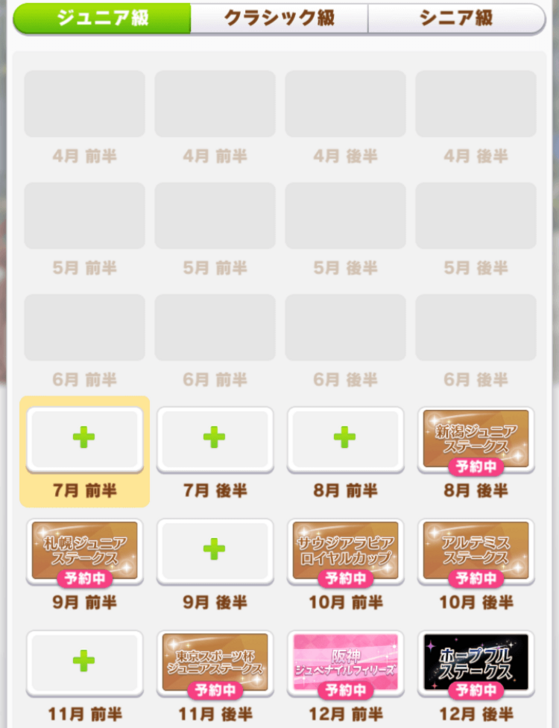
|
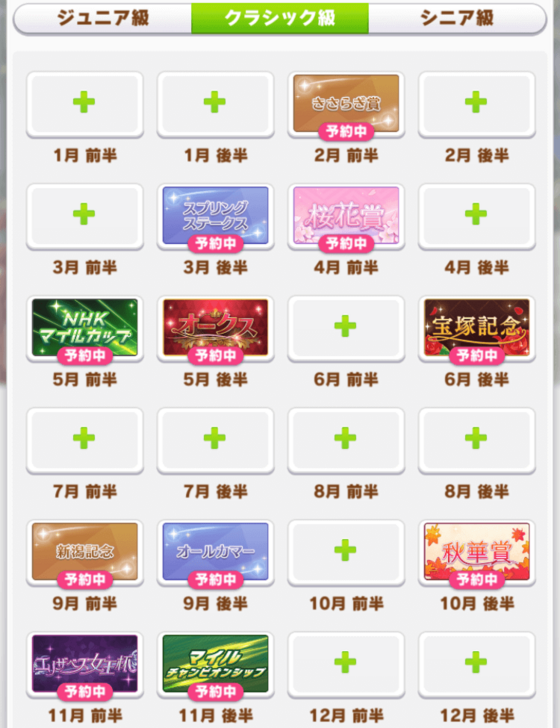
|
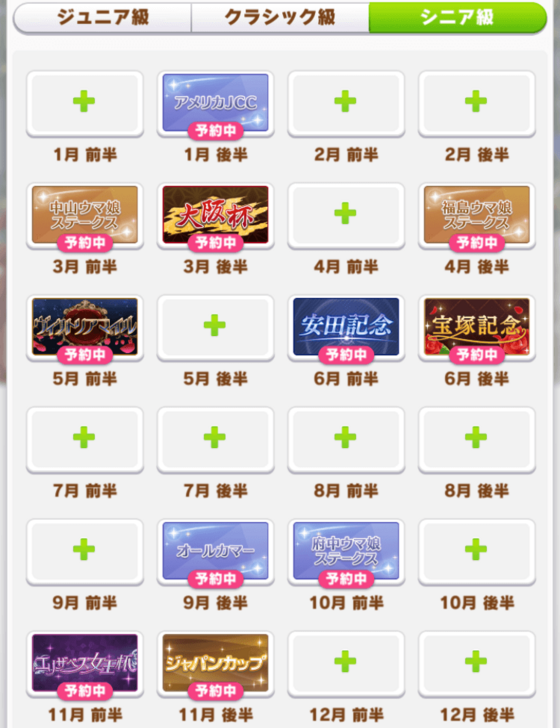
|
Above is a sample Turf, Mile to Medium race rotation for Trackblazer.
Counting the trainee’s debut but not the last turns for the Twinkle Star Climax, there are about 72 turns where the expected schedule consists of around 30 races or more. That’s nearly half of all turns, and double or triple compared to previous scenarios, where 10-15 races are normally done. The amount can vary depending on your training strategy in your career (between choosing to train or race), as well as whether your trainee’s aptitudes will allow her to cover several races.
After completing the Debut Race, you’ll want to try scheduling 2 races and 1 free turn. You may chain 3 races or more, but note that you are likely to suffer a negative condition and mood down when doing so. An exception would be if you end the last day of the year with a 3rd race in a chain, in which there will be no negative consequences that follow.
When to Train in Trackblazer
Since races can fill around 50% of your training schedule, the best time to train would be during the Summer Camp Period, which happens in Early July to Late August in both Classic and Senior Years. They’re the best periods due to their temporary instant access to Level 5 Training Facilities. You’ll want to have saved Training-boosting and energy restoration items by then.
You can also choose to train during your free turns where races are not scheduled. Monitor closely first if the training gains will provide better results, since Races are typically more economical choices. If you do the usual 2 races and 1 free turn, expect to be at a low energy often on your free turn, since races typically eat up around 30-40 of your trainee’s energy.
The MANT Domino and Alarm Clocks
| Lose Race → Less Shop Currency (→ Need More Currency? Do More Races) → Less Items Over Time → Less Training with Items → Less Overall Trainee Progression |
Compared to other scenarios, losses in this scenario lead to more negative consequences. Losing a race causes a cut immediately to your Shop coins; the precious resource you need to access items that effectively improves and shields your trainee from other causes of failure.
The losses are greater the further you are from 1st place, since your Shop Coin gain is proportional to your trainee's position at the end of a race. You can use Alarm Clocks (up to 5 per career) to reset a race if you didn't get 1st place. Alarm Clocks are best used for maximizing your chances of getting 1st in G1 races.
You usually buy Alarm Clocks from the Daily Sales shop, which becomes available as you participate in daily races. But you may also earn them through other ways, such as through Events and Special Missions, whenever they are available.
Pro Shop Item Strategy
| Trackblazer Items Tier List | |
|---|---|
|
Immediate Use:
Base Cost: 30 Speed +15 Base Cost: 30 Power +15 Base Cost: 30 Stamina +15 Base Cost: 30 Guts +15 Base Cost: 30 Wit +15 Base Cost: 15 Speed +7 Base Cost: 15 Power +7 Base Cost: 15 Stamina +7 Base Cost: 15 Guts +7 Base Cost: 15 Wit +7 Base Cost: 280 Acquires Fast Learner. Save for Training: Base Cost: 40 On the turn it is used, the failure rate of all training becomes 0%. Base Cost: 70 Restores +100 Energy and decreases Mood by 1. Base Cost: 55 Mood +2 Base Cost: 30 Mood +1 Base Cost: 75 Energy +65 Base Cost: 55 Energy +40 Base Cost: 35 Energy +20 Base Cost: 20 Rearrange the Umamusume appearing in training. Base Cost: 70 Training stat gain +60% for 2 turns. Base Cost: 50 Increases training effectiveness by 50% but raises energy used by 20%. Base Cost: 50 Increases training effectiveness by 50% but raises energy used by 20%. Base Cost: 50 Increases training effectiveness by 50% but raises energy used by 20%. Base Cost: 50 Increases training effectiveness by 50% but raises energy used by 20%. Save for Races: Base Cost: 40 Race Stat gain +35%. Base Cost: 20 Race stat gain +20%. |
|
|
Immediate Use (best used early in career):
Base Cost: 40 Supports' Friendship gauges +5. Save for Training: Base Cost: 55 Training stat gain +40% for 3 turns. Cure Conditions: Base Cost: 40 Cures all bad conditions. Base Cost: 15 Cures Skin Outbreak. |
|
|
Immediate Use (use early and only if affordable):
Base Cost: 150 Speed training level +1 Base Cost: 150 Stamina training level +1 Base Cost: 150 Power training level +1 Base Cost: 150 Guts training level +1 Base Cost: 150 Wit training level +1 |
|
|
Save for Training:
Base Cost: 40 Training stat gain +20% for 4 turns. Fan Farming Only (best for fan-heavy G1s and TS Climax races) Base Cost: 15 Race fan gain +50%. Cure Conditions: Base Cost: 15 Cures Slow Metabolism. Base Cost: 15 Cures Slacker. Base Cost: 15 Cures Migraine Base Cost: 15 Cure Night Owl. Base Cost: 15 Cures Practice Poor. Inefficient: Base Cost: 10 Speed +3 Base Cost: 10 Power +3 Base Cost: 10 Stamina +3 Base Cost: 10 Guts +3 Base Cost: 10 Wit +3 Base Cost: 30 Increases Max Energy by 4 and restores Energy by 5. Base Cost: 50 Increases Max Energy by 8. Base Cost: 150 Acquires Practice Perfect ◯ Base Cost: 150 Acquires Hot Topic. Base Cost: 150 Acquires Charming ◯. Base Cost: 10 Director Akikawa's bond +5. |
|
Above Trackblazer items are ranked according their value, from a must-buy to an optional or inefficient pickup. You can check explanations for each items in tier in the Trackblazer Items Guide.
Same Items Do Not Stack
Effects do not stack when two of the same item types are used; the item with the strongest effect takes priority.
Similarly, items that last multiple turns do not stack and cannot be overwritten, so it is recommended to use the higher-tier version of these items instead of the cheaper, but lower-tier ones.
Use Some Items Immediately
It is ideal to buy certain items early and use them as soon as they are bought to gain an advantage during the career scenario. These items are:
- Stat Boost items. It is preferable to buy those that give +7 or +15 stats.
- Training items that raise the facility level.
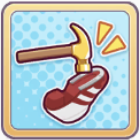
- Grilled Carrots are useful early, as they increase the Friendship gauge of all support card characters by 5.
Prioritize Energy Recovery and Stats
 Energy Restoration Energy Restoration |
 Stat Building Stat Building |
Always aim to get items that restore energy, such as Vita, for later training use. One of the more prized items in this category is the Royal Kale Juice, which restores 100 Energy at the cost of 1 Mood.
The mood debuff can immediately be restored with a Cupcake, so there's almost no downside. Max Energy does not provide enough to compensate for the frequent energy drains from races, so focus on direct energy recovery instead.
For stat books, such as scrolls, we recommend at least you buy +7, and better if it gives +15, whenever they are affordable. It's best to avoid the ones that only give +3 due to their lower efficiency.
Use Training Items in Summer
 Improves General Training Improves General Training |
 Improves Specific Training Improves Specific Training |
 Re-orders Supports in Facilities Re-orders Supports in Facilities |
 Grants 0% Failure Rate Grants 0% Failure Rate |
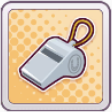
Most of your serious training will be done during the Summer Camp period where all facilities are at level 5. Use Megaphones and Ankle Weights here to boost training effectiveness and maximize the stat gain.
It's also best to stack Friendship training on the stat you want, so you can use the Whistle to reroll the support card positions. Lastly, the Good-Luck Charm is great for training even if your energy is out since it reduces failure to 0%.
Raise Bonds Early
 Raises All Support Card Bonds Raises All Support Card Bonds |
The Grilled Carrots item is great to use early on to raise Friendship with all support cards. Aim to hit orange (80+) by the first Summer in early July, so you can make the most of the training items listed earlier.
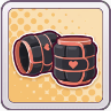
Save Gold Cleat Hammers for Twinkle Star Climax
 Increases Race Bonus Increases Race Bonus |
Cleat hammers increase race bonus for the turn they're used. They're best used during the Twinkle Star Climax as their stat boosts will be more significant there. Try to save up three gold ones by then.
For regular cleat hammers, you can use them on G1 and G2 races since these give more skill points per win.
Buy the Fast Learner Item if Affordable
 Increases Race Bonus Increases Race Bonus |
Of the condition items that can show up in the Pro Shop, the best one to obtain would be the Scholar's Hat which gives Fast Learner. Fast Learner gives a discount on learning skills. Note that this item is expensive, sitting at a base of 280 Shop Coins. You'll have to save up a worth of 3 first-place wins.
How to Increase Unique Skill Level
| Year | Unique Level Up |
|---|---|
| Junior | 15 Director Bond (1 Blue) 5,000+ Fans |
| Classic | 30 Director Bond (2 Blue) 60,000+ Fans |
| Senior | 50 Director Bond (Green) 120,000+ Fans |
Because the usual events are removed, the conditions for raising unique level are different. You'll still need to gain fans and Director bond, but these will only trigger during Late December of every year.
Paired Stats and Skill Points Bonuses for Umamusume of the Year
| Year | Umamusume of the Year Bonuses |
|---|---|
| Junior | 15 Director Bond (1 Blue) 5,000+ Fans 60 Result Points 20 Reporter Bond |
| Classic | 30 Director Bond (2 Blue) 60,000+ Fans 450 Result Points 40 Reporter Bond |
| Senior | 50 Director Bond (Green) 120,000+ Fans 480 Result Points 60 Reporter Bond |
Along with the Unique Skill level up conditions, there will also be additional bonuses of stats and skill hints for Glittering Star if your trainee attains Umamusume of the Year at the end of every year's Late December period.
How to Increase Unique Skill Level
How to Level Up Training Facilities
Level Facilities by Using Them
Leveling up facilities in Trackblazer works just like the URA Finale, where they increase in level the more you use them. As such, it's recommended to have at least 2 of the types you want in your deck to stack Friendship training.
Use Training Application Items
Training Applications are special items that raise a training facility’s level and can also be bought with coins. Only buy these if you can afford them, since most stat gains from training are expected during the Summer where all facilities are fixed at Level 5. Also, only purchase the ones that match your support cards to make the most of the increased level.
Raise Aptitudes to Cover a Lot of Races
| Base Grade | Sparks Needed to A |
|---|---|
| B | 1 |
| C | 4 |
| D | 7 |
| E | 10 |
Having enough A-aptitudes to cover the schedule of Mile-Medium-Long, Mile-Medium, or Medium-Long Turf races is usually recommended for this scenario. This is so Rival races can appear and gives more flexiblity when setting an agenda. Having B-aptitude can be acceptable, but A is the optimal grade for a higher chance of winning.
Aptitudes can be raised directly through pink sparks from inheritance. A chance to gain another increase from the pink sparks can also happen at the in-career inspiration event. On initial trainee selection, each aptitude can be raised by up to 4 grades with 10-star sparks of the same aptitude. Be sure to check your legacies, as an Umamusume can only inherit up to 9 pink spark types, totaling 18 stars.
Legacy and Sparks Guide: Inheritance Explained
Trackblazer Scenario Advantages and Disadvantages
| Prioritizes Races Over Training | Grants More Fans and Better Parent Training |
| Benefits Wide-Ranged Aptitudes | Most Trainee Events are Unavailable |
Prioritizes Races Over Training
Unlike the URA Finale where training itself is important and the Unity Cup where Unity Training is the highest priority, winning Races is the key to developing a trainee into a strong, competitive Umamusume the Trackblazer Scenario.
Races and Planning Take Time
Due to focus on Races, management through Shop items take precedence over conventional methods of rest, recreation, and training. Good-Luck Charm allows failure rate bypass at 0% energy, cupcakes can restore mood, items can directly increase stats and training facility levels. This means you'll be spending more time per turn, making each run of the scenario last between 30 minutes to an hour.
Race Bonus Priority Reduces F2P Gap
The most important stat in Trackblazer is Race Bonus, and building a strong deck using free cards is fairly easy. The reduced reliance on gacha supports makes this scenario great for F2P trainers since it's much easier to train up veterans with very high stats compared to the previous scenarios.
Grants More Fans and Better Parent Training
Since Trackblazer encourages participation in several races, this leads to significantly more fan gain and better spark opportunities compared to previous scenarios. This makes it a great environment for fan farming for clubs, as well as for preparing inheritance for your own trainees and others.
Trackblazer Benefits Wide-Ranged Aptitudes
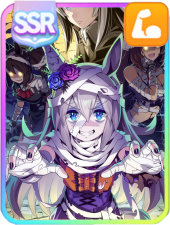
 Agnes Digital (Full-Color Fangirling) Agnes Digital (Full-Color Fangirling)
|
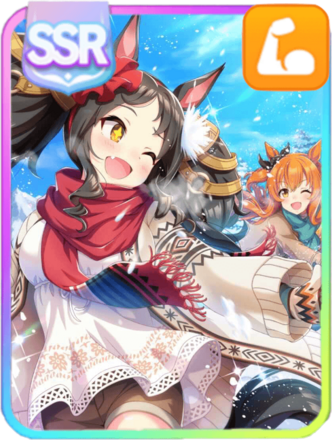
 Taiki Shuttle (Wild Frontier) Taiki Shuttle (Wild Frontier)
|
 Oguri Cap (Starlight Beat) Oguri Cap (Starlight Beat)
|
 El Condor Pasa (El Numero 1) El Condor Pasa (El Numero 1)
|
Umamusume who have a 'wide' natural aptitude pool in Turf and Distance, such as Agnes Digital and Taiki Shuttle, have an advantage in race scheduling. The scenario also greatly benefits trainees with multiple distance aptitudes such as Oguri Cap and El Condor Pasa.
Scenario Disadvantages Narrow Aptitudes and Dirt
 Manhattan Cafe (Creeping Shadow) Manhattan Cafe (Creeping Shadow)
|
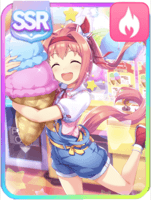
 Smart Falcon (LOVE☆4EVER) Smart Falcon (LOVE☆4EVER)
|
On the other hand, those with a 'narrow' natural aptitude pool, such that they cannot cover Races in common distances, will be harder to train in this scenario. An example of this is Manhattan Cafe and Meisho Doto.
Dirt races at distances of Mile and above are rare in Junior Year, and Umamusume who are specialized in Dirt races, such as Smart Falcon, are also in a race scheduling disadvantage due to the smaller pool of races they can participate in. More Dirt races will be introduced in the near future, but they will still want to aim for some Turf Sparks to have more race options.
Most Trainee Events are Unavailable
Nearly all other events, such as character-specific events and annual events (New Year Shrine Visits, Raffle Ticket), are non-existent. This creates both advantages and disadvantages for certain Umamusume.
Negative Events Don't Trigger
The difficulty is lifted in training certain Umamusume due to the absence of negative events and/or tough race goals, such as in the case of Gold City and King Halo having difficult careers, and Narita Taishin who will never have to deal with her massive mood drop and practice poor event Don't Say It!.
Trainees will no longer be forced to participate in races that are difficult due to being largely contrary to their natural aptitude, such as Haru Urara or Fuji Kiseki competing in the Arima Kinen.
Locked Out of Skill Events
On the other hand, trainees like Silence Suzuka cannot obtain skills from their events, locking her out of the Runaway style for the scenario. Another is Mayano Top Gun, who cannot trigger the event that gives her Straightaway Spurt or Head-On in Trackblazer.
Trackblazer Scenario Skill Hints
| Radiant Star and Glittering Star | Rival Skill Hints | Title Rewards |
| Random Event Skills | Trackblazer Skill Spark |
Radiant Star and Glittering Star
The only skill exclusive to the Trackblazer Scenario is Radiant Star and its base skill Glittering Star. Radiant Star is a rare skill that increases velocity & acceleration, and provides recovery at a random point in the second half of the race. Its effects get stronger the more races you win. However, due to its high cost, we only recommend learning this skill if you have spare skill points.
The Radiant Star skill is obtained by winning the Twinkle Star Climax, which is the set of 3 races at the end of the Trackblazer scenario career (similar to the URA Finale).
Rival Skill Hints
As noted above, most basic skills are available as skill hints by beating Rivals. The skill will either be based on the distance of the race or the style you used to win. This means winning a Mile race as an End Closer will either give you a Mile skill (such as Unyielding Spirit) or an End Closer skill (such as Straightaway Spurt).
Epithet/Title Rewards
| Titles | Conditions |
|---|---|
| Legendary | Obtain the Spring Champion and Fall Champion titles, and either the Stunning or Lady titles.
Homestretch Haste hint +1 |
| Mile a Minute | Win the following Mile races:
・
 Oka Sho Oka Sho
・  NHK Mile Cup NHK Mile Cup
・  Yasuda Kinen Yasuda Kinen
・  Victoria Mile Victoria Mile
・  Mile Championship Mile Championship
・  Hanshin Juvenile Fillies Hanshin Juvenile Fillies
You may also do Asahi Hai Futurity Stakes as an alternative. Mile Straightaway ◯ hint +1 |
| Dirt G1 Dominator | Win 9 G1 Dirt races.
Top Pick hint +1 |
The Trackblazer scenario also rewards skill hints and stats as an achievement for completing a certain number of races or winning specific races. The table above shows the skills you can gain by earning these Epithets or titles.
List of Race Titles in Trackblazer
Random Event Skill Hints
During the scenario, you may encounter random events that give you two choices. The top choice will always provide a stat or mood boost while the bottom option will give you a fixed skill hint. There doesn't seem to be a way to reliably trigger these, so you shouldn't rely too much on the random events for skills.
All Trackblazer (MANT) Events and Choices
Trackblazer Scenario Spark
| URA Finale | Unity Cup | TS Climax Scenario |
|---|---|---|
| Speed / Stamina | Power / Wit | Stamina / Guts |
Like with the previous scenarios, a spark based on the scenario, called TS Climax Scenario, can be gained upon clearing it. This spark boosts Stamina and Guts stats if it activates during inspiration.
Trackblazer (MANT) Release Date
Now Available as of March 12, 2026
 |
||
| Release Date | ||
|---|---|---|
| March 12, 2026, 10PM (UTC) | ||
| JP Scenario Release Dates | |
|---|---|
 Trackblazer (MANT) クライマックスシナリオ February 24, 2022 | |
| Previous | Next |
 Unity Cup (Aoharu Hai) アオハル杯 August 30, 2021 |
 Grand Live グランドライブ August 24th, 2022 |
Trackblazer: Start of the Climax, also known as Make a New Track (MANT) in the Japanese version of the game, is now available as of March 12, 2026 (UTC), the same day of the Kitasan Black, Matikane Tannhauser, and Narita Top Road (Speed SSR) banners. It also releases alongside the Flying Run-Up Story Event and 1st Anniversary Celebration Part 2.
This is a permanent scenario and will remain accessible even after additional scenarios are released.
Umamusume: Pretty Derby Related Guides
List of All Career Scenarios
 URA Finale Scenario URA Finale Scenario |
 Unity Cup Scenario Unity Cup Scenario |
| Trackblazer Scenario |
- |
List of Recommended Guides
Comment
Author

Trackblazer (Make a New Track) Scenario Guide
Please participate in our site
improvement survey
03/2026
improvement survey
03/2026
Would you assist in
improving Game8's site?
improving Game8's site?

×
We are listening to our users' valuable opinions and discussing how to act on them.
The information collected through this survey will be used for the purpose of improving our services. In addition, the information will only be disclosed a part of a statistic in a format that will not allow identification of personal information.
Begin Survey
Not Now
×
Please rate each item regarding Game8.co's Advertisements.
Amount of Ads
Very Dissatisfied
Somewhat Dissatisfied
Fine
Somewhat Satisfied
Highly Satisfied
Placement of Ads
Timing of Ad Display
Ad Loading Speed
Safeness of Ads
Content of Ads
×
Please rate each item regarding Game8.co's Quality of Articles.
Amount of information
Very Dissatisfied
Somewhat Dissatisfied
Fine
Somewhat Satisfied
Highly Satisfied
Frequency of updates
Speed of new information
Accuracy of articles
Understandibility of articles
Readability of sentences
×
Please rate each item regarding Game8.co's Usability of the Site.
Ease of finding information
Very Dissatisfied
Somewhat Dissatisfied
Fine
Somewhat Satisfied
Highly Satisfied
Loading Speed
Use of Color
Font Size
Visibility of Images
Easy to Understand Layout
×
Please rate each item regarding Game8.co's Message Boards, Comments.
Ease of Writing
Very Dissatisfied
Somewhat Dissatisfied
Fine
Somewhat Satisfied
Highly Satisfied
Readability
Ease in Finding Information
Comment Quality
Comment Quantity
Admin Response
×
Please rate each item regarding Game8.co's Site's new design.
Please rate our site's new design
Very Dissatisfied
Somewhat Dissatisfied
Fine
Somewhat Satisfied
Highly Satisfied
Do you think that the website's design change makes the site easier to use?
Has the new design made it easier for you to find information on the site?
Has the new design improved the overall visual appeal of the site?
How would you rate your overall satisfaction with the new design of the site?
×
How likely are you to recommend Game8 to someone you know?
Very Unlikely
0
1
2
3
4
5
6
7
8
9
10
Very Likely
If you have other opinions regarding potential improvement to the website, please share them with us. We would appreciate your honest opinion.
Note: This is a free response section, so you can proceed without entering anything.
Note: Please be sure not to enter any kind of personal information into your response.
Note: Please be sure not to enter any kind of personal information into your response.
×
Thank You
×
Thank you for participating in our survey! Your answers will help us to improve the quality of our website and services.
We hope you continue to make use of Game8.
We hope you continue to make use of Game8.
Close
Premium Articles
Rankings
- We could not find the message board you were looking for.

Gaming News


![Monster Hunter Stories 3 Review [First Impressions] | Simply Rejuvenating](https://img.game8.co/4438641/2a31b7702bd70e78ec8efd24661dacda.jpeg/thumb)
Popular Games

Genshin Impact Walkthrough & Guides Wiki
Honkai: Star Rail Walkthrough & Guides Wiki
Umamusume: Pretty Derby Walkthrough & Guides Wiki
Pokemon Pokopia Walkthrough & Guides Wiki
Resident Evil Requiem (RE9) Walkthrough & Guides Wiki
Monster Hunter Wilds Walkthrough & Guides Wiki
Wuthering Waves Walkthrough & Guides Wiki
Arknights: Endfield Walkthrough & Guides Wiki
Pokemon FireRed and LeafGreen (FRLG) Walkthrough & Guides Wiki
Pokemon TCG Pocket (PTCGP) Strategies & Guides Wiki


Recommended Games
Diablo 4: Vessel of Hatred Walkthrough & Guides Wiki
Cyberpunk 2077: Ultimate Edition Walkthrough & Guides Wiki
Fire Emblem Heroes (FEH) Walkthrough & Guides Wiki
Yu-Gi-Oh! Master Duel Walkthrough & Guides Wiki
Super Smash Bros. Ultimate Walkthrough & Guides Wiki
Pokemon Brilliant Diamond and Shining Pearl (BDSP) Walkthrough & Guides Wiki
Elden Ring Shadow of the Erdtree Walkthrough & Guides Wiki
Monster Hunter World Walkthrough & Guides Wiki
The Legend of Zelda: Tears of the Kingdom Walkthrough & Guides Wiki
Persona 3 Reload Walkthrough & Guides Wiki


All rights reserved
© Cygames, Inc.
The copyrights of videos of games used in our content and other intellectual property rights belong to the provider of the game.
The contents we provide on this site were created personally by members of the Game8 editorial department.
We refuse the right to reuse or repost content taken without our permission such as data or images to other sites.