Meisho Doto (Turbulent Blue) Build Guide and Character Info
This is a build guide for Meisho Doto (Turbulent Blue) in Umamusume: Pretty Derby. Find out how to build Meisho Doto (Turbulent Blue), her preferred tracks, distances, and style, as well as her basic character information, here!
| Meisho Doto Related Guides | |
|---|---|
|
|
|
List of Contents
Meisho Doto (Turbulent Blue) Character Info
Meisho Doto (Turbulent Blue) Stats
| Meisho Doto (Turbulent Blue) | |||||||||||||||||||
|---|---|---|---|---|---|---|---|---|---|---|---|---|---|---|---|---|---|---|---|

|
|||||||||||||||||||
| Overall | Ease (TB) | T.Trials | CM11 | ||||||||||||||||
|
|
|
|
| ||||||||||||||||
| Track Aptitude | |||||||||||||||||||
| Turf: A | Dirt: E | ||||||||||||||||||
| Distance Aptitude | |||||||||||||||||||
| Sprint: G | Mile: F | Med: A | Long: A | ||||||||||||||||
| Pace Aptitude | |||||||||||||||||||
| Front: F | Pace: A | Late: B | End: E | ||||||||||||||||
| Stat Growth | |||||||||||||||||||
| SPD: 0% | STA: 20% | POW: 0% | GUT: 10% | WIT: 0% | |||||||||||||||
Meisho Doto (Turbulent Blue) Unique Skill
|
|
Aim for the front with unwavering determination when passing another runner from midpack or further back on a corner late-race. |
|---|
How to Activate I Never Goof Up!
| Trigger Conditions |
|---|
| ・In the 3rd position or further back.
・On a late-race corner. ・Overtake 1 racer. |
| JP Balance Updates |
|
Original:
I Never Goof Up! could only be activated during corners and with ranking conditions.
2nd Anniversary Update (JP): I Never Goof Up! can be activated outside of corners with no more position restrictions. |
When the skill updates based on JP information will come at a later time.
I Never Goof Up! is a combined acceleration and velocity skill that activates in a late-race corner, in the 3rd position or better, and requires overtaking 1 racer.
At present, this skill can easily be activated with the Late Surger or End Closer styles. Pace Chasers can also make use of it as long as the skill conditions can still be met.
For Pace Chasers, a Front-heavy race or sacrificial Fronts as overtake targets can make activating the skill much easier.
Meisho Doto (Turbulent Blue) Innate Skills
| All Innate Skills |
|---|
Meisho Doto (Turbulent Blue) Potential Skills
| Skill Per Potential Level |
|---|
| Potential 2: Potential 3: Potential 4: Potential 5: |
Meisho Doto (Turbulent Blue) Career Skills
| All Career Event Skills |
|---|
Is Meisho Doto (Turbulent Blue) Worth It?
Viable as a Competitive Pace Chaser
Meisho Doto is a decent pick for PvP. She may need some setups to work to be optimal (such as a team for overtakes to let her unique activate), but she can still do well with a typical Pace Chaser build. She is a Pace Chaser adept at Medium and Long distances. About her career, they're pretty straightforward; all Mediums and only Senior Year Arima Kinen as her Long goal race, making her somewhat easy to train.
Her skill kit isn't exactly high meta, however. Medium Corners, Pace Strategy, and her unique are the most useable with limited cases for Non-Standard Distances (still good for CM like the Leo Cup). So you'll have to build her well for CM, as well as give her a team that can support her unique.
You stand to benefit having her as a fine Medium contender in Team Trials or Champions Meeting, and if not in PvP, Meisho Doto is cute. There'll be other meta picks to pick up on the way if you are saving carats, but nothing's stopping you from pulling for her if you've have her as a favorite character for a while!
Meisho Doto (Turbulent Blue) Career Training Tips
| Training Tips |
|---|
|
|
Train in the Unity Cup Scenario

When training Meisho Doto, use the brand new Unity Cup scenario to take advantage of the new Spirit Burst mechanic. This not only lets you gain more stats than normal, but can also provide useful Skill Hints.
Run Her as a Pace Chaser
As Meisho Doto already has an A-rank for her Pace Chaser aptitude, it's best to run her in this style for your Team Trials team. Consider raising her aptitude from A to S as well using legacy sparks.
Improve Her Medium Aptitude
As she will be a Medium runner in your Team Trials setup, upgrade her aptitude from A to S with legacy sparks to maximize her performance during races.
For a competitive edge in modes like Champions Meeting, it is even better to improve her existing natural distances (along with Turf aptitude) to S if you have the sparks. Otherwise, having this increase makes it easier to maintain winning positions in her career runs.
Legacy and Sparks Guide: Inheritance Explained
Unlock up to Potential Level 3
Upgrade Meisho Doto's Potential to Level 3 to access Speed Star, a decent Pace Chaser skill that helps her break out of the pack further. However, if you don't have the Monies or materials to do so, you can take Prepared to Pass as an alternative.
Potential Unlocks at Level 4 and above are not that noteworthy: Subdued Late Surgers is best suited for dedicated debuffers, and Indomitable is an inconsistent recovery skill.
Minimize Race Participation After Make Debut
| Unique Status Condition |
|---|
"Not Ready"
・There's a chance Meisho Doto will get -5 Energy after competing in a race. (Sleepy Stumble Event) ・Status will be cured after fan count goal is reached on her 3rd race goal in Classic Year Late October. |
| Notable Career Goals |
| ・1st: Complete Make Debut
・2nd: Reach 6,000 Fan Count ・3rd: Reach 15,000 Fan Count Best Races to Take: ・Hopeful Stakes (+7,000 Fans) (Junior Yr. Late Dec) ・Satsuki Sho (+11,000 Fans) (Classic Yr. Early April) ┗ Can be done for Meisho Doto's Hidden Event Other Races to Take: ・Any Med-Long G1 Race (usually +7,000 Fans or more) ・Any Med-Long G2 Race (usually +5,000 Fans) Note: 1st place wins will boost the amount earned by a large margin, can be +1,000~2,000 or even more by the original amount. |
| ⓘ Note that minimizing races too much can cause her not to meet the unique skill level ups she can get in her career due to the lack of Fans. |
Right after Meisho Doto's debut race, she will get a unique status condition called Not Ready which gives a chance to reduce her Energy every time she races. This status cannot be cured until she completes her 3rd career goal in Classic Year Late October (after around 40+ turns).
To counteract this, it is recommended that she enters in select G1 or G2 races to maximize the Fan count, then avoid or minimize participating races (unless you need Skill Points) until her 3rd career goal.
Meisho Doto (Turbulent Blue) Build
Recommended Stats
| 1200 | 800 | 800 | 300 | 400 |
Meisho Doto will be part of your Medium team in Team Trials as a Pace Chaser. The stats above will provide her with enough Speed and Stamina to survive her races, as well as sufficient Power to overtake her opponents late-race. Getting at least one recovery skill will also help lower Stamina requirements.
If you are only planning to clear a career run with Meisho Doto, then you can aim for lower stat numbers, as the stats above are for Team Trials.
Recommended Support Cards
Unity Cup Build


We recommend a 3 Speed, 2 Power, 1 Pal setup to allow Meisho Doto to easily overtake other runners and break out of the pack when needed. Her Stamina can come from Power training, her 20% Stamina growth rate, or using Riko Kashimoto (Planned Perfection) as the preferred Pal card.
If Meisho Doto is having a hard time maintaining her Stamina, opt for a 3 Speed, 2 Stamina, and 1 Pal deck, which should help her maintain her position during the race.
Budget Build


This deck is for players who are starting out and are still trying to get a feel of the game's mechanics and intricacies. This deck can help you get the needed stats to clear the career, while also providing important skills.
Take advantage of the game's borrowing feature to borrow a powerful MLB SSR, like Kitasan Black. Additionally, if you do not have an MLB copy of Riko Kashimoto (Tracen Academy), it would be better to use another SR Stamina card instead.
Alternate Cards
| Recommended Alternative Support Cards | |
|---|---|
| Speed |  Tokai Teio Rarity: SSR Type: Speed  Kawakami Princess Rarity: SSR Type: Speed  Narita Brian Rarity: SSR Type: Speed  Special Week Rarity: SSR Type: Speed  Nishino Flower Rarity: SSR Type: Speed  Mayano Top Gun Rarity: SSR Type: Speed  Matikane Fukukitaru Rarity: SSR Type: Speed  Narita Top Road Rarity: SSR Type: Speed  Narita Taishin Rarity: SR Type: Speed |
| Stamina | |
| Power |


These cards will help Meisho Doto level her needed Stats (especially with Rainbow/Friendship Training), as well as provide some needed skills.
URA Finale Build
These stats are enough to clear the URA Finale easily, as it provides enough Speed and Power for all of Meisho Doto's career races, especially when partnered with the correct skills.
As for the deck, you can run a 4 Speed, 2 Stamina setup as she will be running a lot of Medium races. You can also try a 3 Speed and 3 Power setup if you feel that she is having a hard time navigating the race or overtaking her opponents.
Recommended Legacy Sparks
| Recommended | |
|---|---|
| 9★ Stamina 9★ Power |
|
| 3★ Medium 3★ Pace Chaser |
For Legacy Sparks, we recommend trying to find Stamina and Power sparks to help with Meisho Doto's races. As for race length aptitudes and running style, get Medium sparks to upgrade her aptitude from A to S.
You can use either your own Veterans, or borrow the ones from your friends. If you do not have Veterans with full sparks, you can go with whatever you have access to.
Recommended Skills
 Pace Chaser Corners ◯
 Head-On
 Professor of Curvature
 No Stopping Me!
 Swinging Maestro
 Triumphant Pulse
 Shooting for Victory!
Meisho Doto requires at least one gold recovery skill to maintain her Stamina throughout the race. However, the skill Indomitable from her kit is unreliable in its activation. So it's recommended to get recovery skills from other sources, such as Swinging Maestro which is often more consistent due to its accessibility and easy-to-activate conditions.
As she is running Medium races, she also needs Speed skills. Professor of Curvature is a go-to velocity skill that is easy to trigger, while Uma Stan gives a boost in velocity if she is close to many racers.
Since her unique depends on overtakes, she can inherit the following unique skills to synergize with her own, namely:
- Triumphant Pulse is a straightforward velocity skill. Must be between 2nd-5th position and have at most 200m left to cover to activate.
- Shooting for Victory! increases acceleration and requires 3rd position or further, not conflicting with I Never Goof Up!
If you cannot get the recommended skills, you can replace them with similar skills that you have access to. You will just need to make sure that Meisho Doto can activate said skills in a race.
Meisho Doto (Turbulent Blue) Events
A Little Bag of Help
| Choice | Outcome |
|---|---|
|
Choice 1
(Let's clean it up and take good care of it, then.) |
・ 10 Wit ・ 15 Skill Pts |
|
Choice 2
(Is there anything inside?) |
・ 20 Power |
Fierce Fight! A Spicy Match
| Choice | Outcome |
|---|---|
|
Choice 1
(Don't panic and go at your own pace.) |
・ 20 Stamina |
|
Choice 2
(Go for three times the speed!) |
・ 20 Speed |
Uma Umya Umyam Myam?
| Choice | Outcome |
|---|---|
|
Choice 1
(You should try to find the fun in practicing.) |
・ 10 Power ・ 10 Wit ・ Practice Perfect ◯ (random) |
|
Choice 2
(Try fixing the root of the problem, rather than sweating the details.) |
・ 20 Guts ・ Practice Perfect ◯ (random) |
Are My Feelings Reaching You?
| Choice | Outcome |
|---|---|
| Choice 1 | ・ 10 Power |
| Choice 2 | ・ 10 Speed |
| Choice 3 | ・ 10 Guts |
Equivalent Exchange?
| Choice | Outcome |
|---|---|
| Choice 1 | ・ 10 Speed |
| Choice 2 | ・ 10 Wit |
Lost and Alone
| Choice | Outcome |
|---|---|
| Choice 1 | ・ 10 Stamina |
| Choice 2 | ・ 10 Guts |
Pack a Punch
| Choice | Outcome |
|---|---|
| Choice 1 | ・ 10 Power |
| Choice 2 | ・ 10 Stamina |
Twilight Ice Cream
| Choice | Outcome |
|---|---|
| Choice 1 | ・ 10 Wit |
| Choice 2 |
・ 5 Speed ・ 5 Stamina |
Best Shot
| Choice | Outcome |
|---|---|
|
Choice 1
(Try to picture a smile in your head.) |
・ 10 Wit |
|
Choice 2
(Why not go for a little run?) |
・ 10 Stamina |
Dance Lesson (Meisho Doto)
| Choice | Outcome |
|---|---|
| Choice 1 | ・ 10 Guts |
| Choice 2 | ・ 10 Power |
First Step to Flawlessness
| Choice | Outcome |
|---|---|
|
Choice 1
(That's the spirit!) |
・ 10 Guts |
|
Choice 2
(Let's first take a break.) |
・ 10 Energy |
Monumental Calories
| Choice | Outcome |
|---|---|
|
Choice 1
(It's okay to pace yourself and savor it.) |
・ 10 Energy ・ 5 Skill Pts |
|
Choice 2
(Fail)
(Show your thanks by finishing it all.) |
・ 30 Energy ・ -5 Speed ・ 5 Power ・ 10 Skill Pts ・ Slow Metabolism |
|
Choice 2
(Success)
(Show your thanks by finishing it all.) |
・ 30 Energy ・ 10 Skill Pts |
Positively Tickled!
| Choice | Outcome |
|---|---|
|
Choice 1
(Attempt to power through today's training.) |
・ -10 Energy ・ 10 Guts |
|
Choice 1
(Attempt to power through today's training.) |
・ -5 Energy ・ 1 Mood ・ 2 Random Stats +10 |
|
Choice 2
(Err on the safe side and take the day off.) |
・ 10 Energy |
Words of Aid
| Choice | Outcome |
|---|---|
| Choice 1 |
・ 10 Power ・ 15 Skill Pts |
| Choice 2 | ・ Tactical Tweak +1 Skill Hint |
At Summer Camp (Year 2) (Meisho Doto)
| Choice | Outcome |
|---|---|
|
Choice 1
(Make a speech on top of the festival tower.) |
・ 10 Power |
|
Choice 2
(Make a promise to your star.) |
・ 10 Guts |
New Year's Resolutions (Meisho Doto)
| Choice | Outcome |
|---|---|
|
Choice 1
(A mountain hike.) |
・ 10 Guts |
|
Choice 2
(Shop and snack.) |
・ 20 Energy |
|
Choice 3
(Traditional New Year's games.) |
・ 20 Skill Pts |
New Year's Shrine Visit (Meisho Doto)
| Choice | Outcome |
|---|---|
|
Choice 1
(Chillax with the crew.) |
・ 30 Energy |
|
Choice 2
(Go for a mountain retreat.) |
・ 5 All Stats |
|
Choice 3
(Learn the art of napping.) |
・ 35 Skill Pts |
Don't Overdo It! (Meisho Doto)
| Choice | Outcome |
|---|---|
| Choice 1 |
・ 10 Energy ・ -2 Mood ・ Last trained stat and two other random stat -10 ・ Practice Poor (random) |
| Choice 2 (Success) | ・ Practice Perfect ◯ |
| Choice 2 (Fail) |
・ -3 Mood ・ 3 Random stat -10 ・ Practice Poor |
Extra Training (Meisho Doto)
| Choice | Outcome |
|---|---|
| Choice 1 |
・ -5 Energy ・ Last trained stat +5 ・ 5 Friendship with Director |
| Choice 2 | ・ 5 Energy |
Get Well Soon! (Meisho Doto)
| Choice | Outcome |
|---|---|
| Choice 1 |
・ -1 Mood ・ Last trained stat -5 ・ Practice Poor (random) |
| Choice 2 (Success) | ・ Practice Perfect ◯ |
| Choice 2 (Fail) |
・ -1 Mood ・ Last trained stat -10 ・ Practice Poor (random) |
Defeat (G1) (Meisho Doto)
| Choice | Outcome |
|---|---|
| Choice 1 |
・ -25 Energy ・ 25 Skill Pts ・ Random Stat +4 |
| Choice 2 (Success) |
・ -15 Energy ・ 25 Skill Pts ・ Random Stat +4 |
| Choice 2 (Fail) |
・ -35 Energy ・ 25 Skill Pts ・ Random Stat +4 |
Defeat (G2) (Meisho Doto)
| Choice | Outcome |
|---|---|
| Choice 1 |
・ -25 Energy ・ 20 Skill Pts ・ Random Stat +3 |
| Choice 2 (Success) |
・ -15 Energy ・ 20 Skill Pts ・ Random Stat +3 |
| Choice 2 (Fail) |
・ -35 Energy ・ 20 Skill Pts ・ Random Stat +3 |
Defeat (G3) (Meisho Doto)
| Choice | Outcome |
|---|---|
| Choice 1 |
・ -25 Energy ・ 20 Skill Pts ・ Random Stat +3 |
| Choice 2 (Success) |
・ -15 Energy ・ 20 Skill Pts ・ Random Stat +3 |
| Choice 2 (Fail) |
・ -35 Energy ・ 20 Skill Pts ・ Random Stat +3 |
Defeat (OP and Pre-OP) (Meisho Doto)
| Choice | Outcome |
|---|---|
| Choice 1 |
・ -25 Energy ・ 10 Skill Pts |
| Choice 2 (Success) |
・ -15 Energy ・ 10 Skill Pts |
| Choice 2 (Fail) |
・ -35 Energy ・ 10 Skill Pts |
Solid Showing (G1) (Meisho Doto)
| Choice | Outcome |
|---|---|
| Choice 1 |
・ -20 Energy ・ 45 Skill Pts ・ Random Stat +8 |
| Choice 2 (Success) |
・ -10 Energy ・ 45 Skill Pts ・ Random Stat +8 |
| Choice 2 (Fail) |
・ -30 Energy ・ 45 Skill Pts ・ Random Stat +8 |
Solid Showing (G2) (Meisho Doto)
| Choice | Outcome |
|---|---|
| Choice 1 |
・ -20 Energy ・ 35 Skill Pts ・ Random Stat +5 |
| Choice 2 (Success) |
・ -10 Energy ・ 35 Skill Pts ・ Random Stat +5 |
| Choice 2 (Fail) |
・ -30 Energy ・ 35 Skill Pts ・ Random Stat +5 |
Solid Showing (G3) (Meisho Doto)
| Choice | Outcome |
|---|---|
| Choice 1 |
・ -20 Energy ・ 35 Skill Pts ・ Random Stat +5 |
| Choice 2 (Success) |
・ -10 Energy ・ 35 Skill Pts ・ Random Stat +5 |
| Choice 2 (Fail) |
・ -30 Energy ・ 35 Skill Pts ・ Random Stat +5 |
Solid Showing (OP and Pre-OP) (Meisho Doto)
| Choice | Outcome |
|---|---|
| Choice 1 |
・ -20 Energy ・ 30 Skill Pts ・ Random Stat +3 |
| Choice 2 (Success) |
・ -10 Energy ・ 30 Skill Pts ・ Random Stat +3 |
| Choice 2 (Fail) |
・ -30 Energy ・ 30 Skill Pts ・ Random Stat +3 |
Victory! (G1) (Meisho Doto)
| Choice | Outcome |
|---|---|
| Choice 1 |
・ -15 Energy ・ 45 Skill Pts ・ Random Stat +10 |
| Choice 2 (Success) |
・ -5 Energy ・ 45 Skill Pts ・ Random Stat +10 |
| Choice 2 (Fail) |
・ -20 Energy ・ 45 Skill Pts ・ Random Stat +10 |
Victory! (G2) (Meisho Doto)
| Choice | Outcome |
|---|---|
| Choice 1 |
・ -15 Energy ・ 35 Skill Pts ・ Random Stat +8 |
| Choice 2 (Success) |
・ -5 Energy ・ 35 Skill Pts ・ Random Stat +8 |
| Choice 2 (Fail) |
・ -20 Energy ・ 35 Skill Pts ・ Random Stat +8 |
Victory! (G3) (Meisho Doto)
| Choice | Outcome |
|---|---|
| Choice 1 |
・ -15 Energy ・ 35 Skill Pts ・ Random Stat +8 |
| Choice 2 (Success) |
・ -5 Energy ・ 35 Skill Pts ・ Random Stat +8 |
| Choice 2 (Fail) |
・ -20 Energy ・ 35 Skill Pts ・ Random Stat +8 |
Victory! (OP and Pre-OP) (Meisho Doto)
| Choice | Outcome |
|---|---|
| Choice 1 |
・ -15 Energy ・ 30 Skill Pts ・ Random Stat +5 |
| Choice 2 (Fail) |
・ -20 Energy ・ 30 Skill Pts ・ Random Stat +5 |
| Choice 2 (Success) |
・ -5 Energy ・ 30 Skill Pts ・ Random Stat +5 |
Meisho Doto (Turbulent Blue) Hidden Events
After the Debut: Feeling...Dizzy...
| Condition | Participate in the Junior Make Debut. |
|---|---|
| Event Time | After Junior Make Debut |
| Event Rewards |
・ All stats +3 ・ Skill points +20 ・ Get Not Ready status ・ Yayoi Akikawa +4 |
After finishing the Junior Make Debut race, Meisho Doto will acquire a unique negative condition called Not Ready, causing a chance to get -5 Energy for every race she participates in. This event will happen regardless if she wins the Make Debut race or not.
To remove this negative condition, Meisho Doto must achieve her 3rd career goal of earning 15,000 fans and above.
Goal Achieved: A Fallen Star
| Condition | Earn 15,000 fans |
|---|---|
| Event Time | Classic Year Late Oct |
| Event Rewards |
・ All stats +3 ・ Skill points +20 ・ Heal Not Ready status ・ Yayoi Akikawa +4 |
Upon achieving 15,000 fans and clearing her 3rd career goal, the Not Ready condition will be removed from Meisho Doto.
Triumph! I'm the Overlord?!
| Condition | Win the Satsuki Sho, Tenno Sho (Spring), Takarazuka Kinen, Tenno Sho (Autumn), Japan Cup, Arima Kinen. |
|---|---|
| Event Time | After winning all races |
| Event Rewards |
・ All stats +10 ・ Skill points +20 ・ Prepared to Pass +1 ・ Up-Tempo +1 |
| Race(s) to Win | |
|
Satsuki Sho (Classic Year)
| 2000m (Medium)
Early April, Classic Year Tenno Sho (Spring) (Senior Year) | 3200m (Long) Late April, Senior Year Takarazuka Kinen (Senior Year) | 2200m (Medium) Late June, Classic/Senior Year Tenno Sho (Autumn) (Senior Year) | 2000m (Medium) Late Oct, Classic/Senior Year Japan Cup (Senior Year) | 2400m (Medium) Late Nov, Classic/Senior Year Arima Kinen (Senior Year) | 2500m (Long) Late Dec, Classic/Senior Year |
|
This hidden event is achieved by winning the 6 G1 races involving T.M. Opera O in the list above. Note that T.M. Opera O will be a difficult opponent. The first two races, Satsuki Sho and Tenno Sho (Spring) are not part of the career goals, so use the Agenda Function to schedule these races manually.
Tenno Sho (Spring) is notorious for its length, so a baseline of 500 Stamina is suggested. Hitting this baseline is much easier with good Stamina inheritance sparks, or more Stamina cards.
Completing this hidden event will net you around +10 to all of your stats, as well as 1 hint level for the skills Up-Tempo and Prepared to Pass.
Meisho Doto (Turbulent Blue) Career Goals
| Goal | Race/Goal |
|---|---|
| Run in Junior Make Debut | Junior Make Debut |
| Earn 6000 Fans | 6000 or above Junior Year Early April |
| Earn 15000 fans | 15000 or above Classic Year Late October |
| Place top 3 in Nikkei Shinshun Hai |
 Nikkei Shinshun Hai Nikkei Shinshun Hai
(Medium - 2400m) Senior Year Early Jan |
| Place 1st in Kinko Sho |
 Kinko Sho Kinko Sho
(Medium - 2000m) Senior Year Early Mar |
| Place top 2 in Takarazuka Kinen |
 Takarazuka Kinen Takarazuka Kinen
(Medium - 2200m) Senior Year Late June |
| Place top 2 in Tenno Sho (Autumn) |
 Tenno Sho (Autumn) Tenno Sho (Autumn)
(Medium - 2000m) Senior Year Late Oct |
| Place top 2 in Japan Cup |
 Japan Cup Japan Cup
(Medium - 2400m) Senior Year Late Nov |
| Place top 2 in Arima Kinen |
 Arima Kinen Arima Kinen
(Long - 2500m) Senior Year Late Dec |
Meisho Doto Profile
Basic Information
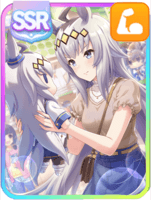
 Meisho Doto Meisho Doto"Oh no... Someone like me shouldn't be racing... But still..." | Voice Actress | Misaki Watada |
|---|---|---|
| Height | 164cm / 5'4" | |
| Weight | Slight increase... somewhere | |
| Birthday | Mar 25 | |
| Three Sizes | B 99 | W 61 | H 89 | |
| Her self-esteem droops as low as her ears. Things never seem to go quite right for this clumsy girl. Even so, she's determined to change herself for the better and doesn't want to ever give up, all for the chance at securing a brighter future. She admires T.M. Opera O's grandiose self-confidence. | ||
Umamusume: Pretty Derby Related Guides
Character Guides
| Height and Weight | Voice Actors | Three Sizes | List of Birthdays |
Characters (Trainees) by Rarity
| 3-Star Characters | 2-Star Characters | 1-Star Characters |
Current Uma Musume Characters (Trainees)
 Matikane Tannhauser (Clippety Tippety Clop)
 Kitasan Black (Gilded Shrine to Glory)
 Admire Vega (Starry Nocturne)
 Mejiro Ardan (Crystalline)
 Eishin Flash (Precise Chocolatier)
 Mihono Bourbon (CODE: ICING)
 Sakura Chiyono O (Strength in Full Bloom)
 T.M. Opera O (New Year, Same Radiance!)
 Haru Urara (New Year ♪ New Urara!)
 Tamamo Cross (Fast as Lightning)
 Fine Motion (Noble Seamair)
 Biwa Hayahide (Rouge Caroler)
 Oguri Cap (Ashen Miracle)
 Mejiro Dober (Off the Line)
 Tosen Jordan (Jokester ☆ Vibes)
 Gold City (Autumn Cosmos)
 Symboli Rudolf (Archer by Moonlight)
 Manhattan Cafe (Creeping Shadow)
 Kawakami Princess (Princess of Pink)
 Super Creek (Chiffon-Wrapped Mummy)
 Rice Shower (Vampire Makeover!)
 Agnes Digital (Full-Color Fangirling)
 Hishi Akebono (Buono☆Alla Moda)
 Matikane Fukukitaru (Lucky Tidings)
 Eishin Flash (Meisterschaft)
 Maruzensky (Hot☆Summer Night)
 Special Week (Hopp'n♪Happy Heart)
 Gold City (Authentic / 1928)
 Fuji Kiseki (Shooting Star Revue)
 Grass Wonder (Saintly Jade Cleric)
 El Condor Pasa (Kukulkan Warrior)
 Hishi Amazon (Azure Amazon)
 Seiun Sky (Reeling in the Big One)
 Air Groove (Quercus Civilis)
 Mayano Top Gun (Sunlight Bouquet)
 Narita Brian (Maverick)
 Smart Falcon (LOVE☆4EVER)
 Narita Taishin (Nevertheless)
 Curren Chan (Fille Éclair)
 Tokai Teio (Beyond the Horizon)
 Mejiro McQueen (End of the Skies)
 Biwa Hayahide (pf. Winning Equation...)
 Mihono Bourbon (MB-19890425)
 T.M. Opera O (O Sole Suo!)
 Rice Shower (Rosy Dreams)
 Symboli Rudolf (Emperor's Path)
 Mejiro McQueen (Frontline Elegance)
 Taiki Shuttle (Wild Frontier)
 Oguri Cap (Starlight Beat)
 Maruzensky (Formula R)
 Tokai Teio (Peak Joy)
 Silence Suzuka (Innocent Silence)
 Special Week (Special Dreamer)
 Super Creek (Murmuring Stream)
 Mayano Top Gun (Scramble Zone)
 Air Groove (Empress Road)
 El Condor Pasa (El Numero 1)
 Grass Wonder (Stone-Piercing Blue)
 Daiwa Scarlet (Peak Blue)
 Vodka (Wild Top Gear)
 Gold Ship (Red Strife)
 King Halo (King of Emeralds)
 Nice Nature (Poinsettia Ribbon)
 Matikane Fukukitaru (Rising Fortune)
 Haru Urara (Bestest Prize)
 Sakura Bakushin O (Blossom in Learning)
 Winning Ticket (Get to Winning!)
 Agnes Tachyon (Tach-nology)
 Mejiro Ryan (Down the Line)
Comment
Please make/update unity cup build when you have the time. Thank you!
Author

Meisho Doto (Turbulent Blue) Build Guide and Character Info
Premium Articles
Rankings

Gaming News

![Star Savior Review [First Impressions] | Engaging, Entertaining, and Expensive](https://img.game8.co/4447603/8f500e9bf666bdb8adb1af478e9dfdbd.png/show)


Popular Games

Genshin Impact Walkthrough & Guides Wiki
Umamusume: Pretty Derby Walkthrough & Guides Wiki
Crimson Desert Walkthrough & Guides Wiki
Monster Hunter Stories 3: Twisted Reflection Walkthrough & Guides Wiki
Honkai: Star Rail Walkthrough & Guides Wiki
Pokemon Pokopia Walkthrough & Guides Wiki
The Seven Deadly Sins: Origin Walkthrough & Guides Wiki
Wuthering Waves Walkthrough & Guides Wiki
Zenless Zone Zero Walkthrough & Guides Wiki
Arknights: Endfield Walkthrough & Guides Wiki


Recommended Games
Fire Emblem Heroes (FEH) Walkthrough & Guides Wiki
Diablo 4: Vessel of Hatred Walkthrough & Guides Wiki
Cyberpunk 2077: Ultimate Edition Walkthrough & Guides Wiki
Yu-Gi-Oh! Master Duel Walkthrough & Guides Wiki
Super Smash Bros. Ultimate Walkthrough & Guides Wiki
Pokemon Brilliant Diamond and Shining Pearl (BDSP) Walkthrough & Guides Wiki
Elden Ring Shadow of the Erdtree Walkthrough & Guides Wiki
Monster Hunter World Walkthrough & Guides Wiki
The Legend of Zelda: Tears of the Kingdom Walkthrough & Guides Wiki
Persona 3 Reload Walkthrough & Guides Wiki


All rights reserved
© Cygames, Inc.
The copyrights of videos of games used in our content and other intellectual property rights belong to the provider of the game.
The contents we provide on this site were created personally by members of the Game8 editorial department.
We refuse the right to reuse or repost content taken without our permission such as data or images to other sites.
for now maybe you can use Tachyon's Unity Cup build.