How to Win Races at Any Distance

You can win any race by focusing on your Trainee's aptitude and skills in Umamusume: Pretty Derby. See how to win races at any distance, tips before starting a Career, as well as a list of racecourses in this guide.
List of Contents
How to Win Races at Any Distance
| Tips for Winning Races |
|---|
|
|
Train Based on Aptitude and Race Goals

Each Trainee has different aptitudes for races such as Track, Distance, and Style. Always try to enter races with tracks and distances that align with your Trainee's strengths, and pick up skills for her running style.
Aptitude Guide (Track, Distance, Style)
Learn the Appropriate Skills
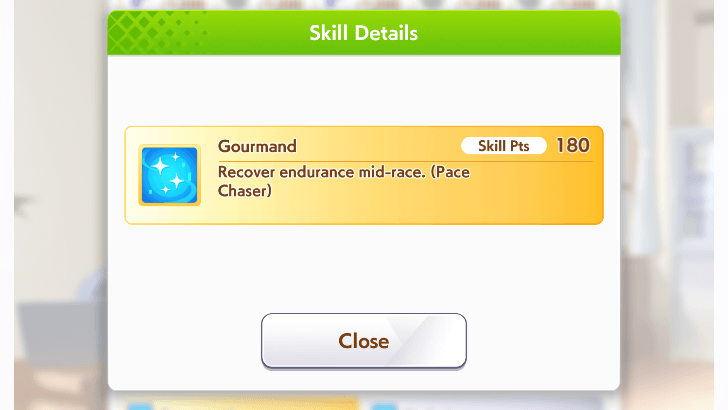
Some skills only work for certain track distances or running styles. These conditions are typically indicated by parentheses in the skill descriptions.
Consider learning skills that match your Trainee's aptitude, support milestone races, or compensate for lacking stats!
Plan for Races Ahead
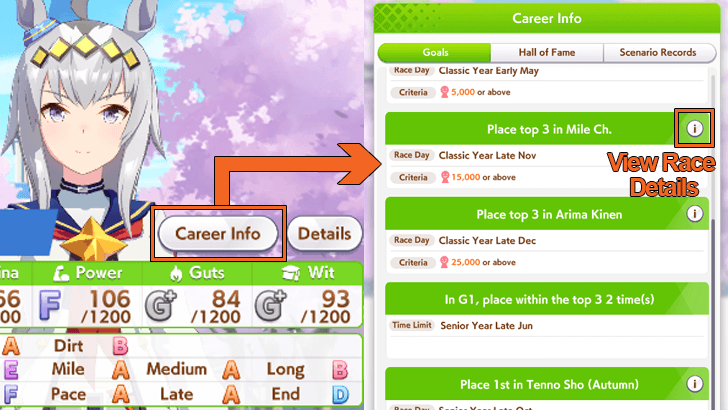
On the Trainee select screen, click on the Career Info button to view the races so you can plan ahead of time.
Prioritize Speed When Training
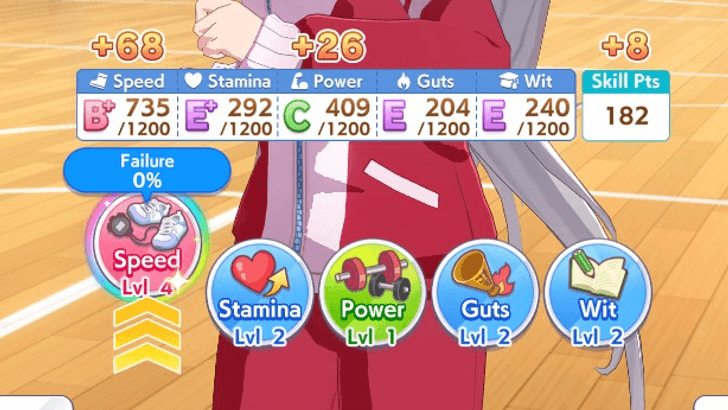
Speed is the most important stat, as it determines your Trainee’s top speed and should be your priority during training.
Don't forget to consider Stamina depending on your target races, and aim for at least 300 Wit to reliably proc skills.
Speed Guide: What Does Speed Do?
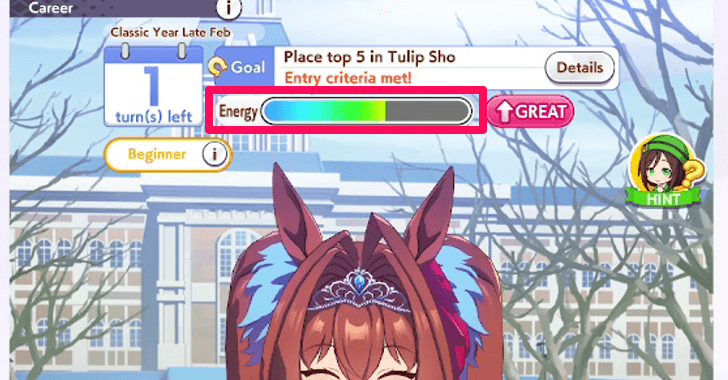
Manage Energy Properly
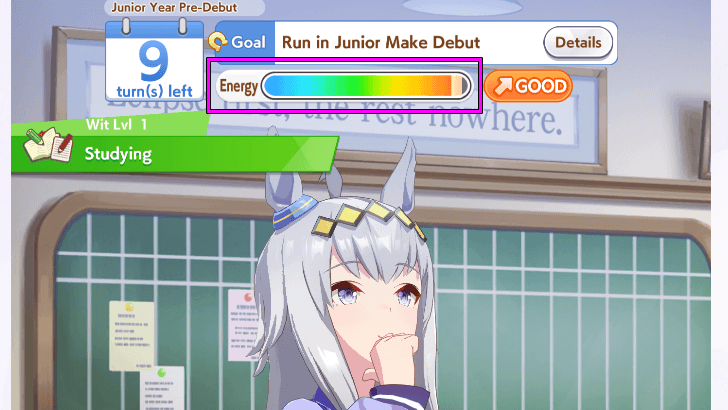
Energy management is important throughout a Career to prevent injuries and wasting turns at the infirmary. If your Trainee’s energy drops below 50%, training may fail. The lower the energy, the greater the risk.
Whenever possible, try to weave in Wit training to push your energy above the failure threshold. However, don't rely solely on Wit training for energy as you may miss out on more valuable turns. It's still a good idea to let your Trainee rest if her energy is too low!
Rest Guide: How to Increase Energy
Stat Priorities for Each Distance
| Sprint and Mile | |
|---|---|
| Medium |
|
| Long |
|
Longer races require a more balanced distribution of stats, which makes Medium and Long distance Trainees trickier to train.
In comparison, Sprint and Mile races mostly require Speed and some Stamina, so Trainees with aptitude for those distances (like Sakura Bakushin O and Oguri Cap) are generally easier to train.
Best Character (Trainee) Tier List
Stat Priorities for Running Styles
| Front Runner | |
|---|---|
|
Pace Chaser Late Surger End Closer |
|
Speed is the top priority for Front Runners. For other running styles, Speed remains important, but Power is a crucial secondary stat.
Race in Great Condition
| Mood | Effects |
|---|---|
| Great |
・Increases training results by 20%. ・Increases attributes while running by 4%. |
| Good |
・Increases training results by 10%. ・Increases attributes while running by 2%. |
| Normal |
・No change in training results. ・No change to attributes while running. |
| Bad |
・Lowers training results by 10%. ・Lowers attributes while running by 2%. |
| Awful |
・Lowers training results by 20%. ・Lowers attributes while running by 4%. |
Your Trainee's mood affects her performance during races. Try to enter races while your Trainee is in Great condition for the 4% stat increase.
Recreation Guide: How to Improve Mood
Energy Does Not Affect Race Performance
Your Trainee's energy does not affect her performance during races, so there's no need to worry if she's low on energy beforehand.
Energy is consumed after a race, so you may need to let your Trainee rest, especially if she entered with low energy.
Use Alarm Clocks

Alarm Clocks are your last resort if you can't win a race. It allows you to retry a race while improving your Trainee's mood by one level (no change if mood is already Great) and reassigns bracket numbers.
Alarm Clocks can be purchased from the Daily Shop and earned as rewards from events.
Tips Before Starting a Career
Level Up Support Cards

Always try to max out your Support Cards before starting a Career run to get the most out of your Support Cards.
Prioritize Support Cards that you only plan on using as leveling them up costs a lot of SP (Support Points) and Monies.
Borrow Support Cards and Legacy Trainees from Friends
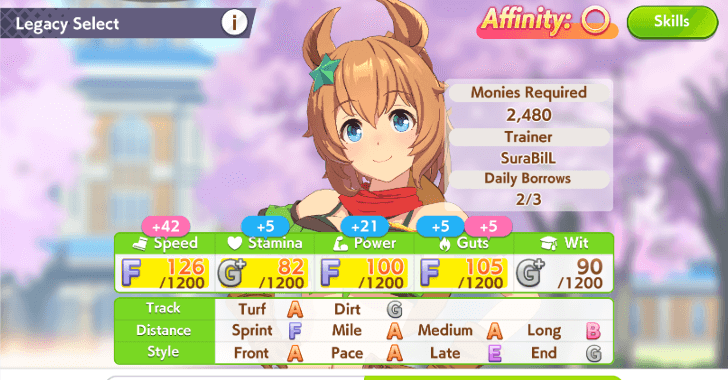
You can borrow Support Cards, ideally ones that are maxed out or MLB (Max Limit Break), as well as Legacy Trainees from friends, preferably those with 9-Star Sparks. Note that you can only borrow Legacy Trainees up to 3 times per day.
Find and follow friends in our Friend ID Sharing Board by clicking the link below.
List of Racecourses
All Racecourses and Info
| Racecourse | Details |
|---|---|
 Sapporo Sapporo |
Distances: 1200, 1500, 1700, 1800, 2000, 2600 Tracks: Turf, Dirt Direction: Right Major Races: Sapporo Kinen (G2), Sapporo Junior Stakes (G3) |
 Hakodate Hakodate |
Distances: 1200, 1400, 1700, 1800, 2000 Tracks: Turf, Dirt Direction: Right Major Races: Hakodate Junior Stakes (G3) |
 Fukushima Fukushima |
Distances: 1200, 1700, 1800, 2000 Tracks: Turf, Dirt Direction: Right Major Races: None |
 Niigata Niigata |
Distances: 1000, 1200, 1400, 1600, 1800, 2000 Tracks: Turf, Dirt Direction: Left Major Races: Niigata Kinen (G3), Niigata Junior Stakes (G3) |
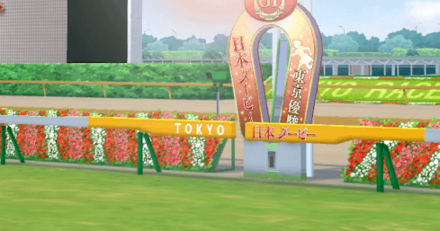 Tokyo Tokyo |
Distances: 1400, 1600, 1800, 2000, 2100, 2400, 2500, 3400 Tracks: Turf, Dirt Direction: Left Major Races: Japanese Oaks (G1), Japanese Derby (G1), Autumn Tenno Sho (G1) |
 Nakayama Nakayama |
Distances: 1200, 1600, 1800, 2000, 2200, 2500, 3600 Tracks: Turf, Dirt Direction: Right Major Races: Hopeful Stakes (G1), Yayoi Sho (G2), Satsuki Sho (G1), Arima Kinen (G1) |
 Chukyo Chukyo |
Distances: 1200, 1400, 1600, 1800, 2000 Tracks: Turf, Dirt Direction: Left Major Races: Champions Cup (G1), Kinko Sho (G2) |
 Kyoto Kyoto |
Distances: 1200, 1400, 1600, 1800, 1900, 2000, 2200, 2400, 3000, 3200 Tracks: Turf, Dirt Direction: Right Major Races: Shuka Sho (G1), Kikuka Sho (G1), Tenno Sho Spring (G1) |
 Hanshin Hanshin |
Distances: 1200, 1400, 1600, 1800, 2000, 2200, 2400, 3000 Tracks: Turf, Dirt Direction: Right Major Races: Hanshin JF (G1), Takarazuka Kinen (G1), Osaka Hai (G1) |
 Kokura Kokura |
Distances: 1200, 1700, 1800, 2000 Tracks: Turf, Dirt Direction: Right Major Races: Kokura Junior Stakes (G3) |
 Oi Oi |
Distances: 1200, 1400, 1800, 2000 Tracks: Dirt Direction: Right Major Races: Japan Dirt Derby (G1), Tokyo Daishoten (G1) |
The table above shows a list of all racecourses, along with other details including distances, track types, directions, and major races.
List of All Races (G1, G2, G3, EX)
Umamusume: Pretty Derby Related Guides

Tips and Tricks
Comment
Author

How to Win Races at Any Distance
Premium Articles


Rankings
- We could not find the message board you were looking for.

Gaming News


Popular Games

Genshin Impact Walkthrough & Guides Wiki
Umamusume: Pretty Derby Walkthrough & Guides Wiki
Crimson Desert Walkthrough & Guides Wiki
Monster Hunter Stories 3: Twisted Reflection Walkthrough & Guides Wiki
Honkai: Star Rail Walkthrough & Guides Wiki
Pokemon Pokopia Walkthrough & Guides Wiki
The Seven Deadly Sins: Origin Walkthrough & Guides Wiki
Wuthering Waves Walkthrough & Guides Wiki
Zenless Zone Zero Walkthrough & Guides Wiki
Arknights: Endfield Walkthrough & Guides Wiki


Recommended Games
Fire Emblem Heroes (FEH) Walkthrough & Guides Wiki
Diablo 4: Vessel of Hatred Walkthrough & Guides Wiki
Cyberpunk 2077: Ultimate Edition Walkthrough & Guides Wiki
Yu-Gi-Oh! Master Duel Walkthrough & Guides Wiki
Super Smash Bros. Ultimate Walkthrough & Guides Wiki
Pokemon Brilliant Diamond and Shining Pearl (BDSP) Walkthrough & Guides Wiki
Elden Ring Shadow of the Erdtree Walkthrough & Guides Wiki
Monster Hunter World Walkthrough & Guides Wiki
The Legend of Zelda: Tears of the Kingdom Walkthrough & Guides Wiki
Persona 3 Reload Walkthrough & Guides Wiki


All rights reserved
© Cygames, Inc.
The copyrights of videos of games used in our content and other intellectual property rights belong to the provider of the game.
The contents we provide on this site were created personally by members of the Game8 editorial department.
We refuse the right to reuse or repost content taken without our permission such as data or images to other sites.