Best Party Setup
★ Characters and Gifts Guide
☆ All 16 Romance Options
★ Boss Taming Guide and Best Items to Give
☆ Check our Daily Routine Guide for your daily tasks!
★ Walkthrough and Complete Story Guide
☆ Village Building Guide
There are five unique roles that a party member can have in Rune Factory: Guardians of Azuma (RFGoA). Read on to learn more about the best party setup, what each role does, and how to form a party!
List of Contents
Best Party Setup
Debuffer, Buffer, Attacker
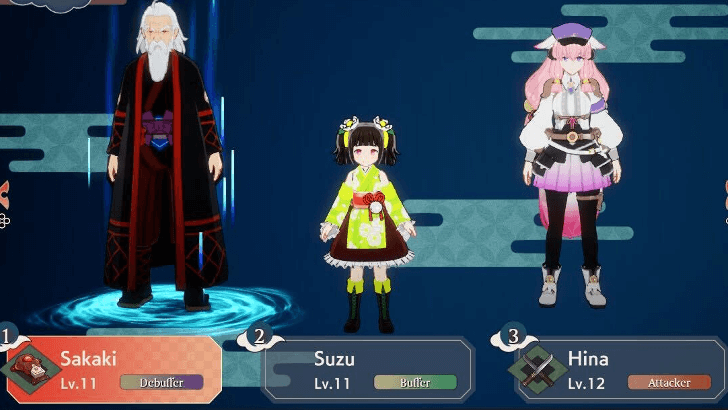
For an offense build, we recommend having a Buffer, Debuffer, and an Attacker in your party. The Debuffer can lower your enemy's defenses while the Buffer can boost your party's attacks! Suzu, in particular, doesn't take any damage if you bring her along, making her a reliable buffer to have.
Having another attacker on your team can help you take advantage of all the debuffs and buffs, making swift work of your opponents.
Buffer Can Be Switched With a Healer in the Early Game
During the early game, you can also switch out a Buffer with a Healer while you have low HP. However, Healers may not be as useful in the late game since their healing can be easily replicated with Food items and Potions.
If you do decide to have a healer, we recommend using Ulalaka since her healing abilities scale with the Sacred Drum's Skill.
Best Sacred Drum Skills and How to Use
Defender, Debuffer, Attacker
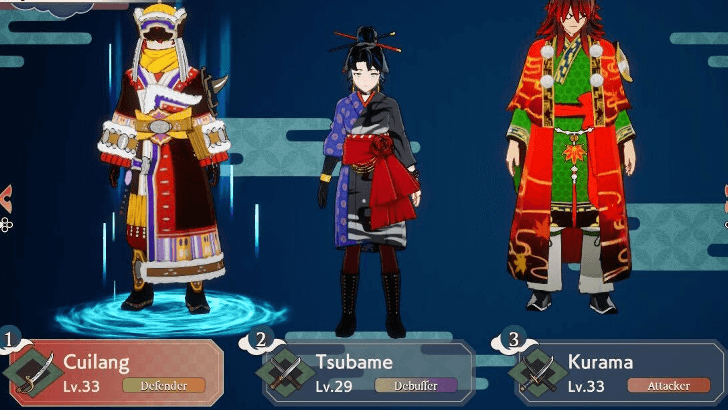
For a more defensive build, have a Defender, Debuffer, and Attacker in your party. The Defender can draw enemies away from you, making it easier to deal with larger groups. The Debuffer can lower enemy stats, which also aids the Defender in the long run since they are not tanking a lot of heavy damage.
Your Attacker can then help you with clearing out enemies while they are distracted by the Defender.
Party Role Explanation
Attacker
| List of Attackers | ||
|---|---|---|
 Subaru Subaru
|
 Kaguya Kaguya
|
 Murasame Murasame
|
 Hina Hina
|
 Matsuri Matsuri
|
 Kurama Kurama
|
 Clarice Clarice
|
 Ikaruga Ikaruga
|
 Pilika Pilika
|
 Takumi Takumi
|
 Sakuna Sakuna
|
 Tsuyu Tsuyu
|
 Umi Umi
|
||
Attackers serve as your secondary damage dealers. They boost your offense and can help clear waves of monsters.
For attackers, you would want to buff their ATK stat to maximize their damage output. You should also check their Battle Skills to see if they inflict any elemental attacks, which you will need the M.ATK stat for.
You can view battle skills by selecting Stats & Skills in your party's Gear Menu.
Defender
| List of Defenders | ||
|---|---|---|
 Iroha Iroha
|
 Kai Kai
|
 Cuilang Cuilang
|
 Zaza Zaza
|
||
Defenders will attract monsters away from you, keeping you from being overwhelmed by larger groups of enemies. Some of them can even buff an ally's DEF and M.DEF at later levels.
For defenders, you would want to focus on building up their DEF and M.DEF stat and make them as tanky as possible while you pick off enemies from the side.
Buffer
| List of Buffers | ||
|---|---|---|
 Fubuki Fubuki
|
 Suzu Suzu
|
 Watarase Watarase
|
 Sayo Sayo
|
||
Buffers will boost certain stats which will help you perform better in battle. Different buffers can buff different stats, which you can view in the Battle Skills menu.
Party members who are buffed will have a blue symbol underneath their name in the upper left of your screen.
Debuffer
| List of Debuffers | ||
|---|---|---|
 Sakaki Sakaki
|
 Tsubame Tsubame
|
 Hisui Hisui
|
 Kotaro Kotaro
|
 Hana Hana
|
 Sora Sora
|
Debuffers will lower an enemy's attacks and defenses, making them hurt less and easier to defeat. We recommend having debuffers in your party, especially as enemy levels scale as the story progresses.
Healer
| List of Healers | ||
|---|---|---|
 Mauro Mauro
|
 Ulalaka Ulalaka
|
 Kanata Kanata
|
 Kusatsu Kusatsu
|
 Yachiyo Yachiyo
|
 Riku Riku
|
Healers will heal HP and status effects. Later on, they could even revive fallen party members. They are great to have in the early game when your HP is still low and you are traversing in treacherous domains which can inflict status effects.
How to Form a Party
Adjust Parties in the Party Menu
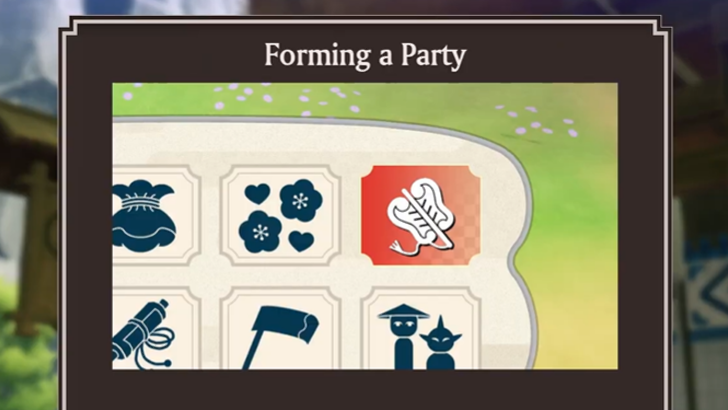
You can adjust your party through the party icon in the upper right corner of the Camp Menu. Here you can view your party member's stats and even change their equipment so they could better support you on your journey.
Keep in mind that you cannot adjust your party outside of a village so make sure you check on your party before you step through the gates.
How to Form a Party and Increase Party Size
Rune Factory: Guardians of Azuma (RFGoA) Related Guides

Beginner's Guide and Tips and Tricks
Tips and Tricks Guides
Exploration Guides
Combat Guides
Story Progression Guides
| Story Progression Guides | |
|---|---|
| All Points of No Return | What Should You Sacrifice? |
| How to Get Married | Can You Have Children? |
| How to Get a Bird and a Dog | - |
Monster Guides
| Monster Guides | |
|---|---|
| How to Tame Monsters | How to Ride Monsters |
| Boss Taming Guide and Best Items to Give | Best Monsters to Tame |
Author
Rankings
- We could not find the message board you were looking for.
Gaming News


Popular Games

Genshin Impact Walkthrough & Guides Wiki
Umamusume: Pretty Derby Walkthrough & Guides Wiki
Pokemon Pokopia Walkthrough & Guides Wiki
Honkai: Star Rail Walkthrough & Guides Wiki
Monster Hunter Stories 3: Twisted Reflection Walkthrough & Guides Wiki
Arknights: Endfield Walkthrough & Guides Wiki
Wuthering Waves Walkthrough & Guides Wiki
Zenless Zone Zero Walkthrough & Guides Wiki
Pokemon TCG Pocket (PTCGP) Strategies & Guides Wiki
Monster Hunter Wilds Walkthrough & Guides Wiki


Recommended Games
Fire Emblem Heroes (FEH) Walkthrough & Guides Wiki
Diablo 4: Vessel of Hatred Walkthrough & Guides Wiki
Cyberpunk 2077: Ultimate Edition Walkthrough & Guides Wiki
Yu-Gi-Oh! Master Duel Walkthrough & Guides Wiki
Super Smash Bros. Ultimate Walkthrough & Guides Wiki
Pokemon Brilliant Diamond and Shining Pearl (BDSP) Walkthrough & Guides Wiki
Elden Ring Shadow of the Erdtree Walkthrough & Guides Wiki
Monster Hunter World Walkthrough & Guides Wiki
The Legend of Zelda: Tears of the Kingdom Walkthrough & Guides Wiki
Persona 3 Reload Walkthrough & Guides Wiki


All rights reserved
©2025 Marvelous Inc.
The copyrights of videos of games used in our content and other intellectual property rights belong to the provider of the game.
The contents we provide on this site were created personally by members of the Game8 editorial department.
We refuse the right to reuse or repost content taken without our permission such as data or images to other sites.
Hana isn't a debuffer.