Walkthrough and Complete Story Guide
★ Characters and Gifts Guide
☆ All 16 Romance Options
★ Boss Taming Guide and Best Items to Give
☆ Check our Daily Routine Guide for your daily tasks!
★ Walkthrough and Complete Story Guide
☆ Village Building Guide
This is a guide for all the main quests of Rune Factory: Guardians of Azuma. Read on for a walkthrough and a complete story guide for all main quests!
List of Contents
Prologue Main Quests
| All Prologue Main Quests | |
|---|---|
| Rise and Shine | Morning Chores |
| The Dance of Bonds and Save Statues | - |
Rise and Shine
| Step-by-Step Guide | |
|---|---|
| 1 | 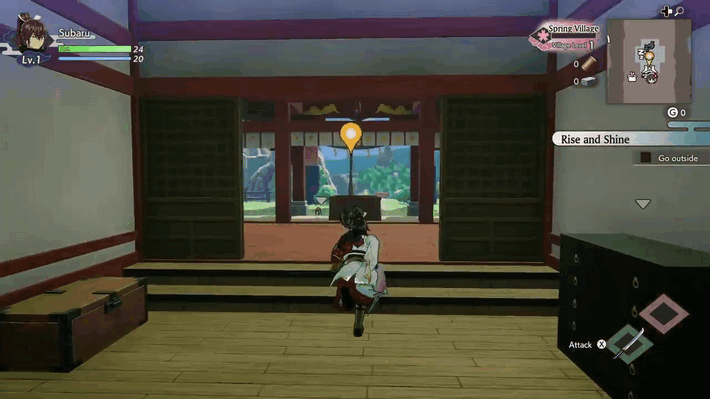
Go Outside. After exploring the interior of the house and familiarizing yourself with the controls, head outside. |
| 2 | 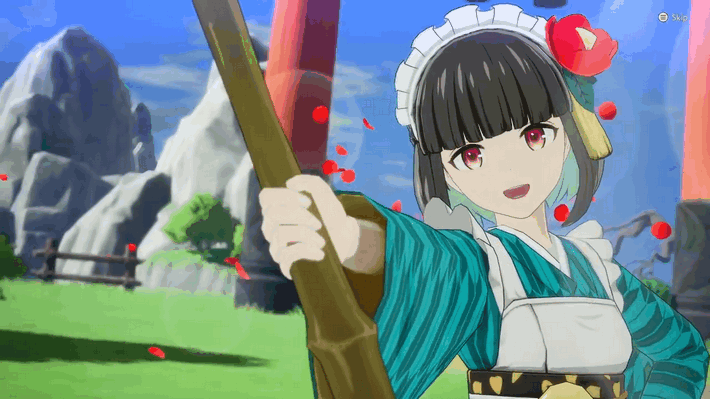
Talk to Iroha. Iroha will give you the Bamboo Broom and start the next quest. |
Morning Chores
| Step-by-Step Guide | |
|---|---|
| 1 | 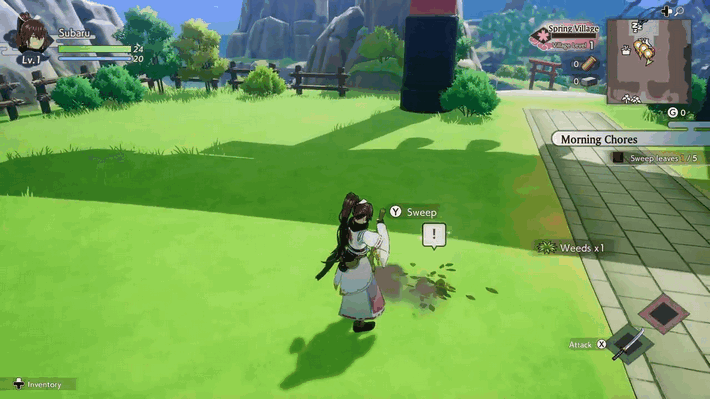 Sweep Leaves. Sweep the leaves by walking up to them and interacting with them. |
| 2 | 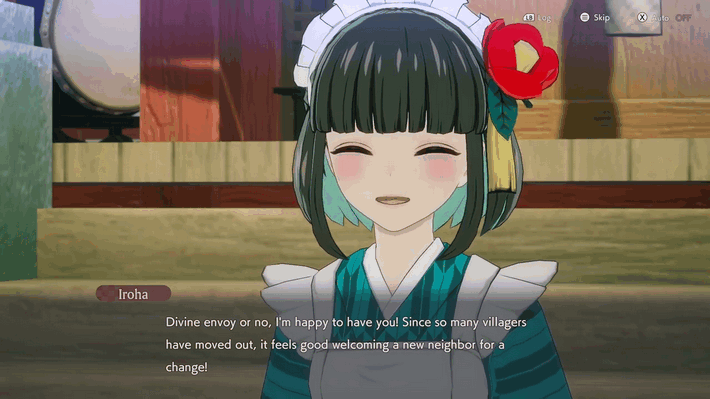
Talk to Iroha. After sweeping the 5 Leaf Piles, talk to Iroha again to receive the Plum Branch and proceed. |
The Dance of Bonds and Save Statues
| Step-by-Step Guide | |
|---|---|
| 1 | 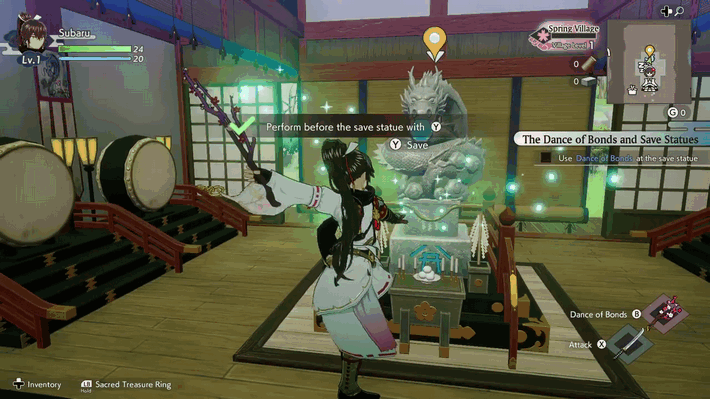
Use Dance of Bonds at the save statue. With the Plum Branch equipped, head back inside and use Dance of Bonds in front of the save statue. |
| 2 | Talk to Iroha. After saving your game, talk to Iroha again to proceed. |
Spring Village Main Quests
Something's on Suzu's Mind
| Step-by-Step Guide | |
|---|---|
| 1 | 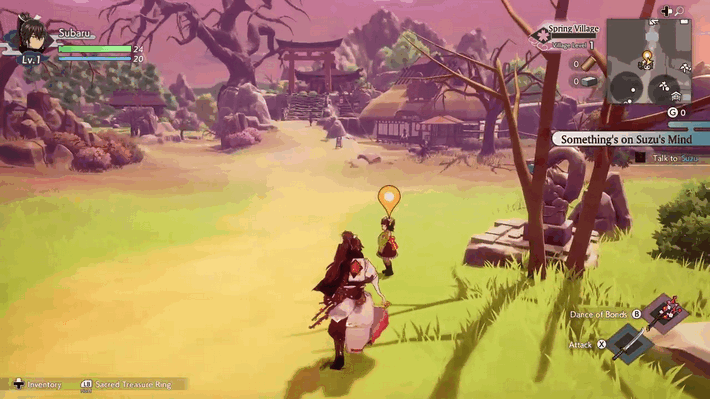
Talk to Suzu. Walk further down the road and talk to Suzu to begin the quest. |
Finding the Weird Animal
| Step-by-Step Guide | |
|---|---|
| 1 | 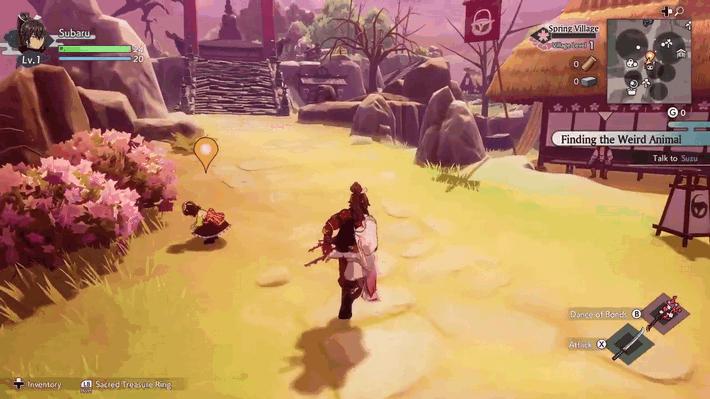 Talk to Suzu. Talk to Suzu again to learn more clues about the Weird Animal.
 |
| 2 | 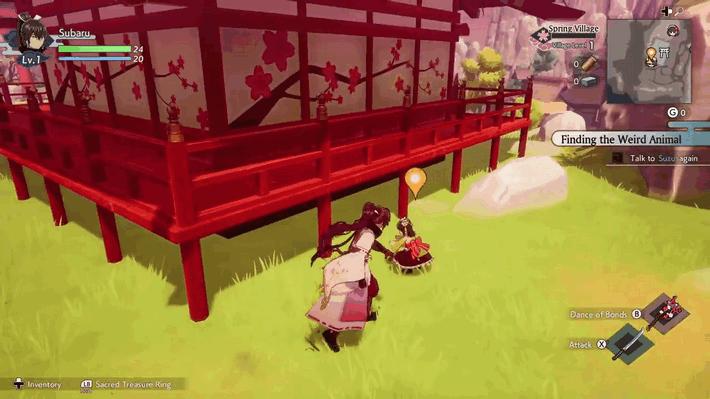
Talk to Suzu again. Follow Suzu behind the shrine, and talk to her again. |
| 3 | 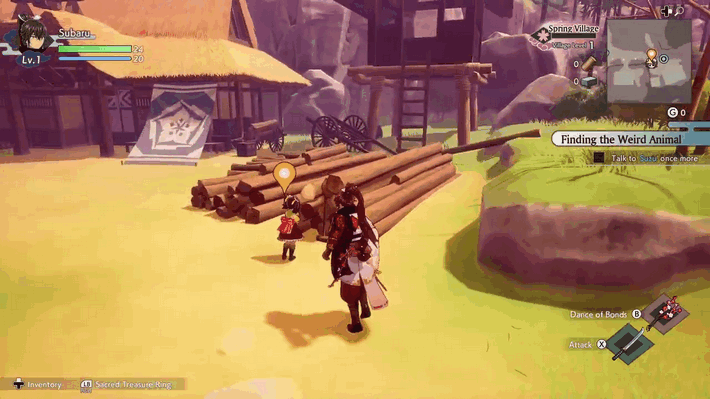
Talk to Suzu once more. Follow Suzu again, this time towards the village, as she follows the trail of the Weird Animal. |
Time to Rest
| Step-by-Step Guide | |
|---|---|
| 1 | Go to the Dragon Shrine and sleep. Head back home by walking or Fast Traveling to the save statue. Interact with your Futon to end the day. |
After the Disaster
| Step-by-Step Guide | |
|---|---|
| 1 | 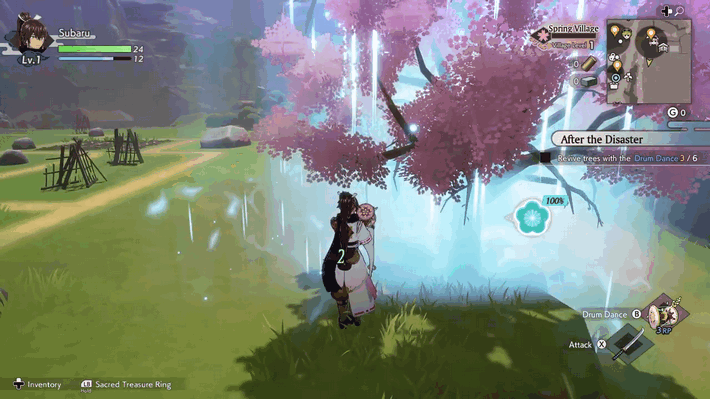
Revive trees with the Drum Dance. Equip the Drum Dance, then walk up to the dead trees. Using the Drum Dance in front of the dead trees will bring them back to life. |
| 2 | 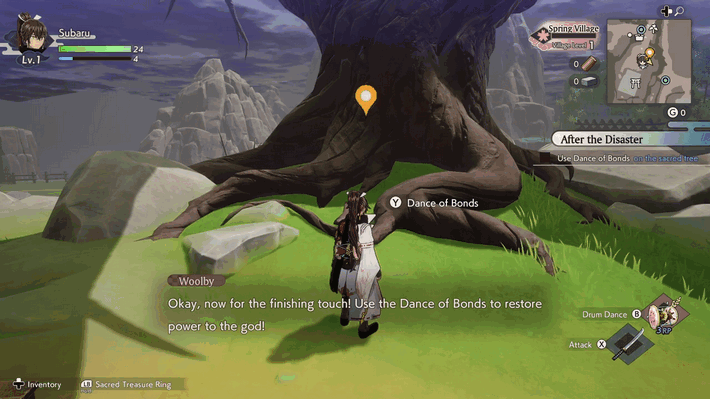
Use Dance of Bonds on the sacred tree. After reviving 6 Dead Trees, head to the Sacred Tree and use the Dance of Bonds. |
Village Chief
| Step-by-Step Guide | |
|---|---|
| 1 | 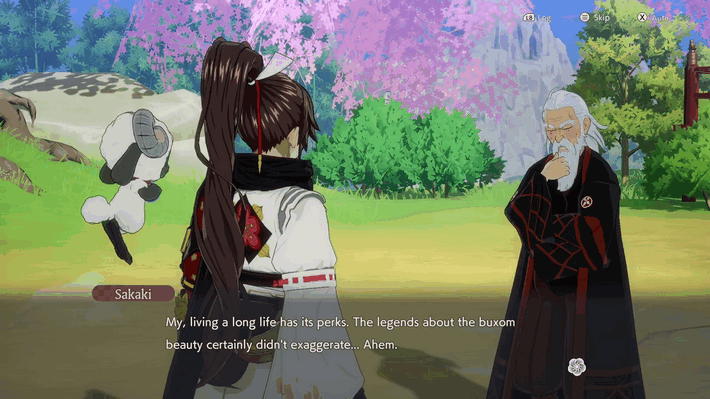
Talk to Sakaki. After reviving the Trees and receiving the blessing from Ulalaka, talk to Sakaki, and receive the Terra Tiller from Woolby. |
The State of the Village
| Step-by-Step Guide | |
|---|---|
| 1 | 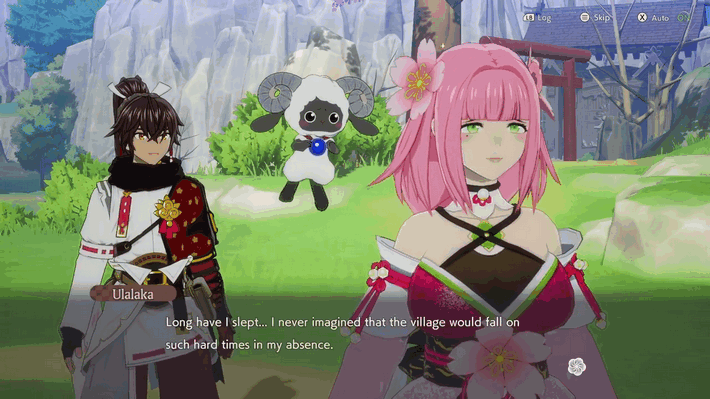
Head to the development zone. Once there, speak with Ulalaka to progress the quest. |
Clearing Debris
| Step-by-Step Guide | |
|---|---|
| 1 | 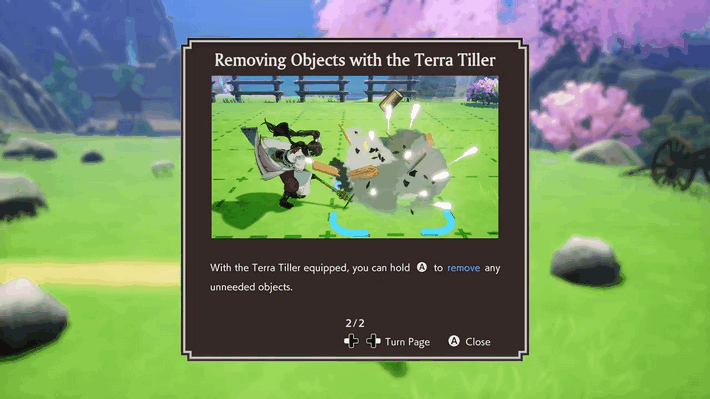
Destroy debris with the Terra Tiller. After speaking with Ulalaka, equip the Terra Tiller to begin clearing the Debris from the field. |
Placing Fields
| Step-by-Step Guide | |
|---|---|
| 1 | 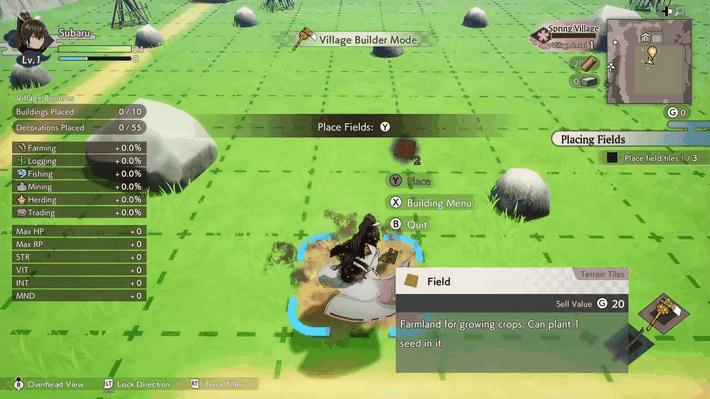
Place Field tiles. Once enough debris have been removed, start placing Field Tiles. These will serve as your main farmland, where you can plant and grow crops! |
Planting Seeds
| Step-by-Step Guide | |
|---|---|
| 1 | 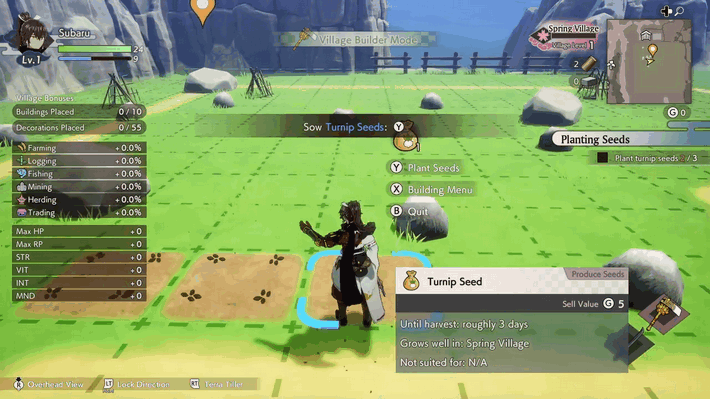 Plant turnip seeds. Select the seeds Woolby provided, and then plant them on the field tiles.
 |
| 2 | 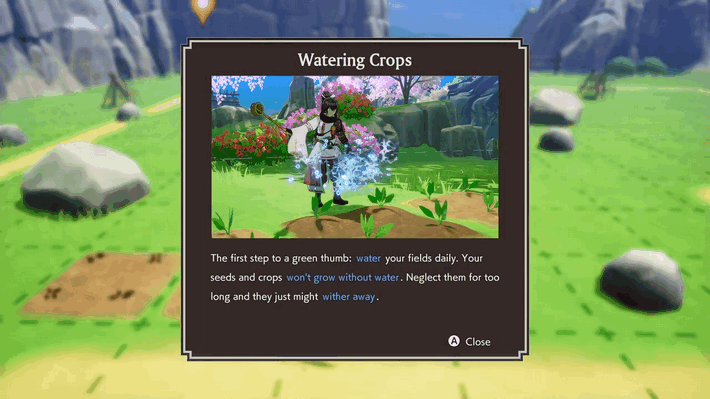
Water the fields. After planting the turnips, interact with them again to water them. |
Reaping What You've Sown
| Step-by-Step Guide | |
|---|---|
| 1 | 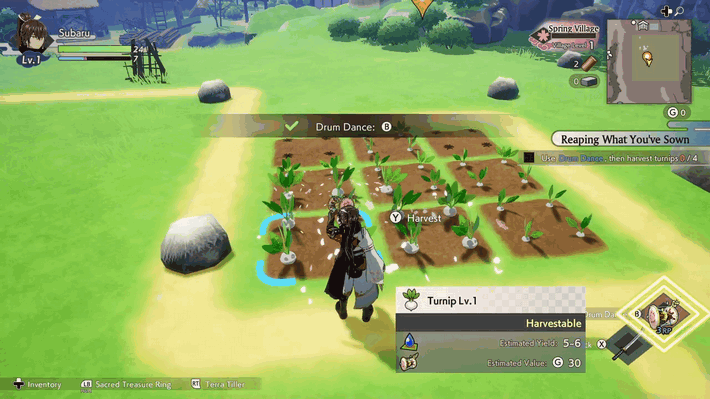
Use Drum Dance, then harvest turnips. Equip the Sacred Drum and head towards the pre-planted field. Once near, perform the Drum Dance to speed up crop growth, and harvest the turnips. |
Ship 'Til You Drop
| Step-by-Step Guide | |
|---|---|
| 1 | 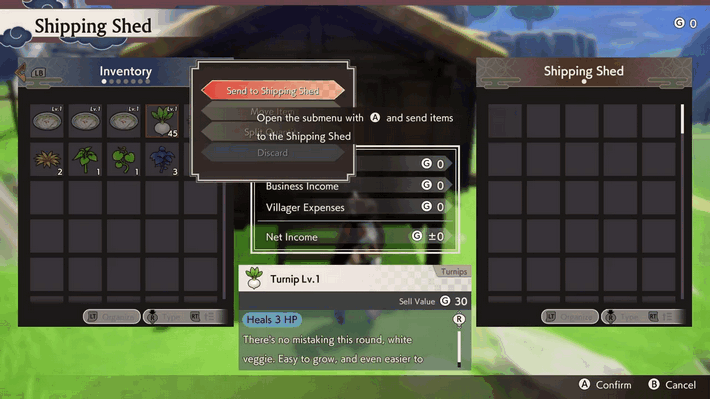
Put Turnips in the shipping shed. After harvesting your turnips, head to the Shipping shed and move the turnips from your inventory to the Shed. |
Creating Tiles
| Step-by-Step Guide | |
|---|---|
| 1 | 
Call Woolby and create field tiles. Open Woolby's menu and craft additional Field tiles. Woolby will provide enough materials to allow you to craft Field Tiles 6 times. |
Let's Review
| Step-by-Step Guide | |
|---|---|
| 1 |
Place Field Tiles. Place the 6 newly obtained Field Tiles anywhere. |
| 1.1 | Plant turnip seeds. After placing the tiles, plant and water the turnips. |
Time to Rest
| Step-by-Step Guide | |
|---|---|
| 1 | Head to the Dragon Shrine and sleep. Return to the house via walking or fast travel to end the day. |
The Missing Carpenter
| Step-by-Step Guide | |
|---|---|
| 1 | 
Talk to Sakaki. Talk to Sakaki to receive the Cheap Hammer and Common Hatchet. |
Can't Fight on an Empty Stomach
| Step-by-Step Guide | |
|---|---|
| 1 | 
Head for the Abandoned Shrine. Head towards the Abandoned Shrine, where you will be stopped by Iroha. |
| 1.1 | Make Onigiri. After receiving the Onigiri recipe and Steamed Rice, prepare the dish to finish the quest. |
Searching for Takumi
| Step-by-Step Guide | |
|---|---|
| 1 | 
Head to the Abandoned Shrine. Continue forward and enter the Spring Highlands, towards the Abandoned Shrine. |
| 2 | 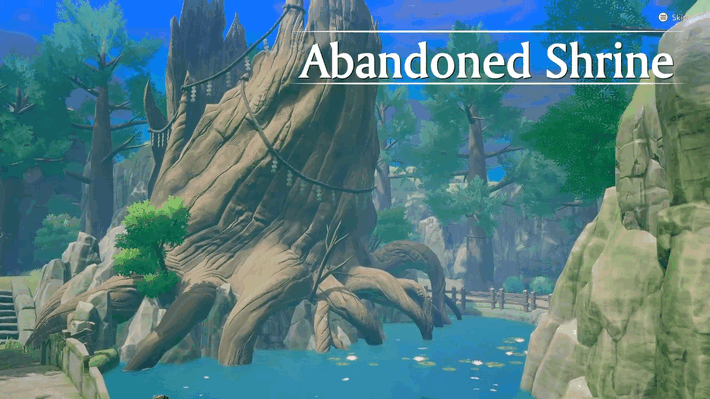 Explore the Abandoned Shrine. Once inside, explore the place by collecting resources and opening chests you can find scattered about. |
| 2.1 |  Defeat the monsters. After reaching a certain point inside the Shrine, you will experience a Monster Barrier, which can only be cleared by defeating all enemes present.
 |
| 2.2 | Defeat Monsters for EXP. Continue looting and defeating monsters in the area to gain useful items and level up your character. Don't forget to learn weapon skills while you're at it! |
| 3 | 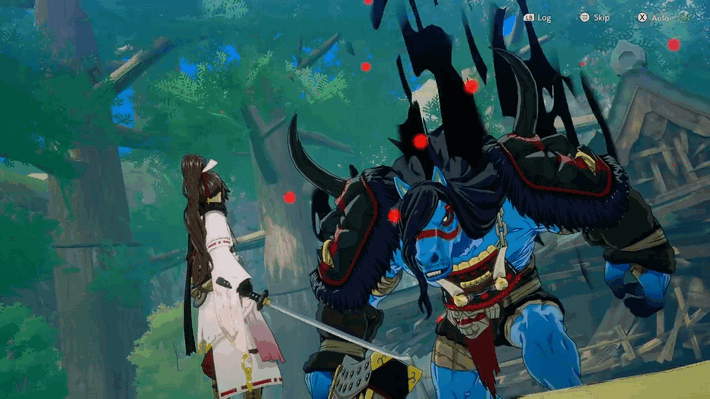 Defeat Mezuki. When you're ready, head to the quest marker, where you will face off against the first boss, Mezuki.
 |
Using a Bow
| Step-by-Step Guide | |
|---|---|
| 1 | Equip the bow. After finding Takumi, multiple dialogues will ensue, which will end in you receiving the Bow. Equip it to progress the quest. |
| 1.1 | Hit the target with the bow. Attack the dummy using the bow to finish the Bow weapon tutorial. |
The Business of Being Chief
| Step-by-Step Guide | |
|---|---|
| 1 | Accept an ema plaque request. Interact with the Ema Plaque, and accept the request from Sakaki. |
Building a Home 1
| Step-by-Step Guide | |
|---|---|
| 1 |  Talk to Takumi. Speak with Takumi to learn how to build Houses. |
Building a Home 2
| Step-by-Step Guide | |
|---|---|
| 1 | 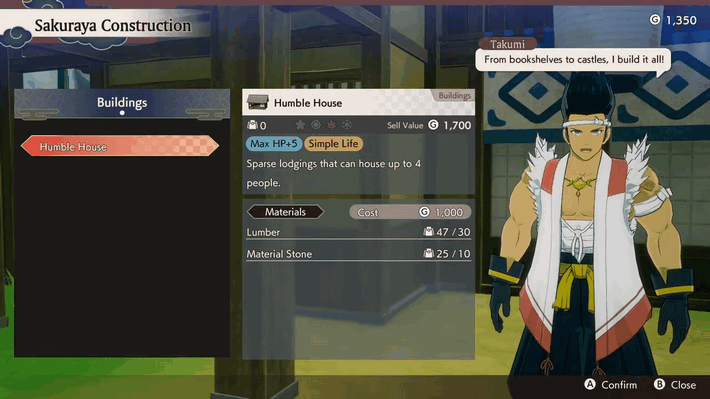
Ask Takumi about building a house. Speak with Takumi again and build the Humble House. |
| 2 | 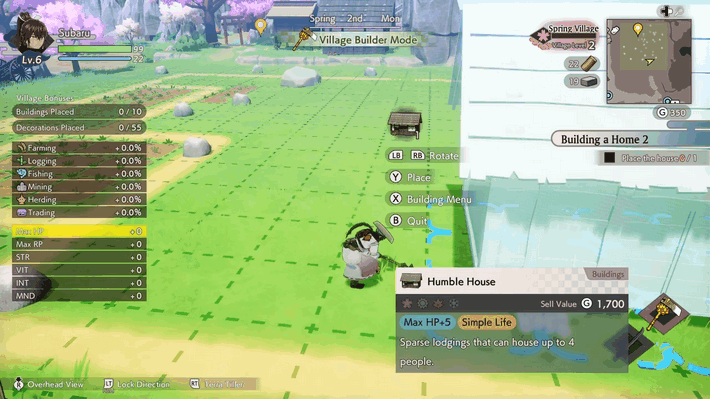
Place the house. Place the Humble House anywhere within the Dev Zone. |
| 3 | Turn in ema plaque request. Return to the ema plaque to finish the quest. |
Time to Rest
| Step-by-Step Guide | |
|---|---|
| 1 | Head to the Dragon Shrine and sleep. Return to the house via walking or fast travel to end the day. |
Ulalaka's Summons
| Step-by-Step Guide | |
|---|---|
| 1 | 
Talk to Ulalaka. Follow the quest marker and talk to Ulalaka. She will introduce Villager Jobs and how to assign Villagers to tasks. |
Finding Help
| Step-by-Step Guide | |
|---|---|
| 1 | 
Ask villagers to do work for you. After learning Villager Jobs from Ulalaka, assign villagers to help out with chores you wish to be automated. |
Ulalaka's Woes 1
| Step-by-Step Guide | |
|---|---|
| 1 | 
Talk with Ulalaka. Talk to Ulalaka in front of the Shipping Shed to learn more about Villager Expenses. |
Ulalaka's Woes 2
| Step-by-Step Guide | |
|---|---|
| 1 | 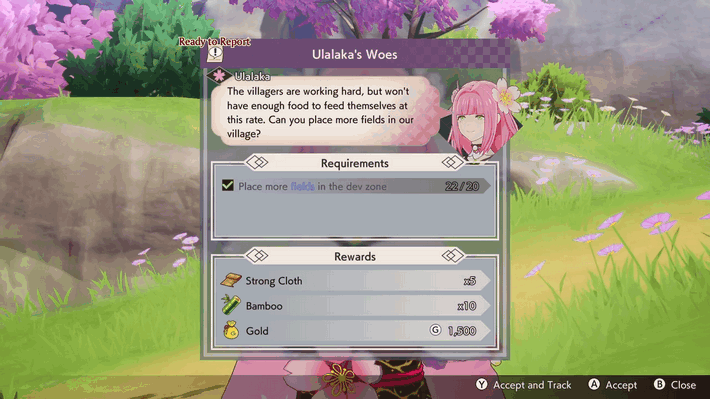
Listen to Ulalaka's request. Talk to Ulalaka and select Do you have any requests? from the dialogue choices. |
| 2 | Complete Ulalaka's request. Complete Ulalaka's request, or immediately submit the request for completion if you have already placed 20 fields in the Dev Zone. |
Blacksmith Brouhaha 1
| Step-by-Step Guide | |
|---|---|
| 1 | 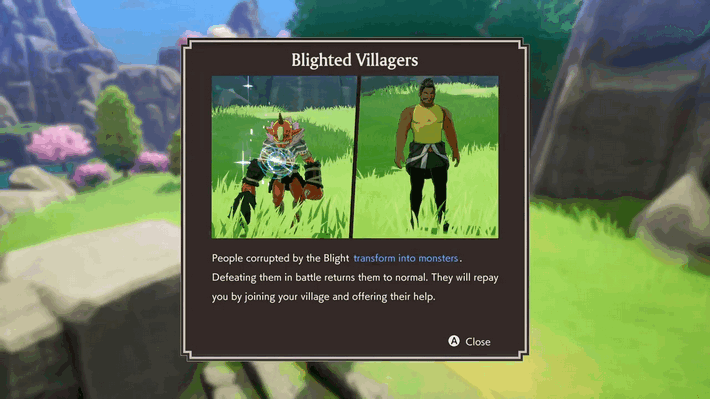
Defeat the strange red oni. Follow the quest marker and head for Spring Highlands again. Once you spot the red oni, attack it until it reaches low hp where a cutscene will ensue. |
| 2 | Return to Spring Village. After saving the Blighted Villager, head back to the Village to finish the quest. |
Blacksmith Brouhaha 2
| Step-by-Step Guide | |
|---|---|
| 1 | 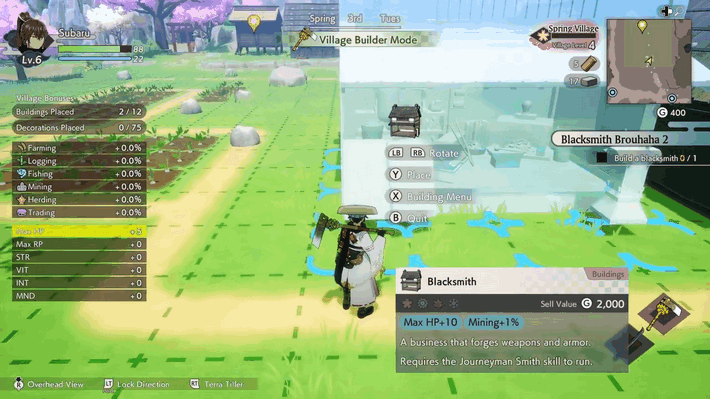
Build a blacksmith. Talk to Takumi and build a Blacksmith. Building a Blacksmith requires 40 Lumber, 20 Material Stone, and 1 Iron. Make sure to place it in the Dev Zone once built. |
| 2 | 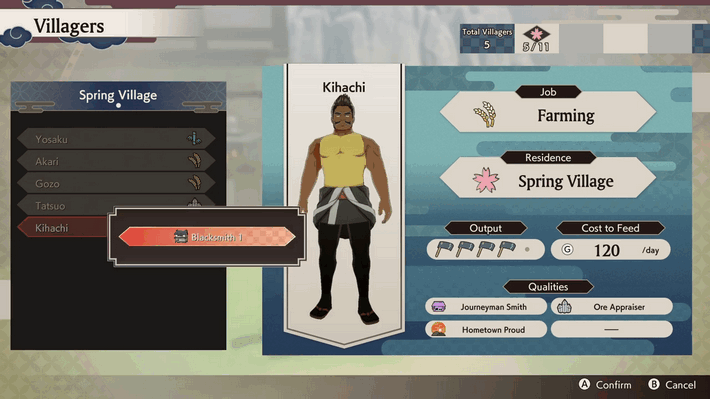
Have Kihachi run the blacksmith. After placing the Blacksmith, assign Kihachi to run the blacksmith and complete the quest. |
Lessons with a Superstar
| Step-by-Step Guide | |
|---|---|
| 1 | 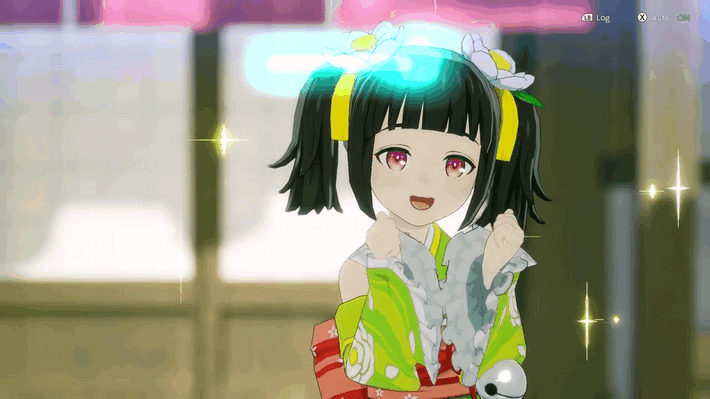
Get to know Suzu better. Increase Suzu's affinity by talking to her. Choosing any of the options will increase your Bond Level with Suzu to 1. |
Amazing Decorations
| Step-by-Step Guide | |
|---|---|
| 1 | Place a scarecrow. Place a scarecrow decoration anywhere in the Dev Zone. |
| 2 | Place a torii gate. Place a torii gate decoration anywhere in the Dev Zone. |
Amazing Buildings
| Step-by-Step Guide | |
|---|---|
| 1 | Place 5 buildings in the dev zone. Talk to Takumi and build any 5 buildings. Place them within the Dev Zone to complete the quest. |
Checking on Takumi
| Step-by-Step Guide | |
|---|---|
| 1 | 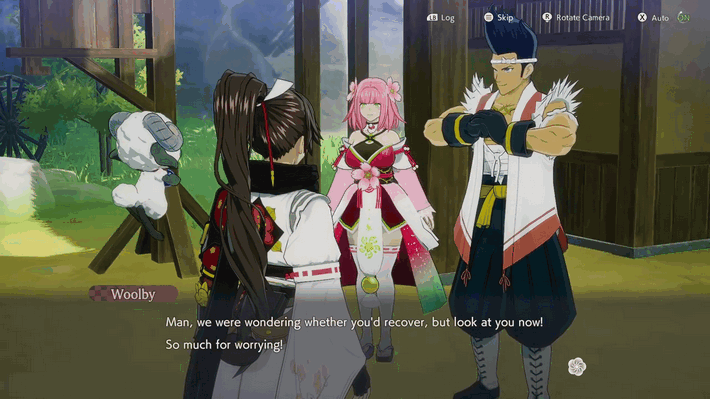
Talk to Takumi. Talk to Takumi to inquire about fixing the shrine. |
| 2 | 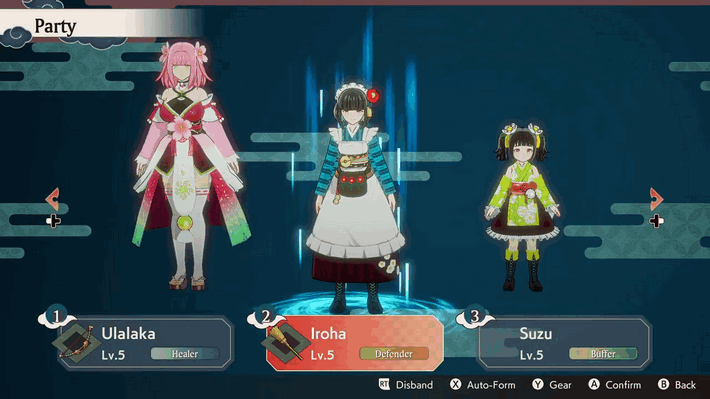
Form a party. After speaking with Takumi, the game will teach you to create a party. |
Guardian's Grove Lumber Hunt
| Step-by-Step Guide | |
|---|---|
| 1 | Cross the bridge to Guardian's Grove. Follow the quest marker heading towards Guardian's Grove. |
| 2 | 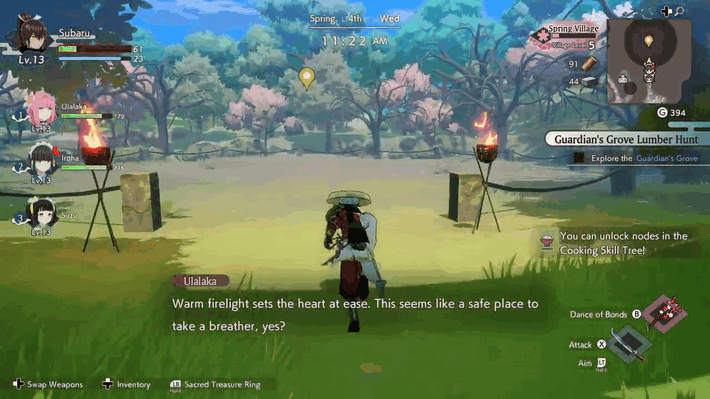
Explore the Guardian's Grove. Explore the area, collecting materials, and opening crates you find along the way. |
| 3 | 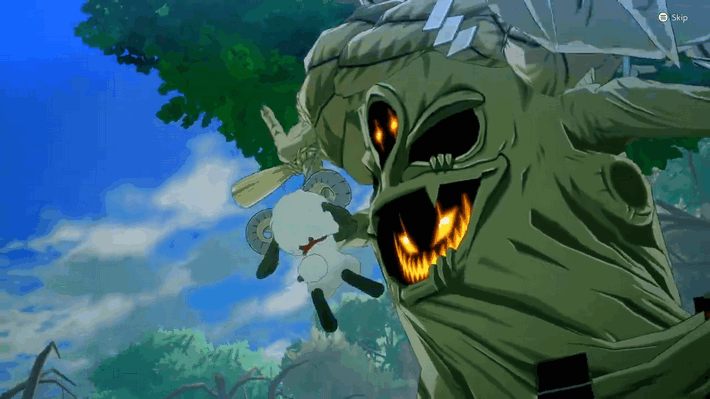
Defeat the Cursed Tree. Together with your party, attack and defeat the Cursed Tree. |
Repairing the Dragon Shrine
| Step-by-Step Guide | |
|---|---|
| 1 | 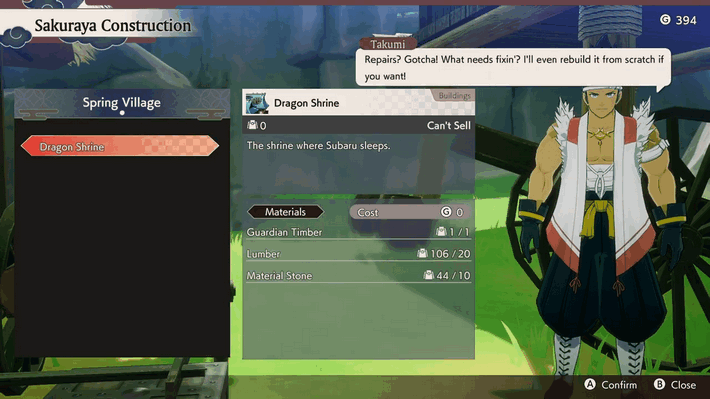
Ask Takumi to fix the Dragon Shrine. Return to the village and talk to Takumi to inquire about fixing the shrine again. |
Searching for Azuma's Gods
| Step-by-Step Guide | |
|---|---|
| 1 | Fly to Summer Village. With Woolby regaining his powers, fly and choose to land on Summer Village. |
Summer Village Main Quests
Info on the God of Summer
| Step-by-Step Guide | |
|---|---|
| 1 | 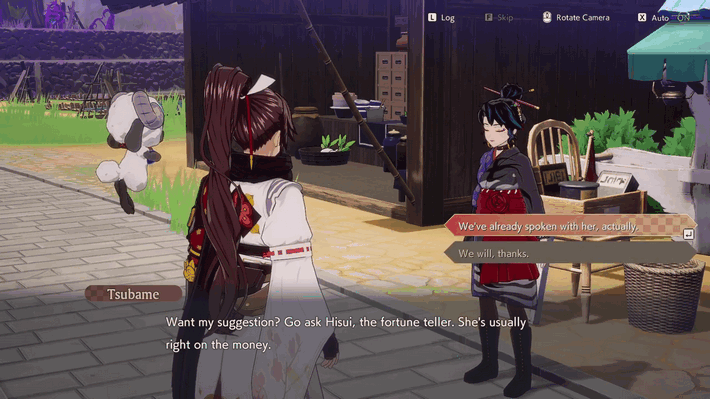
Talk to residents of Summer Village. Talk to the Summer Village residents who greeted you to learn more information. |
| 2 | 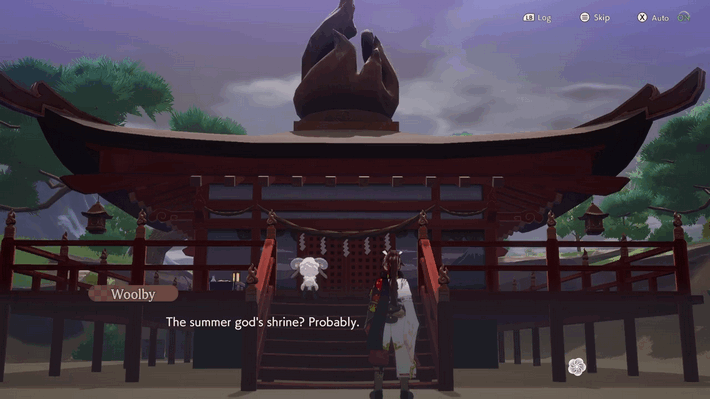
Head to the Summer God Shrine. After speaking with the villagers, follow the quest marker towards the Summer God's shrine to trigger the cutscene. |
Time to Rest
| Step-by-Step Guide | |
|---|---|
| 1 | Head to the Dragon Shrine and sleep. Return to the house via walking or fast travel to end the day. |
Dream Directions
| Step-by-Step Guide | |
|---|---|
| 1 | 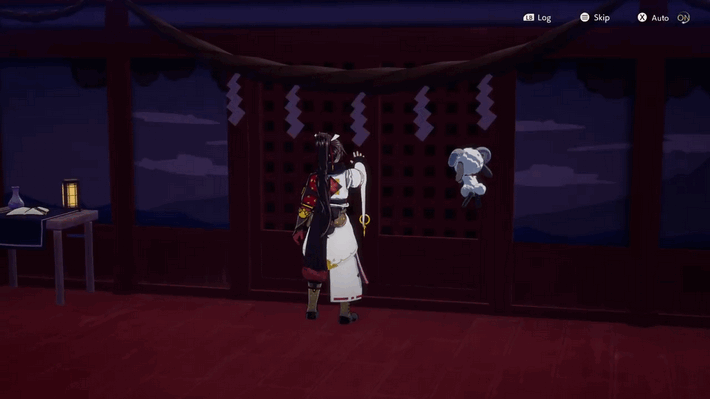
Head to the Summer God Shrine again. After having the strange dream, follow Woolby's suggestion and return to the Summer God Shrine. |
Hide and Seek
| Step-by-Step Guide | |
|---|---|
| 1 | 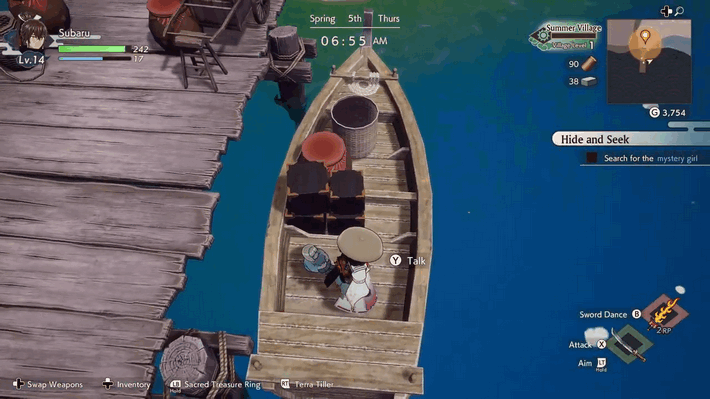
Search for the mystery girl. Search for the mystery girl after the cutscene. She can be found hiding inside the wooden boat. |
| 2 | 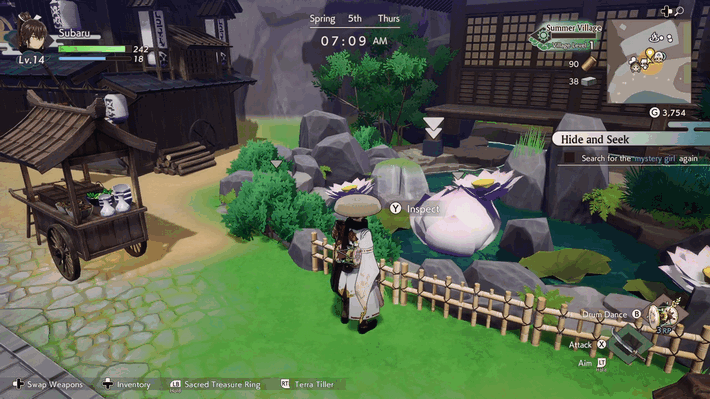
Search for the mystery girl again. For the second time, you can find her hidden inside a Lotus flower. Use the Drum Dance to make the Lotus open and reveal the mystery girl. |
| 3 | 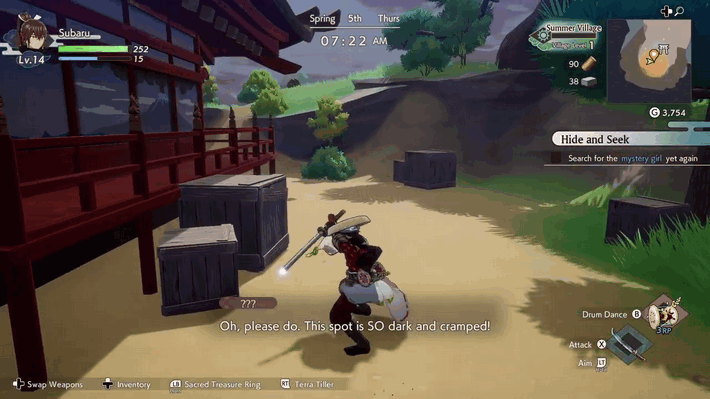
Search for the mystery girl yet again. For the third and final time, you can find her hidden inside wooden crates behind the Shrine. Use a weapon attack to break the crates. |
Finding the Sword
| Step-by-Step Guide | |
|---|---|
| 1 | 
Search the Limestone Caverns. Head outside town towards Summer Shores towards Limestone Caverns. |
| 1.1 | 
Burn the Blightbloom. Once inside, ignite your weapon using the Talisman of Blaze, and attack the Blightbloom to clear a path. |
| 2 | 
Defeat the Spectral Warrior. Defeat the Spectral Warrior. The Boss will be at Level 20, so make sure to come prepared! |
Restoring the Sacred Sword
| Step-by-Step Guide | |
|---|---|
| 1 | 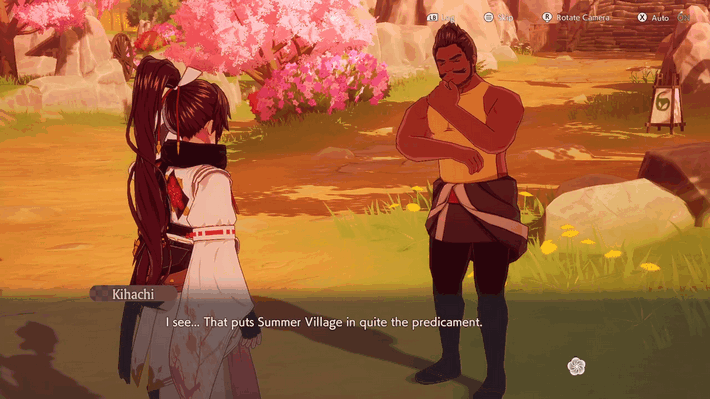
Talk to Kihachi in Spring Village. Return to Spring Village, and talk to the Blacksmith to learn how to restore the Sacred Sword. |
| 2 | 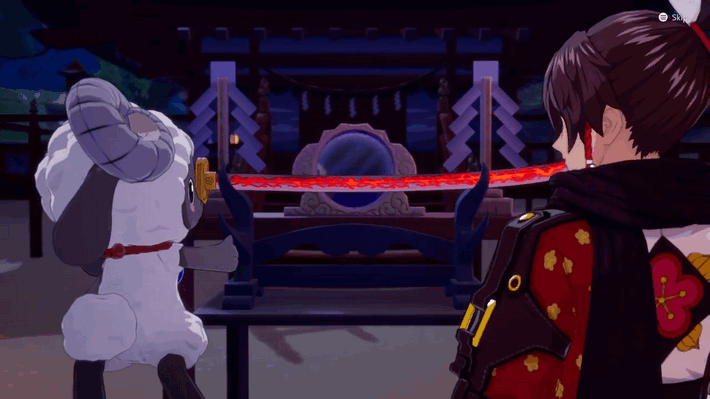
Head to the Summer God Shrine (6 PM - 9 PM). Return to the Summer God Shrine between the required hours. If you do not make it in time, you can return to the Summer God Shrine on the next day instead. |
Monster Attack
| Step-by-Step Guide | |
|---|---|
| 1 | 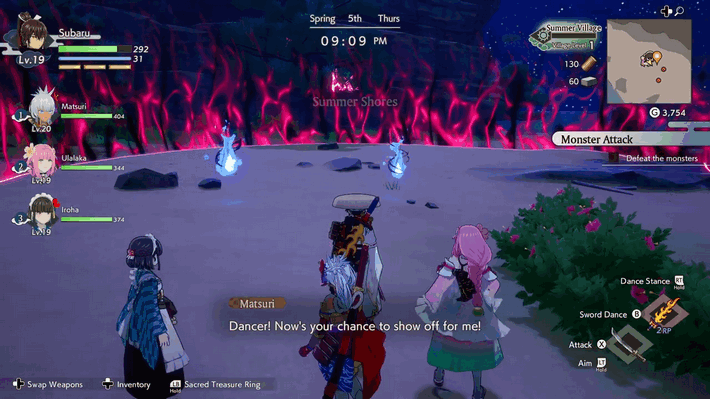
Head to the Summer Shores. After restoring the Sacred Sword, go after Matsuri and fight the monsters outside the village. |
Summer Village Revived 1
| Step-by-Step Guide | |
|---|---|
| 1 | 
Talk to Kusatsu. Talk to Kusatsu to receive a Bath Ticket as a reward. |
| 2 | 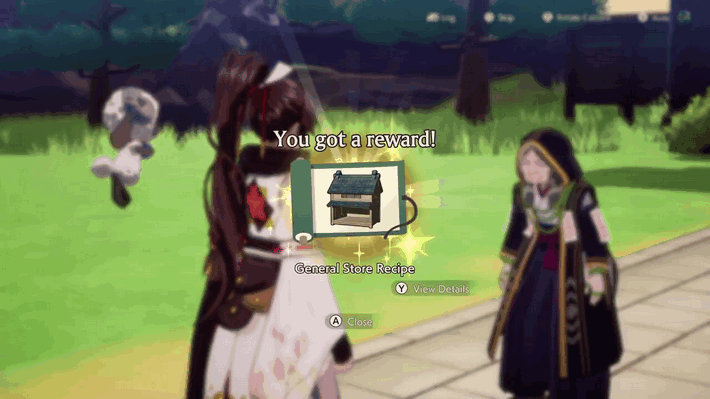
Talk to Hisui. Talk to Hisui to receive General Store and Teahouse Recipes, as well as Ocean Flag decorations. |
Summer Village Revived 2
| Step-by-Step Guide | |
|---|---|
| 1 | Place a general store in Summer Village. Build and place a general store in the Dev Zone of Summer Village. A General Store costs 50 Lumber, 15 Material Stone, and 800 Gold to build. |
| 2 | Place a teahouse in Summer Village. Build and place a teahouse in the Dev Zone of Summer Village. A Teahouse costs 50 Lumber, 15 Material Stone, and 2000 Gold to build |
| 3 | Place ocean flags in Summer Village. Build and place a teahouse in the Dev Zone of Summer Village. |
Summer Village Revived 3
| Step-by-Step Guide | |
|---|---|
| 1 | 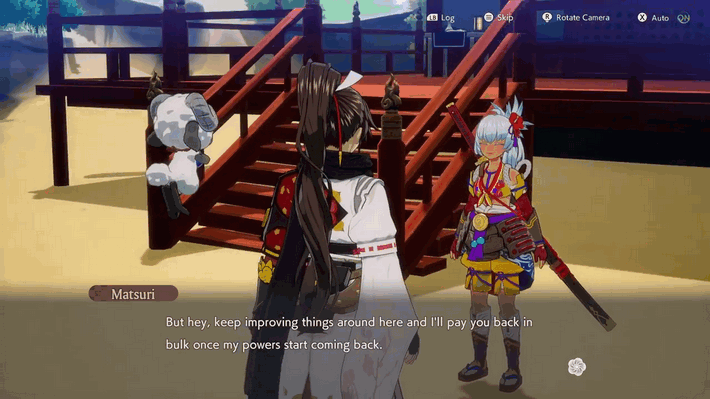
Report back to Matsuri. Talk to Matsuri one last time to finish the Summer Village main quest. |
Searching for Azuma's Gods
| Step-by-Step Guide | |
|---|---|
| 1 | 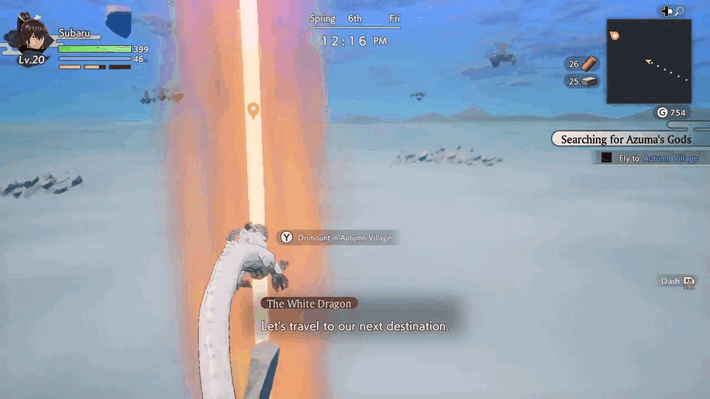
Fly to Autumn Village. Head to Autumn Village, which is indicated by the Orange beacon. |
Autumn Village Main Quests
Info on the God of Autumn
| Step-by-Step Guide | |
|---|---|
| 1 | 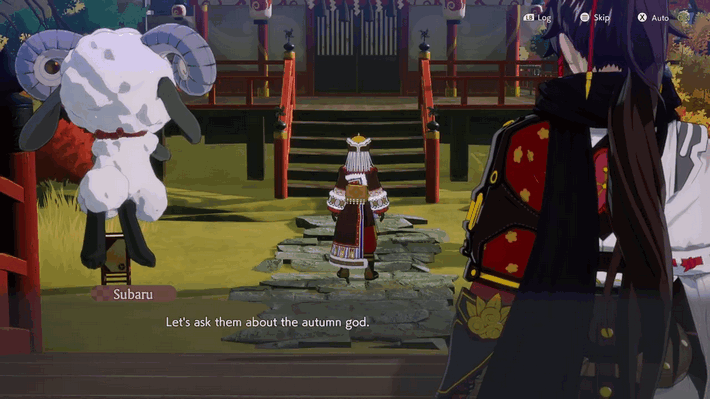
Head to the Autumn God Shrine. After the initial cutscene with the Tanuki, head to the Autumn God Shrine to meet Cuilang. |
Yachiyo's Izakaya
| Step-by-Step Guide | |
|---|---|
| 1 | 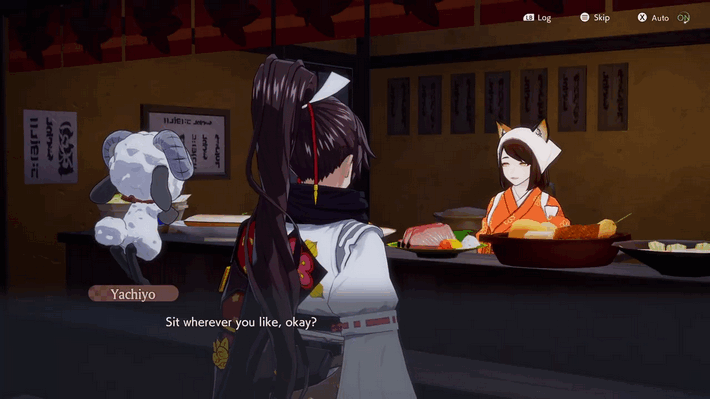
Talk to Yachiyo (7PM-10PM). Talk to Yachiyo between the required hours. You can explore the village and work on the Dev Zones to pass the time. |
Time to Rest
| Step-by-Step Guide | |
|---|---|
| 1 | Head to the Dragon Shrine and sleep. Return to the house via walking or fast travel to end the day. |
Dream Discussions
| Step-by-Step Guide | |
|---|---|
| 1 | 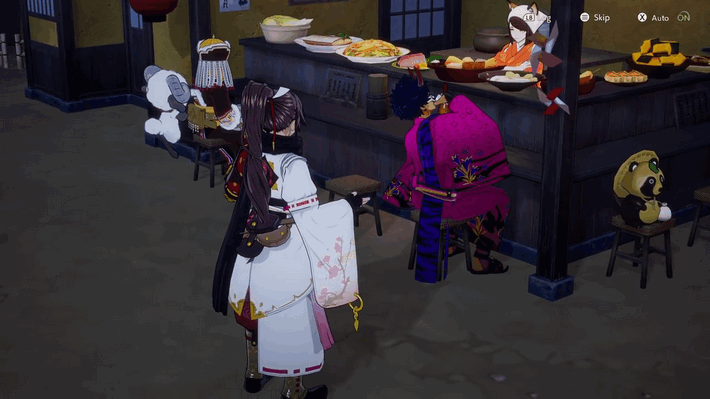
Talk to Kai (7 PM - 10 PM). Talk to Kai during night time to discuss the dream you had. |
Mikoshi Hunt
| Step-by-Step Guide | |
|---|---|
| 1 | 
Head for the Mechanical Maze. Head to Autumn Fields and go towards the quest marker which leads to the Mechanical Maze. |
| 2 | 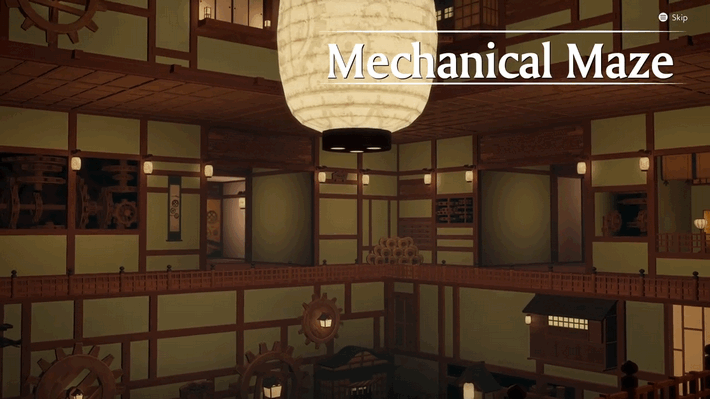
Explore the Mechanical Maze. Explore and fight your way through the Mechanical Maze. Make sure to interact with the mechanisms near doors to open them, allowing you to access different rooms easier. |
| 3 | 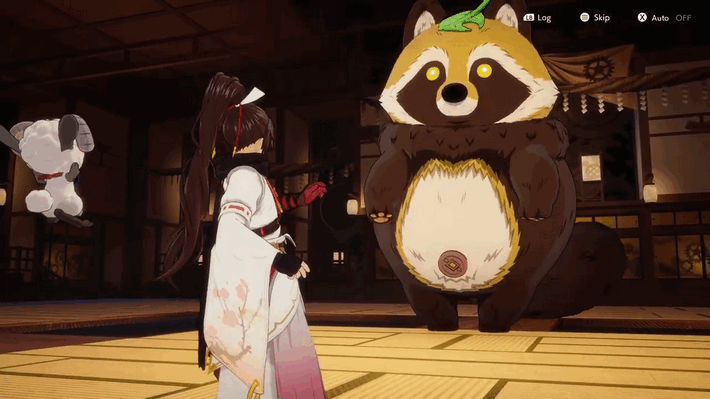
Defeat the Big Boss Tanuki. Defeat the Big Boss Tanuki together with your party. The Tanuki has hard-hitting attacks, but has long cooldowns, so make sure to punish it between its attacks. |
Repairing the Mikoshi 1
| Step-by-Step Guide | |
|---|---|
| 1 | 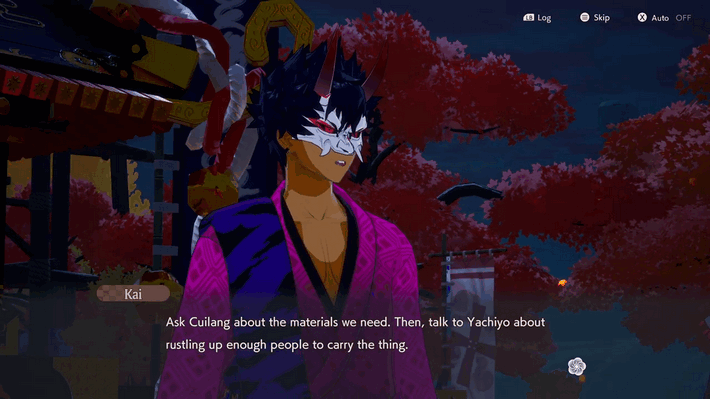
Talk to Kai. After defeating Big Boss Tanuki, a cutscene will ensue about repairing the Mikoshi. |
Repairing the Mikoshi 2
| Step-by-Step Guide | |
|---|---|
| 1 | 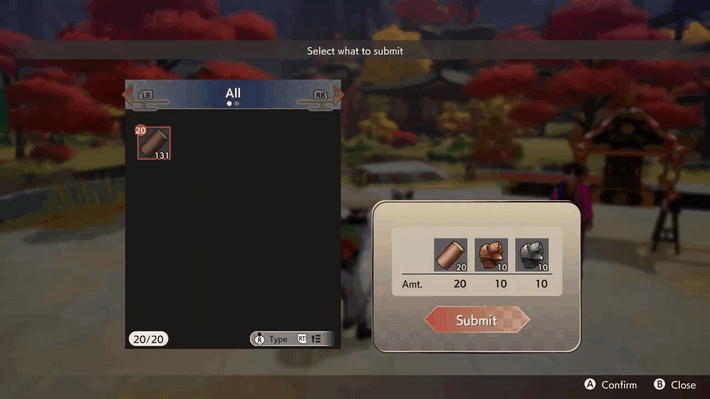
Give Cuilang the mikoshi materials. After the cutscene, give the Materials you received from Kai to Mikoshi. He will need 20 Lumber, 10 Bronze, and 10 Iron. |
Finding Mikoshi Bearers
| Step-by-Step Guide | |
|---|---|
| 1 | 
Increase Autumn Village's Population. To proceed, you must increase Autumn Village's Population to 6. If you have enough villagers from other villages, you can move them to Autumn Village. |
| 2 | 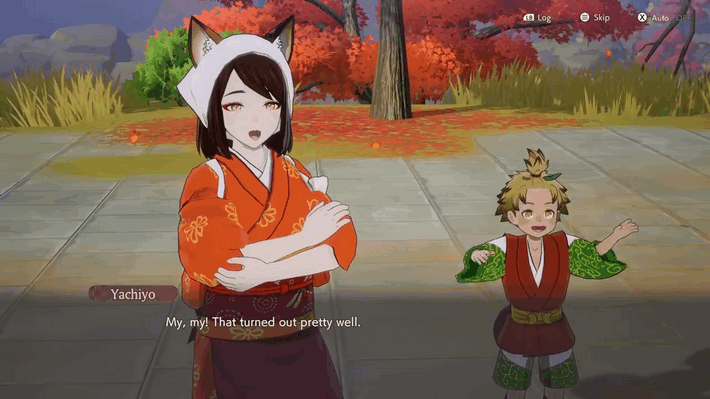
Talk to Yachiyo. After raising the village's population, talk to Yachiyo to witness the restoration of the Mikoshi. |
Time to Rest
| Step-by-Step Guide | |
|---|---|
| 1 | Head to the Dragon Shrine and sleep. Return to the house via walking or fast travel to end the day. |
Make Way for the Mikoshi Melee!
| Step-by-Step Guide | |
|---|---|
| 1 | 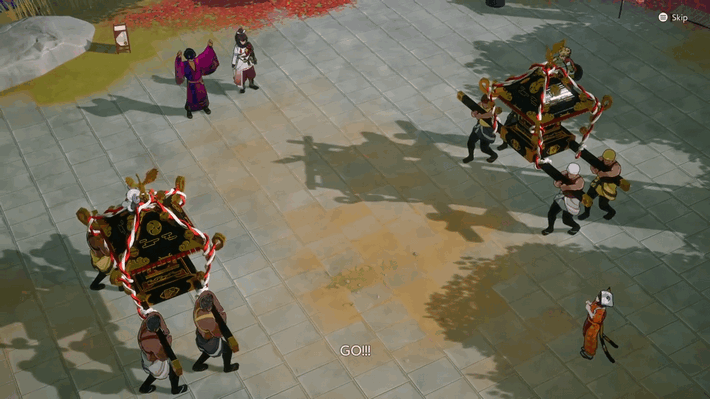 Head to the plaza in Autumn Village (12 PM - 6 PM). Head to the plaza during the afternoon to start the Mikoshi cutscene. |
God of Autumn and Escape Artistry
| Step-by-Step Guide | |
|---|---|
| 1 | Follow the monster to the Autumn Fields. Make your way through the Autumn Fields following the quest marker. Make sure to save your progress by the save statue before approaching the arena. |
| 2 | 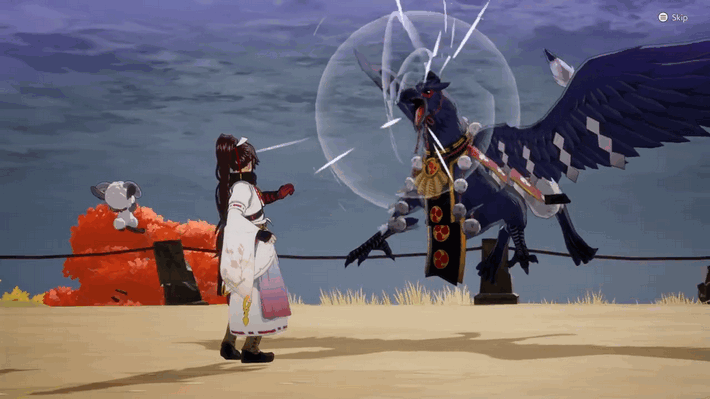
Defeat the Great Storm Tengu. Defeat the Crow Tengu and the Great Storm Tengu. |
Autumn Village Revived 1
| Step-by-Step Guide | |
|---|---|
| 1 | Go to the Autumn Dragon Shrine. After speaking with Kurama, head to the Autumn Dragon Shrine to talk to Yachiyo. |
Monster Bonding
| Step-by-Step Guide | |
|---|---|
| 1 | 
Befriend a Buffamoo. After learning how to befriend monsters from Kurama, head to the Autumn Fields to look for a Buffamoo. |
| 1.1 | 
Gift the Buffamoo Grass or Crops. After making the Buffamoo docile with the Dance of Bonds, gift it Grass or Crops until it is befriended. |
| 2 | 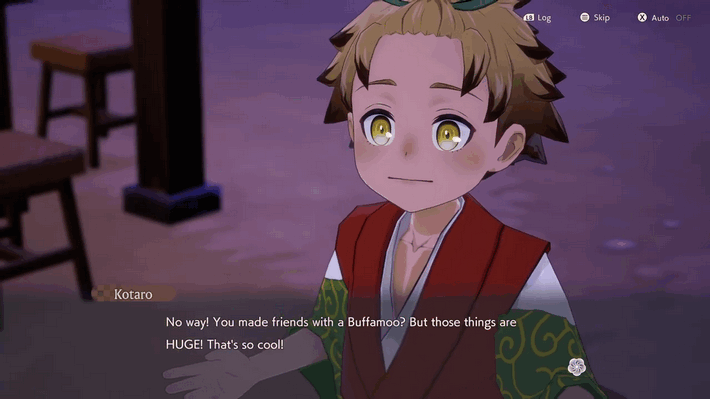
Speak with Kotaro. Talk to Kotaro to let him know you succeeded befriending a Buffamoo, which will finish the quest. |
Autumn Village Revived 2
| Step-by-Step Guide | |
|---|---|
| 1 | 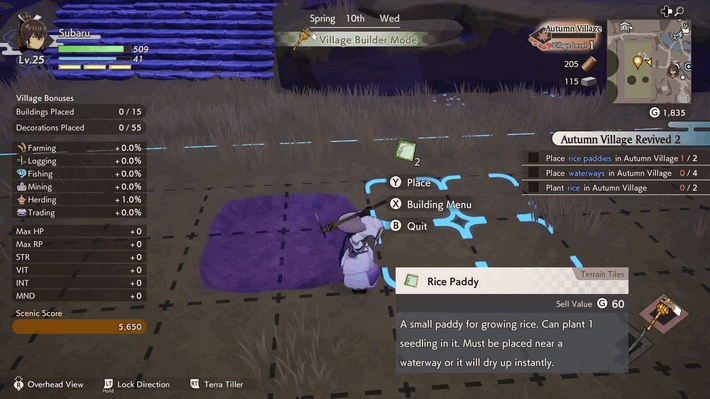
Place rice paddies in Autumn Village. Place 2 Rice Paddies in the Autumn Village Dev Zone. |
| 2 | 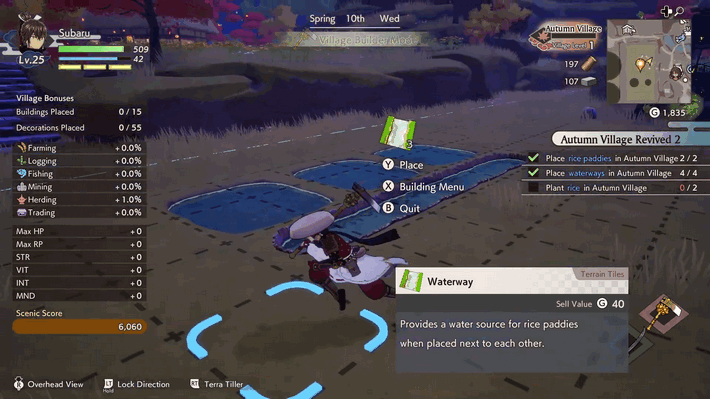
Place waterways in Autumn Village. Place 4 Waterways in the Autumn Village Dev Zone. Make sure that the waterways are adjacent to the rice paddies. |
| 3 | 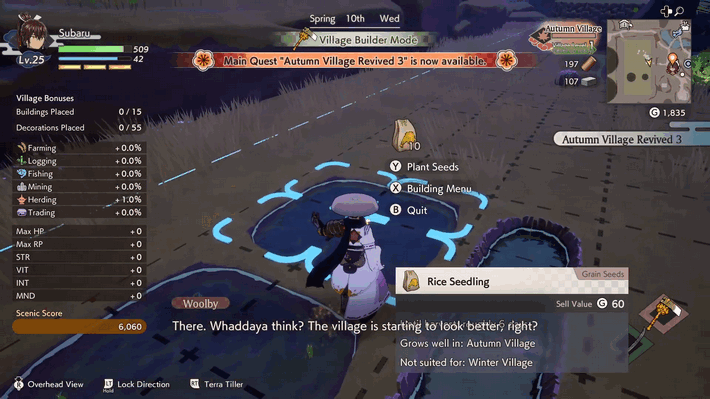
Plant rice in Autumn Village. Plant the rice in the rice paddies. Make sure that the rice paddies are irrigated, with adjacent waterways. |
Autumn Village Revived 3
| Step-by-Step Guide | |
|---|---|
| 1 | 
Report back to Kurama. After setting up the rice fields, return to Kurama to raise the Village Level. |
Searching for Azuma's Gods
| Step-by-Step Guide | |
|---|---|
| 1 | 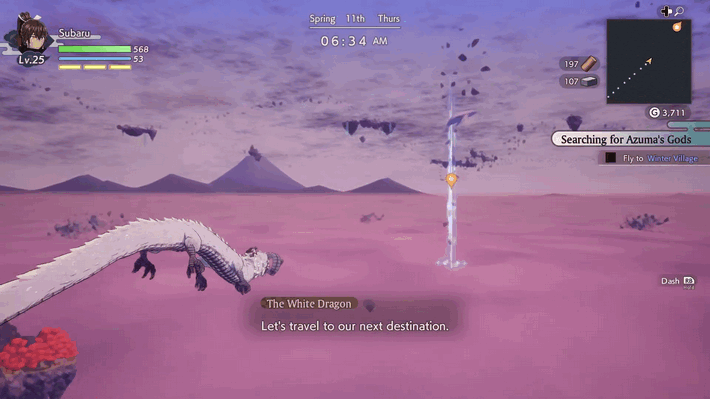
Fly to Winter Village. Head to Winter Village, which is indicated by the Light Blue beacon. |
Winter Village Main Quests
Info on the God of Winter
| Step-by-Step Guide | |
|---|---|
| 1 | 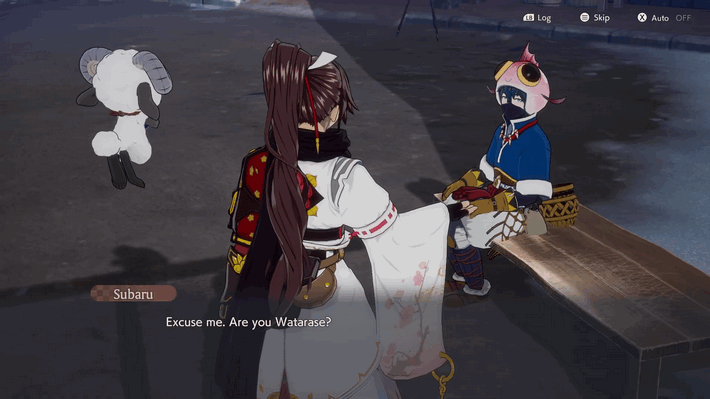
Talk to Watarase. After meeting Pilika, follow the quest marker and inquire about the God of Winter from Watarase. |
Wolves and Waterfalls
| Step-by-Step Guide | |
|---|---|
| 1 | 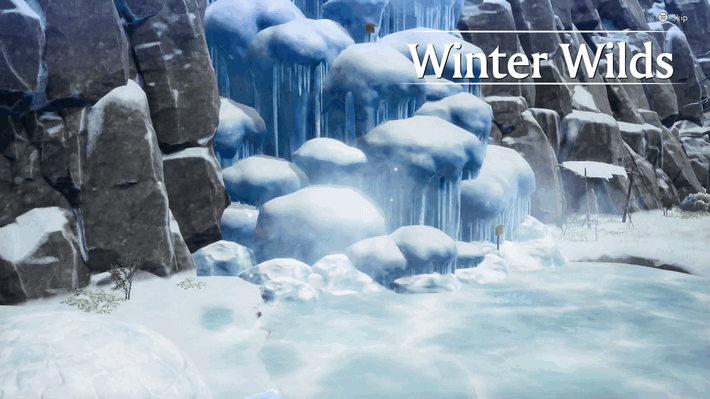
Go to the Winter Wilds waterfall. Leave the town and enter the Winter Wilds and head towards the waterfall. |
| 2 | 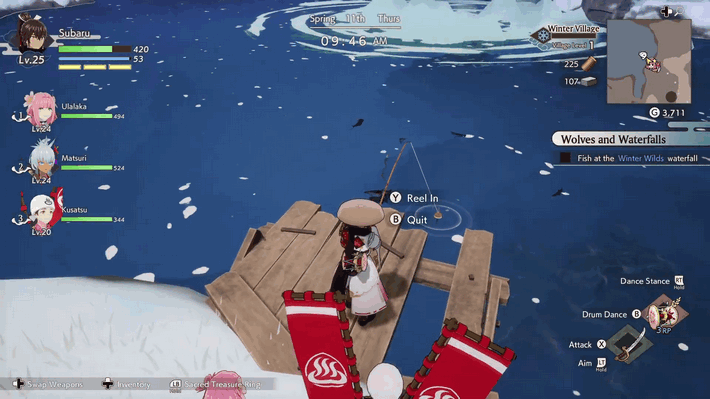
Fish at the Winter Wilds waterfall. Using the Fishing Rod Watarase provided, catch fish from the lake by the waterfall. |
A Present for Watarase
| Step-by-Step Guide | |
|---|---|
| 1 | 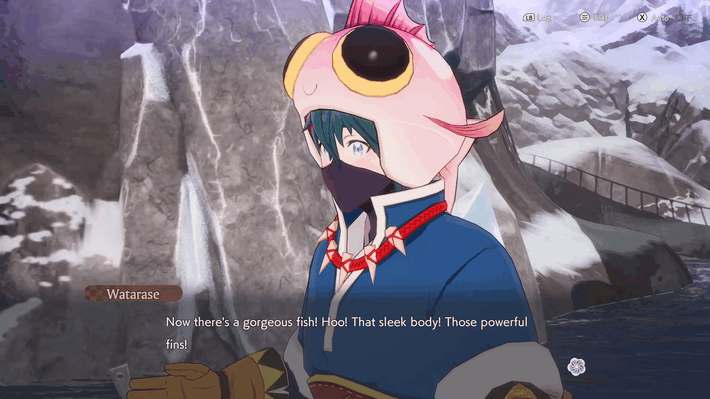
Head to Watarase's house. After rescuing the Woolby, head to Watarase's house back in Winter Village. |
Time to Rest
| Step-by-Step Guide | |
|---|---|
| 1 | Go to the Dragon Shrine and sleep. Head back home by walking or Fast Traveling to the save statue. Interact with your Futon to end the day. |
Wolves and Winter Gods
| Step-by-Step Guide | |
|---|---|
| 1 | 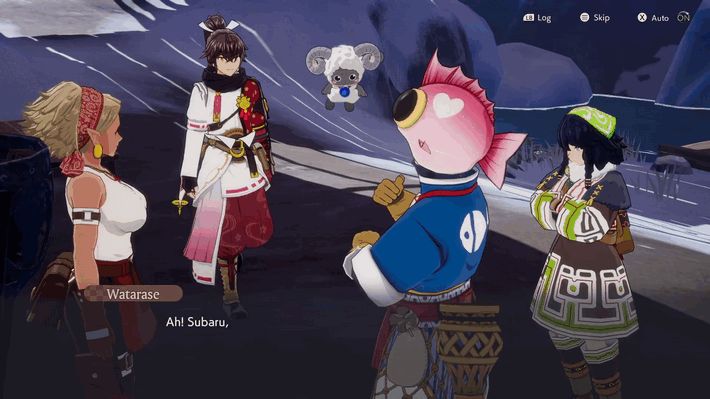 Head to Watarase's house. Return to Watarase's house to discuss your dream. |
Searching for the Winter God
| Step-by-Step Guide | |
|---|---|
| 1 | 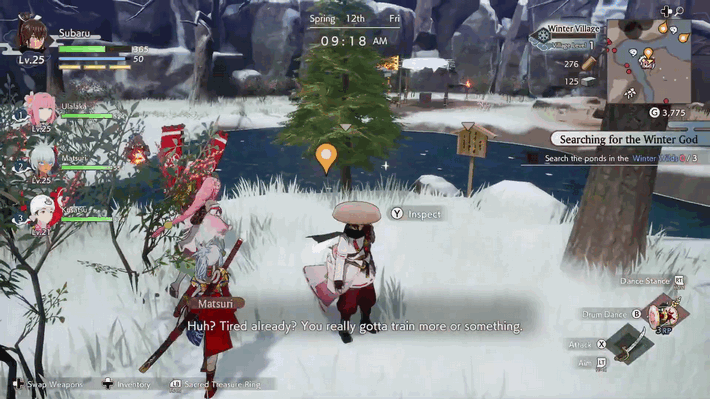
Search the ponds in the Winter Wilds. Head to Winter Wilds and investigate the 3 watering holes. |
One Last Watering Hole
| Step-by-Step Guide | |
|---|---|
| 1 | 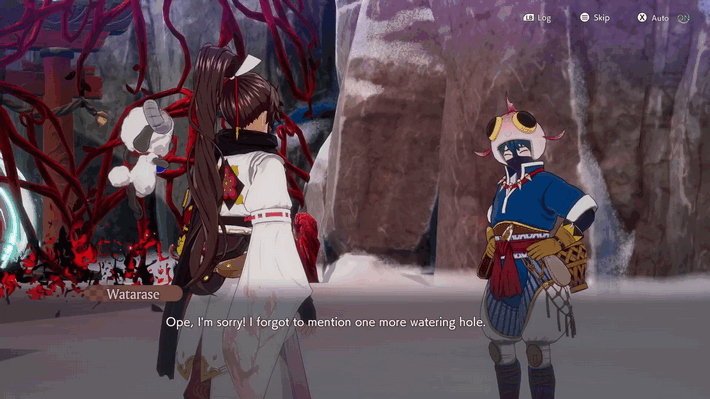
Head toward Watarase's voice. Follow the quest marker towards Watarase by riding the wind currents using the Parasol. |
| 2 | 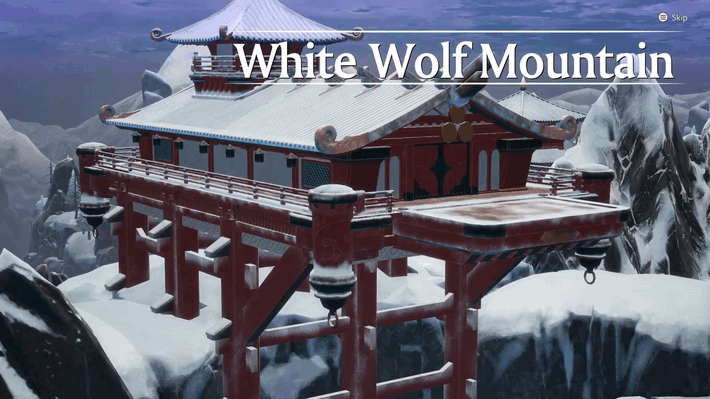
Head to White Wolf Mountain. Enter the gate into White Wolf Mountain. |
| 3 | Explore White Wolf Mountain. Explore White Wolf Mountain, gather materials, and earn EXP before heading to the quest marker. |
The White Wolf's Madness
| Step-by-Step Guide | |
|---|---|
| 1 | 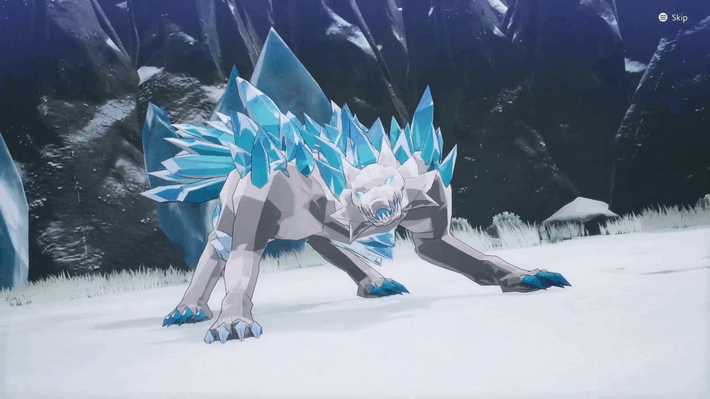
Defeat the White Wolf. Together with your party, defeat the White Wolf. The White Wolf and its Snow Wolf summons will all be Level 30. |
Winter Village Revived 1
| Step-by-Step Guide | |
|---|---|
| 1 | 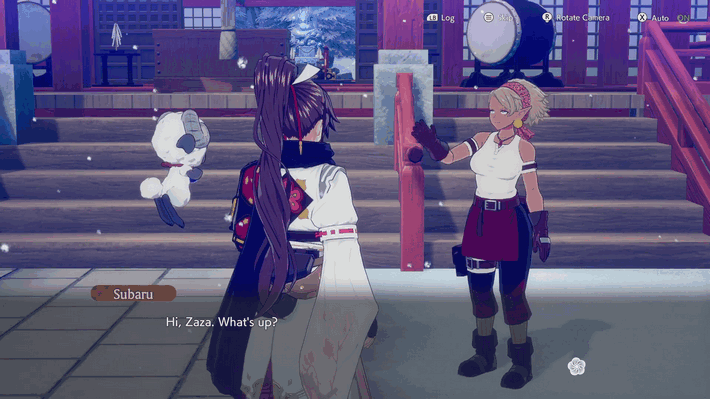
Go to the Winter Dragon Shrine. Head to the Winter Dragon Shrine and talk to Zaza to learn about Magatamas. |
Winter Village Revived 2
| Step-by-Step Guide | |
|---|---|
| 1 | 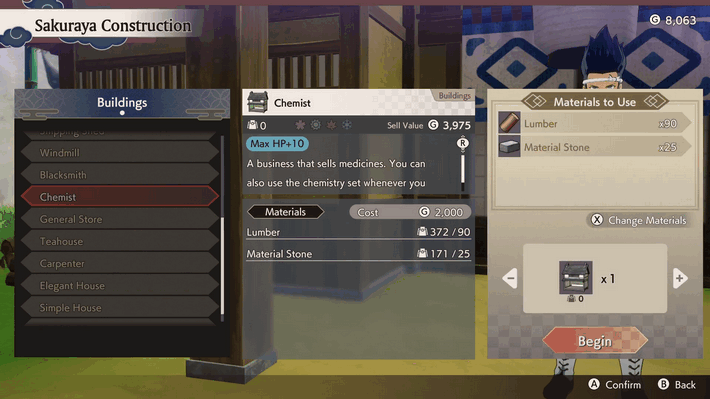
Add a chemist to Winter Village. Construct a Chemist building and place it in the Winter Village Dev Zone. |
| 2 | 
Add a simple house to Winter Village. Construct a Simple House building and place it in the Winter Village Dev Zone. |
| 3 | 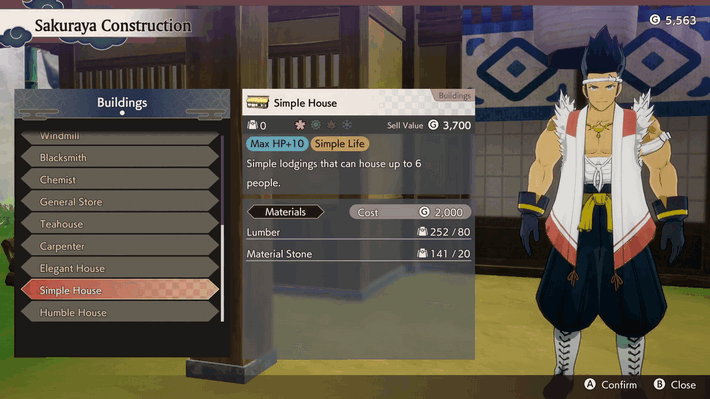
Add an udon cart to Winter Village. Construct a Udon Cart building and place it in the Winter Village Dev Zone. |
Winter Village Revived 3
| Step-by-Step Guide | |
|---|---|
| 1 | 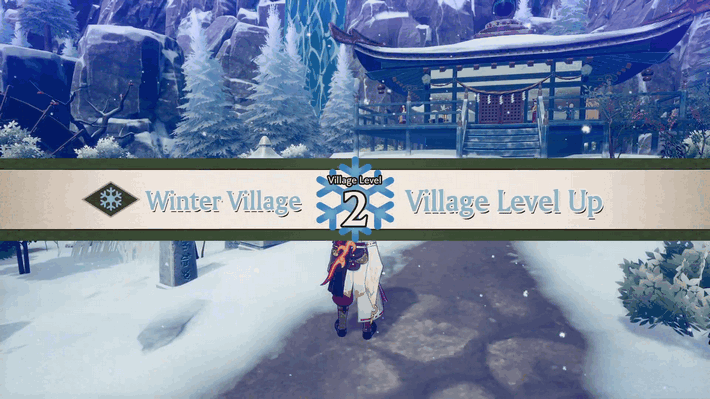
Report to Fubuki. Speak with Fubuki to raise the Village Level to 2. |
Time to Rest
| Step-by-Step Guide | |
|---|---|
| 1 | Go to the Dragon Shrine and sleep. Head back home by walking or Fast Traveling to the save statue. Interact with your Futon to end the day. |
Matsuri's Summons
| Step-by-Step Guide | |
|---|---|
| 1 | 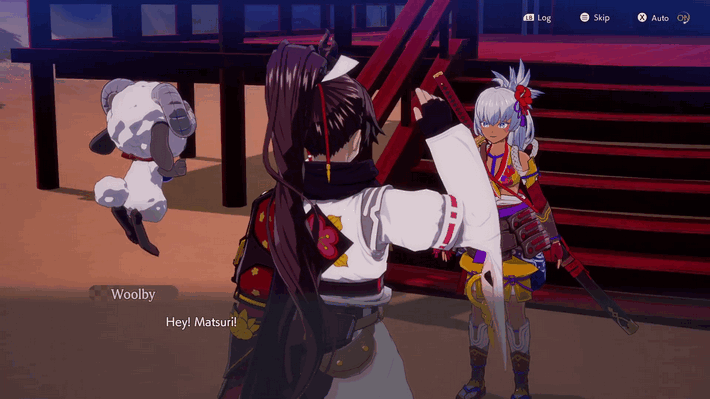 Meet with Matsuri. Head to the Summer God Shrine and speak with Matsuri. After this interaction, you can now have up to 6 Party members. |
The Skies of Azuma Main Quests
The Kagura Shrines
| Step-by-Step Guide | |
|---|---|
| 1 | 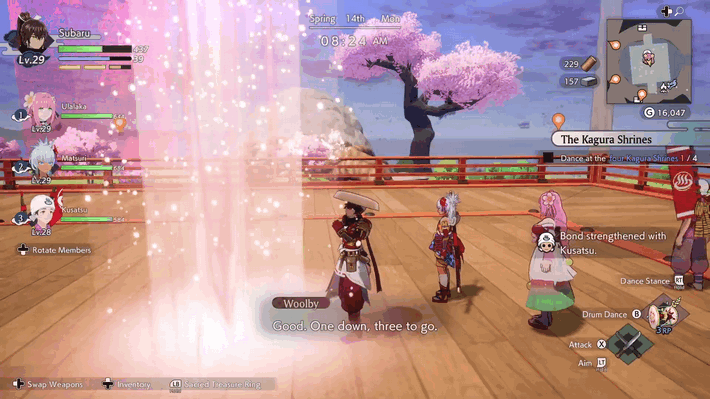
Dance at the Kagura Shrines. No Quest Marker will appear while you are in any of the 4 Villages. Head to the Skies of Azuma and visit the Kagura Shrines in any order. |
| 1.1 | 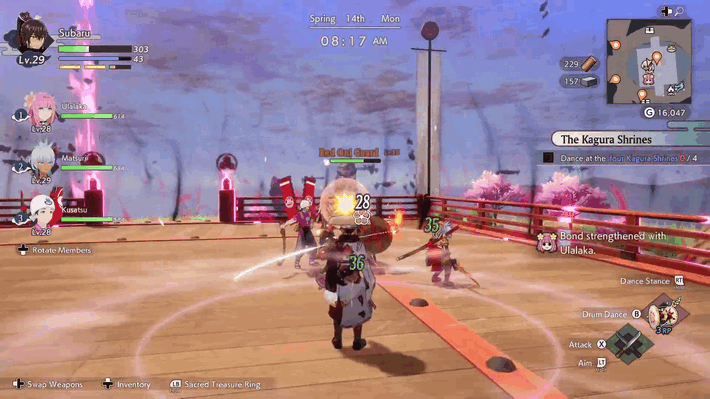
Defeat Enemies at the Kagura Shrines. Once you reach the Kagura Shrines, you will be faced with Level 35 enemies. Make sure your level, equipment, and party members are all optimized to face off against stronger enemies! |
To the Outside World
| Step-by-Step Guide | |
|---|---|
| 1 | Head beyond the barrier. After performing the dance at the 4 Kagura Shrines, follow the quest marker outside of the barrier. |
| 2 | Defeat the black dragon. Once you arrive at the quest marker, defeat the Black Dragon boss. Once the black dragon reaches 25% HP, the battle will end. |
The First Meeting of the Gods
| Step-by-Step Guide | |
|---|---|
| 1 | Head to Iroha's Teahouse (6 AM - 10 PM). Head to Iroha's Teahouse during the designated time to attend the meeting of the Gods from the 4 Villages. |
Rebuilding Azuma's Villages
| Step-by-Step Guide | |
|---|---|
| 1 | Raise Summer Village's Level to 3. Complete Village Quests to raise Summer Village's level to 3 and restore Matsuri's Divinity. |
| 2 | Raise Autumn Village's Level to 3. Complete Village Quests to raise Autumn Village's level to 3 and restore Kurama's Divinity. |
| 3 | Raise Winter Village's Level to 3. Complete Village Quests to raise Winter Village's level to 3 and restore Fubuki's Divinity. |
Village Level Effects and How to Increase
Fubuki's Summons
| Step-by-Step Guide | |
|---|---|
| 1 | 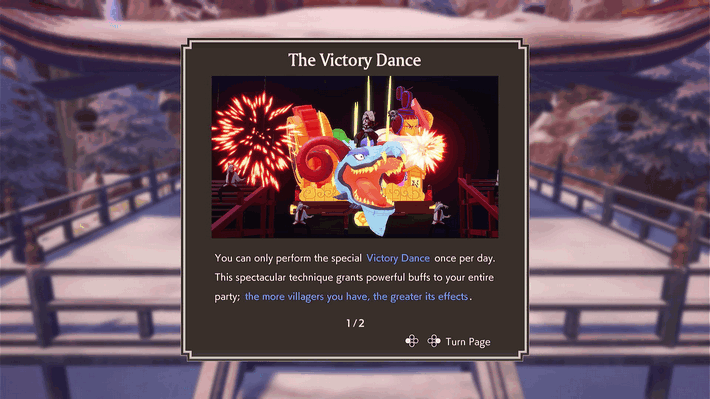
Talk to Fubuki. Head to the Winter Village and speak with Fubuki to learn the Victory Dance. You can perform this dance once per day to buff your party. |
The Astral Shrine
| Step-by-Step Guide | |
|---|---|
| 1 | 
Search for the Astral Shrines. Head to the Forgotten Grove and search for the Astral Shrines. During this time, Murasame will automatically be added to your party. You can head to any village to change your party if you do not wish to include Murasame in your party. |
The Corpse Tree
| Step-by-Step Guide | |
|---|---|
| 1 | 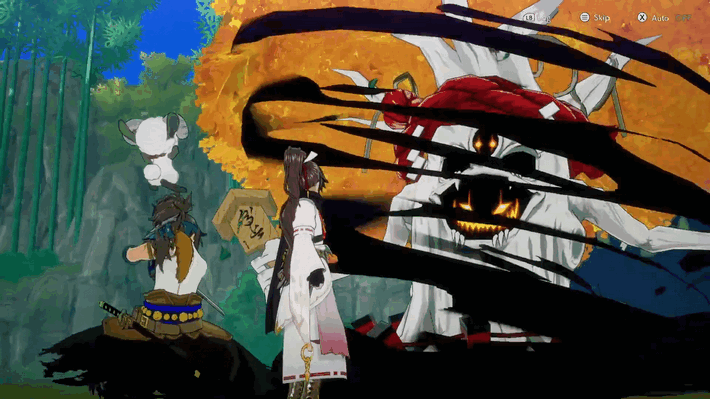
Defeat the Corpse Tree. Together with your party, defeat the Corpse Tree. The Corpse Tree is at Level 40, so make sure to come prepared! |
Back to Summer Village
| Step-by-Step Guide | |
|---|---|
| 1 | 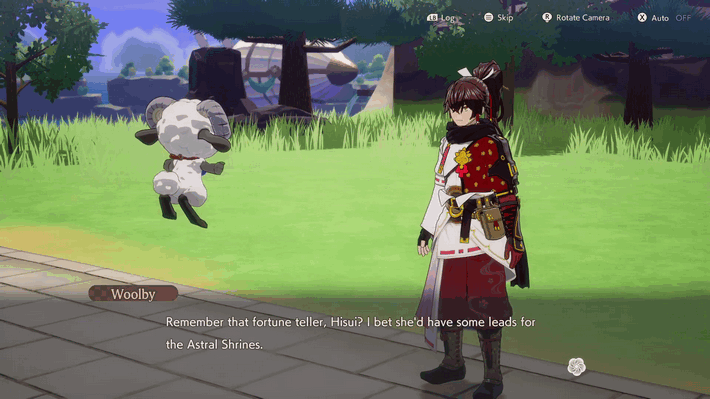
Go to the Summer Dragon Shrine. Go back to the Summer Dragon Shrine to look for leads regarding the Astral Shrines. |
Searching for Astral Shrines
| Step-by-Step Guide | |
|---|---|
| 1 | 
Head to Fortune's Favor (6 AM - 6 PM). Head to Fortune's Favor to talk to Hisui and learn more about the Astral Shrines. |
The Astral Shrine
| Step-by-Step Guide | |
|---|---|
| 1 | 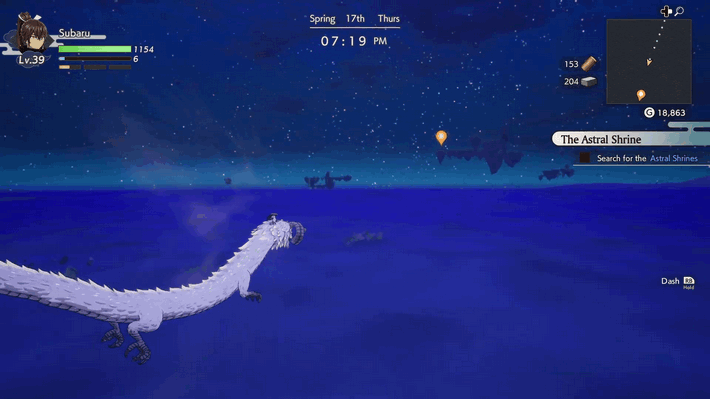
Take to the Skies. Return to the Skies of Azuma, and head towards the quest marker. |
| 2 | 
Search for the Astral Shrines. Return to the Skies and follow the quest marker towards Gale Pass. |
The Grudge Knight
| Step-by-Step Guide | |
|---|---|
| 1 | 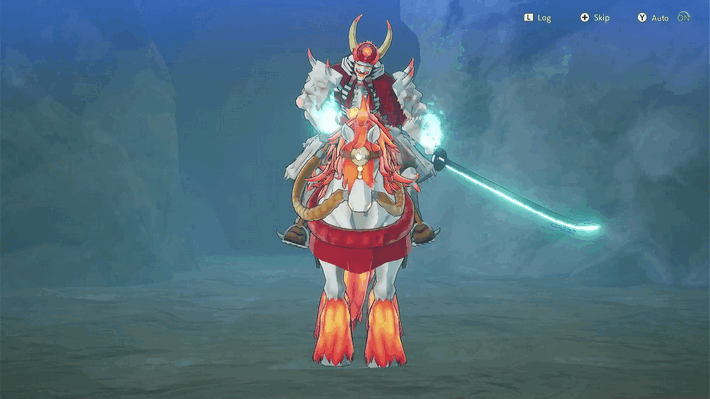
Defeat the Grudge Knight. Together with your party, defeat the Grudge Knight. The Grudge Knight is at Level 45, so make sure you and your party are well prepared! |
Back to Autumn Village
| Step-by-Step Guide | |
|---|---|
| 1 | Go to the Autumn Dragon Shrine. Go back to the Autumn Dragon Shrine to look for leads regarding the Astral Shrines. |
Kotaro's Request
| Step-by-Step Guide | |
|---|---|
| 1 | 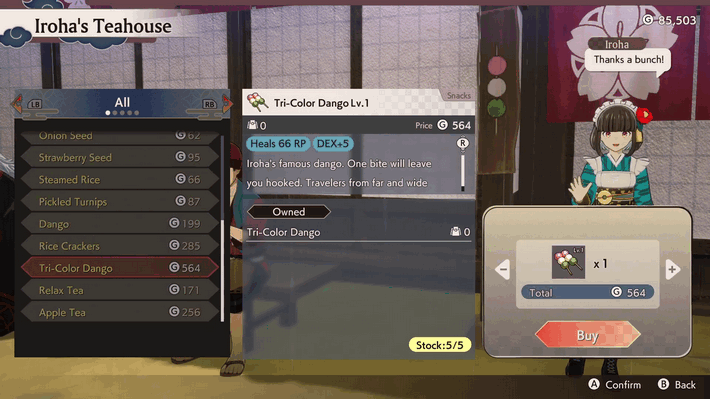
Acquire a tri-color dango for Kotaro. You can either cook a Tri-Color Dango, or purchase from Iroha. |
| 2 | 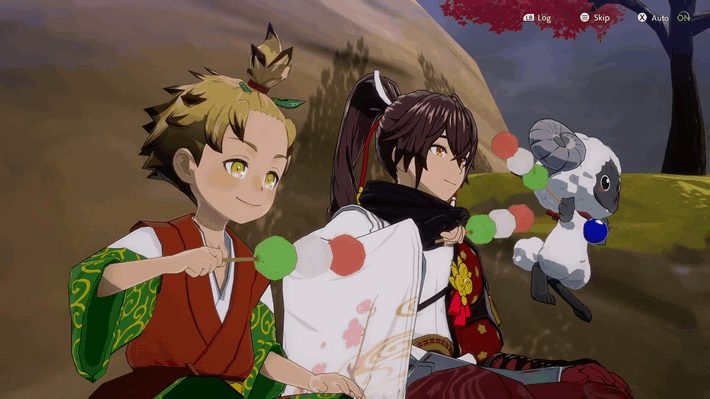
Return to Kotaro. Return to Kotaro and give him the Tri-Color Dango to start the cutscene. |
Searching for Astral Shrines
| Step-by-Step Guide | |
|---|---|
| 1 | Take to the sky. Return to any of the islands in the Skies of Azuma. |
| 2 | 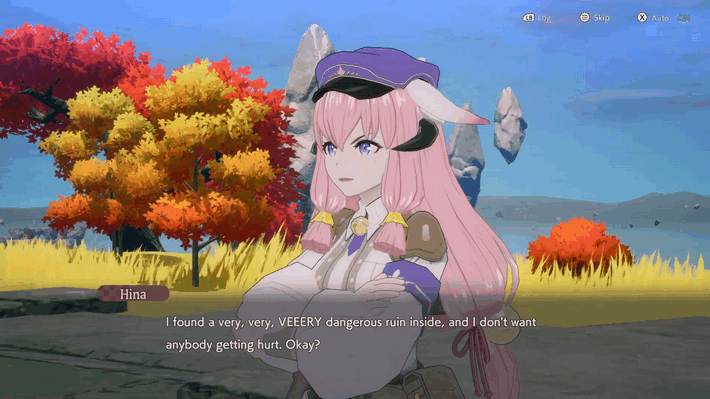
Search for the Astral Shrines. Follow the quest marker towards Prisoner Island to trigger a cutscene with Hina. |
Nine-Tails
| Step-by-Step Guide | |
|---|---|
| 1 | 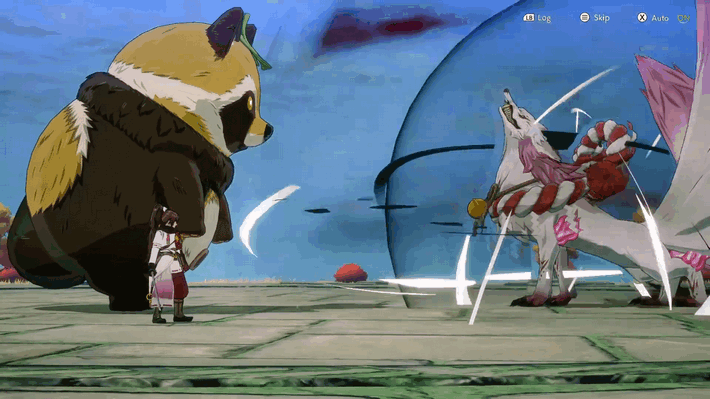 Defeat Nine-Tails. Defeat the Level 45 Nine-Tails. Capitalize on it's weakness to Long Swords to inflict stagger faster! |
The Astral Shrine
| Step-by-Step Guide | |
|---|---|
| 1 | 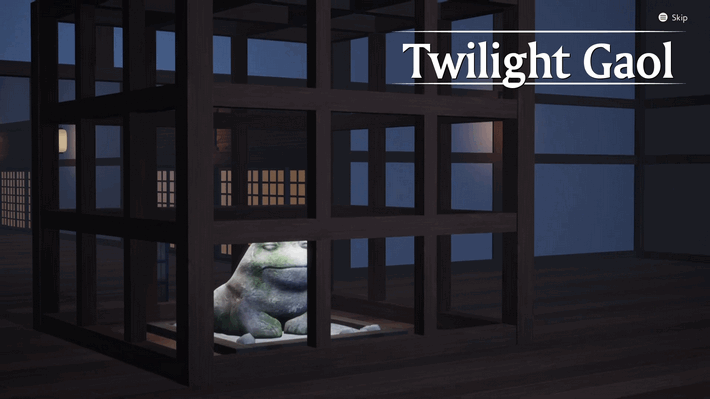 Search for the Astral Shrines. Enter the Torii Gate towards Twilight Gaol. Make your way through the labyrinth to find the third Astral Shrine.
 |
Back to Winter Village
| Step-by-Step Guide | |
|---|---|
| 1 | Go to the Winter Dragon Shrine. Go back to the Winter Dragon Shrine to look for leads regarding the Astral Shrines. |
Searching for Astral Shrines
| Step-by-Step Guide | |
|---|---|
| 1 | Take to the sky. Return to any of the islands in the Skies of Azuma. |
| 2 | 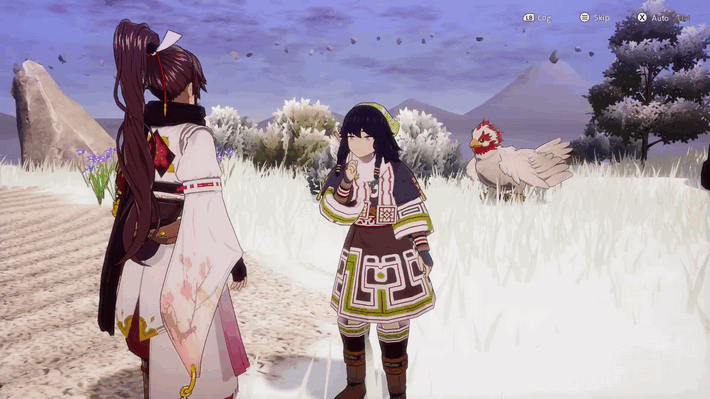
Search for the Astral Shrines. Follow the quest marker to trigger a cutscene with Pilika. Continue further to meet with Ikaruga. |
The Astronomer
| Step-by-Step Guide | |
|---|---|
| 1 | 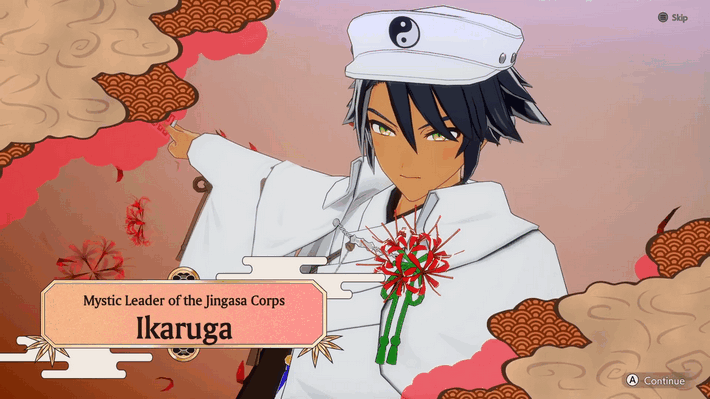
Defeat Ikaruga. Defeat the Level 50 Ikaruga and the Jingasa Corps. Capitalize on it's weakness to Wind Attacks to inflict stagger faster! |
The Astral Shrine
| Step-by-Step Guide | |
|---|---|
| 1 |  Search for the Astral Shrines. Enter the Torii Gate towards Frostfang Cavern. Make your way through the labyrinth to find the fourth Astral Shrine. |
Time to Rest
| Step-by-Step Guide | |
|---|---|
| 1 | Go to the Dragon Shrine and sleep. Head back home by walking or Fast Traveling to the save statue. Interact with your Futon to end the day. |
The Second Meeting of the Gods
| Step-by-Step Guide | |
|---|---|
| 1 |  Head to Yachiyo's Izakaya (5 PM - 11 PM). Head to Yachiyo's Izakaya during the afternoon to attend the second meeting of the Gods, as instructed by Kurama. |
The Valiant Herald of Rebellion
| Step-by-Step Guide | |
|---|---|
| 1 | 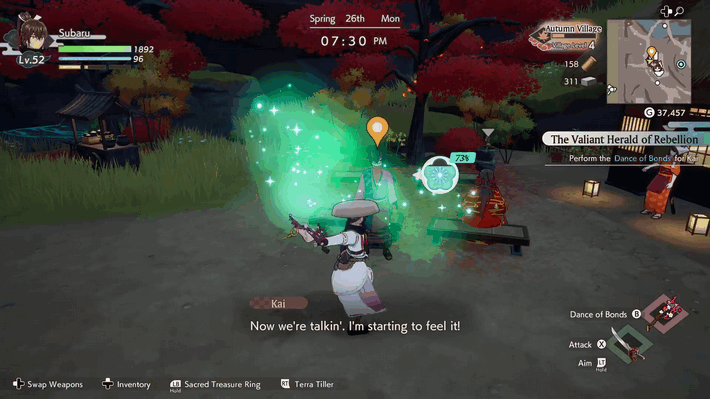 Perform the Dance of Bonds for Kai. Head to Kai in front of the Izakaya and perform the Dance of Bonds .
 |
Open the Demon Gate!
| Step-by-Step Guide | |
|---|---|
| 1 | Take to the Sky. Head to any of the islands in the Skies of Azuma . |
| 2 | 
Head to the Demon Gate. Follow the quest marker to trigger a cutscene with Kai. |
| 3 | 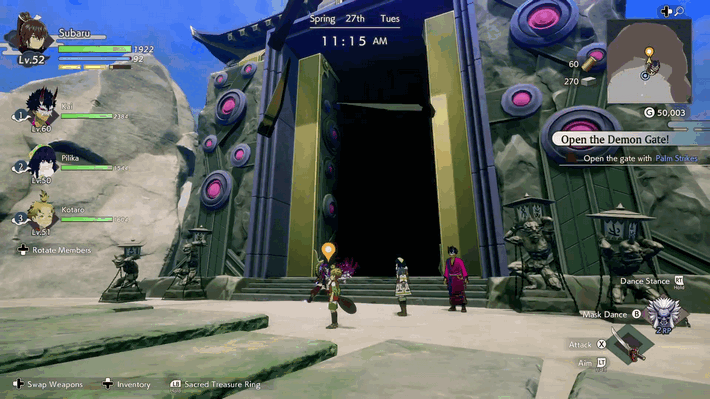
Open the Gate with Palm Strikes. With the newly acquired sacred treasure, perform the Mask Dance to open the gate. |
Gatekeepers of the Underworld
| Step-by-Step Guide | |
|---|---|
| 1 |  Defeat Gozuki and Mezuki. Defeat both Gozuki and Mezuki, who are both Level 55 Bosses.
 |
The Underworld Main Quests
| All Underworld Main Quests | |
|---|---|
| To Devil's Bluff! | The Oni Hunter's Band of Buds |
| Settling the Score with Lord Ura | Rebuilding Azuma's Villages |
| Time to Rest | - |
To Devil's Bluff!
| Step-by-Step Guide | |
|---|---|
| 1 | 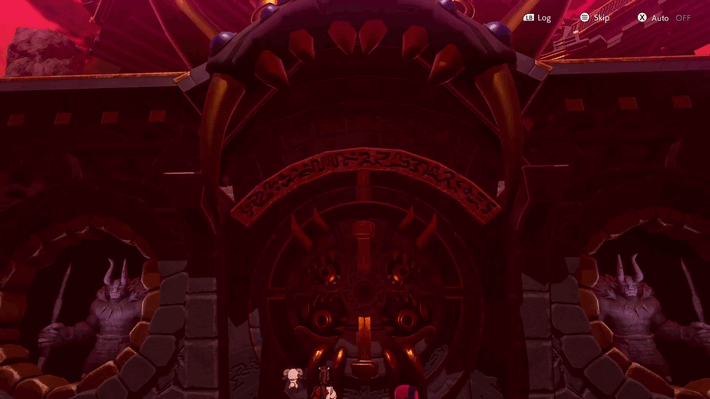
Head to Devil's Bluff. Make your way through the Underworld and head to Devil's Bluff. Make sure to open chests and shrines along the way to acquire new recipes. |
The Oni Hunter's Band of Buds
| Step-by-Step Guide | |
|---|---|
| 1 | Add a bird to your party. With Kurama's alternate form being a Tengu, add Kurama to your party to count as the required bird. |
| 2 | Add a dog to your party. With Fubuki's alternate form being a Wolf, add Fubuki to your party to count as the required dog. |
| 3 | 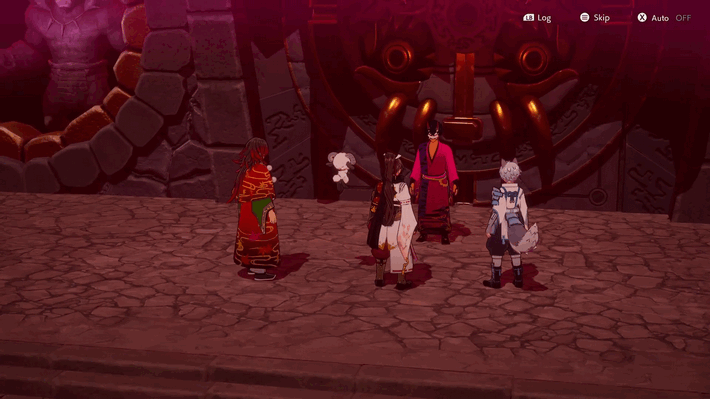
Talk to Kai. With the required party members met, talk to Kai to enter Devil's Bluff Tower. |
Settling the Score with Lord Ura
| Step-by-Step Guide | |
|---|---|
| 1 | 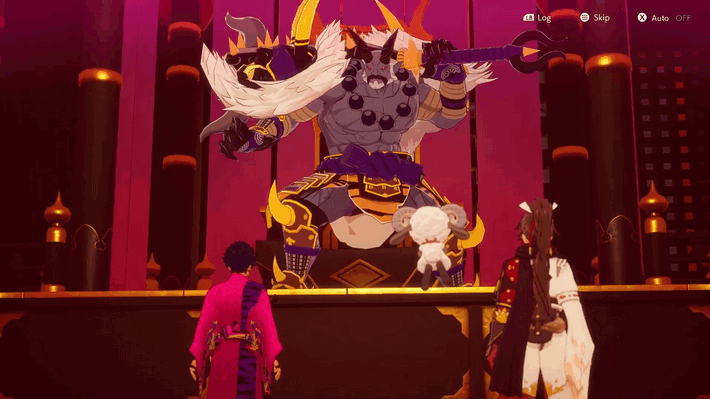
Head to Devil's Bluff Tower. Follow the quest marker towards the middle of the arena to trigger the cutscene with Lord Ura. |
| 2 | 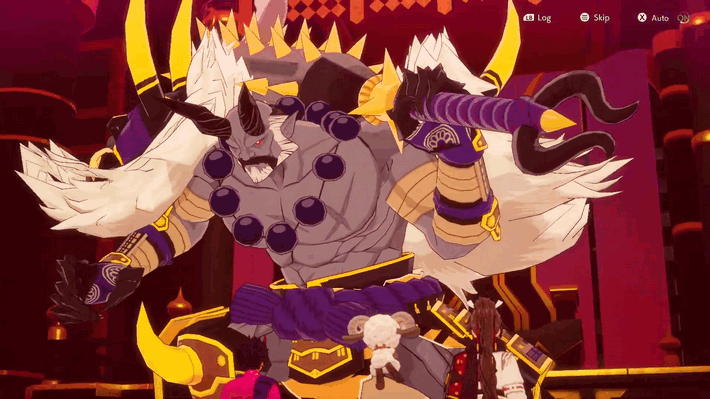
Defeat Lord Ura. Defeat the Level 60 Lord Ura. During this fight, Kai will also join your party at Level 60. |
Time to Rest
| Step-by-Step Guide | |
|---|---|
| 1 | Go to the Dragon Shrine and sleep. Head back home by walking or Fast Traveling to the save statue. Interact with your Futon to end the day. |
The Heavenly Realm Main Quests
The God of the Heavens in Hiding
| Step-by-Step Guide | |
|---|---|
| 1 | Take to the sky. Head back to any of the islands in the Skies of Azuma to find the next quest marker. |
| 2 | 
Head to the Heavenly Gate. Follow Kai towards the Heavenly Gate to unlock the next area. |
| 3 | 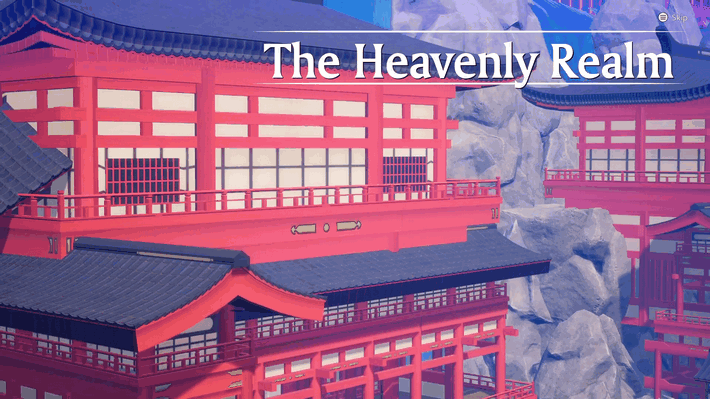
Explore the Heavenly Realm. Enter the gate and explore the Heavenly Realm. Once inside, equip the Sacred Staff to reveal the unseen walls and floors. |
Time to Rest
| Step-by-Step Guide | |
|---|---|
| 1 | Go to the Dragon Shrine and sleep. Head back home by walking or Fast Traveling to the save statue. Interact with your Futon to end the day. |
Preparing to Party 1
| Step-by-Step Guide | |
|---|---|
| 1 | 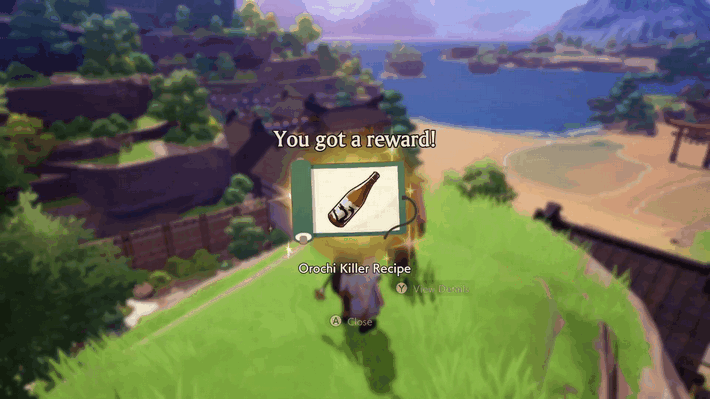
Talk to Kai. Talk to Kai in Summer Village to receive the Orochi Killer recipe. |
| 2 | 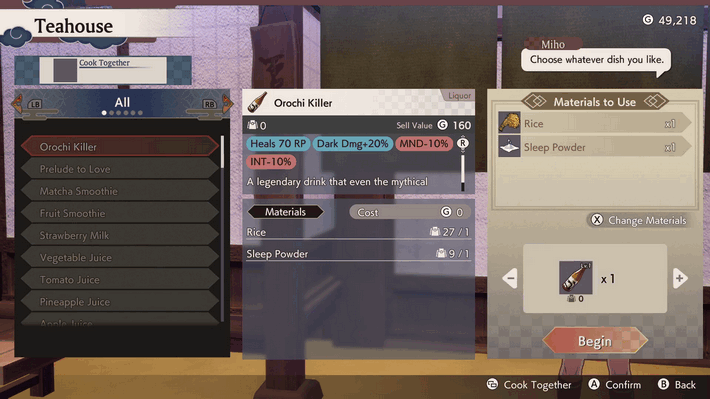
Give Kai an Orochi Killer. Cook the Orochi Killer using Rice and Sleep Powder, and give it to Kai. |
| 3 | 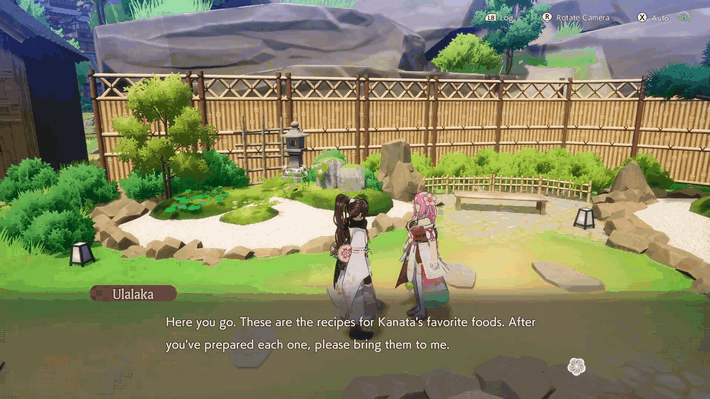
Talk to Ulalaka. Talk to Ulalaka to receive the recipes for Kanata's favorite food. |
Preparing to Party 2
| Step-by-Step Guide | |
|---|---|
| 1 | 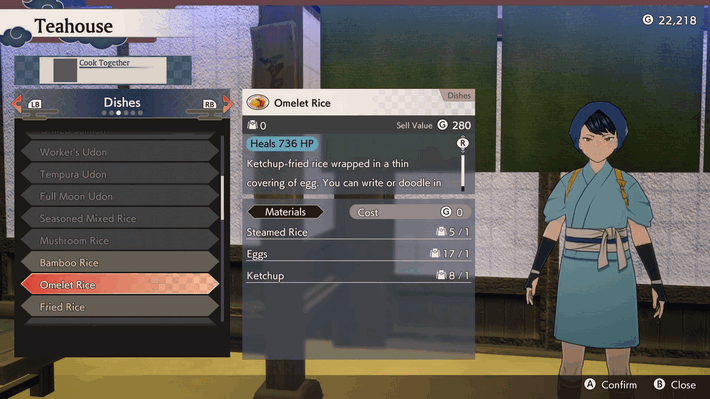
Give Ulalaka an omelet rice. Cook or buy an Omelet Rice to give to Ulalaka. |
| 2 | 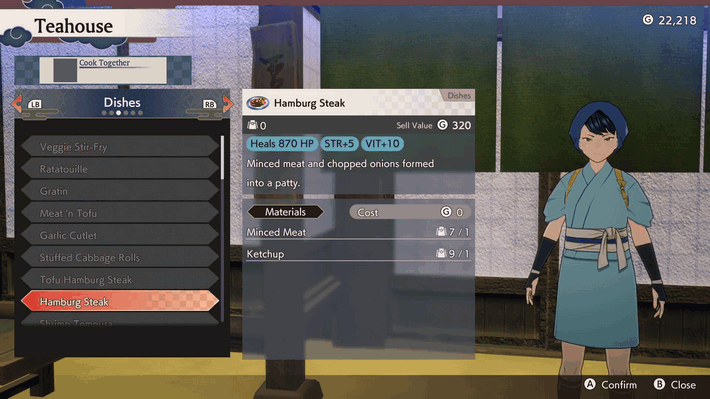
Give Ulalaka a Hamburg steak. Cook or buy a Hamburg steak to give to Ulalaka. |
| 3 | Give Ulalaka the handmade gratin. Cook or buy a handmade gratin to give to Ulalaka. |
A Heavenly Party
| Step-by-Step Guide | |
|---|---|
| 1 |  Talk to Matsuri. Talk to Matsuri about the party preparations. |
| 2 | Increase Summer Village's population. Upon Matsuri's request, increase Summer Village's population to 14. |
| 3 | 
Talk to Matsuri (7 PM - 11 PM). Talk to Matsuri during the evening to begin the festivities. |
Breaking the Barrier
| Step-by-Step Guide | |
|---|---|
| 1 | Take to the sky. Head to any of the sky islands to reveal the quest marker. During this quest, Ulalaka, Fubuki, Matsuri, Kanata, Kai, and Kurama cannot be added to the party. |
| 2 | 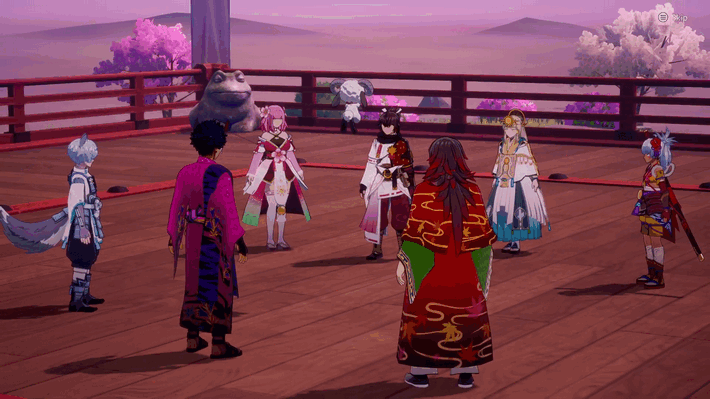
Head to the Spring Kagura Shrine. Meet with the rest of the Guardians at the Kagura Shrine to break the barrier. |
The Black Dragon and Her Rider
| Step-by-Step Guide | |
|---|---|
| 1 |  Head to the epicenter. Head to any of the sky islands to reveal the quest marker. During this quest, Ulalaka, Fubuki, Matsuri, Kanata, Kai, and Kurama cannot be added to the party. |
| 2 | 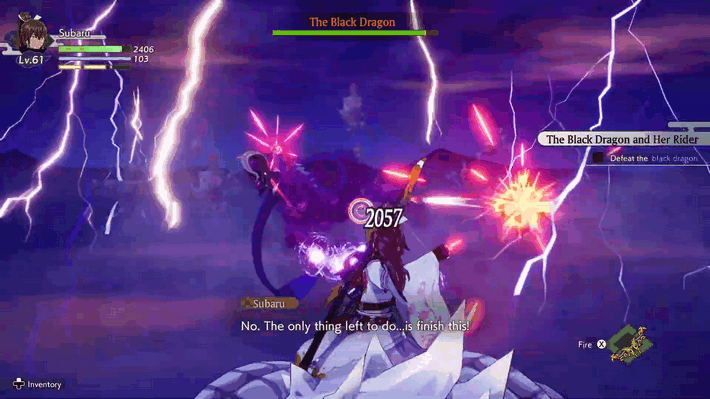
Defeat the black dragon. Fight the black dragon a second time. Use your bow attacks to attack the Black Dragon and the rider. |
| 3 | 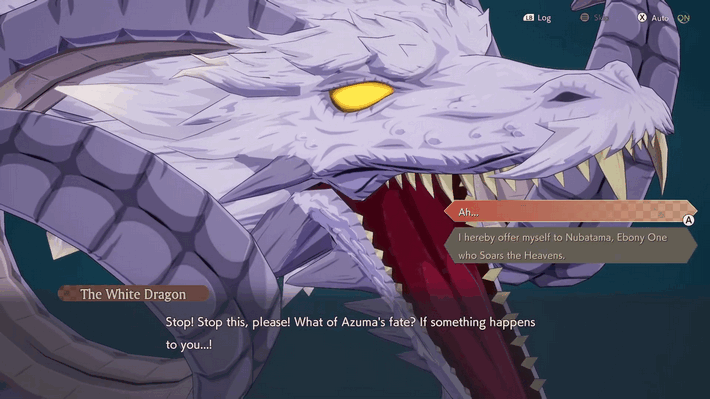
Choose what to sacrifice. During this part, your dialogue choice will matter. Choosing not to sacrifice anything results in your counterpart's death, and sacrificing yourself will give you the prompt to sacrifice something of equal value. |
Time to Rest
| Step-by-Step Guide | |
|---|---|
| 1 | Go to the Dragon Shrine and sleep. Head back home by walking or Fast Traveling to the save statue. Interact with your Futon to end the day. |
Holy Shrines Main Quests
Fubuki's Request
| Step-by-Step Guide | |
|---|---|
| 1 | Take to the sky. Head to any of the sky islands to reveal the quest marker. During this quest, Ulalaka, Fubuki, Matsuri, Kanata, Kai, and Kurama cannot be added to the party. |
| 2 | Search for the Holy Shrine. Head towards the quest marker and enter the gate to Fleeting Flower Village to look for the Holy Shrine. |
The Holy Shrine of Spring
| Step-by-Step Guide | |
|---|---|
| 1 | Explore the Fleeting Flower Village. Make your way through the Fleeting Flower Village, while opening chests and defeating enemies along the way. |
| 2 | Use Dance of Bonds at the Holy Shrine. Use the Dance of Bonds at the Holy Shrine to inscribe runes and activate it. |
Versus Veyron
| Step-by-Step Guide | |
|---|---|
| 1 | Defeat Veyron. Together with your party, defeat the Level 70 Veyron. Veyron is weak to Dual Blades and Fire Attacks. |
How's Ulalaka Doing?
| Step-by-Step Guide | |
|---|---|
| 1 | Head to the Spring God Shrine. Return to the Spring God Shrine in Spring Village to check on Ulalaka. |
| 2 | 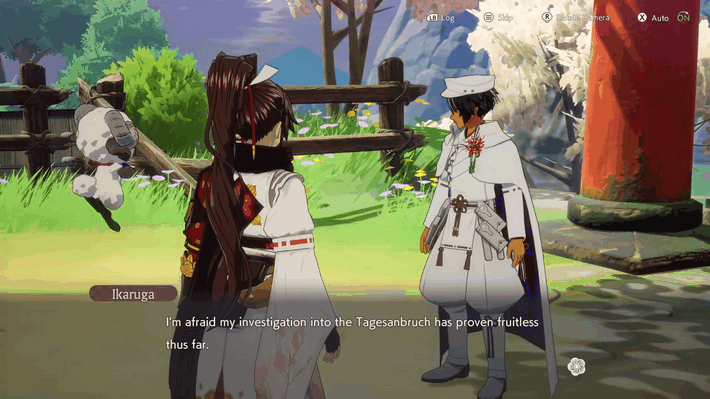
Speak with Ikaruga. Talk to Ikaruga to ask about the Tagesanbruch. |
A Prayer for the Future
| Step-by-Step Guide | |
|---|---|
| 1 | 
Go to the Spring Dragon Shrine. Return to the Spring Dragon Shrine and talk to Iroha. |
To the Summer Region
| Step-by-Step Guide | |
|---|---|
| 1 | Take to the sky. Return to any of the islands in the Skies of Azuma to reveal the quest marker. |
| 2 | 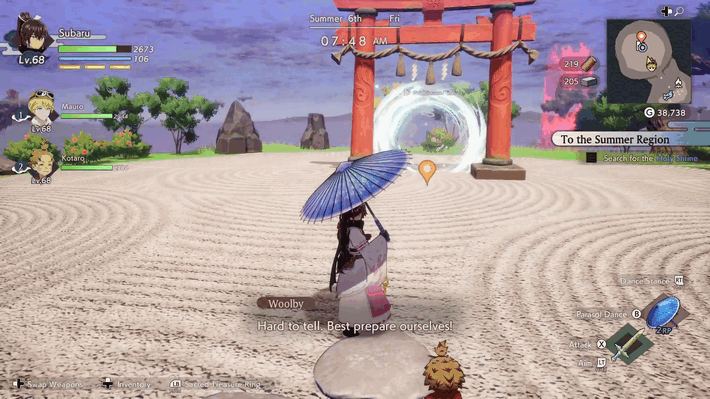
Search for the Holy Shrine. Head to Abandoned Island and make your way to the Goldblossom Mines Entrance. |
The Holy Shrine of Summer
| Step-by-Step Guide | |
|---|---|
| 1 | 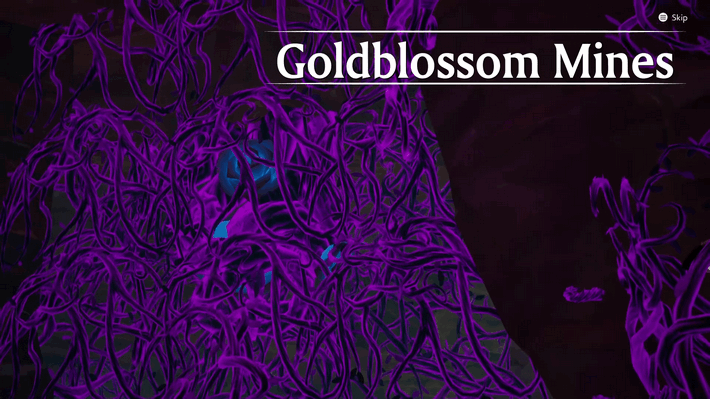
Explore the Goldblossom Mines. Explore Goldblossom Mines and follow the quest marker towards the next Holy Shrine. |
| 2 | 
Use Dance of Bonds at the Holy Shrine. Use the Dance of Bonds at the Holy Shrine to inscribe runes and activate it. |
Hostilities with the Hound
| Step-by-Step Guide | |
|---|---|
| 1 | 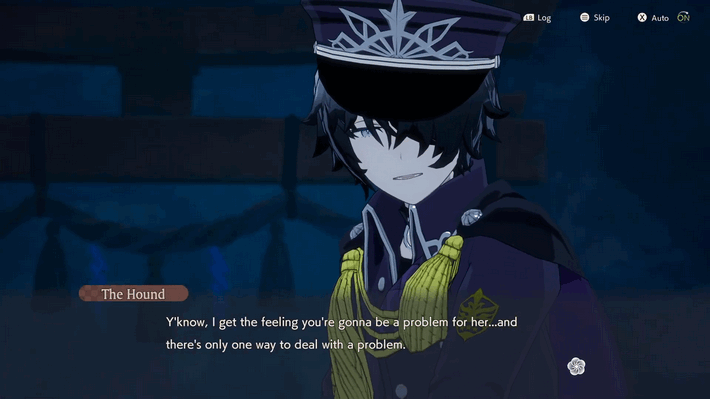
Defeat The Hound. Together with your party, defeat the Level 75 The Hound. The Hound is weak to Light Attacks. |
How's Matsuri Doing?
| Step-by-Step Guide | |
|---|---|
| 1 |  Head to the Summer God Shrine. Return to the Summer God Shrine in Summer Village to check on Matsuri. |
Memories of a Childhood Friend
| Step-by-Step Guide | |
|---|---|
| 1 |  Go to the Summer Dragon Shrine. Return to the Summer Dragon Shrine to check in on Kaguya/Subaru. |
Back to Autumn Village
| Step-by-Step Guide | |
|---|---|
| 1 | 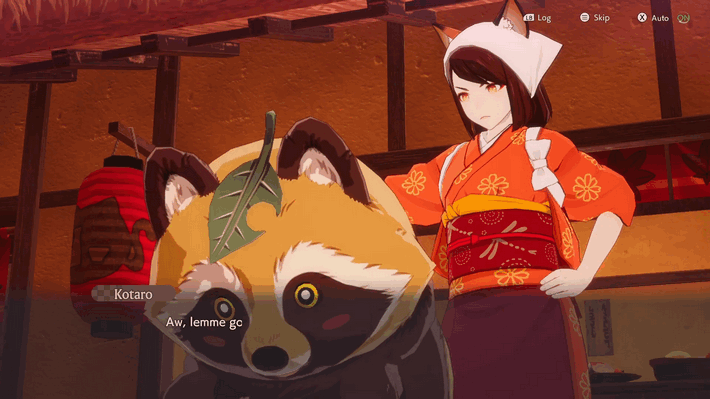 Head to Yachiyo's Izakaya (5 PM - 11 PM). Head to Yachiyo's Izakaya in Autumn Village to ask about the Holy Shrine.
 |
Finding a Transformation Leaf
| Step-by-Step Guide | |
|---|---|
| 1 | 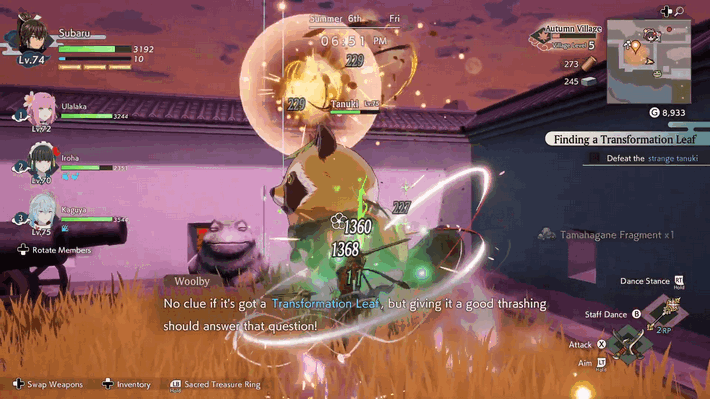 Find the strange tanuki. Head to the Autumn Fields to look for the strange Tanuki. |
Finding a Wooly Heart
| Step-by-Step Guide | |
|---|---|
| 1 | 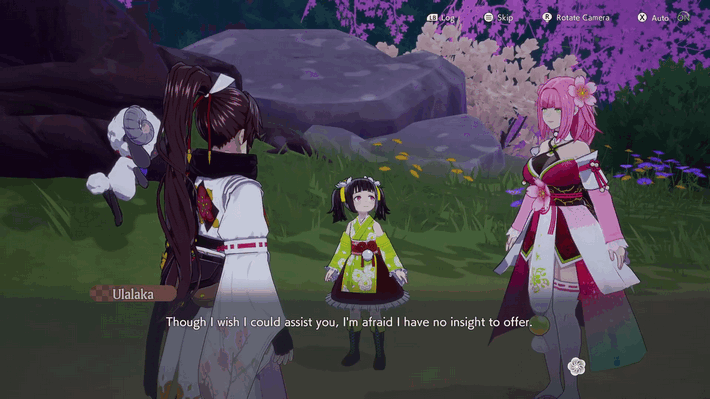 Meet with Ulalaka. Head to Spring Village to talk to Ulalaka and Suzu. |
| 2 | Head to Suzu's stage. Make your way to the Isolated Islet and towards Suzu's stage. |
| 3 | 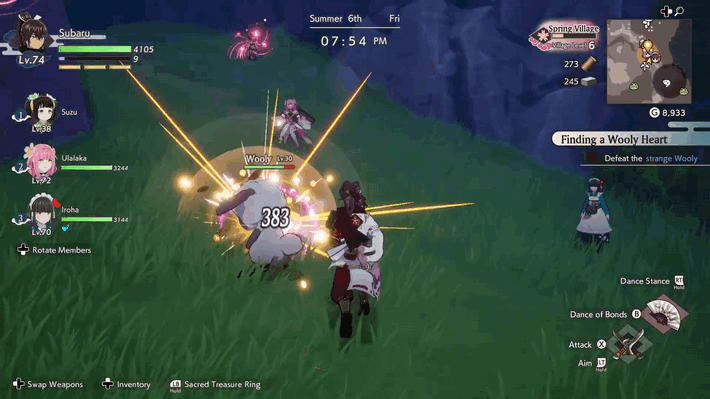
Defeat the strange Wooly. Defeat the strange and larger Wooly to obtain the Wooly Heart. |
Transformation 101
| Step-by-Step Guide | |
|---|---|
| 1 | 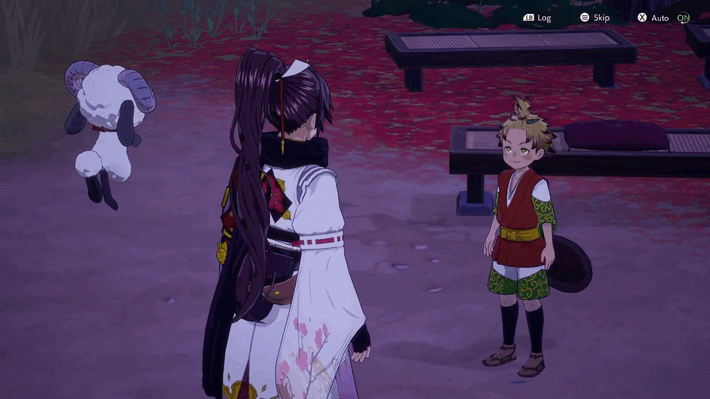
Talk to Kotaro. Return to Autumn Village and talk to Kotaro to learn how to transform into a Wooly. |
What We Lost
| Step-by-Step Guide | |
|---|---|
| 1 | 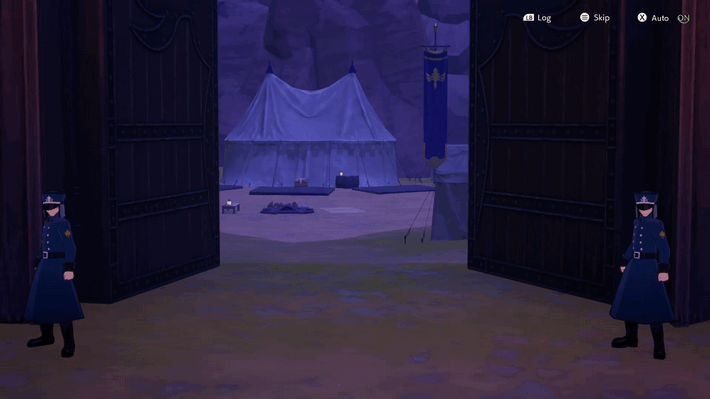 Head to the Tagesanbruch base. Head to Autumn Fields, and destroy the rocks using Mask Dance to enter the Tagesanbruch base. |
| 2 | 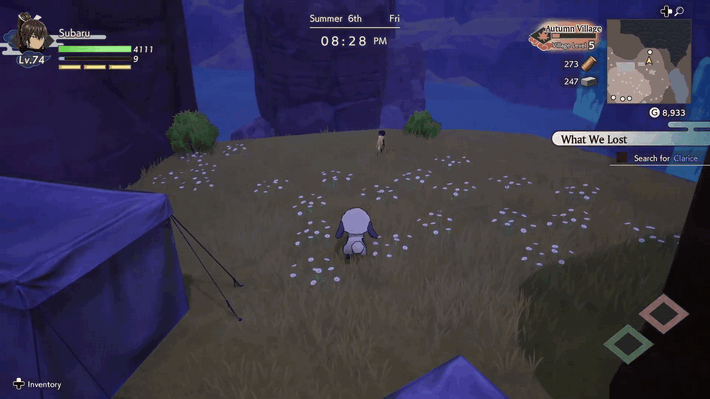
Search for Clarice. Disguised as a Wooly, look for Clarice within the base. Clarice can be found watching the waterfalls. |
Talking to Hina
| Step-by-Step Guide | |
|---|---|
| 1 | 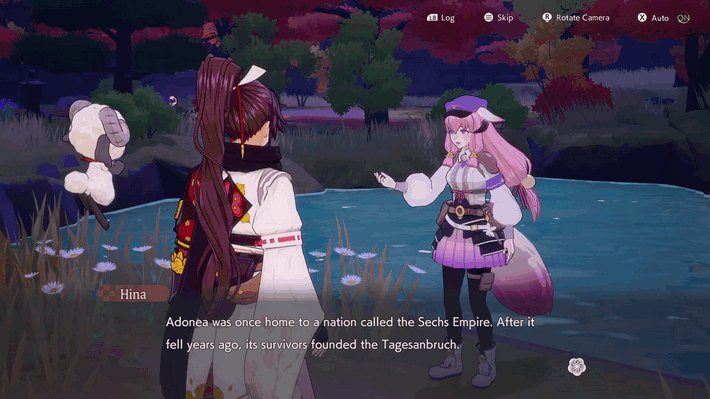 Talk to Hina. Return to Autumn Village and talk to Hina to learn more about Adonea. |
Time to Rest
| Step-by-Step Guide | |
|---|---|
| 1 | Go to the Dragon Shrine and sleep. Head back home by walking or Fast Traveling to the save statue. Interact with your Futon to end the day. |
Reviving the God of Autumn
| Step-by-Step Guide | |
|---|---|
| 1 | Take to the sky. Return to any of the islands in the Skies of Azuma to reveal the quest marker. |
| 2 | 
Search for the Holy Shrine. Follow the quest marker to the Isle of the Drowned to look for the Holy Shrine. The Quest Marker points to the Torii gate leading to the Palace of Serendipity. |
The Holy Shrine of Autumn
| Step-by-Step Guide | |
|---|---|
| 1 | 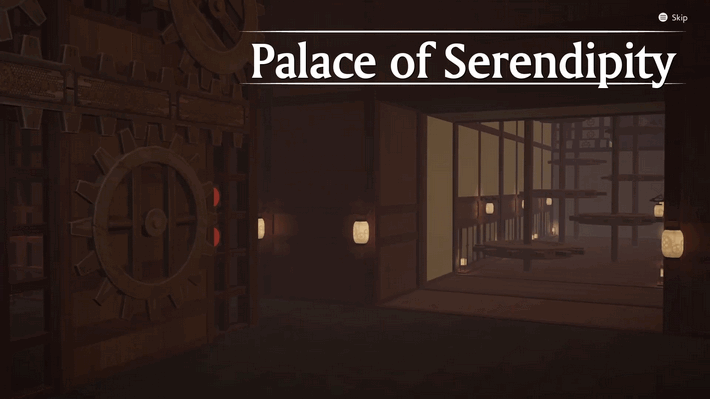
Explore the Palace of Serendipity. Explore the Palace of Serendipity and follow the quest marker towards the next Holy Shrine. |
| 2 | 
Use Dance of Bonds at the Holy Shrine. Use the Dance of Bonds at the Holy Shrine to inscribe runes and activate it. |
A Clash with Clarice
| Step-by-Step Guide | |
|---|---|
| 1 | 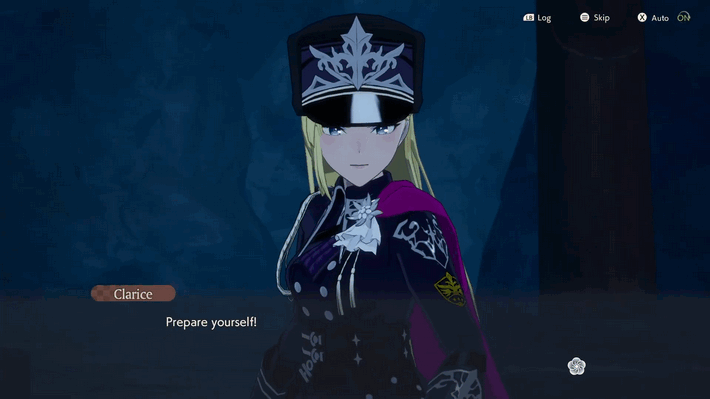
Defeat Clarice. Together with your party, defeat the Level 80 Clarice. Clarice is weak to Long Swords and Dark Attacks. |
The Fifth Meeting of the Gods
| Step-by-Step Guide | |
|---|---|
| 1 | 
Head to the Winter God Shrine. Head to the Winter God Shrine to discuss what to do next. |
Talking about Training
| Step-by-Step Guide | |
|---|---|
| 1 | 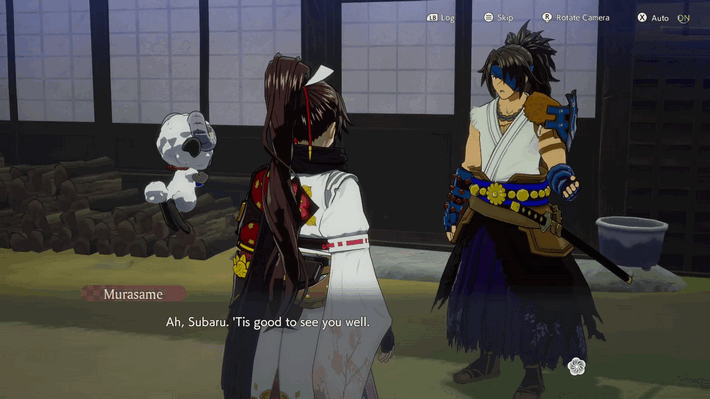 Talk to Murasame. Head to Spring Village to talk to Murasame about Rakshasa Gorge. |
Training from Hell
| Step-by-Step Guide | |
|---|---|
| 1 | Take to the sky. Return to any of the islands in the Skies of Azuma to reveal the quest marker. |
| 2 | 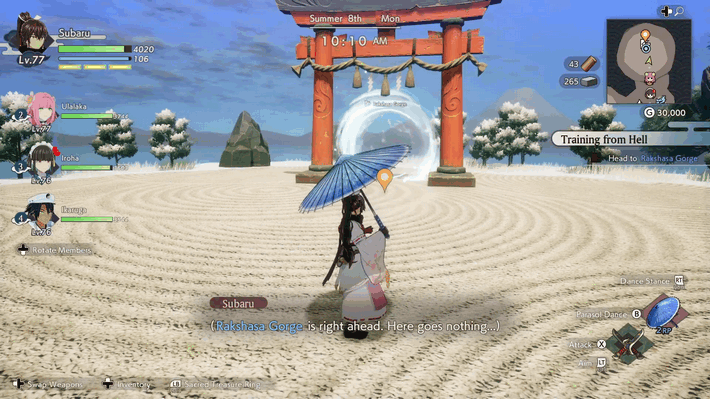
Head to Rakshasa Gorge. Follow the quest marker to Arctic Island. Make sure to defeat enemies, and open chests as you make your way to the Rakshasa Gorge Torii Gate! |
Beyond Mortal Limits
| Step-by-Step Guide | |
|---|---|
| 1 | 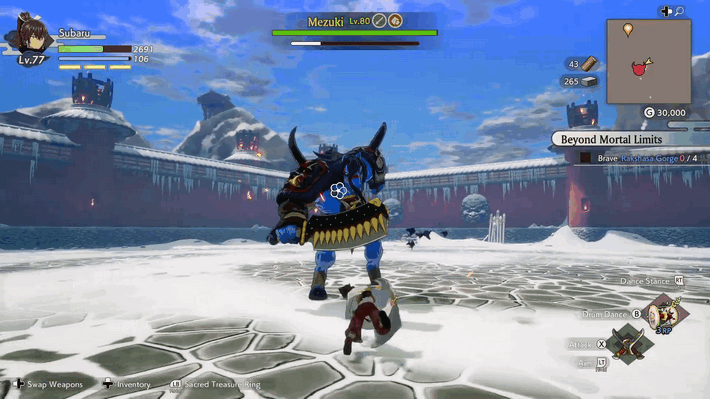
Brave Rakshasa Gorge. Clear the 4 Levels of Rakshasa Gorge, where you will fight Level 80 Mezuki, Cursed Tree, Spectral Warrior, and White Wolf in each room. During this quest, you cannot bring any party members. |
| 2 | 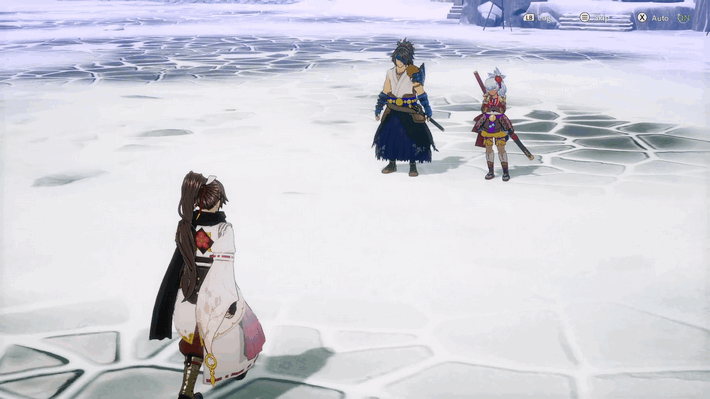
Head further into Rakshasa Gorge. After defeating the bosses, make your way to the final room where Murasame and Matsuri are waiting for you. |
A New Power
| Step-by-Step Guide | |
|---|---|
| 1 | 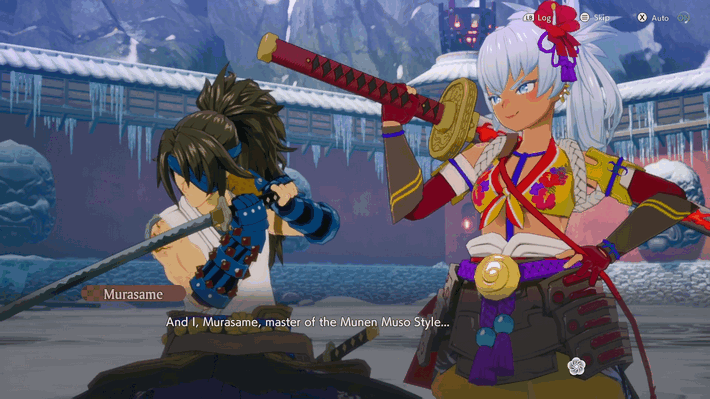 Defeat Matsuri and Murasame. Defeat the Level 85 Matsuri and Murasame at the same time to complete your training. |
| 2 | 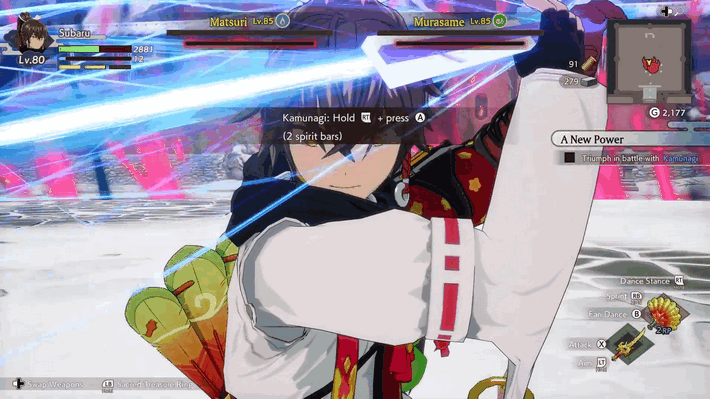
Triumph in battle with Kamunagi. With the last boss down to 1 HP, finish off your training by showing off your new ability, Kamunagi. |
Time to Rest
| Step-by-Step Guide | |
|---|---|
| 1 | Go to the Dragon Shrine and sleep. Head back home by walking or Fast Traveling to the save statue. Interact with your Futon to end the day. |
The Dragon's Tomb Main Quests
A Revolt in the Underworld
| Step-by-Step Guide | |
|---|---|
| 1 | 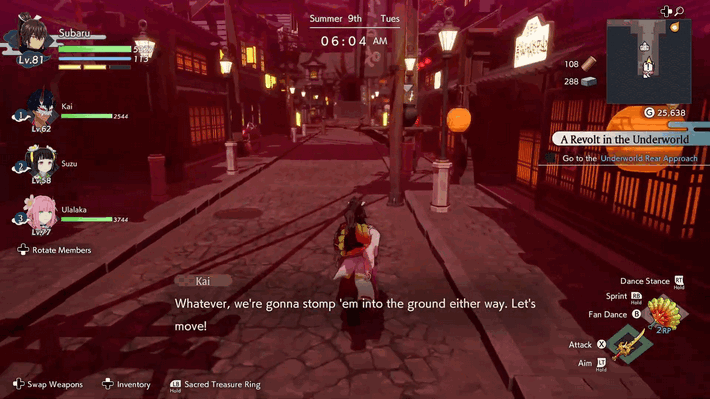 Head to the Underworld. Upon Kai's request, head to the Underworld to stop the revolt. |
| 2 | 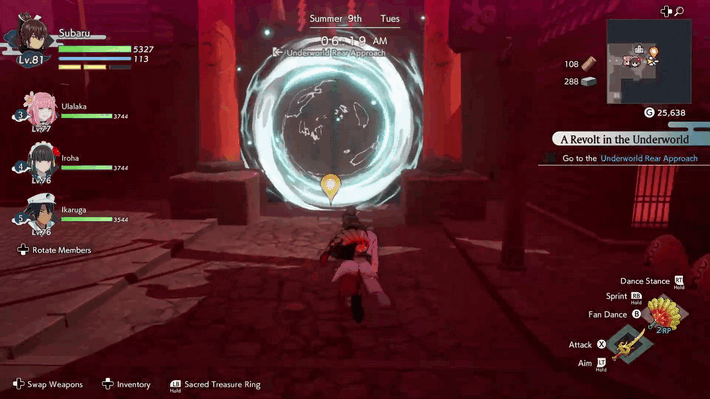
Go to the Underworld Rear Approach. Follow the quest marker and enter the Torii Gate towards the Underworld Rear Approach. |
Quashing the Revolt
| Step-by-Step Guide | |
|---|---|
| 1 |  Search for Lord Ura. Make your way through the Rear Approach and look for Lord Ura. |
The Night Squad
| Step-by-Step Guide | |
|---|---|
| 1 |  Defeat Lord Ura. The Night Squad and Lord Ura are set to Level 90. You will first fight against waves of Oni, before Lord Ura appears. Lord Ura is still vulnerable to Long Swords and Light Attacks, so make sure to come prepared! |
The Dragon's Gravesite
| Step-by-Step Guide | |
|---|---|
| 1 | 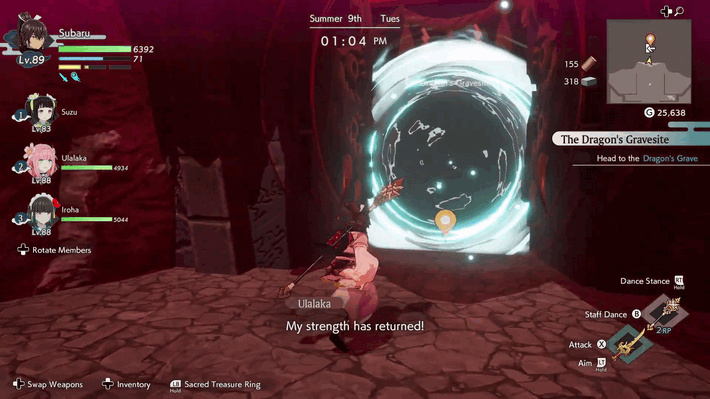 Head to the Dragon's Grave. With Kai left behind, head to the Torii Gate leading to the Dragon's Grave. |
Why We Fight
| Step-by-Step Guide | |
|---|---|
| 1 | 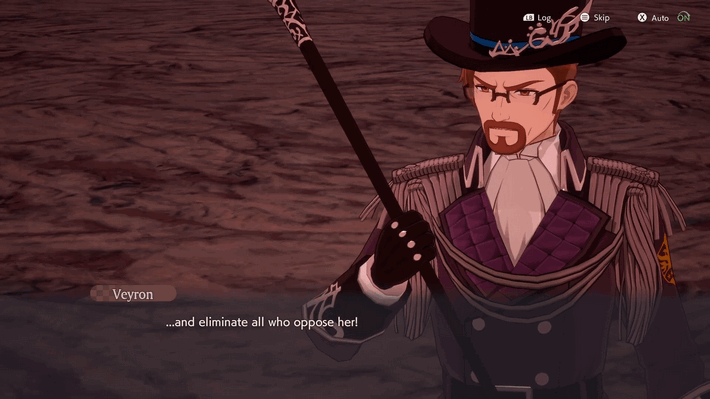 Defeat Veyron. Fight Veyron a second time, with him being Level 90 this time around. Veyron is still weak to Dual Swords and Fire Attacks, making the fight only a slightly more difficult version of the initial Veyron fight. |
On the Trail of the Dragon Casket
| Step-by-Step Guide | |
|---|---|
| 1 | Head to the epicenter. Fly with Woolby towards the epicenter to enter the Dragon's Tomb. |
The Dragon's Tomb
| Step-by-Step Guide | |
|---|---|
| 1 | Search for the Dragon Casket. Make your way through the Dragon's Tomb until you reach the quest marker. Save before entering the arena as you prepare for the next boss fight. |
An Evil Star
| Step-by-Step Guide | |
|---|---|
| 1 | Defeat the Hound. The Hound will have the same moves and abilities from the previous fight, with the main difference being he is set at Level 88 this time around. Use Short Swords and Light Attacks to defeat him quickly! |
| 2 | Defeat Kamurosaki. After defeating The Hound, he will transform into Kamurosaki, a dark variant of the White Wolf. Kamurosaki is still vulnerable to Short Swords and Light Attacks, so you do not need to change your equipment here. |
Clarice's Motives
| Step-by-Step Guide | |
|---|---|
| 1 | Keep searching for the Dragon Casket. Make your way further into the Dragon's Tomb to look for Clarice and the Dragon Casket. |
The Gods' Power
| Step-by-Step Guide | |
|---|---|
| 1 | Clear cannon platforms of enemies. Clear the 4 platforms of all enemies present to assist the Gods of Azuma from preventing its destruction. |
| 2 | Talk to Kai and Kanata. Head to Kai and Kanata and watch them perform the Divine Severance. |
The Final Battle
| Step-by-Step Guide | |
|---|---|
| 1 | Attack Mihoshi Habaki's heart. Attack the Mihoshi Habaki's heart using bow attacks. Destroy the heart shards using your bow, and then attack with Kamunagi to damage it. |
| 2 | Attack the heart with Kamunagi. With the heart down, use Kamunagi to damage it until you eventually destroy it. |
Earth Dancer
| Step-by-Step Guide | |
|---|---|
| 1 | Absorb attacks with Dance of Bonds. Absorb the Mihoshi's attacks using the dance of bonds, and once you absorbed enough, use the Dance of the Sovereign to finally defeat the Mihoshi Habaki. |
Rune Factory: Guardians of Azuma Related Guides

Rune Factory: Guardians of Azuma Top Page
Guides by Category
| Rune Factory: Guardians of Azuma Guides | |
|---|---|
 News & Game Info News & Game Info |
 Tips and Tricks Tips and Tricks |
 Characters Characters |
 Walkthrough Walkthrough |
 Sacred Treasures Sacred Treasures |
 Village Building Village Building |
 Items Items |
 Weapons Weapons |
 Bosses Bosses |
 Armor Armor |
 Monsters Monsters |
 Tools Tools |
 Shops Shops |
 Festivals Festivals
|
 Contests Contests |
|
Recommended Guides
 Romance Options
 List of Voice Actors
 Cosmetic Guide
 Character Customization
 How to Increase Bond Levels
 All Wayside Shrine Recipes and Locations
 All Golden Seed Locations
 How to Get Recipes
 All Jizo Statue Rewards and Locations
 All Target Locations
 All Seals of Approval
 Best Crops to Grow
Comment
Author
Walkthrough and Complete Story Guide
Rankings
- We could not find the message board you were looking for.
Gaming News


Popular Games

Genshin Impact Walkthrough & Guides Wiki
Umamusume: Pretty Derby Walkthrough & Guides Wiki
Pokemon Pokopia Walkthrough & Guides Wiki
Honkai: Star Rail Walkthrough & Guides Wiki
Monster Hunter Stories 3: Twisted Reflection Walkthrough & Guides Wiki
Arknights: Endfield Walkthrough & Guides Wiki
Wuthering Waves Walkthrough & Guides Wiki
Zenless Zone Zero Walkthrough & Guides Wiki
Pokemon TCG Pocket (PTCGP) Strategies & Guides Wiki
Monster Hunter Wilds Walkthrough & Guides Wiki


Recommended Games
Fire Emblem Heroes (FEH) Walkthrough & Guides Wiki
Diablo 4: Vessel of Hatred Walkthrough & Guides Wiki
Cyberpunk 2077: Ultimate Edition Walkthrough & Guides Wiki
Yu-Gi-Oh! Master Duel Walkthrough & Guides Wiki
Super Smash Bros. Ultimate Walkthrough & Guides Wiki
Pokemon Brilliant Diamond and Shining Pearl (BDSP) Walkthrough & Guides Wiki
Elden Ring Shadow of the Erdtree Walkthrough & Guides Wiki
Monster Hunter World Walkthrough & Guides Wiki
The Legend of Zelda: Tears of the Kingdom Walkthrough & Guides Wiki
Persona 3 Reload Walkthrough & Guides Wiki


All rights reserved
©2025 Marvelous Inc.
The copyrights of videos of games used in our content and other intellectual property rights belong to the provider of the game.
The contents we provide on this site were created personally by members of the Game8 editorial department.
We refuse the right to reuse or repost content taken without our permission such as data or images to other sites.