This survey will take about 1 minute.
Your answers will help us to improve our website.
Honkai: Star Rail
Grove, Wherefore Are the Wise Silent Mission Guide
★ Exclusive: Check out the State of Meta in 4.0!
♦ Latest: 4.1 Livestream Redeem Codes
♦ Phase 2: Sparkxie, Sparkle, Cerydra, Rappa
♦ Upcoming: Ashveil, Silver Wolf Lv.999, Evanescia
♦ Events: Cosmicon, Roll On!, Ding! Arcadia Fun-Time Clock-In Essentials
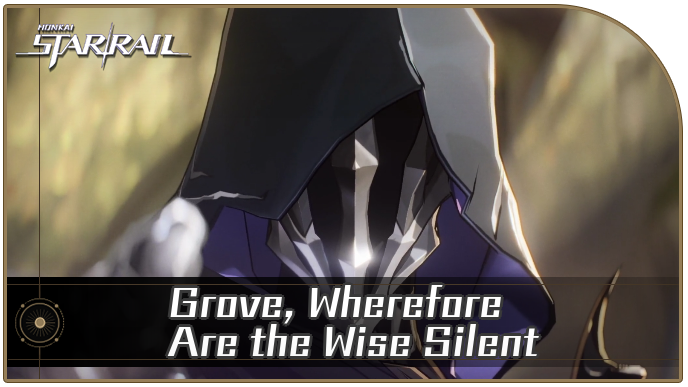
Grove, Wherefore Are the Wise Silent is a Trailblaze Mission in Honkai: Star Rail that is part of the Light Slips the Gate, Shadow Greets the Throne mission series. Check out how to unlock this mission, its walkthrough, and the rewards for completion in this guide!
| Previous Mission | Next Mission |
|---|---|
| Glory, Turn From Imbibed Prison | Lamentations, Bring Not Empty Tears |
List of Contents
Grove, Wherefore Are the Wise Silent Information
| Mission Type | Trailblaze Mission |
|---|---|
| Location | Amphoreus, "Eternal Holy City" Okhema |
| Required Level | 34 |
Part of Light Slips the Gate, Shadow Greets the Throne Mission Series
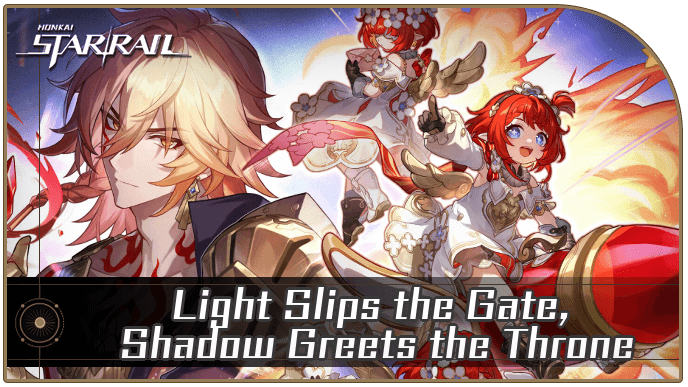
Grove, Wherefore Are the Wise Silent is the third quest for the Light Slips the Gate, Shadow Greets the Throne Mission Series.
Light Slips the Gate, Shadow Greets the Throne Mission Guide
How to Unlock Grove, Wherefore Are the Wise Silent
Unlock Requirements
| How to Unlock | Reach Trailblaze Level 34 or above Complete
Hero, Bear Thy Coreflame
|
|---|
Complete Glory, Turn From Imbibed Prison Mission
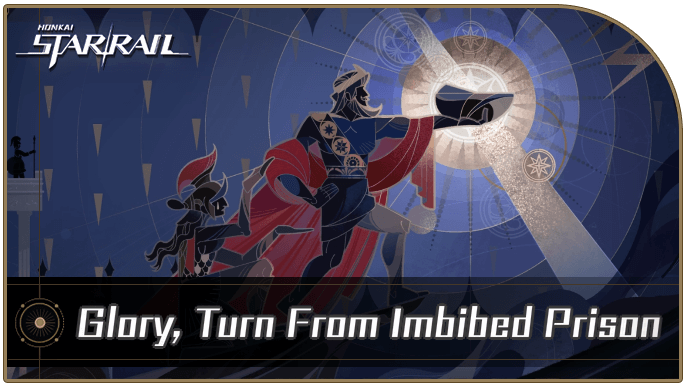
Grove, Wherefore Are the Wise Silent can be unlocked once you reach Trailblaze Level 34 or above and have completed Glory, Turn From Imbibed Prison mission.
Glory, Turn From Imbibed Prison Mission Guide
Grove, Wherefore Are the Wise Silent Walkthrough
How to Complete Grove, Wherefore Are the Wise Silent
- Step 1: Follow Castorice to Meet With Aglaea
- Step 2: Speak With Castorice and Hyacine
- Step 3: Follow Trianne
- Step 4: Enter the Grove of Epiphany
- Step 5: Leave the Courtyard of Storge
- Step 6: Open the Gate and Continue Forward
- Step 7: Head to the Luminary Throne
- Step 8: Find the Source of the Sound
- Step 9: Pass the Deep Wall and Obtain Golden Bough of Vows
- Step 10: Offer the Golden Bought of Vows to the Heart
- Step 11: Take the Waterwheel to Head to the Top
- Step 12: Leave the Library of Philia
- Step 13: Pass Through the Dome of Devotion
- Step 14: Rescue Mem
- Step 15: Pick the Remaining Fires With the Golden Bough
- Step 16: Offer the Remaining Fires to the Butterfly
- Step 17: Meet Up With Cerces at The Throne
Follow Castorice to Meet With Aglaea
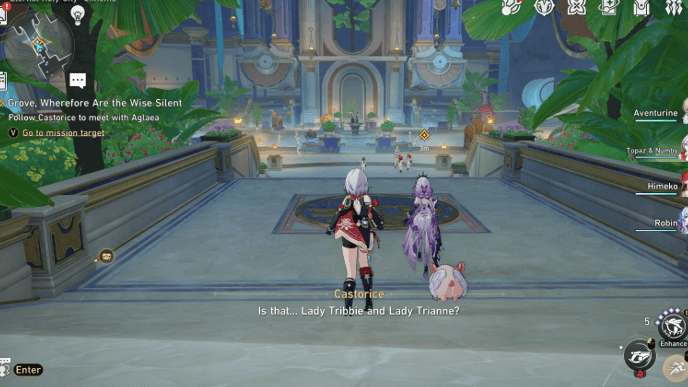
After talking with Castorice, follow her so you both can meet up with Aglaea to discuss the next move. You will come across Trianne and Tribbie eventually, so you'll have to converse with them.
Finish the dialogue with them and continue following Castorice until you both reach Aglaea and speak with her. After the dialogue, you'll obtain the Weft Mission Item.
Speak With Castorice and Hyacine
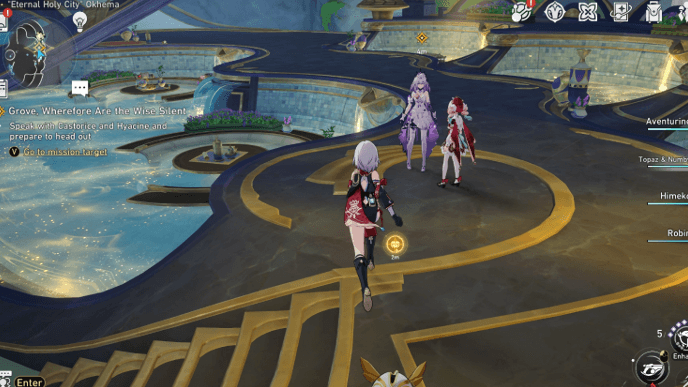
Next, talk to Castorice and Hyacine nearby to proceed. You'll be transported to another area where you'll see Trianne and Clementine nearby with an injured person. Talk to them and proceed.
Follow Trianne
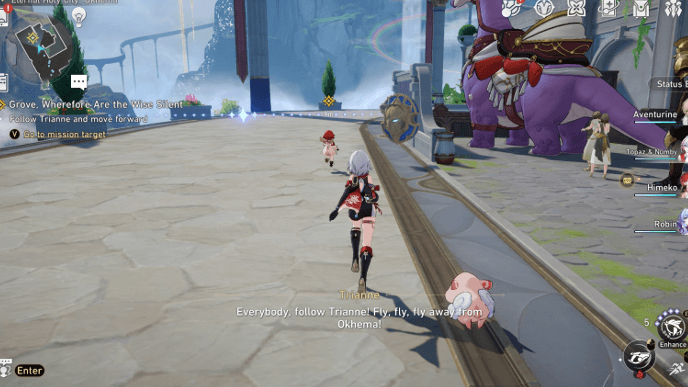
Follow Trianne as she leads you out of Okhema. Finish the dialogue and you'll be transported to Murmuring Woods in the Grove of Epiphany.
Enter the Grove of Epiphany
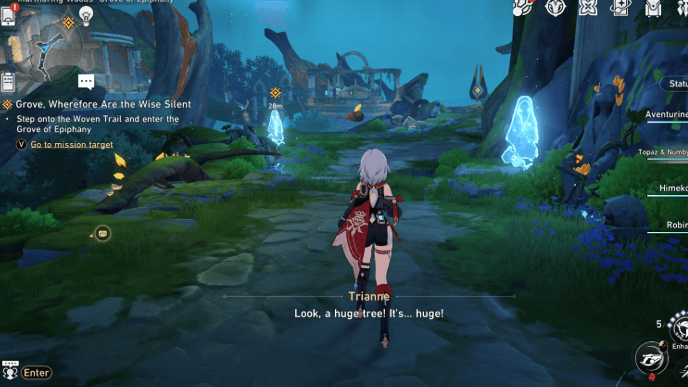
Continue down the path and enter the Grove of Epiphany. You'll come across a giant tree where a dialogue happens. Next, you'll be prompted to take a picture of it. Take it and proceed.
Use the Janus Passage nearby to get to the other side and approach the huge seed to trigger another dialogue.
Leave the Courtyard of Storge
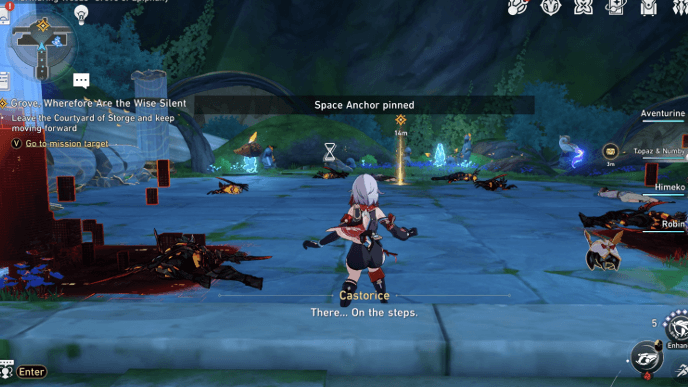
Use the next Janus Passage nearby to continue further into the grove. Climb up the stairs and you'll see bodies of enemies everywhere. Approach them and a battle ensues. After the battle, you'll be asked to open the gate and continue.
Open the Gate and Continue Forward

Proceed up the stairs until you reach the temple and approach the door. Along the way, you can also investigate the bodies of the enemies but this is only optional and for flavor purposes. A dialogue will happen with Anaxa once you interact with the door.
Head to the Luminary Throne
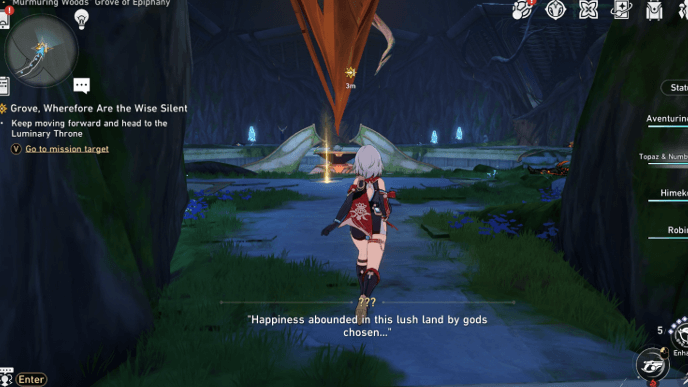
Finish the dialogue with Anaxa and go inside the grove. Once you reach the inner part of the grove, you'll start hearing a voice. Follow the voice and interact with the statue to proceed.
Find the Source of the Sound
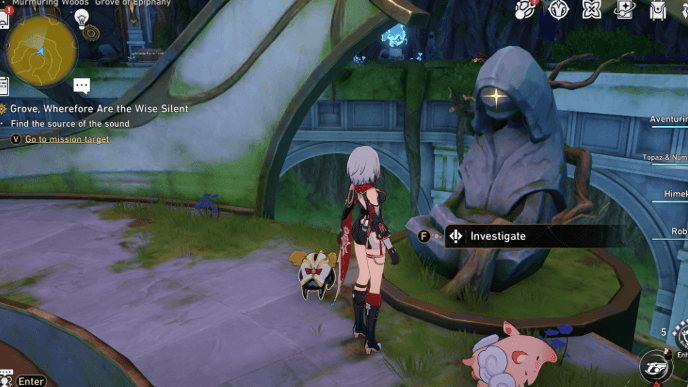
Go down the steps and look at the statue in the middle area. Approach and interact with it to trigger another dialogue. Calypso will appear and ask for your help getting to the Luminary Throne. Follow the mission marker and go through the door then into the hallway.
Take the elevator down and head towards the next area. You'll have to solve a short puzzle to proceed.
Pass the Deep Wall and Obtain Golden Bough of Vows
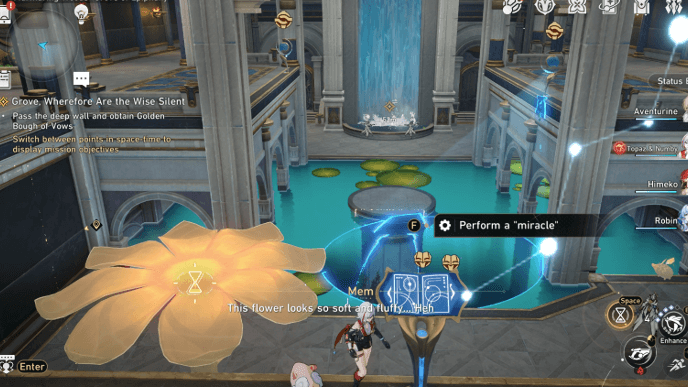
You'll have to get to the small pond to obtain the Golden Bough of Vows. First, change the time to Day using the book. Then you can use the orb nearby to amplify the prayers.
Use the Cognos Bloom to Go Down
Step onto the flower and go down to the first floor. Next, use the book in front of the water to turn the time back to Evernight. You'll then see a box with a yellow seed nearby.
Attack Ichor Vessel to Use the Seed
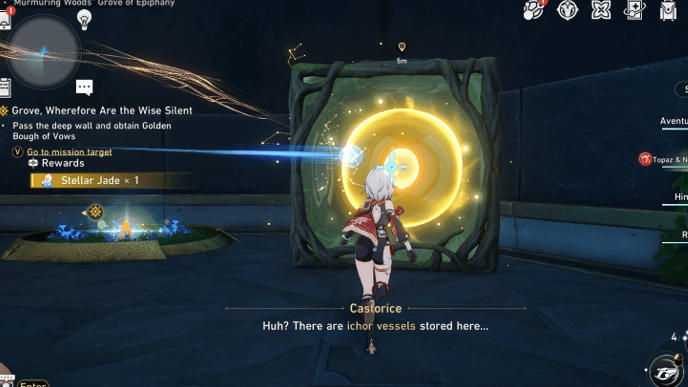
Attack the front side of the Ichor Vessel to let the seed out. It will roll to the circle on the other side and grow a Cognos Bloom. You can then use the flower to go up.
Turn on the Miracle Orb

Use the flower to get to the second floor's other side. Head to the right and you'll see a Miracle Orb which you'll have to turn on to make another bridge of lilypads for the pond. Use the flower to go back down again and cross the bridge of lilypads to get to the Bough.
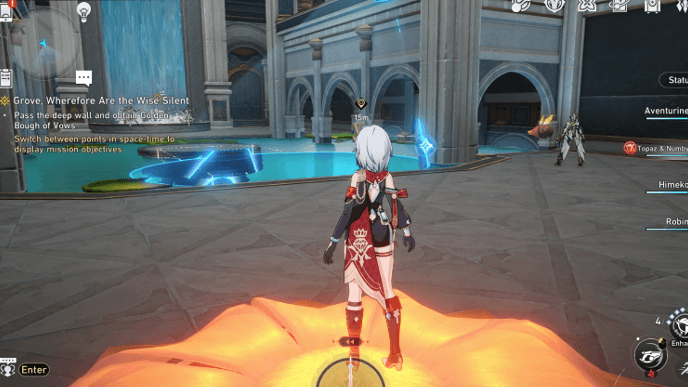
Offer the Golden Bought of Vows to the Heart
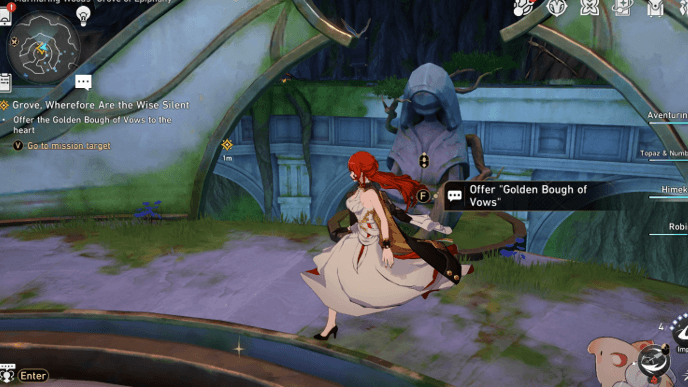
Interact with the Bough and more dialogue will ensue. After the dialogue, you'll obtain the Golden Bough of Vows Mission Item. Next, head to the left and use the elevator back up. Back in the main area, interact with the heart to proceed.
Take the Waterwheel to Head to the Top
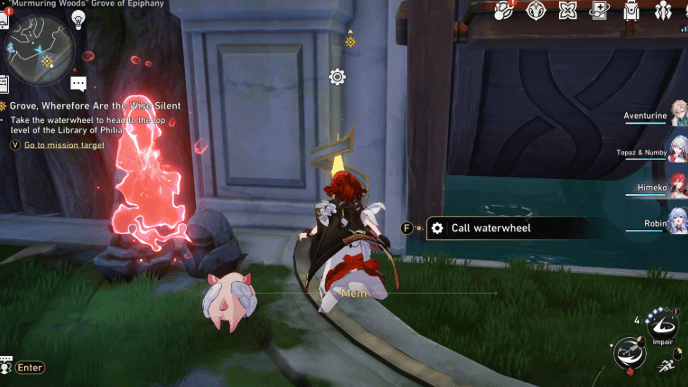
After the dialogue, go to the waterwheel nearby and interact with it. You can then ride it to the next area. Follow the path and it'll lead you outside. Keep following the mission marker and it'll lead you to a Janus Passage that takes you to the next area.
Leave the Library of Philia
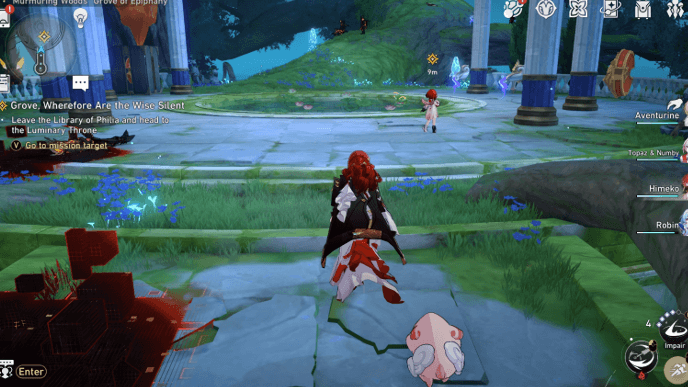
After riding the Janus Passage, you'll see Trianne nearby. Approach her and a dialogue happens. After the talk, keep moving forward until you reach the end of the giant branch which also has another Janus Passage you can use.
Pass Through the Dome of Devotion

Keep moving forward after you reach the next area. Enter through the doors in front of the small pond and you'll eventually see a giant butterfly made out of branches. Approach it and more dialogue will happen.
Rescue Mem
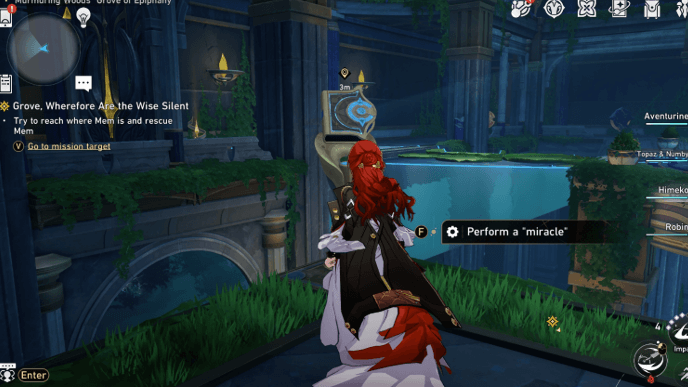
You'll be asked to find Mem and Trianne. Head down the path and follow the mission marker towards the next area. Upon reaching the next area, more dialogue ensues and you'll have to save Mem from monsters.
First, use the book nearby to shift the time. You can then cross the path of lilypads to your left and head up the stairs. You'll then see another book on the second floor.
Use the Book on the Second Floor to Shift the Time
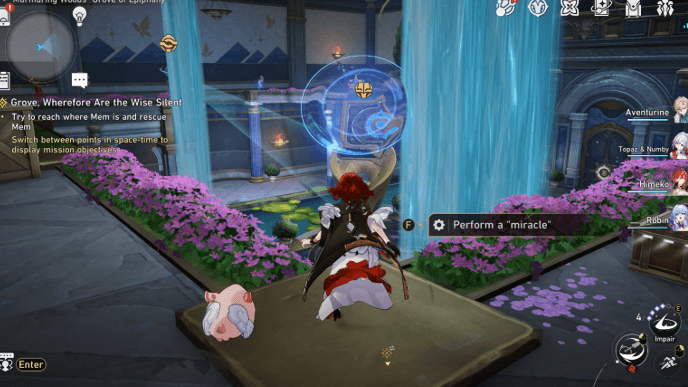
Use the book to turn the time again on the second floor. This allows you to use the Miracle Orb right next to it.
Turn on the Miracle Orb to Make a Path
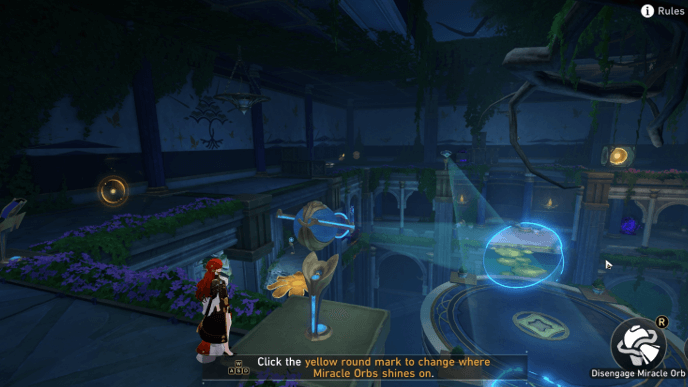
Turn on the Miracle Orb and make a path out of lilypads so you can cross the pond below. You'll see a flower near the orb and a mechanism to enhance prayers. Use the mechanism first then hop on the flower to go straight down.
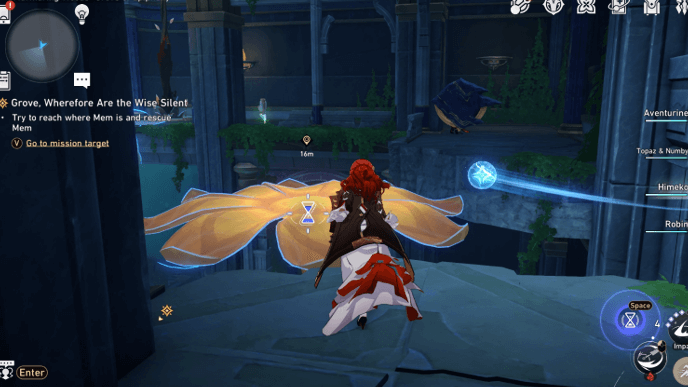
Cross the water and you'll see another flower you can ride down to the lower floor.
Use the Flower to Get to Mem
Use the flower and ride it down to get to Mem. You'll see amber and a bunch of monsters near Mem, so approach them and take them out in a battle.
Pick the Remaining Fires With the Golden Bough
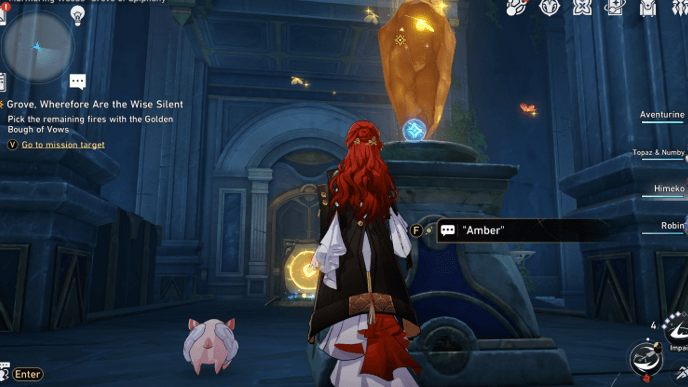
Interact with the amber after the battle and dialogue to proceed. You'll get the Burning Golden Bough of Vows Mission Item after. Head back to the giant butterfly from earlier using the seed in a box in front of the amber.
Attack the box and a flower will appear which you can ride to the top.
Offer the Remaining Fires to the Butterfly
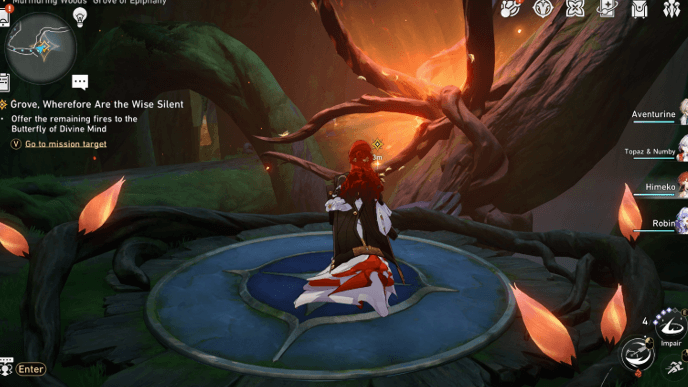
Back at the butterfly, offer the Burning Golden Bough of Vows to it. Proceed with the dialogue and then up the path that appeared to get to the Luminary Throne.
Meet Up With Cerces at The Throne

Keep moving forward until you make it to the Luminary Throne where you'll see Anaxa and the Flame Reaver. Approach them and more dialogue happens. A battle with the Flame Reaver commences shortly after.
Finish the battle and more cutscenes will happen. You'll then be transported back to Okhema. This marks the end of this mission!
Grove, Wherefore Are the Wise Silent Rewards
| Mission Rewards | ||
|---|---|---|
 Stellar Jade
x150 Stellar Jade
x150 |
 Traveler's Guide
x20 Traveler's Guide
x20 |
 Celestial Ambrosia
x480 Celestial Ambrosia
x480 |
 Shattered Mortal Realms
x1 Shattered Mortal Realms
x1 |
Shattered Manuscripts
x1 |
 Credit
x172000 Credit
x172000 |
Honkai: Star Rail Related Guides

All Missions and Mission Types
Other Light Slips the Gate, Shadow Greets the Throne Guides

| Light Slips the Gate, Shadow Greets the Throne | |
|---|---|
| 1 | Strife, Dispel the Accompanying Fears |
| 2 | Glory, Turn From Imbibed Prison |
| 3 | Grove, Wherefore Are the Wise Silent |
| 4 | Lamentations, Bring Not Empty Tears |
| 5 | Memories, Veiled in Blazing Mist |
| 6 | Passages, Knocking Echoes in Dreams |
| 7 | Nemesis Scorched by Golden Blood |
| 8 | Throne, End Those Long Years Forlorn |
| 9 | Passage, Reveal the Past Once More |
Light Slips the Gate, Shadow Greets the Throne
All Trailblaze Missions
| Prologue: Herta Space Station | |
|---|---|
| 1 | Today Is Yesterday's Tomorrow |
| Chapter 1: Jarilo-VI | |
| 2 | In the Withering Wintry Night |
| 3 | In the Sweltering Morning Sun |
| Chapter 2: The Xianzhou Loufu | |
| 4 | Windswept Wanderlust |
| 5 | Topclouded Towerthrust |
| 6 | Karmic Clouds Faded, War Banners Folded |
| Chapter 3: Penacony | |
| 7 | The Sound and the Fury |
| 8 | Cat Among Pigeons |
| 9 | In Our Time |
| 10 | Farewell, Penacony |
| 11 | A New Venture on the Eighth Dawn |
| Chapter 4: Amphoreus | |
| 12 | Heroic Saga of Flame-Chase |
| 13 | Light Slips the Gate, Shadow Greets the Throne |
| 14 | Through the Petals in the Land of Repose |
| 15 | The Fall at Dawn's Rise |
| 16 | For the Sun is Set to Die |
| 17 | Before Their Deaths |
| 18 | Back to Earth in Evernight |
| 19 | As Tomorrow Became Yesterday |
Author

Grove, Wherefore Are the Wise Silent Mission Guide
Please participate in our site
improvement survey
03/2026
improvement survey
03/2026
Would you assist in
improving Game8's site?
improving Game8's site?

×
We are listening to our users' valuable opinions and discussing how to act on them.
The information collected through this survey will be used for the purpose of improving our services. In addition, the information will only be disclosed a part of a statistic in a format that will not allow identification of personal information.
Begin Survey
Not Now
×
Please rate each item regarding Game8.co's Advertisements.
Amount of Ads
Very Dissatisfied
Somewhat Dissatisfied
Fine
Somewhat Satisfied
Highly Satisfied
Placement of Ads
Timing of Ad Display
Ad Loading Speed
Safeness of Ads
Content of Ads
×
Please rate each item regarding Game8.co's Quality of Articles.
Amount of information
Very Dissatisfied
Somewhat Dissatisfied
Fine
Somewhat Satisfied
Highly Satisfied
Frequency of updates
Speed of new information
Accuracy of articles
Understandibility of articles
Readability of sentences
×
Please rate each item regarding Game8.co's Usability of the Site.
Ease of finding information
Very Dissatisfied
Somewhat Dissatisfied
Fine
Somewhat Satisfied
Highly Satisfied
Loading Speed
Use of Color
Font Size
Visibility of Images
Easy to Understand Layout
×
Please rate each item regarding Game8.co's Message Boards, Comments.
Ease of Writing
Very Dissatisfied
Somewhat Dissatisfied
Fine
Somewhat Satisfied
Highly Satisfied
Readability
Ease in Finding Information
Comment Quality
Comment Quantity
Admin Response
×
Please rate each item regarding Game8.co's Site's new design.
Please rate our site's new design
Very Dissatisfied
Somewhat Dissatisfied
Fine
Somewhat Satisfied
Highly Satisfied
Do you think that the website's design change makes the site easier to use?
Has the new design made it easier for you to find information on the site?
Has the new design improved the overall visual appeal of the site?
How would you rate your overall satisfaction with the new design of the site?
×
How likely are you to recommend Game8 to someone you know?
Very Unlikely
0
1
2
3
4
5
6
7
8
9
10
Very Likely
If you have other opinions regarding potential improvement to the website, please share them with us. We would appreciate your honest opinion.
Note: This is a free response section, so you can proceed without entering anything.
Note: Please be sure not to enter any kind of personal information into your response.
Note: Please be sure not to enter any kind of personal information into your response.
×
Thank You
×
Thank you for participating in our survey! Your answers will help us to improve the quality of our website and services.
We hope you continue to make use of Game8.
We hope you continue to make use of Game8.
Close
Premium Articles

Rankings
- We could not find the message board you were looking for.
Gaming News


![Monster Hunter Stories 3 Review [First Impressions] | Simply Rejuvenating](https://img.game8.co/4438641/2a31b7702bd70e78ec8efd24661dacda.jpeg/thumb)
Popular Games

Genshin Impact Walkthrough & Guides Wiki
Honkai: Star Rail Walkthrough & Guides Wiki
Umamusume: Pretty Derby Walkthrough & Guides Wiki
Pokemon Pokopia Walkthrough & Guides Wiki
Resident Evil Requiem (RE9) Walkthrough & Guides Wiki
Monster Hunter Wilds Walkthrough & Guides Wiki
Wuthering Waves Walkthrough & Guides Wiki
Arknights: Endfield Walkthrough & Guides Wiki
Pokemon FireRed and LeafGreen (FRLG) Walkthrough & Guides Wiki
Pokemon TCG Pocket (PTCGP) Strategies & Guides Wiki


Recommended Games
Diablo 4: Vessel of Hatred Walkthrough & Guides Wiki
Cyberpunk 2077: Ultimate Edition Walkthrough & Guides Wiki
Fire Emblem Heroes (FEH) Walkthrough & Guides Wiki
Yu-Gi-Oh! Master Duel Walkthrough & Guides Wiki
Super Smash Bros. Ultimate Walkthrough & Guides Wiki
Pokemon Brilliant Diamond and Shining Pearl (BDSP) Walkthrough & Guides Wiki
Elden Ring Shadow of the Erdtree Walkthrough & Guides Wiki
Monster Hunter World Walkthrough & Guides Wiki
The Legend of Zelda: Tears of the Kingdom Walkthrough & Guides Wiki
Persona 3 Reload Walkthrough & Guides Wiki


All rights reserved
Copyright © 2024 HoYoverse, COGNOSPHERE. All Rights Reserved.
The copyrights of videos of games used in our content and other intellectual property rights belong to the provider of the game.
The contents we provide on this site were created personally by members of the Game8 editorial department.
We refuse the right to reuse or repost content taken without our permission such as data or images to other sites.
hey admin🖐🏻😎 please add the option to walk along/ date with Castorice before TB was meet with Aglaea at your 1st step of mission. it was a rare situation that we can date with heroin like Firefly back in Penacony... also it will unlock a Hidden Achievement if TB and Castorice take a photos together near Chimera at Garden of Life. tysm before😎