Through A Glass Darkly Mission Guide
★ Exclusive: Check out the State of Meta in 4.0!
♦ Latest: 4.1 Livestream Redeem Codes
♦ Phase 2: Sparkxie, Sparkle, Cerydra, Rappa
♦ Upcoming: Ashveil, Silver Wolf Lv.999, Evanescia
♦ Events: Cosmicon, Roll On!, Ding! Arcadia Fun-Time Clock-In Essentials

Through A Glass Darkly is a Trailblaze Mission in Honkai: Star Rail that is part of the The Sound and the Fury mission series. Check out how to unlock this mission, its walkthrough, and the rewards for completion in this guide!
| Previous Mission | Next Mission |
|---|---|
| Gentleness, the Name of Nocturne | Whodunit |
Through A Glass Darkly Information
Required Level and Location Details
| Mission Type | Trailblaze Mission |
|---|---|
| Location | Penacony, Golden Hour |
| Required Level | 34 |
| Client | Firefly |
Part of The Sound and the Fury Mission Series
Through A Glass Darkly is the seventh quest for the The Sound and the Fury Mission Series.
The Sound and the Fury Mission Guide
How to Unlock Through A Glass Darkly
Unlock Requirements
| How to Unlock | Reach Trailblaze Level 34 or above Complete
Gentleness, the Name of Nocturne
|
|---|
Complete Gentleness, the Name of Nocturne Mission
Through A Glass Darkly can be unlocked once you reach Trailblaze Level 34 or above and have completed Gentleness, the Name of Nocturne mission.
Gentleness, the Name of Nocturne Mission Guide
Through A Glass Darkly Walkthrough
Through A Glass Darkly Summary
- Step 1: Head to Golden Hour and Meet With the Crew
- Step 2: Leave the Suspicious Room
- Step 3: Find an Exit From the Mysterious Space
- Step 4: Search For an Exit From the Room
- Step 5: Continue Forward
- Step 6: Head to the Hall's Exit
- Step 7: Continue Forward Again
- Step 8: Solve the Dream Jigsaw Puzzle
- Step 9: Open the Suspicious Chest
- Step 10: Leave this Place Through Any Portal
- Step 11: Fight the Something Unto Death Boss
Follow Firefly to the Secret Spot

After talking with Firefly, you both head back to the Golden Hour to meet with the Astral Express Crew. However, you instead find Sampo while everyone is missing. Approach him and a cutscene will commence.
Leave the Suspicious Room
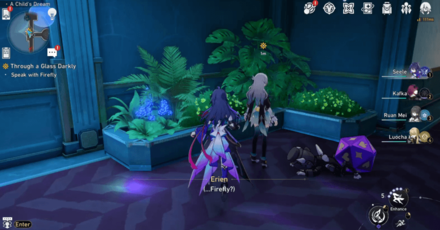
You'll wake up in a suspicious room after the cutscene with Sparkle. Go through the door and talk to Firefly, who is standing just outside the room. She'll come with you as you try to find an exit.
Find an Exit From the Mysterious Space
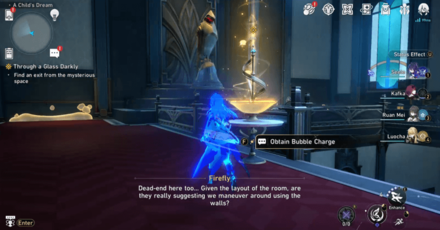
Follow Firefly's instructions and keep moving forward until you see a huge gap in the floor. Go through the left door and keep moving until you see a Bubble Charge mechanism. This allows you to do Dreamwalker puzzles.
Search For an Exit From the Room
Interact with the Bubble Charge mechanism and approach the dispersed bubble near the wall in front of you. You can use Bubble Charges you get to construct a Bubble Bridge, which allows you to traverse the wall. Use one Bubble charge on the wall and walk on it.
Use Other Bubble Charge on Next Wall
Move forward and fight or avoid the sitting Heartbreaker until you see another dispersed bubble near another wall. Use your last Bubble Charge on it and traverse it to get to the next area.
Continue Forward
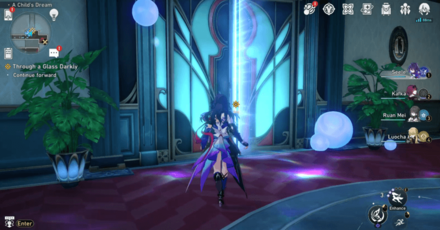
In the next area, proceed forward and walk through the door to see yourself on the other side of the large gap in the floor earlier. Enter the double doors and go up the stairs until you see the giant fountain, where a small dialogue with Firefly will play.
Head to the Hall's Exit
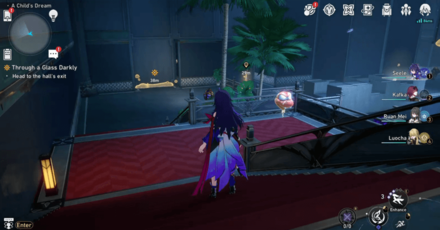
To get to the exit, you need to do another Dreamwalker Puzzle. Down the stairs on the left, you'll see another wall you can traverse and another Bubble Charge mechanism. Interact with it to get your charges and approach the wall.
Use First Bubble Charge
You'll get three Bubble Charges this time. Use your first charge to traverse the wall. Move forward and you'll immediately see the next wall you need to traverse, so head on over.
Use Second Bubble Charge
Use your second Bubble Charge on the wall and traverse it. You'll see the huge fountain sideways and a Treasure Chest. Approach the fountain and a small dialogue with Firefly will commence. On your right, you will see the third wall you need to traverse.
Use Third Bubble Charge
Use your third Bubble Charge to go down the wall. Follow the path to see another Bubble Charge mechanism and some monsters. Fight the monsters first so you can interact with the mechanism freely.
Recharge Your Bubble Charges
Use the Bubble Charge mechanism to refresh your three charges, since you'll be needing them to traverse down walls next. Just in front, use a charge to go down the wall that leads to the next area.
Use Next Charge on the Right Wall
In the next area, you'll see another wall on the right you can traverse. Use your second Bubble Charge on it and head up to the next area. You'll see another Heartbreaker and a Treasure Chest.
Use Last Charge on the Left Wall
To the left of the Treasure Chest is another wall you can traverse, so use your last Bubble Charge on it and move up to the next area. Follow the path to and go up the stairs to see the exit door and another Treasure Chest.
Continue Forward Again
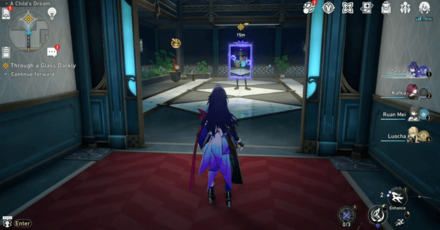
Head through the door and continue moving forward until you see a Dream Jigsaw puzzle. The pieces will move to another area, so you'll have to find them to complete the jigsaw puzzle.
Find the First Lost Piece
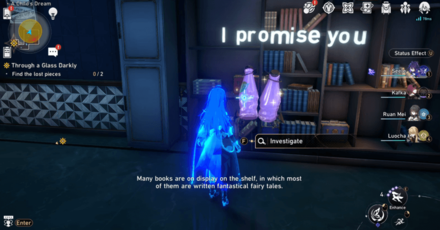
The first lost jigsaw piece is in one of the destructible purple soda bottles. Approach them and destroy them to get the first jigsaw piece. Go on and find the next jigsaw piece in another area.
Find the Second Lost Piece
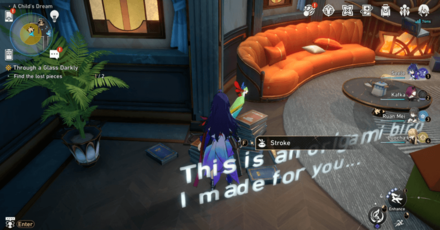
The second lost jigsaw piece is held by an Origami Bird standing on a pile of books. Interact with it and you'll get the second lost jigsaw piece. Return to the Dream Jigsaw puzzle to complete it.
Solve the Dream Jigsaw Puzzle
To solve the puzzle, just rotate and fit in the pieces in the missing slots. The door will appear after you solve the jigsaw puzzle.
Open the Suspicious Chest
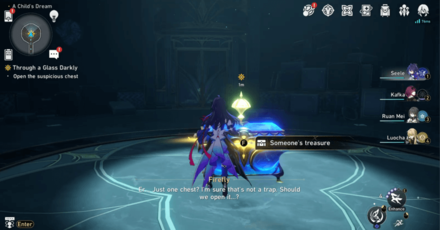
Go through the door and you'll be in a dark room with a lone chest in it. Open the chest and a small event will happen. The lights will all turn on and you have to try and leave the room.
Leave this Place Through Any Portal
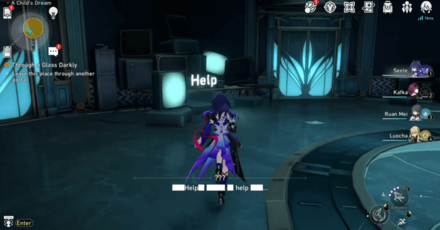
When you try leaving the area through any door, you'll just end up returning to the same place over and over. The door you choose doesn't matter since every door brings you back to the same area. After doing this multiple times, a cutscene will play.
Fight the Something Unto Death Boss
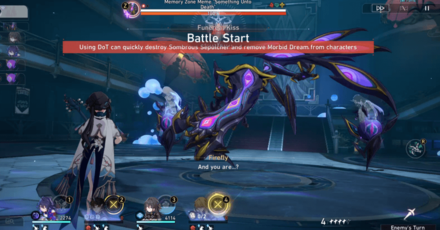
After the cutscene, you will encounter Memory Zone Meme Something Unto Death and a battle will commence. This battle can be a tough one, but focus on the Sepulchers when they spawn to remove Morbid Dream inflicted by the monster.
A cutscene with Black Swan will soon play after. After the fight, you'll wake up and talk with Black Swan. This marks the end of the Through A Glass Darkly Mission!
Something Unto Death Enemy Guide
Through A Glass Darkly Quest Rewards
| Mission Rewards | ||
|---|---|---|
 Trailblaze EXP
x500 Trailblaze EXP
x500 |
 Stellar Jade
x60 Stellar Jade
x60 |
 Traveler's Guide
x10 Traveler's Guide
x10 |
 Clock Credits
x250 Clock Credits
x250 |
 Return of None
x1 Return of None
x1 |
 Chaine Signifiante
x1 Chaine Signifiante
x1 |
 Credit
x100000 Credit
x100000 |
||
Honkai: Star Rail Related Guides

All Missions and Mission Types
Other The Sound and the Fury Guides

| The Sound and the Fury | |
|---|---|
| 1 | Long Day's Journey Into Night |
| 2 | The Youths Who Chase Dream |
| 3 | Sleepless Night |
| 4 | Tales from the Golden Age |
| 5 | Good Omen, My Friend |
| 5.5 | Lullaby of the North Wind |
| 6 | Gentleness, the Name of Nocturne |
| 7 | Through A Glass Darkly |
| 8 | Should One Awaken at Midnight |
| 9 | Whodunit |
All Trailblaze Missions
| Prologue: Herta Space Station | |
|---|---|
| 1 | Today Is Yesterday's Tomorrow |
| Chapter 1: Jarilo-VI | |
| 2 | In the Withering Wintry Night |
| 3 | In the Sweltering Morning Sun |
| Chapter 2: The Xianzhou Loufu | |
| 4 | Windswept Wanderlust |
| 5 | Topclouded Towerthrust |
| 6 | Karmic Clouds Faded, War Banners Folded |
| Chapter 3: Penacony | |
| 7 | The Sound and the Fury |
| 8 | Cat Among Pigeons |
| 9 | In Our Time |
| 10 | Farewell, Penacony |
| 11 | A New Venture on the Eighth Dawn |
| Chapter 4: Amphoreus | |
| 12 | Heroic Saga of Flame-Chase |
| 13 | Light Slips the Gate, Shadow Greets the Throne |
| 14 | Through the Petals in the Land of Repose |
| 15 | The Fall at Dawn's Rise |
| 16 | For the Sun is Set to Die |
| 17 | Before Their Deaths |
| 18 | Back to Earth in Evernight |
| 19 | As Tomorrow Became Yesterday |
Comment
Author
Through A Glass Darkly Mission Guide
improvement survey
03/2026
improving Game8's site?

Your answers will help us to improve our website.
Note: Please be sure not to enter any kind of personal information into your response.

We hope you continue to make use of Game8.
Premium Articles
Rankings
Gaming News
Popular Games

Genshin Impact Walkthrough & Guides Wiki

Honkai: Star Rail Walkthrough & Guides Wiki

Umamusume: Pretty Derby Walkthrough & Guides Wiki

Pokemon Pokopia Walkthrough & Guides Wiki

Resident Evil Requiem (RE9) Walkthrough & Guides Wiki

Monster Hunter Wilds Walkthrough & Guides Wiki

Wuthering Waves Walkthrough & Guides Wiki

Arknights: Endfield Walkthrough & Guides Wiki

Pokemon FireRed and LeafGreen (FRLG) Walkthrough & Guides Wiki

Pokemon TCG Pocket (PTCGP) Strategies & Guides Wiki
Recommended Games

Diablo 4: Vessel of Hatred Walkthrough & Guides Wiki

Fire Emblem Heroes (FEH) Walkthrough & Guides Wiki

Yu-Gi-Oh! Master Duel Walkthrough & Guides Wiki

Super Smash Bros. Ultimate Walkthrough & Guides Wiki

Pokemon Brilliant Diamond and Shining Pearl (BDSP) Walkthrough & Guides Wiki

Elden Ring Shadow of the Erdtree Walkthrough & Guides Wiki

Monster Hunter World Walkthrough & Guides Wiki

The Legend of Zelda: Tears of the Kingdom Walkthrough & Guides Wiki

Persona 3 Reload Walkthrough & Guides Wiki

Cyberpunk 2077: Ultimate Edition Walkthrough & Guides Wiki
All rights reserved
Copyright © 2024 HoYoverse, COGNOSPHERE. All Rights Reserved.
The copyrights of videos of games used in our content and other intellectual property rights belong to the provider of the game.
The contents we provide on this site were created personally by members of the Game8 editorial department.
We refuse the right to reuse or repost content taken without our permission such as data or images to other sites.


![Everwind Review [Early Access] | The Shaky First Step to A Very Long Journey](https://img.game8.co/4440226/ab079b1153298a042633dd1ef51e878e.png/thumb)

![Monster Hunter Stories 3 Review [First Impressions] | Simply Rejuvenating](https://img.game8.co/4438641/2a31b7702bd70e78ec8efd24661dacda.jpeg/thumb)


