This survey will take about 1 minute.
Your answers will help us to improve our website.
Honkai: Star Rail
Slaughterhouse Mission Guide
★ Exclusive: Check out the State of Meta in 4.0!
♦ Latest: 4.0 Redeem Codes
♦ Phase 2: Sparkxie, Sparkle, Cerydra, Rappa
♦ Upcoming: Ashveil, Silver Wolf Lv.999, Evanescia
♦ Events: Cosmicon, Roll On!, Ding! Arcadia Fun-Time Clock-In Essentials
Slaughterhouse is an Adventure Mission in Honkai: Star Rail. Check out how to unlock this mission, its walkthrough, rewards for completion, and all choices in this guide!
| Previous Mission | Next Mission |
|---|---|
| Whodunit | - |
List of Contents
Slaughterhouse Information
| Mission Type | Adventure Mission |
|---|---|
| Location | Penacony, Golden Hour |
| Required Level | 34 |
| Client | Singler |
How to Unlock Slaughterhouse
Unlock Requirements
| How to Unlock |
Reach Trailblaze Level 34 or above
Complete
Whodunit
|
|---|
Complete Whodunit Mission
Slaughterhouse can be unlocked once you reach Trailblaze Level 34 or above and have completed Whodunit mission.
Slaughterhouse Walkthrough
Slaughterhouse Summary
- Step 1: Talk to Singler
- Step 2: Enter the hotel in the Dreamscape and investigate the mysterious painting
- Step 3: Find all the scattered clues within the chaotic space (Part 1)
- Step 4: Find all the scattered clues within the chaotic space (Part 2)
- Step 5: Find all the scattered clues within the chaotic space (Part 3)
- Step 6: Enter the chaotic space one final time to search for clues (Part 4)
- Step 7: Leave the chaotic space and witness the outcomes of your investigation
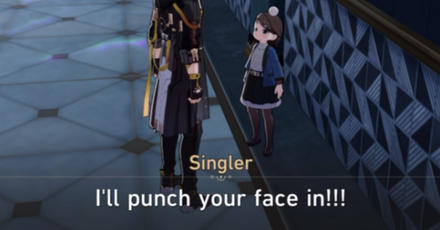
Talk to Singler
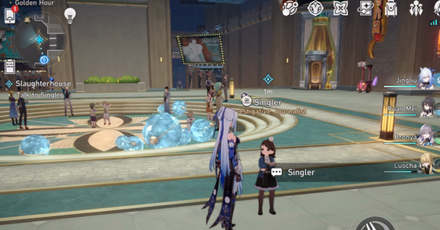
To start the Mission, look for a small girl by the name of Singler and go talk to her on the second floor of the Golden Hour.
Enter the hotel in the Dreamscape and investigate the mysterious painting
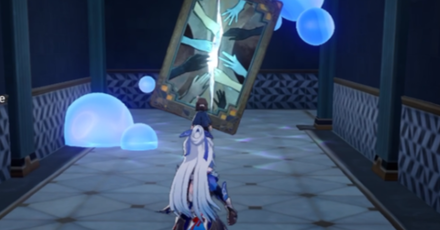
Enter the room in front of you and interact with the mysterious painting.
Find all the scattered clues within the chaotic space (Part 1)
Basic Treasure 1
Move forward until you find a Bubble Tower mechanism and interact with it to obtain a bubble charge. Look behind you and use your bubble charge on the to make a Dream Bridge.
After climbing to the wall, you can find the first Basic Treasure on your left.
Bountiful Treasure
After collecting the first Basic Treasure, go back to the main floor and obtain a bubble charge to use on the other side. After climbing the wall, you can find a Dreamjolt enemy and a Dream Bridge.
Climb the wall again to find a Bountiful Treasure.
Basic Treasure 2
On the left of the Bountiful Treasure, you can find a mechanism that can open up a path to the Bubble Tower. Refill some Bubble Charges on the Bubble Tower then head back to the wall you last entered.
There should be another Basic Treasure you can find. Collect it to complete Part 1 of the scattered clues objective. You will have to Talk to Singler after.
Find all the scattered clues within the chaotic space (Part 2)
Get closer and interact with the jigsaw
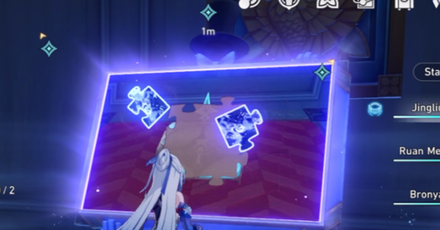
In Part 2, you can find a jigsaw puzzle in the middle of the room. Approach it and then two jigsaw puzzle pieces will scatter in the room.
Jigsaw Piece 1
Use the Bubble Tower on the room to collect a Bubble Charge then go to the right side of the room and use it to make a Dream Bridge.
Head to the other side of the wall to create another Dream Bridge and use it to collect the first jigsaw piece.
Basic Treasure 1
Use the Bubble Tower again and use it on the left wall to make a dream bridge. After entering the wall, turn right and use another Bubble Charge to make another Dream Bridge then enter it.
You should find stairs and move straight on to find the first Basic Treasure.
Jigsaw Piece and Basic Treasure 2
After collecting the Basic Treasure, go back to the previous wall you entered and look for a Dream Bridge with a Blue Snake Head nearby and use your Bubble Charge there.
Once you climb the wall, you will find both the last Jigsaw Piece and the last Basic Treasure.
Submit the Jigsaw Pieces
Head back to the jigsaw puzzle and add the missing jigsaw pieces to generate a Bountiful Chest. Open it to complete Part 2 of the objective.
Find all the scattered clues within the chaotic space (Part 3)
Use Bubble Charges on the Left Wall
After you enter the room, you'll find a Bubble Tower. Collect the charges and use them on the Dream Bridge that's stuck on the left wall.
Move forward until you find another Dream Bridge and head straight until you find a mechanism that opens up the path on the right for the Bubble Tower.
Basic Treasure 1
Use the Bubble Tower again and use the bubble charges on the platform in the middle of the room. You will be able to find a Basic Treasure after using two charges.
Extra Bubble Charge Count
The other path in the middle platform will lead to a Bubble Tower that can increase your maximum Bubble Charge count by 1.
Basic Treasure 2
Now that you have three charges, go to the right wall and create a dream bridge. On the wall you're standing, head northwest to find a Dream Bridge that leads to another Basic Treasure.
Bountiful Treasure
On the floor with the second Basic Treasure, there's a Bubble Tower you can use to get an extra charge and use it on the wall. Afterwards, head left to find a Dream Bridge beside a television screen.
After entering the Dream Bridge, head right to find another Dream Bridge that will give you the Bountiful Treasure.
Enter the chaotic space one final time to search for clues (Part 4)
Four Jigsaw Puzzles
Solve the first three jigsaw puzzles to unlock access to the Bubble Tower. The fourth jigsaw puzzle will unlock a jigsaw puzzle on the ceiling.
Extra Bubble Charge Count
Use the Bubble Tower and use it on the Dream Bridge that's nearest to the entrance. Go to the Dream Bridge on the right side of the nearest pillar which leads to an extra Bubble Tower that grants an extra charge count.
Bountiful Treasure
Use the Dream Bridge on the left wall. You will find another Dream Bridge you can use on the right that leads to the fifth jigsaw puzzle.
After solving the puzzle, you can now collect the Bountiful Treasure on the ground floor.
Basic Treasure 1
On the left of the fifth jigsaw puzzle, you'll find a Bubble Tower with a Dream Bridge behind it. Refill your Bubble Charges and use it on the nearest wall.
Head straight to find another Dream Bridge that leads to a Basic Treasure.
Basic Treasure 2
Go back to the previous Bubble Tower refill the charges and use it the nearest Dream Bridge. This time, head right to a path with two Dream Bridges that lead to the second Basic Treasure.
Leave the chaotic space and witness the outcomes of your investigation
After collecting the necessary chests, talk to Singler one last time. The mission ends after an angry Singler leaves the Dreamscape.
Slaughterhouse Rewards
Get "Space Walk" Achievement
Completing Slaughterhouse will unlock the "Space Walk" achievement!
Other Completion Rewards
| Mission Rewards | ||
|---|---|---|
 Credit
x5000 Credit
x5000 |
||
Honkai: Star Rail Related Guides

All Missions and Mission Types
All Penacony Mission Guides
Comment
4  Anonymous about 1 year
I'm trying to get to the very last treasure, but I only have 2 bubbles available, while the video shows 3. did I encounter some bug, or is soemthing else needed to get 3?
Author

Slaughterhouse Mission Guide
Please participate in our site
improvement survey
03/2026
improvement survey
03/2026
Would you assist in
improving Game8's site?
improving Game8's site?

×
We are listening to our users' valuable opinions and discussing how to act on them.
The information collected through this survey will be used for the purpose of improving our services. In addition, the information will only be disclosed a part of a statistic in a format that will not allow identification of personal information.
Begin Survey
Not Now
×
Please rate each item regarding Game8.co's Advertisements.
Amount of Ads
Very Dissatisfied
Somewhat Dissatisfied
Fine
Somewhat Satisfied
Highly Satisfied
Placement of Ads
Timing of Ad Display
Ad Loading Speed
Safeness of Ads
Content of Ads
×
Please rate each item regarding Game8.co's Quality of Articles.
Amount of information
Very Dissatisfied
Somewhat Dissatisfied
Fine
Somewhat Satisfied
Highly Satisfied
Frequency of updates
Speed of new information
Accuracy of articles
Understandibility of articles
Readability of sentences
×
Please rate each item regarding Game8.co's Usability of the Site.
Ease of finding information
Very Dissatisfied
Somewhat Dissatisfied
Fine
Somewhat Satisfied
Highly Satisfied
Loading Speed
Use of Color
Font Size
Visibility of Images
Easy to Understand Layout
×
Please rate each item regarding Game8.co's Message Boards, Comments.
Ease of Writing
Very Dissatisfied
Somewhat Dissatisfied
Fine
Somewhat Satisfied
Highly Satisfied
Readability
Ease in Finding Information
Comment Quality
Comment Quantity
Admin Response
×
Please rate each item regarding Game8.co's Site's new design.
Please rate our site's new design
Very Dissatisfied
Somewhat Dissatisfied
Fine
Somewhat Satisfied
Highly Satisfied
Do you think that the website's design change makes the site easier to use?
Has the new design made it easier for you to find information on the site?
Has the new design improved the overall visual appeal of the site?
How would you rate your overall satisfaction with the new design of the site?
×
How likely are you to recommend Game8 to someone you know?
Very Unlikely
0
1
2
3
4
5
6
7
8
9
10
Very Likely
If you have other opinions regarding potential improvement to the website, please share them with us. We would appreciate your honest opinion.
Note: This is a free response section, so you can proceed without entering anything.
Note: Please be sure not to enter any kind of personal information into your response.
Note: Please be sure not to enter any kind of personal information into your response.
×
Thank You
×
Thank you for participating in our survey! Your answers will help us to improve the quality of our website and services.
We hope you continue to make use of Game8.
We hope you continue to make use of Game8.
Close
Premium Articles

Rankings
- We could not find the message board you were looking for.
Gaming News


Popular Games

Genshin Impact Walkthrough & Guides Wiki
Honkai: Star Rail Walkthrough & Guides Wiki
Umamusume: Pretty Derby Walkthrough & Guides Wiki
Pokemon Pokopia Walkthrough & Guides Wiki
Resident Evil Requiem (RE9) Walkthrough & Guides Wiki
Monster Hunter Wilds Walkthrough & Guides Wiki
Wuthering Waves Walkthrough & Guides Wiki
Arknights: Endfield Walkthrough & Guides Wiki
Pokemon FireRed and LeafGreen (FRLG) Walkthrough & Guides Wiki
Pokemon TCG Pocket (PTCGP) Strategies & Guides Wiki


Recommended Games
Diablo 4: Vessel of Hatred Walkthrough & Guides Wiki
Fire Emblem Heroes (FEH) Walkthrough & Guides Wiki
Yu-Gi-Oh! Master Duel Walkthrough & Guides Wiki
Super Smash Bros. Ultimate Walkthrough & Guides Wiki
Pokemon Brilliant Diamond and Shining Pearl (BDSP) Walkthrough & Guides Wiki
Elden Ring Shadow of the Erdtree Walkthrough & Guides Wiki
Monster Hunter World Walkthrough & Guides Wiki
The Legend of Zelda: Tears of the Kingdom Walkthrough & Guides Wiki
Persona 3 Reload Walkthrough & Guides Wiki
Cyberpunk 2077: Ultimate Edition Walkthrough & Guides Wiki


All rights reserved
Copyright © 2024 HoYoverse, COGNOSPHERE. All Rights Reserved.
The copyrights of videos of games used in our content and other intellectual property rights belong to the provider of the game.
The contents we provide on this site were created personally by members of the Game8 editorial department.
We refuse the right to reuse or repost content taken without our permission such as data or images to other sites.
open the map, it's shows in 3D, you can see all the basin icons to pick up bubbles, look for one with a little + marking on the basin. :)