Trial of the Equilibrium: Part Three Mission Guide
★ Exclusive: Check out the State of Meta in 4.0!
♦ Latest: 4.0 Redeem Codes
♦ Phase 2: Sparkxie, Sparkle, Cerydra, Rappa
♦ Upcoming: Ashveil, Silver Wolf Lv.999, Evanescia
♦ Events: Cosmicon, Roll On!, Ding! Arcadia Fun-Time Clock-In Essentials

The Trial of the Equilibrium: Part Three is a Trailblaze Mission in Honkai: Star Rail that players will need to complete in order to raise their Equilibrium Level. Check out how to unlock and complete this Trial of the Equilibrium, including a full list of rewards for beating it!
| Previous Mission | Next Mission |
|---|---|
| Trial of the Equilibrium: Part Two | Trial of the Equilibrium: Part Four |
Trial of the Equilibrium: Part Three Information
| Mission Type | Trailblaze Mission |
|---|---|
| Location | Jarilo-VI, Great Mine |
| Required Level | 40 |
Bosses Inside Trial of the Equilibrium: Part Three
| All Trial Bosses | |
|---|---|
 Frigid Prowler Frigid Prowler
(Level 50) |
 Voidranger - Trampler Voidranger - Trampler
(Level 50) |
How to Unlock Trial of the Equilibrium: Part Three
Reach Trailblaze Level 40
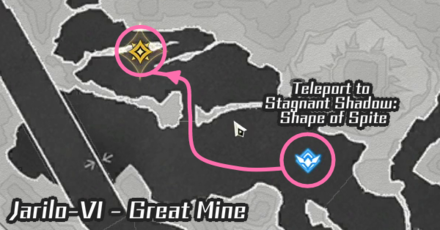
| Map Location | World View |
|---|---|
 |
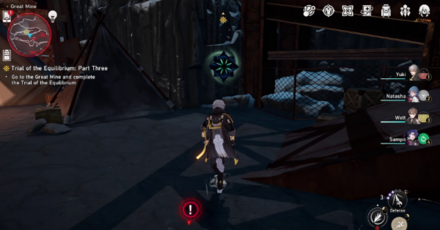 |
Trial of the Equilibrium: Part Three will automatically unlock once players hit Trailblaze Level 40. Once unlocked, head over to the Great Mine in Jarilo-VI to find the challenge you must complete.
How to Beat Trial of the Equilibrium: Part Three
| Boss Tips for Trial of the Equibrium: Part Three |
|---|
|
|
Best Characters for Trial of the Equilibrium: Part Three
| Enemies | Weaknesses |
|---|---|
Use characters that are of the same elements as shown above to easily break the enemies' Toughness Meter. You will not be able to change your team once inside, so use a team that can deal with both enemies.
Note: The Frigid Prowler will have a resistance to Ice damage. Avoid using Ice units like Yanqing as your main source of damage.
Clear the Other Monsters to Make Both Fights Easier
| Enemies | Weaknesses |
|---|---|
The Frigid Prowler can summon two Everwinter Shadewalkers as much as it wants. Meanwhile, the Vodranger - Trampler will start with two Voidranger - Weavers.
Make sure to clear any support mobs before you handle the boss, since they can whittle you down badly at this point in the game. Luckily, the Voidranger - Trampler will not re-summon minions, so taking them out early will do wonders for your team's survivability.
Use Techniques Before Battle
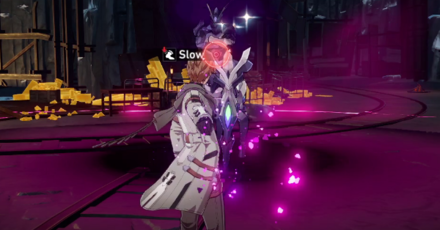
Techniques are essential for these fights, especially if you want to avoid taking damage as soon as you enter the fight. Make sure to buff, debuff, or use offensive Techniques to start both boss fights in your favor.
Nihility and Harmony characters are good at these boss rush situations, as they can help you set up the field to your advantage.
You can also use offensive techniques to break inflict Weakness break on smaller enemies before the battle starts. Great examples in these fights are Serval and Asta.
Play Safe and Rely on Heals and Shields

At this point in the game, enemies are ramping up in difficulty, always remember that it will always be better to play around your heals and shields. Make full use of the no-turn limit of the challenge, and use Skill Points on shields and heals if needed.
When the Voidranger uses its Spiral Arrow, make sure you're on standby with both your shields and heals. Targeted characters that you have to leave unshielded should be healed and vice versa.
Bring Consumables to Heal Between Battles
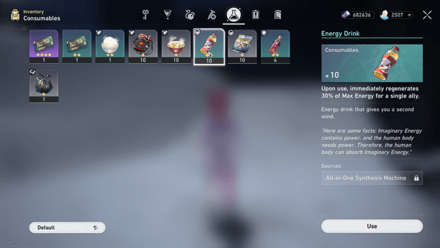
If you're attempting the challenge without a Healer, it is recommended that you bring HP-restoring consumables that you can use to heal in-between fights. Without these, you will be fighting the second boss with a preventable handicap.
Prioritize the Everwinter Shadewalkers
The Frigid Prowler will always summon two Everwinter Shadewalkers to the field if there aren't any. It will then consume them after a turn has passed, raising its ATK for every one it eats.
However, defeating the summons before the Frigidwalker has the chance to consume them will result in lowering its DEF instead.
Everwinter Sidewalkers Inflict Slow on Attack
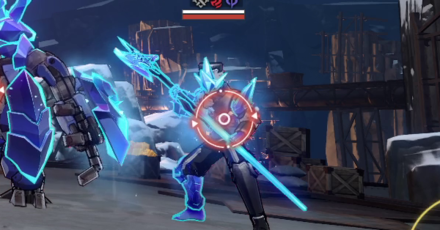
Other than buffing the Frigid Prowler, the Everwinter Shadewalkers' attacks also inflict Slow on whoever they hit, making the Firigidwalker obtain ATK buffs faster.
Take them out first by targeting them specifically, or use characters like Himeko or Trailblazer (Fire) to break their Toughness bar with their AoE Fire attacks.
Inflict Weakness Break on The Voidranger - Trampler
The Voidranger - Trampler has a special Follow-Up attack where, for one turn, it will charge its bow for a devastating targeted attack. Time your Ultimates and Skills in order to break its Toughness Bar to cancel this attack.
Trial of the Equilibrium: Part Three Walkthrough
| Quest Walkthrough | |
|---|---|
| 1 | Teleport to the Stagnant Shadow: Shape of Spite in the Great Mine. |
| 2 | Make your way to the Challenge portal and interact with it. |
| 3 | Select your team and challenge the boss monsters. For this trial, you will face a Frigid Prowler (Lv. 50) and a Voidranger - Trampler (Lv. 50). |
| 4 | Defeat the bosses to complete the trial and unlock Equilibrium Level 3. |
Trial of the Equilibrium: Part Three Rewards
Item and EXP Rewards
| Mission Rewards | ||
|---|---|---|
 Star Rail Pass
x3 Star Rail Pass
x3 |
 Traveler's Guide
x12 Traveler's Guide
x12 |
 Refined Aether
x10 Refined Aether
x10 |
 Credit
x50000 Credit
x50000 |
||
Unlocks Relic Crafting
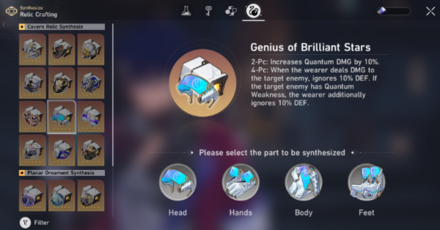
By obtaining Equilibrium Level 3, you can unlock the Relic Crafting System this allows you to craft 5-Star Relics through the Omni-Synthesizer. For each piece, you need 100 Relic Remains to craft them.
Unlocks Equilibrium Level 3
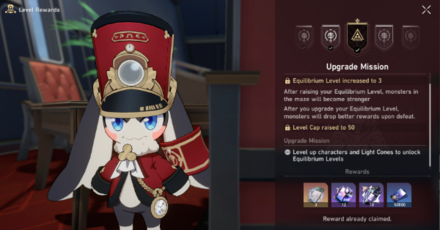
Completing the Trial of the Equilibrium: Part Three will unlock Equilibrium Level 3, allowing you to ascend and level up your Characters and Light Cones to level 60.
Unlocks More Difficult Bosses
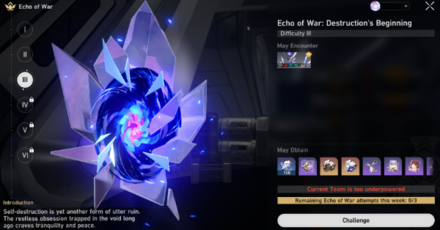
Equilibrium Level 3 will also increase the level and difficulty of the monsters you encounter, but will grant better rewards if you win your fights.
Honkai: Star Rail Related Guides

All Missions and Mission Types
Other Universal Equilibrium Guides

| Universal Equilibrium | |
|---|---|
| 1 | Trial of the Equilibrium: Part One |
| 2 | Trial of the Equilibrium: Part Two |
| 3 | Trial of the Equilibrium: Part Three |
| 4 | Trial of the Equilibrium: Part Four |
| 5 | Trial of the Equilibrium: Part Five |
| 6 | Trial of the Equilibrium: Part Six |
All Trailblaze Missions
| Prologue: Herta Space Station | |
|---|---|
| 1 | Today Is Yesterday's Tomorrow |
| Chapter 1: Jarilo-VI | |
| 2 | In the Withering Wintry Night |
| 3 | In the Sweltering Morning Sun |
| Chapter 2: The Xianzhou Loufu | |
| 4 | Windswept Wanderlust |
| 5 | Topclouded Towerthrust |
| 6 | Karmic Clouds Faded, War Banners Folded |
| Chapter 3: Penacony | |
| 7 | The Sound and the Fury |
| 8 | Cat Among Pigeons |
| 9 | In Our Time |
| 10 | Farewell, Penacony |
| 11 | A New Venture on the Eighth Dawn |
| Chapter 4: Amphoreus | |
| 12 | Heroic Saga of Flame-Chase |
| 13 | Light Slips the Gate, Shadow Greets the Throne |
| 14 | Through the Petals in the Land of Repose |
| 15 | The Fall at Dawn's Rise |
| 16 | For the Sun is Set to Die |
| 17 | Before Their Deaths |
| 18 | Back to Earth in Evernight |
| 19 | As Tomorrow Became Yesterday |
Comment
Author
Trial of the Equilibrium: Part Three Mission Guide
improvement survey
03/2026
improving Game8's site?

Your answers will help us to improve our website.
Note: Please be sure not to enter any kind of personal information into your response.

We hope you continue to make use of Game8.
Premium Articles
Rankings
- We could not find the message board you were looking for.
Gaming News
Popular Games

Genshin Impact Walkthrough & Guides Wiki

Honkai: Star Rail Walkthrough & Guides Wiki

Umamusume: Pretty Derby Walkthrough & Guides Wiki

Pokemon Pokopia Walkthrough & Guides Wiki

Resident Evil Requiem (RE9) Walkthrough & Guides Wiki

Monster Hunter Wilds Walkthrough & Guides Wiki

Wuthering Waves Walkthrough & Guides Wiki

Arknights: Endfield Walkthrough & Guides Wiki

Pokemon FireRed and LeafGreen (FRLG) Walkthrough & Guides Wiki

Pokemon TCG Pocket (PTCGP) Strategies & Guides Wiki
Recommended Games

Diablo 4: Vessel of Hatred Walkthrough & Guides Wiki

Fire Emblem Heroes (FEH) Walkthrough & Guides Wiki

Yu-Gi-Oh! Master Duel Walkthrough & Guides Wiki

Super Smash Bros. Ultimate Walkthrough & Guides Wiki

Pokemon Brilliant Diamond and Shining Pearl (BDSP) Walkthrough & Guides Wiki

Elden Ring Shadow of the Erdtree Walkthrough & Guides Wiki

Monster Hunter World Walkthrough & Guides Wiki

The Legend of Zelda: Tears of the Kingdom Walkthrough & Guides Wiki

Persona 3 Reload Walkthrough & Guides Wiki

Cyberpunk 2077: Ultimate Edition Walkthrough & Guides Wiki
All rights reserved
Copyright © 2024 HoYoverse, COGNOSPHERE. All Rights Reserved.
The copyrights of videos of games used in our content and other intellectual property rights belong to the provider of the game.
The contents we provide on this site were created personally by members of the Game8 editorial department.
We refuse the right to reuse or repost content taken without our permission such as data or images to other sites.


