This survey will take about 1 minute.
Your answers will help us to improve our website.
Dungeons & Dragons: Dark Alliance
Ghosts of the Past Act Guide and Walkthrough | Cursed Giant Urns Locations
This is a walkthrough for Ghosts of the Past, Act 1 of The Mask of Kelvin in Dungeons & Dragons: Dark Alliance. Learn more about the objectives of this quest, available rewards, tips for completion, locations of attribute shrines, as well as boss fight strategies!
| Previous Quest | Current Quest | Next Quest |
|---|---|---|
| Return of the Tyrant | Ghosts of the Past | The Broken City |
List of Contents
Ghosts of the Past Basic Information
Quest Information
| Quest | The Mask of Kelvin |
|---|---|
| Mission | |
| A frost giant named Utaar is attempting to break into Kelvin's Tomb and recover an artifiact that he believes will help him find and claim the Crystal Shard. | |
Act Information
| Act No. | 1 |
|---|---|
| Type | Dungeon |
| Preferred Gear Set Drop | Flag Bearer (Wulfgar) Remorhaz Brotherhood (Drizzt) Barbarian Diplomat (Catti-brie) Battlehammer King (Bruenor) |
| Bosses | The Husk of Torult Dragonbane |
| Optional Bosses | Juurn the Twice Risen |
| Unlock Requirement | Complete The Goblin's Shard, Verbeeg Jamboree and The Order of the One Light |
| Description | |
| Kelvin's Cairn was named for the great frost giant king of old who was buried beneath it, so the legend told. Utaar was one of the few remaining frost giant kings of Icewind Dale. He had delved deep under Kelvin's Cairn and broken the seals set by the clerics of Tempus on the Tomb of Kelvin. Utaar's action had disturbed the dead, and we would have to lay them back to rest before following Utaar into the catacombs of Kelvin's fallen city. | |
Ghosts of the Past Main Objectives
Reach the mushroom garden. Purge the Tempus shrine at the mushroom garden
| Objectives | |
|---|---|
| 1 | 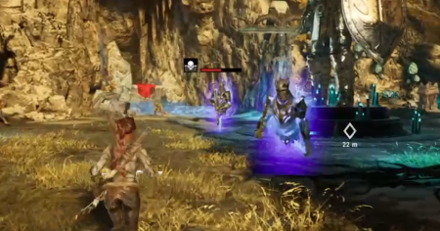 Explore the area to reach the first Tempus shrine Follow the objective marker and battle the enemies at the shrine. Take note that these enemies are far stronger than the ones battled before especially if you've taken those missions at Challenge Rating 1. |
Reach the withered orchard. Purge the Tempus shrine at the withered orchard
| Objectives | |
|---|---|
| 2 | 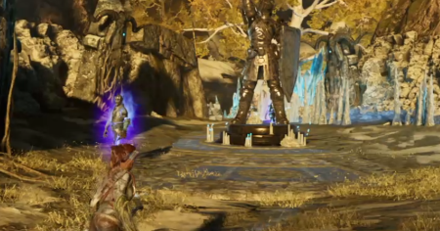 Go down the road and dodge the traps. Jump towards the next area and defeat the enemies there to get a Short Rest. Continue to head down the path to eventually reach the withered orchard. Battle the enemies there. |
Reach the sunset plaza. Purge the Tempus shrine at the sunset plaza
| Objectives | |
|---|---|
| 3 | 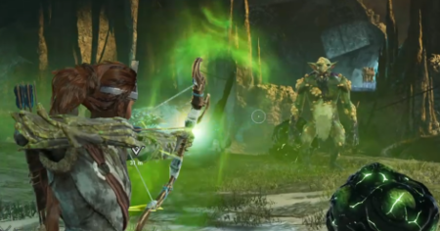 Head down the path, try to avoid the ice spikes below the jumping point. Keep going on the path to battle a troll. Jump over the chasm, head right, jump over another chasm to reach the sunset plaza. Defeat all the enemies here. |
Reach the crystal outcrop. Purge the Tempus shrine at the crystal outcrop
| Objectives | |
|---|---|
| 4 | 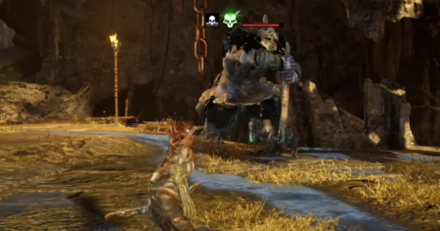 Follow the objective marker and climb the ledges. Head north to battle the troll. Climb the ledge and the wooden path and battle the enemies on to. Head to the wooden bridge and take the portal to the crystal outcrop. Defeat all enemies there. |
Take the portal and reach the soul well
| Objectives | |
|---|---|
| 5 | 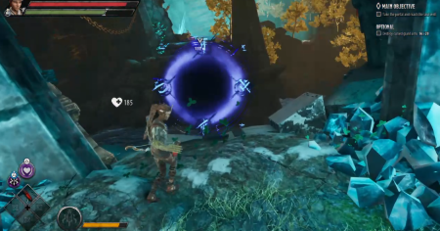 Once all enemies have been cleared, head to the edge of the area to find a portal. Ride it to the soul well. |
Use the pressure plates to restore the Tempus seal on the soul well
| Objectives | |
|---|---|
| 6 | 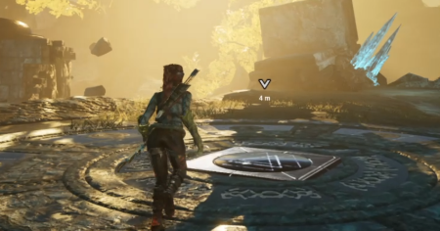 Step on the plates to restore the seal As you enter the soul well, you will see an immobile giant in the middle. Just before him are two pressure plates. Step on them to restore the seal. |
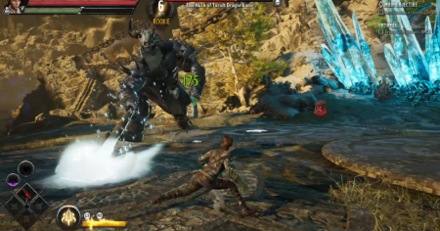
Defeat the Husk of Torult Dragonbane
| Objectives | |
|---|---|
| 7 |  Battle the boss to end the mission Once the seal has been restored, the huge giant will spring back to life to battle you, summoning several minions as well. Defeat him to end the mission. |
Ghosts of the Past Optional Objectives
Defeat Juurn the Twice Risen
| Objectives | |
|---|---|
| 1 | 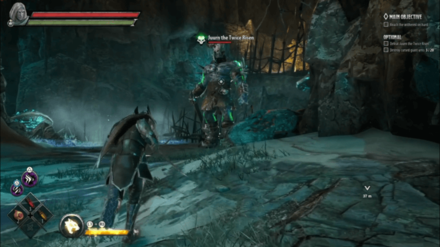 Located just near the area of your first short rest. Climb up the ladder to the right to get to him. Make sure you're well prepared before facing him, he's very durable and hits very hard with his large AoEs. |
Destroy Cursed Giant Urns
| Objectives | |
|---|---|
| 1 | 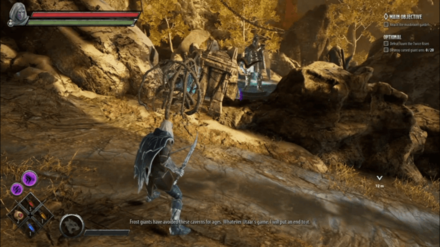 The first urn is located on the path towards the Mushroom Garden. |
| 2 | 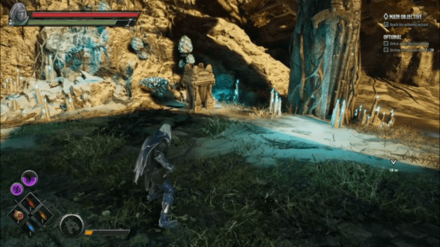 Located in the Mushroom Garden, near a statue. |
| 3 | 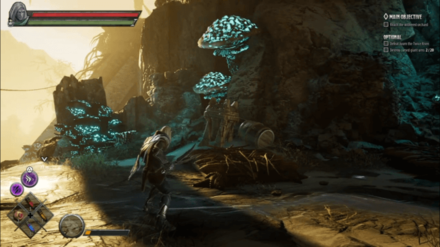 Located in the area of your first short rest. |
| 4 | 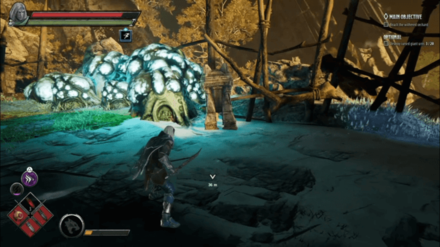 Located just outside the entrance of the Attribute Shrine location. |
| 5 | 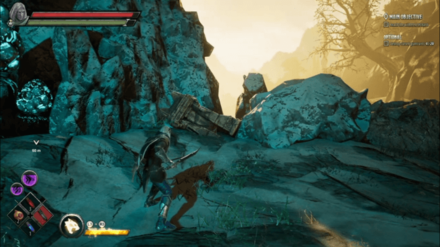 Located just before entering the Withered Orchard location. |
| 6 | 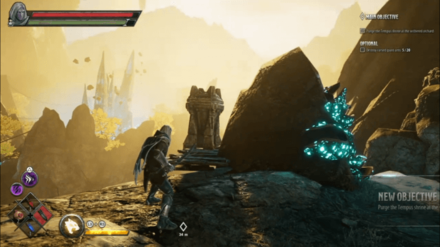 Located behind a rock, just after you reach the Withered Orchard. |
| 7 | 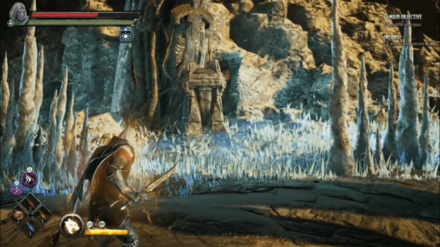 Located on an ice spike near the shrine at Withered Orchard. |
| 8 | 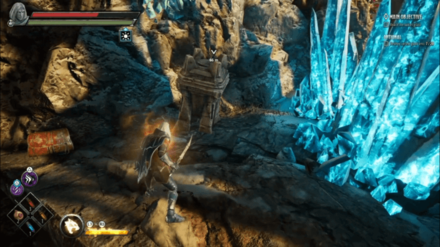 Located just behind a glowing blue crystal in the path ahead of the shrine in Withered Orchard. |
| 9 | 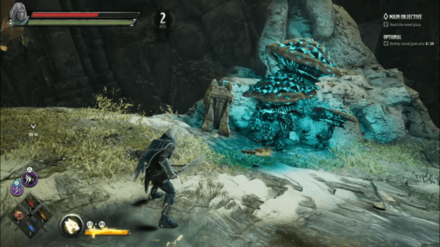 Located besides a mushroom on the path to Sunset Plaza, just before jumping across a broken bridge. |
| 10 | 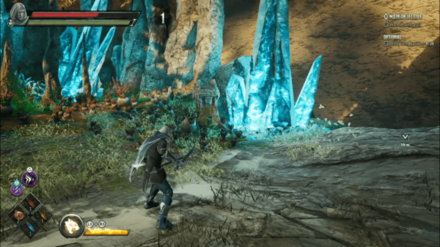 Located just besides a poisonous plant on the path to Sunset Plaza, just before jumping across a broken bridge. |
| 11 | 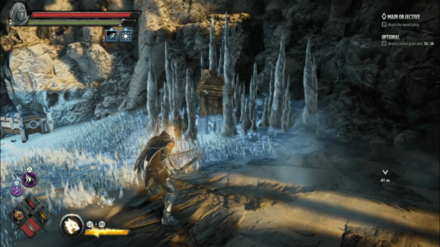 Just before entering the Sunset Plaza, take the path to the left. The Urn is located inside with ice stalagmites surrounding it. |
| 12 | 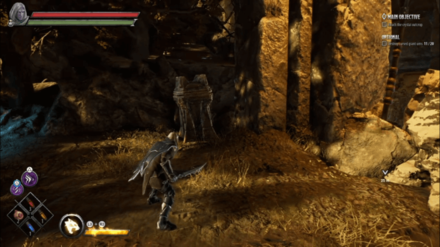 Located on top of a ledge in Sunset Plaza. |
| 13 | 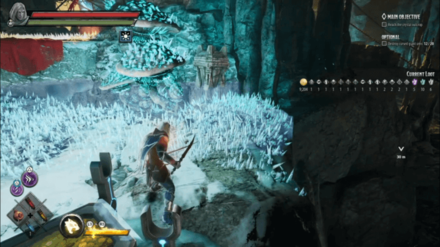 On the way to Crystal Outcrop there will be a path on the left filled with ice spikes. Head inside and jump down a gap. The urn is located besides a mushroom. |
| 14 | 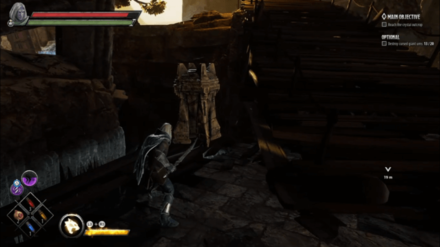 Located besides the wooden bridge leading up to the Crystal Outcrop. |
| 15 |  In the courtyard just before the Crystal Outcrop, there is a hole you can jump into on your left. Once down, there is an urn near an explosive barrel. |
| 16 | 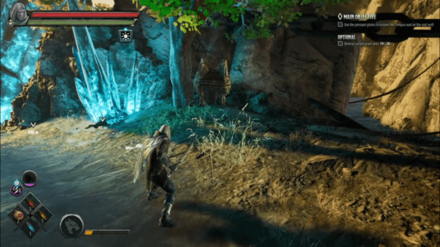 Located near a tree right after taking the portal to the Crystal Outcrop |
| 17 |  Located besides a glowing blue crystal in the Crystal Outcrop shrine. |
| 18 | 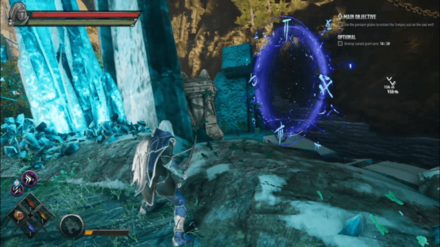 Located at the left side of the portal to the Soul Well. |
| 19 | 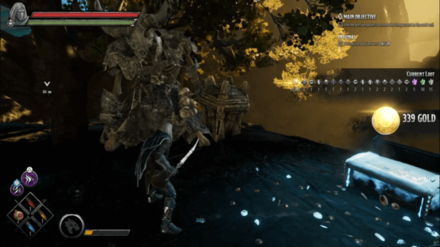 Located near a giant skeleton after taking the portal to Soul Well. |
| 20 | 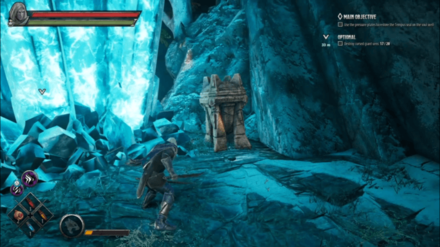 Inside the boss area, just left of the boss. |
Tips and Strategies
Find Teammates
The battles in Dungeons are pretty difficult considering the jump in Challenge Rating. It is advised that you find teammates in order to easily accomplish this mission.
Catti-Brie or Drizzt
For those going solo, Catti-brie and Drizzt will be the best options here. Catti-brie will be useufl thanks to her ranged attacks. If you managed to get a bow with the Acid element, this will make her extremely potent as giants and trolls here are pretty much susceptible to being Poisoned.
Drizzt's Blink is very helpful dishing out massive damage to unsuspecting trolls and giants in this area, making them easier to kill. With Drizzt's fast mobility, he can safely dash out of range for most AoE attacks used by the giants.
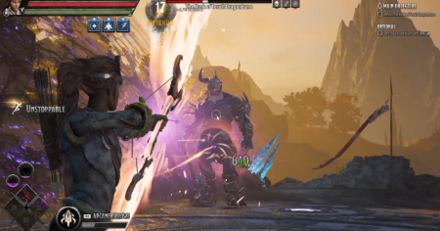
Boss Strategy: The Husk of Torult Dragonbane
While he is not overly difficult as he is big and rather slow, he does pack a punch and a few hits on you will definitely chip away a huge part of your Health. Dodge and time your attacks well. Catti-brie and Drizzt can basically come out of this battle unscathed given the right use of their bow attacks and Blink respectively.
Ghosts of the Past Attribute Shrine Location
| Directions | |
|---|---|
| 1 | 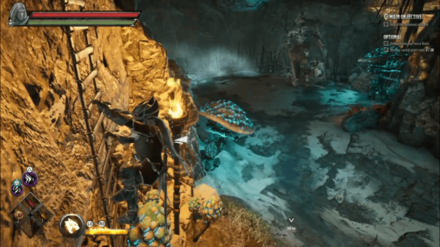 To get to the Attribute Shrine, climb up the ladder just before Juurn the Twice Risen's area. |
| 2 | 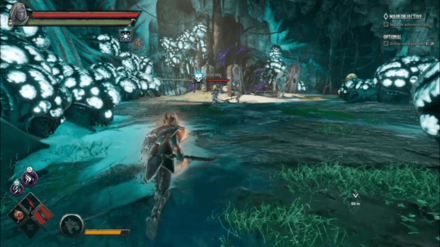 At the top, take the path that leads to the cavern. Inside there are trolls and a bunch of shaman goblins you have to defeat. |
| 3 | 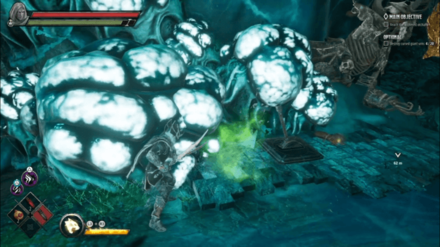 Defeating the troll will drop the Netherese Keystone. You will need two of it to disable the force field. The second Netherese Keystone is located in a cage high up the celing. There is a lever in the second entrance you can interact for the cage to come down. |
| 4 | 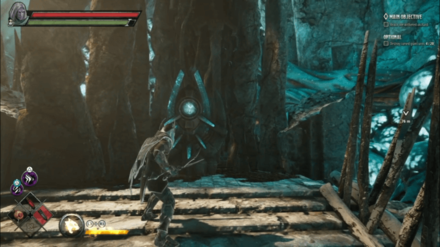 Once you have the two Netherese Keystone, interact with the mechanism and the force field will disappear. You'll be able to take the attribute from the shrine now. |
Ghosts of the Past Chest Locations
| Location | Directions | |
|---|---|---|
| 1 | 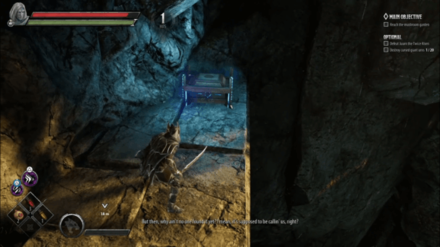 |
Located behind some dead plants, just before entering the Mushroom Garden shrine. |
| 2 | 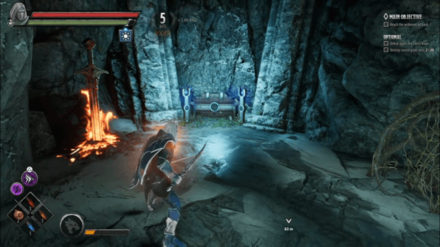 |
There is an ice path you can take in the Mushroom Garden. At the end, behind a dead plant, is a chest. |
| 3 | 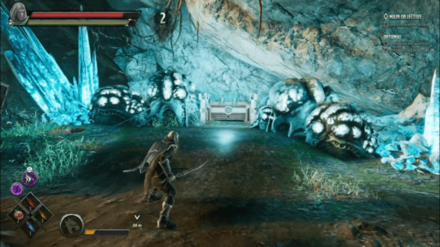 |
Just past the electric traps on the way to the Withered Orchard, take the first ladder you see. At the top will be a chest. Be careful as a troll will spawn as soon as you open the chest. |
| 4 | 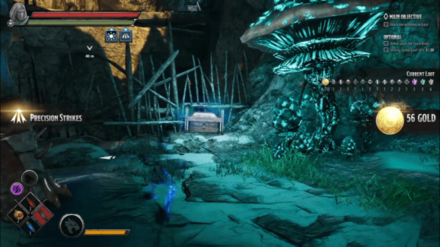 |
Located besides Juurn the Twice Risen, hiding behind a wheelbarrow. |
| 5 | 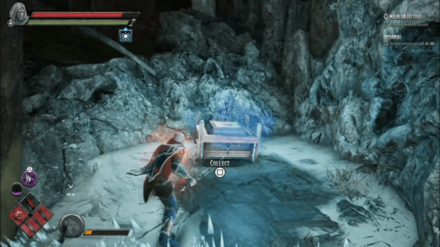 |
Located just before the Attribute Shrine, across an icy field. |
| 6 | 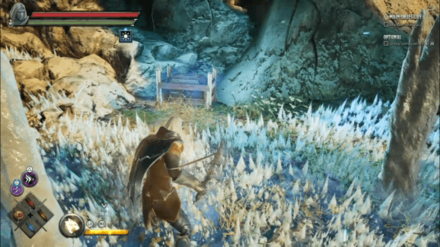 |
Located in the icy field, in the Withered Orchard Shrine. |
| 7 | 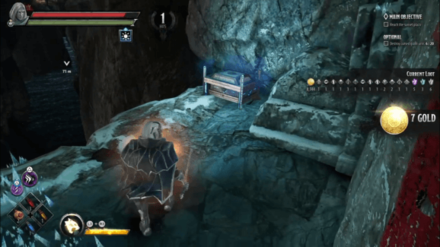 |
Just down a hole in the Withered Orchard Shrine, located behind some ice stalagmites. |
| 8 |  |
Just before entering the Sunset Plaza, take the path to the left. At the end of the path is a chest. |
| 9 | 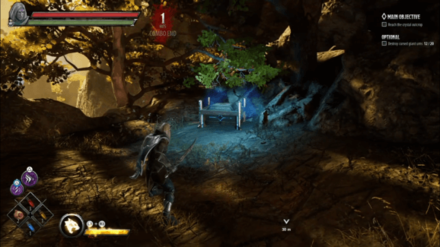 |
Located on top of a ledge in Sunset Plaza, near a tree. |
| 10 | 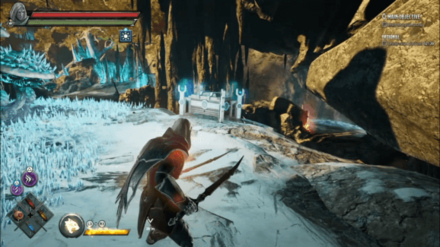 |
On the way to Crystal Outcrop there will be a path on the left filled with ice spikes. Head inside and jump down a hole and there will be a chest. |
| 11 | 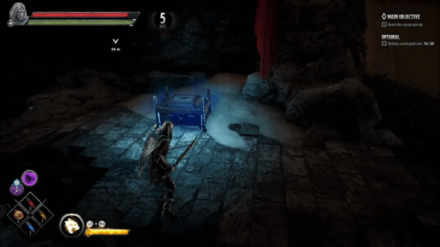 |
Located underground, just before the wooden bridge leading up to the Crystal Outcrop. Jump off a cliff to get down. |
| 12 | 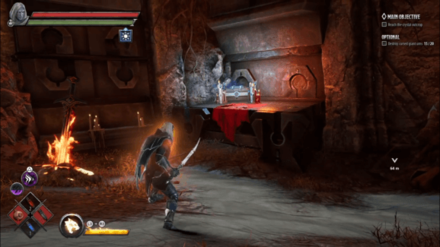 |
In the courtyard just before the Crystal Outcrop, there is a hole you can jump into on your left. Once down, there is locked door. Use the explosive barrel to get inside and get the chest. |
| 13 | 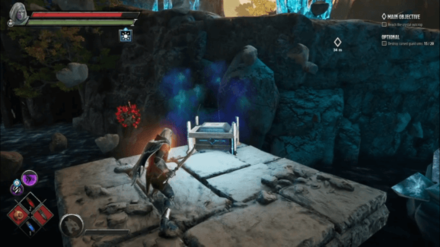 |
The area just before the Crystal Outcrop, where you fight the troll, there is a path to the left that goes around the giant crystal. The chest is located on a floating platform in the river. |
| 14 |  |
There is a platform you can jump down to in the Crystal Outcrop shrine at the edge of the cliff. |
Dark Alliance Related Links
| Companions of Icewind Dale |
|---|
| Goblins at the Gates |
| Halls of Duergar |
| Bangor's Span |
| The Goblin's Shard |
|---|
| The Goblin Valley |
| Goffin's Door |
| The Goblin Tower |
| Verbeeg Jamboree |
|---|
| The Verbeeg Jamboree |
| Designs of the Duergar |
| A Feast for All Cretins |
| The Order of the Light |
|---|
| An Infernal Dispute |
| Order of the One Light |
| The Return of the Tyrant |
| The Mask of Kelvin |
|---|
| Ghosts of the Past |
| The Broken City |
| The Face of Kelvin |
| Crystalline Dreams |
|---|
| The Floating City |
| Crystal Harvest |
| A Crystal Crown |
| The Fury of Icewind |
|---|
| The Hunting Grounds |
| The Hall of Judgment |
| A Tomb of Ice |
Comment
Author

Ghosts of the Past Act Guide and Walkthrough | Cursed Giant Urns Locations
Please participate in our site
improvement survey
03/2026
improvement survey
03/2026
Would you assist in
improving Game8's site?
improving Game8's site?

×
We are listening to our users' valuable opinions and discussing how to act on them.
The information collected through this survey will be used for the purpose of improving our services. In addition, the information will only be disclosed a part of a statistic in a format that will not allow identification of personal information.
Begin Survey
Not Now
×
Please rate each item regarding Game8.co's Advertisements.
Amount of Ads
Very Dissatisfied
Somewhat Dissatisfied
Fine
Somewhat Satisfied
Highly Satisfied
Placement of Ads
Timing of Ad Display
Ad Loading Speed
Safeness of Ads
Content of Ads
×
Please rate each item regarding Game8.co's Quality of Articles.
Amount of information
Very Dissatisfied
Somewhat Dissatisfied
Fine
Somewhat Satisfied
Highly Satisfied
Frequency of updates
Speed of new information
Accuracy of articles
Understandibility of articles
Readability of sentences
×
Please rate each item regarding Game8.co's Usability of the Site.
Ease of finding information
Very Dissatisfied
Somewhat Dissatisfied
Fine
Somewhat Satisfied
Highly Satisfied
Loading Speed
Use of Color
Font Size
Visibility of Images
Easy to Understand Layout
×
Please rate each item regarding Game8.co's Message Boards, Comments.
Ease of Writing
Very Dissatisfied
Somewhat Dissatisfied
Fine
Somewhat Satisfied
Highly Satisfied
Readability
Ease in Finding Information
Comment Quality
Comment Quantity
Admin Response
×
Please rate each item regarding Game8.co's Site's new design.
Please rate our site's new design
Very Dissatisfied
Somewhat Dissatisfied
Fine
Somewhat Satisfied
Highly Satisfied
Do you think that the website's design change makes the site easier to use?
Has the new design made it easier for you to find information on the site?
Has the new design improved the overall visual appeal of the site?
How would you rate your overall satisfaction with the new design of the site?
×
How likely are you to recommend Game8 to someone you know?
Very Unlikely
0
1
2
3
4
5
6
7
8
9
10
Very Likely
If you have other opinions regarding potential improvement to the website, please share them with us. We would appreciate your honest opinion.
Note: This is a free response section, so you can proceed without entering anything.
Note: Please be sure not to enter any kind of personal information into your response.
Note: Please be sure not to enter any kind of personal information into your response.
×
Thank You
×
Thank you for participating in our survey! Your answers will help us to improve the quality of our website and services.
We hope you continue to make use of Game8.
We hope you continue to make use of Game8.
Close
Rankings
- We could not find the message board you were looking for.
Gaming News


![Monster Hunter Stories 3 Review [First Impressions] | Simply Rejuvenating](https://img.game8.co/4438641/2a31b7702bd70e78ec8efd24661dacda.jpeg/thumb)
Popular Games

Genshin Impact Walkthrough & Guides Wiki
Honkai: Star Rail Walkthrough & Guides Wiki
Umamusume: Pretty Derby Walkthrough & Guides Wiki
Pokemon Pokopia Walkthrough & Guides Wiki
Resident Evil Requiem (RE9) Walkthrough & Guides Wiki
Monster Hunter Wilds Walkthrough & Guides Wiki
Wuthering Waves Walkthrough & Guides Wiki
Arknights: Endfield Walkthrough & Guides Wiki
Pokemon FireRed and LeafGreen (FRLG) Walkthrough & Guides Wiki
Pokemon TCG Pocket (PTCGP) Strategies & Guides Wiki


Recommended Games
Diablo 4: Vessel of Hatred Walkthrough & Guides Wiki
Cyberpunk 2077: Ultimate Edition Walkthrough & Guides Wiki
Fire Emblem Heroes (FEH) Walkthrough & Guides Wiki
Yu-Gi-Oh! Master Duel Walkthrough & Guides Wiki
Super Smash Bros. Ultimate Walkthrough & Guides Wiki
Pokemon Brilliant Diamond and Shining Pearl (BDSP) Walkthrough & Guides Wiki
Elden Ring Shadow of the Erdtree Walkthrough & Guides Wiki
Monster Hunter World Walkthrough & Guides Wiki
The Legend of Zelda: Tears of the Kingdom Walkthrough & Guides Wiki
Persona 3 Reload Walkthrough & Guides Wiki


All rights reserved
© 1993-2021 Wizards of the Coast LLC, a subsidiary of Hasbro, Inc. All Rights Reserved.
The copyrights of videos of games used in our content and other intellectual property rights belong to the provider of the game.
The contents we provide on this site were created personally by members of the Game8 editorial department.
We refuse the right to reuse or repost content taken without our permission such as data or images to other sites.