This survey will take about 1 minute.
Your answers will help us to improve our website.
Dungeons & Dragons: Dark Alliance
Bangor's Span Act Guide and Walkthrough

This is a walkthrough for Bangor's Span, Act 3 of Companions of Icewind Dale in Dungeons & Dragons: Dark Alliance. Learn more about the objectives of this quest, available rewards, tips for completion, locations of attribute shrines, as well as boss fight strategies!
| Previous Quest | Current Quest | Next Quest |
|---|---|---|
| Halls of Duergar | Bangor's Span | The Goblin Valley |
List of Contents
Bangor's Span Basic Information
Quest Information
| Quest | Companions of Icewind Dale |
|---|---|
| Mission | |
| Bruenor's people have fled their home, driven out by new threats that have come to claim the Crystal Shard. | |
Act Information
| Act No. | 3 |
|---|---|
| Type | Mission |
| Preferred Gear Set Drop | Hoard Raider (Bruenor) Tundra Raptor (Drizzt) Tundra Trapper (Wulfgar) Tundra Explorer (Catti-brie) |
| Bosses | Garnn and Murdunn |
| Optional Bosses | None |
| Unlock Requirement | Complete Halls of Duergar |
| Description | |
| The duergar we faced were but an advance force of legions on approach along Bangor's Span - the lone gateway to the Underdark. Dwarven sappers had collapsed bridges and tunnels all across their domain, but they had been unable to reach the Span. It was up to us. Destroy Bangor's Span and the duergar army would be safely stranded in the Underdark. But we would first have to face the elite force of duergar holding the Span's entry. | |
Bangor's Span Main Objectives
Reach Bangor's Span. Defeat Garnn and Murdunn
| Objectives | |
|---|---|
| 1 | 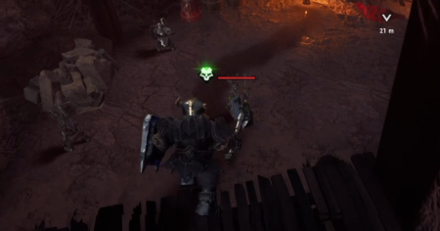 Go through each area and defeat all enemies. Head forward from the starting point and drop down from the first ledge you see. Defeat all enemies below. Continue down a couple of more ledges until you meet the next set of enemies. Destroy some boulders to the right and pick up an explosive barrel. |
| 2 | 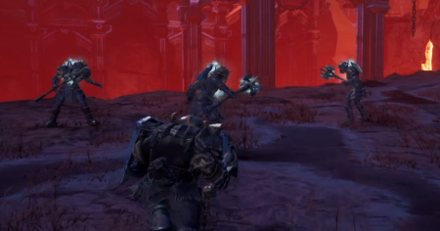 Defeat the Stygian Raiders Drop down on th next ledge to find the first wave of Stygian Raiders. These are pretty quick hitters similar to cultists. Upon their defeat, you will have your first available Short Rest. |
| 3 | 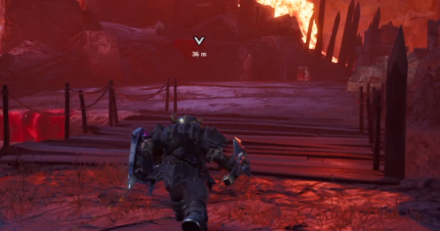 Continue to the next area Head to the next area and cross a bridge over a magma river and defeat the second wave of Stygian Raiders. Your second Short Rest will then be available. |
| 4 | 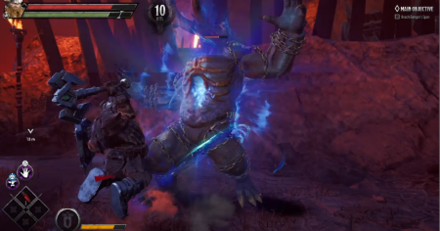 Proceed to the next area. Climb up the next area (take note of the wooden structure to your left) and defeat the huge beast. It'll drop an explosde barrel which you can use to open the wooden structure earlier for some minor loot. |
| 5 | 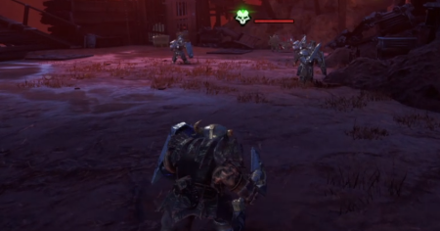 Cross the next area and continue to defeat the enemies. Head to the next area and watch your right side. There will a path there partially hidden by flames and past that is an explosive barrel. Continue on to the bridge and defeat more enemies for your third Short Rest. You can also place the explosive barrel here on the wooden structure nearby for some lore. |
| 6 | 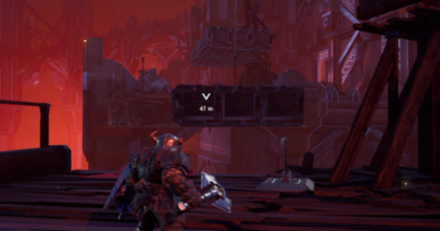 Move to the upper area and clear out the enemies Use the lever on the next ledge to lower the platforms to access the next area. Defeat the enemies here for your fourth and final Short Rest. |
| 7 | 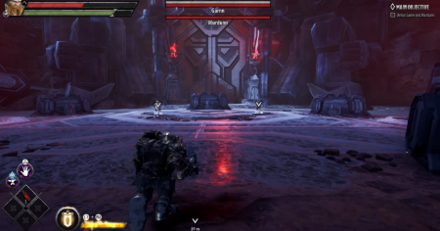 Proceed to the next area and battle the boss. Move towards the next area and climb the nearby elevator to confront the boss, Garnn and Murdunn. |
Tips and Strategies
Dodge! Attack! Rinse! Repeat!

While the first wave of enemies here are your regular duergar, the Stygian Raiders are pretty nimble. So mastering when to dodge is crucial. This is the same for the boss later on as the duo can overwhelm you with continuous attacks.
Boss Strategy: Garnn and Murdunn
Garnn

Garnn is similar to most duergar - he is a defensive specialist. He does have one weakness though - he is easy to knock down. Once his shield is downed, he will be vulnerable for a second or two and if you're fast enough you can easily chip away 10%-20% of his health.
This is easier to do if you deal with Murdunn first as he is the more annoying one of the pair and can easily knock you down.
Murdunn

Murdunn is a magician and he's pretty good at it. You can receive a barrage of spells and stay down for a few seconds, allowing Garnn and their minions to hit you.
The strategy with Murdunn is quick and simple - do not let him cast his spells. Inflict massive combos on him and once he falls Garnn will be much easier to defeat. However, be wary of long ranged minion attacks that may interrupt you. So attack, dodge - rinse and repeat.
Bangor's Span Chest Locations
| Location | Directions | |
|---|---|---|
| 1 | 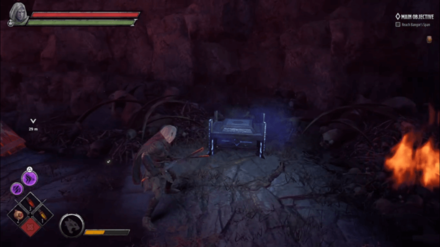 |
The first chest is in the area where you have to fight the first wave of Stygian Raiders. It's located near a wall with a pile of bones around it. |
| 2 | 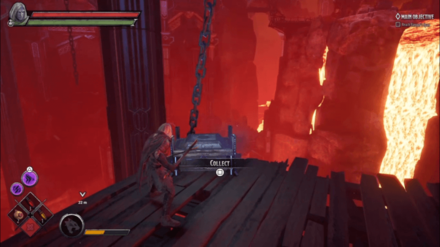 |
For this chest, you need an explosive barrel to open up a cage to acquire the lever in-order to lower the platform containing the chest. The barrel is hidden beneath a rubble near your second encounter while the lever is near the area of the mechanism. |
| 3 | 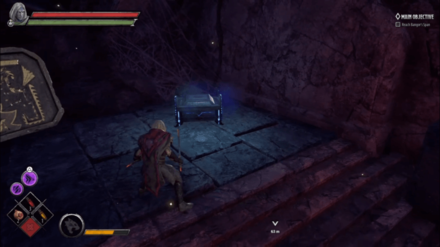 |
After defeating all of the enemies and acquiring your second short rest, destroy the debris on the left side then jump across the gap. Head up the stairs to open the chest. |
| 4 | 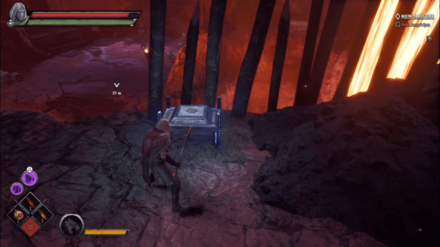 |
After crossing another bridge, keep following the path to the right to get to the chest. |
| 5 | 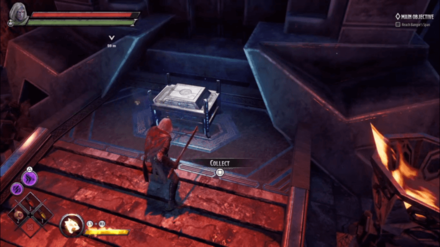 |
After acquiring your fourth short rest, You can break the barricade near the ballista to reveal a path to a chest. Be careful as the place is filled with spike traps and flamethrowers. |
| 6 | 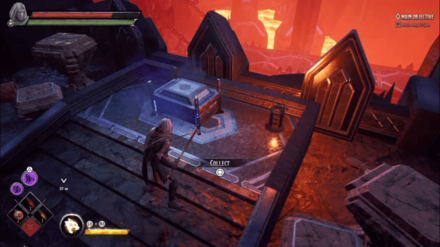 |
Just before the elevator ride towards the boss battle, there is a lever on the left side of the map. Interact with it to have a platform descend. Traverse across the platform to get to the chest. |
Dark Alliance Related Links
| Companions of Icewind Dale |
|---|
| Goblins at the Gates |
| Halls of Duergar |
| Bangor's Span |
| The Goblin's Shard |
|---|
| The Goblin Valley |
| Goffin's Door |
| The Goblin Tower |
| Verbeeg Jamboree |
|---|
| The Verbeeg Jamboree |
| Designs of the Duergar |
| A Feast for All Cretins |
| The Order of the Light |
|---|
| An Infernal Dispute |
| Order of the One Light |
| The Return of the Tyrant |
| The Mask of Kelvin |
|---|
| Ghosts of the Past |
| The Broken City |
| The Face of Kelvin |
| Crystalline Dreams |
|---|
| The Floating City |
| Crystal Harvest |
| A Crystal Crown |
| The Fury of Icewind |
|---|
| The Hunting Grounds |
| The Hall of Judgment |
| A Tomb of Ice |
Author
Bangor's Span Act Guide and Walkthrough
Please participate in our site
improvement survey
03/2026
improvement survey
03/2026
Would you assist in
improving Game8's site?
improving Game8's site?

×
We are listening to our users' valuable opinions and discussing how to act on them.
The information collected through this survey will be used for the purpose of improving our services. In addition, the information will only be disclosed a part of a statistic in a format that will not allow identification of personal information.
Begin Survey
Not Now
×
Please rate each item regarding Game8.co's Advertisements.
Amount of Ads
Very Dissatisfied
Somewhat Dissatisfied
Fine
Somewhat Satisfied
Highly Satisfied
Placement of Ads
Timing of Ad Display
Ad Loading Speed
Safeness of Ads
Content of Ads
×
Please rate each item regarding Game8.co's Quality of Articles.
Amount of information
Very Dissatisfied
Somewhat Dissatisfied
Fine
Somewhat Satisfied
Highly Satisfied
Frequency of updates
Speed of new information
Accuracy of articles
Understandibility of articles
Readability of sentences
×
Please rate each item regarding Game8.co's Usability of the Site.
Ease of finding information
Very Dissatisfied
Somewhat Dissatisfied
Fine
Somewhat Satisfied
Highly Satisfied
Loading Speed
Use of Color
Font Size
Visibility of Images
Easy to Understand Layout
×
Please rate each item regarding Game8.co's Message Boards, Comments.
Ease of Writing
Very Dissatisfied
Somewhat Dissatisfied
Fine
Somewhat Satisfied
Highly Satisfied
Readability
Ease in Finding Information
Comment Quality
Comment Quantity
Admin Response
×
Please rate each item regarding Game8.co's Site's new design.
Please rate our site's new design
Very Dissatisfied
Somewhat Dissatisfied
Fine
Somewhat Satisfied
Highly Satisfied
Do you think that the website's design change makes the site easier to use?
Has the new design made it easier for you to find information on the site?
Has the new design improved the overall visual appeal of the site?
How would you rate your overall satisfaction with the new design of the site?
×
How likely are you to recommend Game8 to someone you know?
Very Unlikely
0
1
2
3
4
5
6
7
8
9
10
Very Likely
If you have other opinions regarding potential improvement to the website, please share them with us. We would appreciate your honest opinion.
Note: This is a free response section, so you can proceed without entering anything.
Note: Please be sure not to enter any kind of personal information into your response.
Note: Please be sure not to enter any kind of personal information into your response.
×
Thank You
×
Thank you for participating in our survey! Your answers will help us to improve the quality of our website and services.
We hope you continue to make use of Game8.
We hope you continue to make use of Game8.
Close
Rankings
- We could not find the message board you were looking for.
Gaming News


![Monster Hunter Stories 3 Review [First Impressions] | Simply Rejuvenating](https://img.game8.co/4438641/2a31b7702bd70e78ec8efd24661dacda.jpeg/thumb)
Popular Games

Genshin Impact Walkthrough & Guides Wiki
Honkai: Star Rail Walkthrough & Guides Wiki
Umamusume: Pretty Derby Walkthrough & Guides Wiki
Pokemon Pokopia Walkthrough & Guides Wiki
Resident Evil Requiem (RE9) Walkthrough & Guides Wiki
Monster Hunter Wilds Walkthrough & Guides Wiki
Wuthering Waves Walkthrough & Guides Wiki
Arknights: Endfield Walkthrough & Guides Wiki
Pokemon FireRed and LeafGreen (FRLG) Walkthrough & Guides Wiki
Pokemon TCG Pocket (PTCGP) Strategies & Guides Wiki


Recommended Games
Diablo 4: Vessel of Hatred Walkthrough & Guides Wiki
Cyberpunk 2077: Ultimate Edition Walkthrough & Guides Wiki
Fire Emblem Heroes (FEH) Walkthrough & Guides Wiki
Yu-Gi-Oh! Master Duel Walkthrough & Guides Wiki
Super Smash Bros. Ultimate Walkthrough & Guides Wiki
Pokemon Brilliant Diamond and Shining Pearl (BDSP) Walkthrough & Guides Wiki
Elden Ring Shadow of the Erdtree Walkthrough & Guides Wiki
Monster Hunter World Walkthrough & Guides Wiki
The Legend of Zelda: Tears of the Kingdom Walkthrough & Guides Wiki
Persona 3 Reload Walkthrough & Guides Wiki


All rights reserved
© 1993-2021 Wizards of the Coast LLC, a subsidiary of Hasbro, Inc. All Rights Reserved.
The copyrights of videos of games used in our content and other intellectual property rights belong to the provider of the game.
The contents we provide on this site were created personally by members of the Game8 editorial department.
We refuse the right to reuse or repost content taken without our permission such as data or images to other sites.