All Tome Locations | Lore Objects
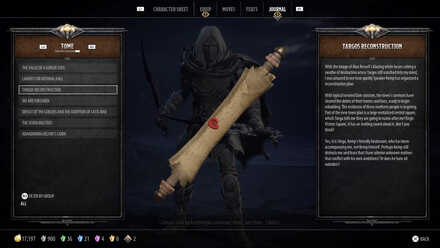
This is a guide to all Tome Locations in the game D&D: Dark Alliance. To know more about which quest you can find a particular Tome, read on!
| All Lore Objects | |
|---|---|
| Paintings | Tablets |
| Tomes | Reliefs |
List of Contents
All Tome Locations
Base Camp
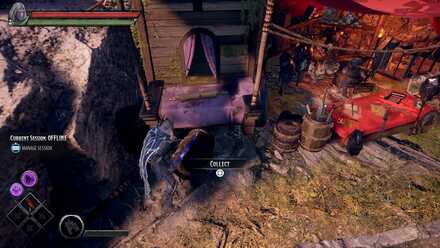
| A Missed Visit | |
|---|---|
 |
|
| How to Get: | |
| At Base Camp, there is a tome right beside the Merchant. | |
| Group |  Notes from Regis Notes from Regis |
Companions of Icewind Dale
Act I
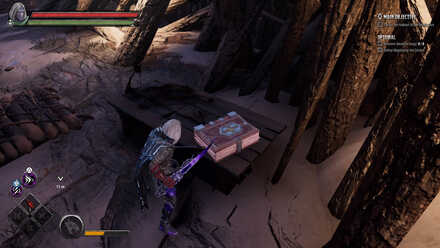
| Abandoning Kelvin's Cairn | |
|---|---|
 |
|
| How to Get: | |
| On the table where you first encounter goblins. | |
| Group | 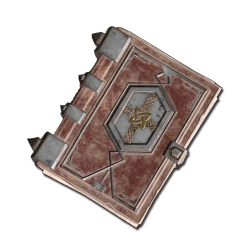 Journal of Goffin Ironmane Journal of Goffin Ironmane |
| Quest | Companions of Icewind Dale |
| Act | Goblins at the Gates |
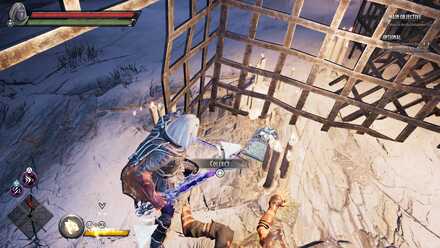
| The Seven Masters | |
|---|---|
 |
|
| How to Get: | |
| In one of the cages on the left in Battlehammer Overlook. | |
| Group | 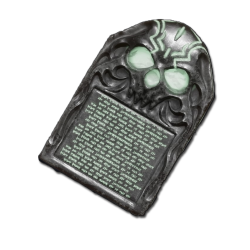 The Crenshinibonomicon The Crenshinibonomicon |
| Quest | Companions of Icewind Dale |
| Act | Goblins at the Gates |
Act II
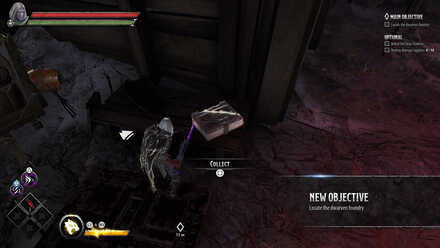
| Defeat of the Goblins and the Adoption of Catti-brie | |
|---|---|
 |
|
| How to Get: | |
| After sealing the first breach tunnel, go up your left and the Tome will be on a table in the corner. | |
| Group |  Journal of Goffin Ironmane Journal of Goffin Ironmane |
| Quest | Companions of Icewind Dale |
| Act | Halls of Duergar |
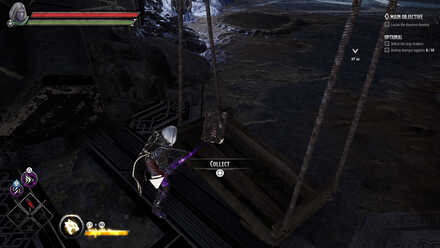
| We Are Forsaken | |
|---|---|
 |
|
| How to Get: | |
| Before entering the area with the elevator to the Foundry, trigger the red barrel to lower the platform. | |
| Group | 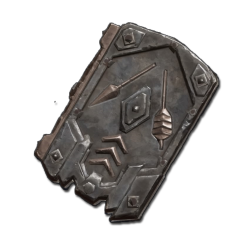 Duergar Campaign for the Shard and Icewind Dale Duergar Campaign for the Shard and Icewind Dale |
| Quest | Companions of Icewind Dale |
| Act | Halls of Duergar |
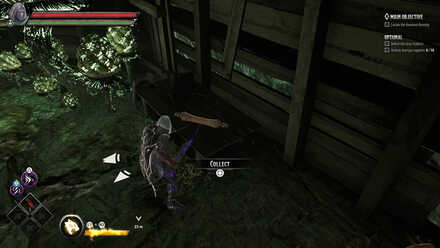
| Targos Reconstruction | |
|---|---|
 |
|
| How to Get: | |
| In the Mushroom Cave, take the lever handle and climb up the ladder. Activate the lever and cross the platform. The tome will be on a table. | |
| Group |  Notes From Regis Notes From Regis |
| Quest | Companions of Icewind Dale |
| Act | Halls of Duergar |
Act III
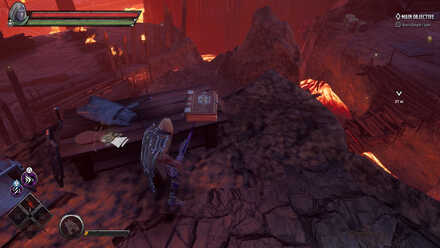
| Lament for Mithral Hall | |
|---|---|
 |
|
| How to Get: | |
| After getting an Explosive Barrel, go further up the rock formation and the tome will be on a table by a chest containing Gold. | |
| Group |  Journal of Goffin Ironmane Journal of Goffin Ironmane |
| Quest | Companions of Icewind Dale |
| Act | Bangor's Span |
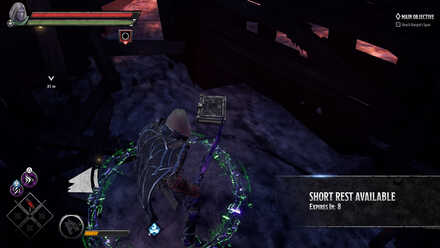
| The Value of A Goblin Soul | |
|---|---|
 |
|
| How to Get: | |
| Set the explosive barrel after clearing the area of Duergar, the tome will be inside the previously inaccessible spot. | |
| Group | 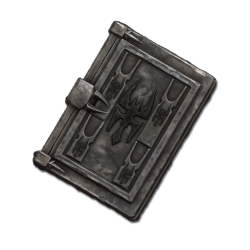 The Personal Accounting of Raddix Rotax The Personal Accounting of Raddix Rotax |
| Quest | Companions of Icewind Dale |
| Act | Bangor's Span |
Companions of Icewind Dale Walkthrough
The Goblin's Shard
Act I
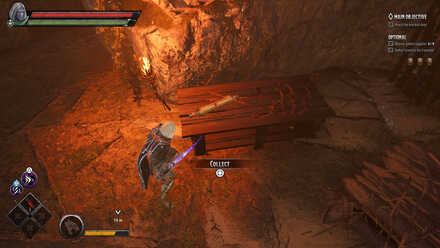
| Where Are You? | |
|---|---|
 |
|
| How to Get: | |
| In the area where you get the third Explosive Barrel, the tome is on the table in the corner. | |
| Group |  Notes From Regis Notes From Regis |
| Quest | The Goblin's Shard |
| Act | The Goblin Valley |
Act II
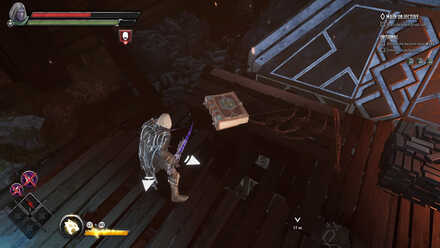
| Trials of Goblins, Orcs, Giants, Yeti, and Crag Cats | |
|---|---|
 |
|
| How to Get: | |
| After getting 3 Dwarven Runestones, the tome is on a table located on a raised platform where you can also get a lever handle. | |
| Group |  Journal of Goffin Ironmane Journal of Goffin Ironmane |
| Quest | The Goblin's Shard |
| Act | Goffin's Door |
Act III
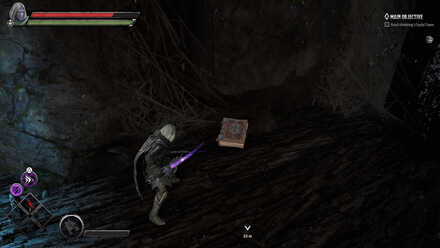
| Battle With The Orc King and Bruenor's Coronation | |
|---|---|
 |
|
| How to Get: | |
| After climbing up a ladder, the Tome is located on a raised platform next to a chest of Gold. | |
| Group |  Journal of Goffin Ironmane Journal of Goffin Ironmane |
| Quest | The Goblin's Shard |
| Act | The Goblin Tower |
The Goblin's Shard Walkthrough
Verbeeg Jamboree
Act I
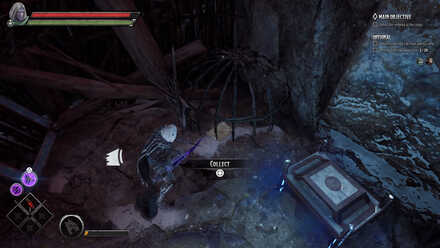
| A Celebration In My Honor | |
|---|---|
 |
|
| How to Get: | |
| Follow the quest objectives until you reach an area with some stairs (the Boss area). Instead of going up, take the path to the left of the stairs until you drop down. | |
| Group |  Notes From Regis Notes From Regis |
| Quest | Verbeeg Jamboree |
| Act | The Verbeeg Jamboree |
Act II
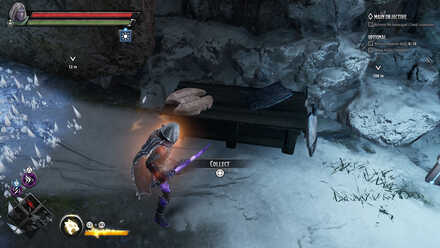
| Battle with a Frost Giant King | |
|---|---|
 |
|
| How to Get: | |
| After clearing the area with two Verbeegs, and Duergars, cross the foot bridge to the flaming sword. Free the flaming sword to get Warmth, the opposite the sword is a breakable floor. The Tome will be at the end of that ice-spiked corridor on a table next to a chest and another flaming sword. | |
| Group |  Journal of Goffin Ironmane Journal of Goffin Ironmane |
| Quest | Verbeeg Jamboree |
| Act | Designs of the Duergar |
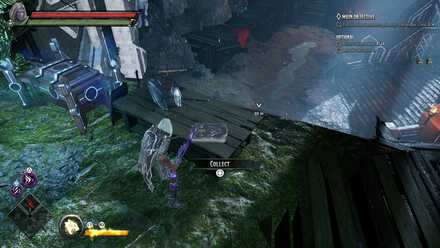
| The Dwarven Forge | |
|---|---|
 |
|
| How to Get: | |
| After clearing another area with two Verbeegs and Duergar, climb the ladder. Walk through the corridor and take right turn. Break the floor and enter. The tome will be on a table next to a chest. | |
| Group |  Duergar Campaign for the Shard and Icewind Dale Duergar Campaign for the Shard and Icewind Dale |
| Quest | Verbeeg Jamboree |
| Act | Designs of the Duergar |
Act III
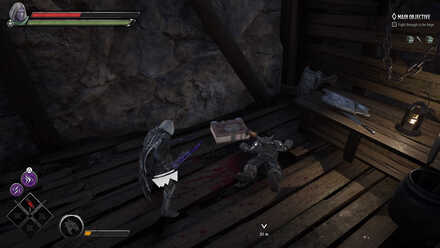
| Discovery of Chardalyn | |
|---|---|
 |
|
| How to Get: | |
| Upon reaching the Cracked Halls, take the path on the left before continuing to follow the quest objective. | |
| Group |  Journal of Goffin Ironmane Journal of Goffin Ironmane |
| Quest | Verbeeg Jamboree |
| Act | A Feast for All Cretins |
The Order of the One Light
Act I
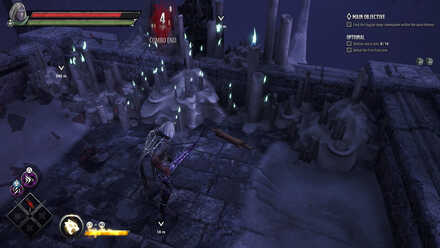
| Nothing To Do | |
|---|---|
 |
|
| How to Get: | |
| The tome will be on the floor on the left wing of the castle structure where you fight multiple Stygian Raiders. | |
| Group |  Notes From Regis Notes From Regis |
| Quest | The Order Of The Light |
| Act | An Infernal Dispute |
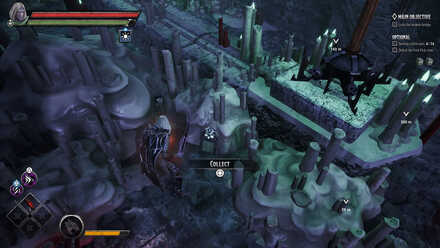
| Kelvin The Great | |
|---|---|
 |
|
| How to Get: | |
| In the area where you put the 4 Netherese Keystones, go near the flaming sword and take a right. The tome will be on the ground next to a chest. | |
| Group |  The Crenshinibonomicon The Crenshinibonomicon |
| Quest | The Order Of The Light |
| Act | An Infernal Dispute |
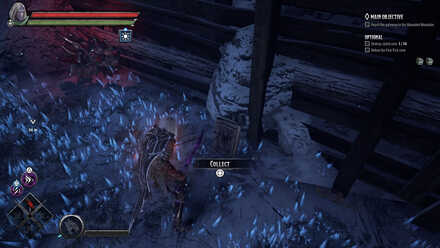
| Cultist Machinations | |
|---|---|
 |
|
| How to Get: | |
| Upon starting the quest, take a right when you see a field of ice spikes. Break the marked floor. The tome is underneath on the field of ice spikes. | |
| Group |  The Personal Accounting of Raddix Rotax The Personal Accounting of Raddix Rotax |
| Quest | The Order Of The Light |
| Act | An Infernal Dispute |
Act II
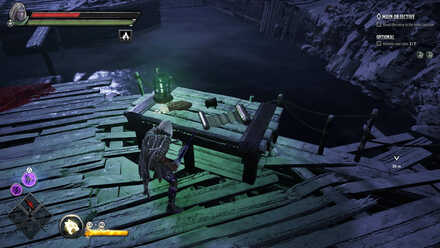
| A Desperate Bargain | |
|---|---|
 |
|
| How to Get: | |
| Follow the quest objectives until you reach an are where you fight two summoned monsters with tusks. Cross the wooden beam and the tome will be on the table. | |
| Group | 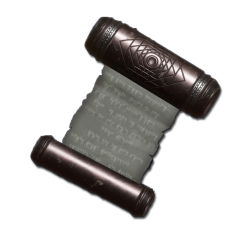 The Last Regrets of Tarajhaba The Last Regrets of Tarajhaba |
| Quest | The Order Of The Light |
| Act | Order of the One Light |
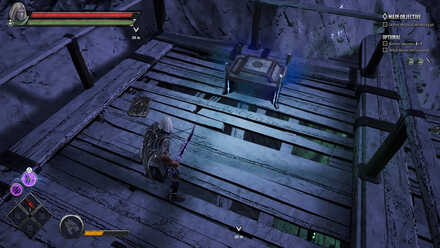
| Dominated by Hagedorn | |
|---|---|
 |
|
| How to Get: | |
| Follow the quest objective. On the second area, go up the left wooden platform where a group of cultists will ambush you. Take a left turn and the tome will be under some barrels you have to break. | |
| Group |  Duergar Campaign for the Shard and Icewind Dale Duergar Campaign for the Shard and Icewind Dale |
| Quest | The Order Of The Light |
| Act | Order of the One Light |
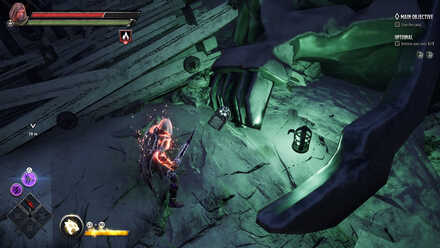
| Confluence of the Seven Worlds | |
|---|---|
 |
|
| How to Get: | |
| Go left from where you battled Orun Bentblade. After defeating the Cultists in the area a red cloth will drape over the breakable wall of wood. Climb up and the tome will be on the ground to your right. | |
| Group |  The Crenshinibonomicon The Crenshinibonomicon |
| Quest | The Order Of The Light |
| Act | Order of the One Light |
Act III
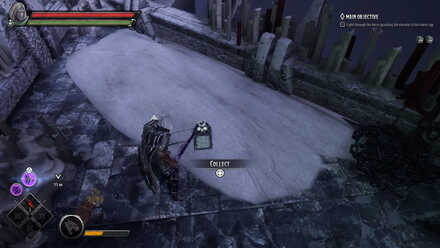
| The Purity of Ambition | |
|---|---|
 |
|
| How to Get: | |
| Go straight from the area with the ballista. After clearing the area of Duergar, the tome will be on the left side of the stairs. | |
| Group |  The Crenshinibonomicon The Crenshinibonomicon |
| Quest | The Order Of The Light |
| Act | Return of the Tyrant |
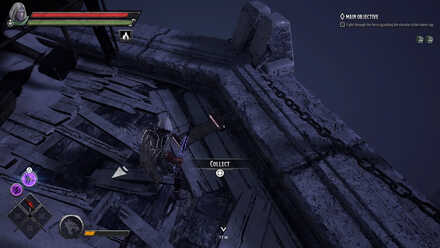
| The Return of Magic | |
|---|---|
 |
|
| How to Get: | |
| Follow the quest objective until you reach the area with a ballista. The tome will be beside the ballista. | |
| Group |  The Last Regrets of Tarajhaba The Last Regrets of Tarajhaba |
| Quest | The Order Of The Light |
| Act | Return of the Tyrant |
The Order of the One Light Walkthrough
The Mask of Kelvin
There are no tomes in Act III.
Act I
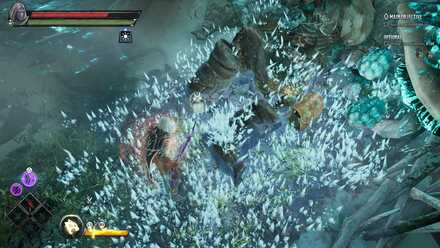
| The One Vessel | |
|---|---|
 |
|
| How to Get: | |
| After clearing the area with the Verbeeg and several goblins, jump towards the ledge and eliminate the Frost Giant. The tome will be on the ground with ice spikes. | |
| Group |  The Crenshinibonomicon The Crenshinibonomicon |
| Quest | The Mask Of Kelvin |
| Act | Ghosts of the Past |
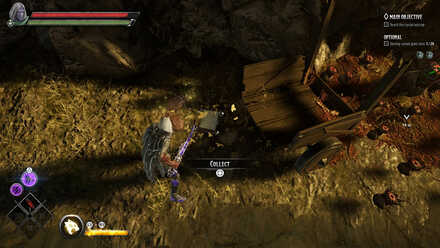
| The Search for Ythryn | |
|---|---|
 |
|
| How to Get: | |
| From the first area object, go down the pavement and you'll see a cart with lots of breakable stones surrounding it. Clear the rocks and the tome will be on the ground. | |
| Group |  The Last Regrets of Tarajhaba The Last Regrets of Tarajhaba |
| Quest | The Mask Of Kelvin |
| Act | Ghosts of the Past |
Act II
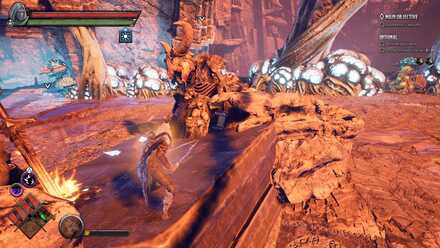
| The Ruin of the Netherese | |
|---|---|
 |
|
| How to Get: | |
| The tome is in the center piece across the flaming sword in the area where you fight the trolls. | |
| Group |  The Last Regrets of Tarajhaba The Last Regrets of Tarajhaba |
| Quest | The Mask Of Kelvin |
| Act | The Broken City |
The Mask of Kelvin Walkthrough
Crystalline Dreams
Act I
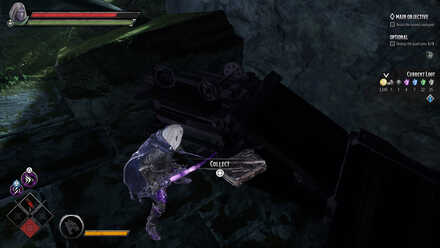
| The Call | |
|---|---|
 |
|
| How to Get: | |
| Follow the quest objective until you reach the wide area with a lot of Cultists and Duergar. After clearing the area, go up the ladder to your left then take another left before reaching the portal until a Duergar shows up. The tome will be behind a rock. | |
| Group |  Duergar Campaign for the Shard and Icewind Dale Duergar Campaign for the Shard and Icewind Dale |
| Quest | Crystalline Dreams |
| Act | The Floating City |
Act II
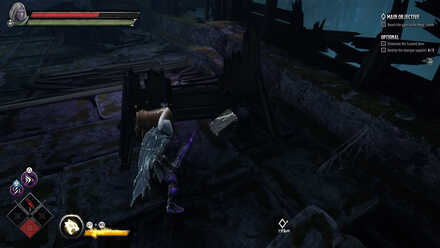
| The Journey | |
|---|---|
 |
|
| How to Get: | |
| Follow the quest objective until you reach a portal that takes you to the boss fight. Go forward and the tome will be behind a barricade next to a bag of gold. | |
| Group |  Duergar Campaign for the Shard and Icewind Dale Duergar Campaign for the Shard and Icewind Dale |
| Quest | Crystalline Dreams |
| Act | Crystal Harvest |
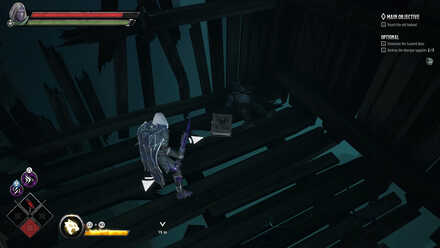
| Tribe of the Goat | |
|---|---|
 |
|
| How to Get: | |
| Follow the quest objective until you reach a platform with two Duergar a long ladder and a breakable wooden wall. The tome will be behind the wall. | |
| Group |  The Personal Accounting of Raddix Rotax The Personal Accounting of Raddix Rotax |
| Quest | Crystalline Dreams |
| Act | Crystal Harvest |
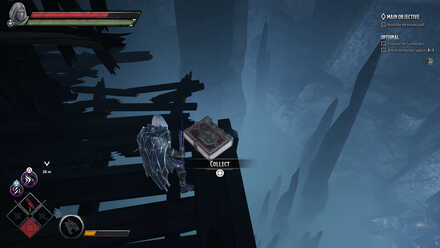
| Scouting the Valley | |
|---|---|
 |
|
| How to Get: | |
| Follow the quest objective. After clearing the area of Cultists and Duergar, look for a breakable wooden wall on your left. The tome is located on the ledge past that wooden wall. | |
| Group |  Journal of Goffin Ironmane Journal of Goffin Ironmane |
| Quest | Crystalline Dreams |
| Act | Crystal Harvest |
Act III
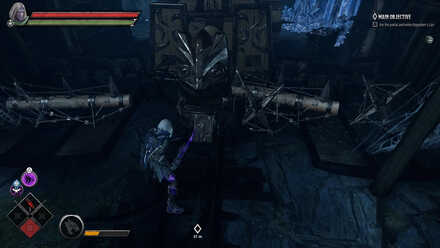
| Flight of the Battlehammers | |
|---|---|
 |
|
| How to Get: | |
| Follow the quest objective. After clearing the second area from Cultists and a Verbeeg, go to the barbed barricades by area entrance. The tome is by the base of the barricades. | |
| Group |  Duergar Campaign for the Shard and Icewind Dale Duergar Campaign for the Shard and Icewind Dale |
| Quest | Crystalline Dreams |
| Act | A Crystal Crown |
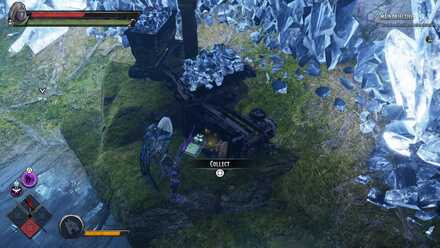
| The Power of Light | |
|---|---|
 |
|
| How to Get: | |
| Follow the quest objective. After clearing the first combat area of Duergar, walk along the right side of the area. The tome will be on elevated ground next to a bag of gold. | |
| Group |  The Crenshinibonomicon The Crenshinibonomicon |
| Quest | Crystalline Dreams |
| Act | A Crystal Crown |
Crystalline Dreams Walkthrough
The Fury of Icewind
Act I
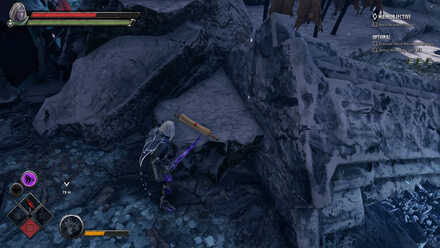
| Dwarven Housing | |
|---|---|
 |
|
| How to Get: | |
| Set the explosive barrel after clearing the area of Duergar, the tome will be inside the previously inaccessible spot. | |
| Group |  Notes From Regis Notes From Regis |
| Quest | The Fury Of Icewind |
| Act | The Hunting Grounds |
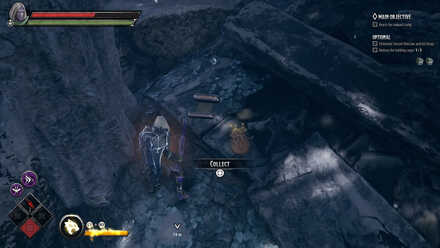
| The Founding of New Netheril | |
|---|---|
 |
|
| How to Get: | |
| Follow the quest objective until a portal takes you down to a lower portion of the map. Continue forward and take a left at the first arch you see. Go straight until you see the next arch. The tome will be on the ground, behind the right pillar of the arch. | |
| Group |  The Last Regrets of Tarajhaba The Last Regrets of Tarajhaba |
| Quest | The Fury Of Icewind |
| Act | The Hunting Grounds |
Act II
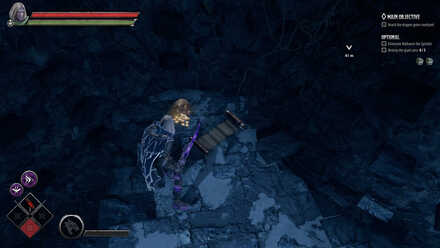
| The Flourishing of New Netheril | |
|---|---|
 |
|
| How to Get: | |
| Upon start the quest, head straight down the path until you reach a point that suggest you to jump to the other side. Instead of jumping over, go down the trench and the tome will be on the left corner. | |
| Group |  The Last Regrets of Tarajhaba The Last Regrets of Tarajhaba |
| Quest | The Fury Of Icewind |
| Act | The Hall of Judgement |
Act III
| Questions of Our Installations and Our Patrons | |
|---|---|
 |
|
| How to Get: | |
| Before riding the elevator, check the surroundings. The tome will be on the ground just by the elevator. | |
| Group |  The Last Regrets of Tarajhaba The Last Regrets of Tarajhaba |
| Quest | The Fury Of Icewind |
| Act | A Tomb of Ice |
The Fury of Icewind Walkthrough
D&D: Dark Alliance Related Links
Beginner's Guide: Tips and Tricks
Author
All Tome Locations | Lore Objects
improvement survey
03/2026
improving Game8's site?

Your answers will help us to improve our website.
Note: Please be sure not to enter any kind of personal information into your response.

We hope you continue to make use of Game8.
Rankings
- We could not find the message board you were looking for.
Gaming News
Popular Games

Genshin Impact Walkthrough & Guides Wiki

Honkai: Star Rail Walkthrough & Guides Wiki

Umamusume: Pretty Derby Walkthrough & Guides Wiki

Pokemon Pokopia Walkthrough & Guides Wiki

Resident Evil Requiem (RE9) Walkthrough & Guides Wiki

Monster Hunter Wilds Walkthrough & Guides Wiki

Wuthering Waves Walkthrough & Guides Wiki

Arknights: Endfield Walkthrough & Guides Wiki

Pokemon FireRed and LeafGreen (FRLG) Walkthrough & Guides Wiki

Pokemon TCG Pocket (PTCGP) Strategies & Guides Wiki
Recommended Games

Diablo 4: Vessel of Hatred Walkthrough & Guides Wiki

Cyberpunk 2077: Ultimate Edition Walkthrough & Guides Wiki

Fire Emblem Heroes (FEH) Walkthrough & Guides Wiki

Yu-Gi-Oh! Master Duel Walkthrough & Guides Wiki

Super Smash Bros. Ultimate Walkthrough & Guides Wiki

Pokemon Brilliant Diamond and Shining Pearl (BDSP) Walkthrough & Guides Wiki

Elden Ring Shadow of the Erdtree Walkthrough & Guides Wiki

Monster Hunter World Walkthrough & Guides Wiki

The Legend of Zelda: Tears of the Kingdom Walkthrough & Guides Wiki

Persona 3 Reload Walkthrough & Guides Wiki
All rights reserved
© 1993-2021 Wizards of the Coast LLC, a subsidiary of Hasbro, Inc. All Rights Reserved.
The copyrights of videos of games used in our content and other intellectual property rights belong to the provider of the game.
The contents we provide on this site were created personally by members of the Game8 editorial department.
We refuse the right to reuse or repost content taken without our permission such as data or images to other sites.





![Monster Hunter Stories 3 Review [First Impressions] | Simply Rejuvenating](https://img.game8.co/4438641/2a31b7702bd70e78ec8efd24661dacda.jpeg/thumb)


