Chirping Secret Treasure? Mission Guide
★ Exclusive: Check out the State of Meta in 4.0!
♦ Latest: 4.1 Livestream Redeem Codes
♦ Phase 2: Sparkxie, Sparkle, Cerydra, Rappa
♦ Upcoming: Ashveil, Silver Wolf Lv.999, Evanescia
♦ Events: Cosmicon, Roll On!, Ding! Arcadia Fun-Time Clock-In Essentials
Chirping Secret Treasure? is an Adventure Mission in Honkai: Star Rail. Check out how to unlock this mission, its walkthrough, rewards for completion, and all choices in this guide!
List of Contents
How to Unlock Chirping Secret Treasure?
Explore Dragonbone City
Styxia
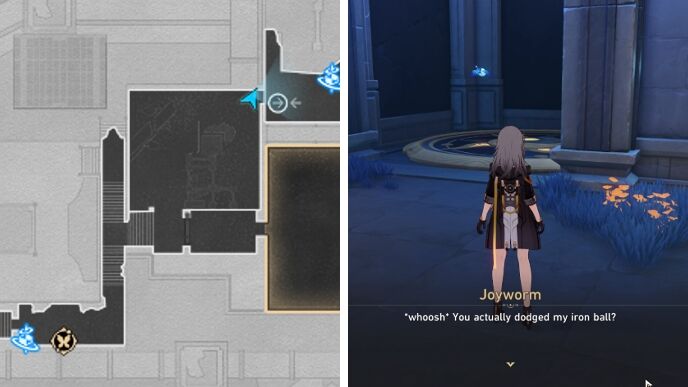
Chirping Secret Treasure? can be unlocked by going to the elevator near the Temple of Ages in "Dragonbone City" Styxia.
From the Royal Palace Ruins Space Anchor, climb up the two flights of stairs then turn left instead of proceeding into the Puzzle room. Head towards the elevator but dodge the iron ball that will roll towards you when nearing it. Joyworm will then start a dialogue that will officially start the mission.
Chirping Secret Treasure? Walkthrough
How to Complete Chirping Secret Treasure?
- Step 1: Speak With the Nymph
- Step 2: Solve the Puzzle in the Room (I)
- Step 3: Enter the Unlocked Room (I)
- Step 4: Speak With Joyworm
- Step 5: Solve the Puzzle in the Room (II)
- Step 6: Enter the Unlocked Room (II)
- Step 7: Speak With Joyworm
- Step 8: Solve the Puzzle in the Room (III)
- Step 9: Enter the Unlocked Room (III)
Speak With the Nymph
After accepting the mission, take the nearby elevator. Talk to Joyworm who is near the entrance of the Template of Ages.
Solve the Puzzle in the Room (I)
| Puzzle I Walkthrough | |
|---|---|
| 1 | 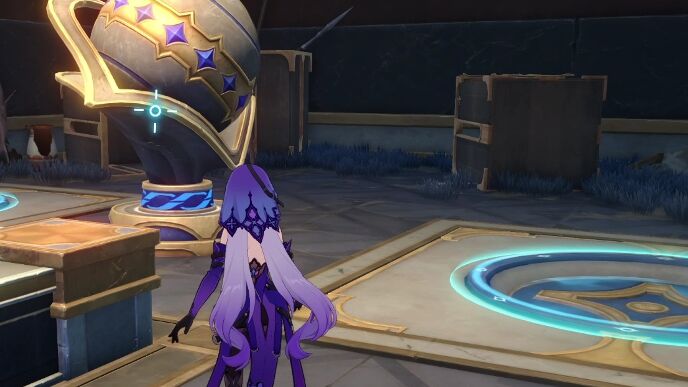 Break the base of the Ball Statue behind the Chrono Vessel. The ball should roll onto the upper right slot. |
| 2 | 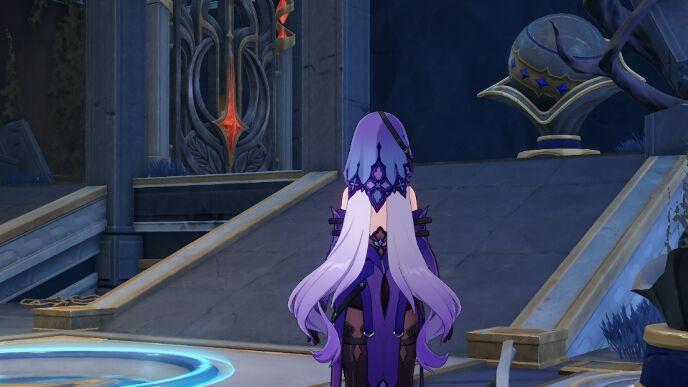 Break the base of the Ball Statue found up the ramp on the right side. Get ready to do Step 3 in quick succession. |
| 3 | 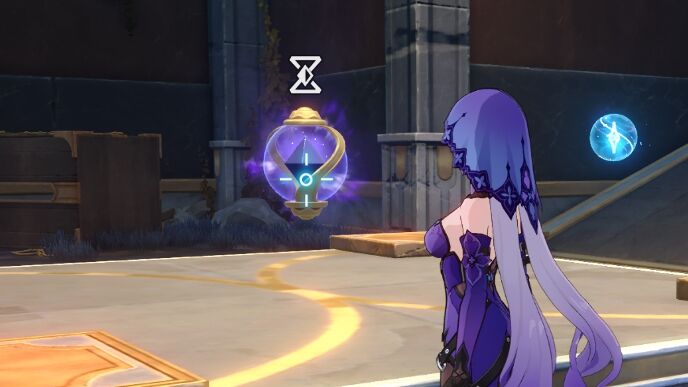 Break the Chrono Vessel as the ball from Step 2 rolls onto the lower left slot. |
| 4 | 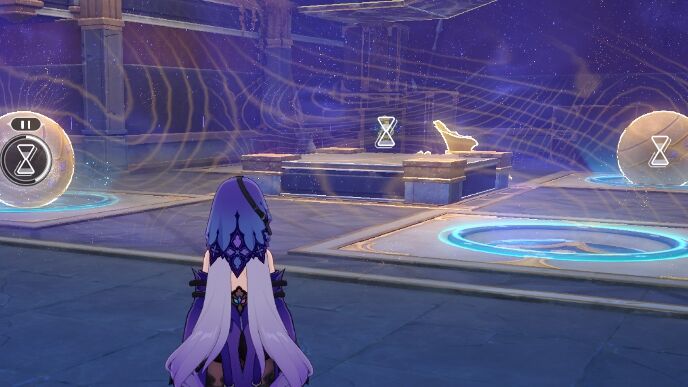 The puzzle should be completed with a ball on the upper right slot and a ball on the lower left slot. |
Enter the Unlocked Room (I)
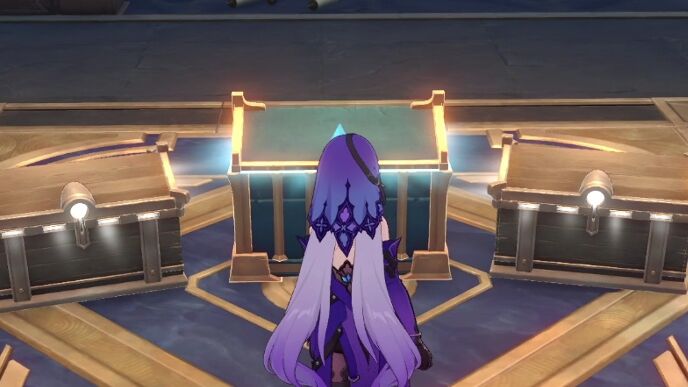
The door in the right side of the puzzle room should now be unlocked. Enter it and keep moving forward until you reach a room containing two Basic Treasures and one Bountiful Treasure.
After opening all Treasure Chests in the room, Joyworm will briefly and tell you to meet them at the beginning of the puzzle room again. However, you will be required to move forward instead of simply turning back to reach the room.
Speak With Joyworm
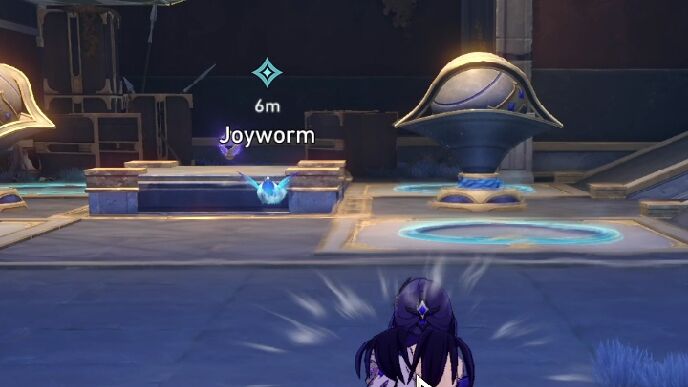
Talk to Joyworm, who is once again standing near the entrance of the building.
Solve the Puzzle in the Room (II)
| Puzzle II Walkthrough | |
|---|---|
| 1 | 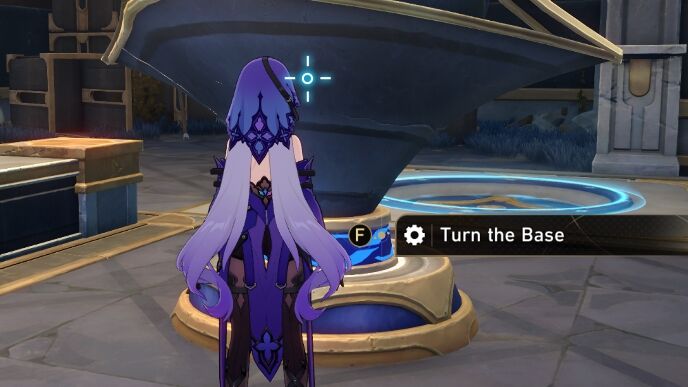 Rotate the Ball Statue to the right of the Chrono Vessel so it is facing the entrance. |
| 2 | 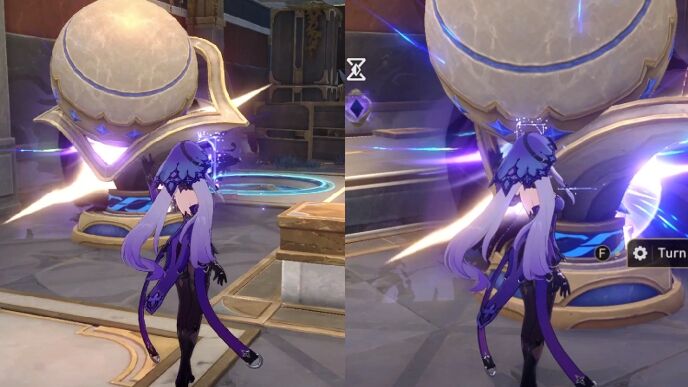 Break the bases of the Ball Statues beside the Chrono Vessel. The balls should roll onto the lower left and lower right slots. |
| 3 |  Break the Chrono Vessel. |
| 4 | 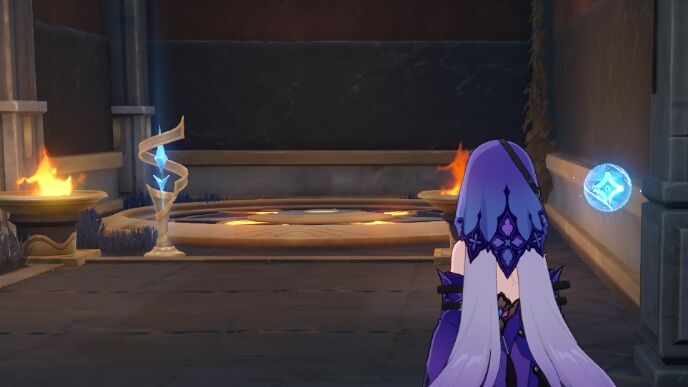 Take the elevator that's on the left side of the room. Cross the unstable bridge to find the third Ball Statue needed for this puzzle. The Prophecy Tablet must be solved first in order to access the elevator. |
| 5 | 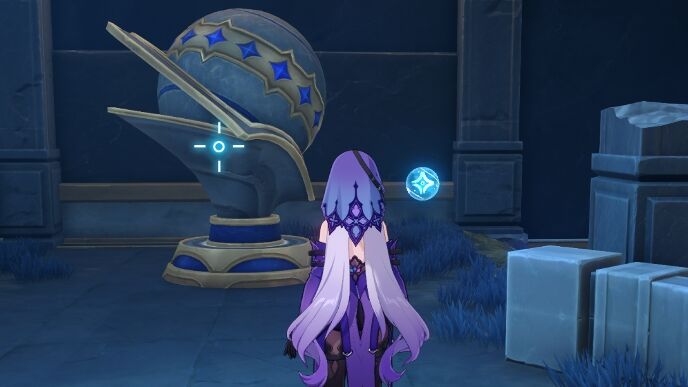 Break the base of the Ball Statue and take the elevator once again to go back down. |
| 6 | 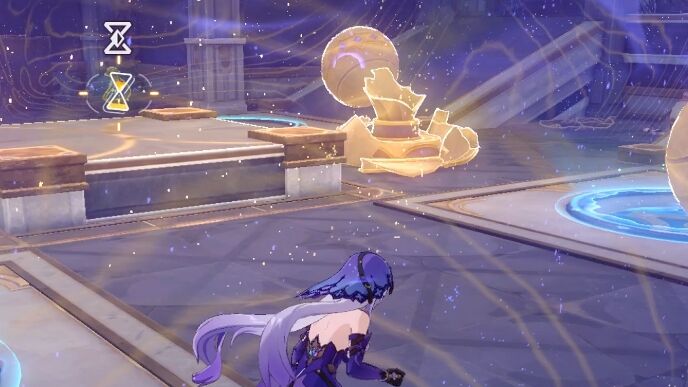 The third ball should be in the Time Stoppped zone. Restore the Chrono Vessel and break it once again once the third ball has rolled onto the upper left slot. |
| 7 | 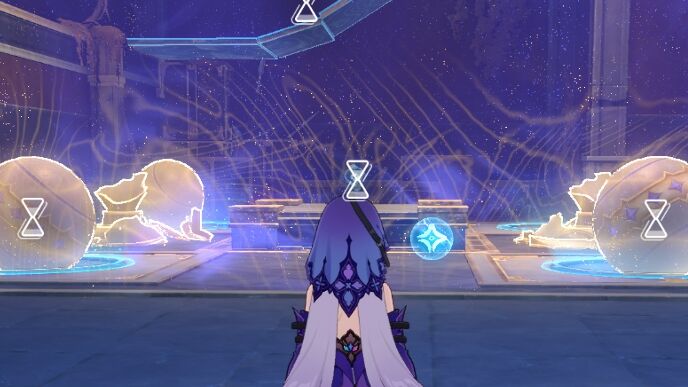 The puzzle should be completed with a ball on the upper left slot, a ball on the lower left slot, and a ball on the lower right slot. |
Enter the Unlocked Room (II)
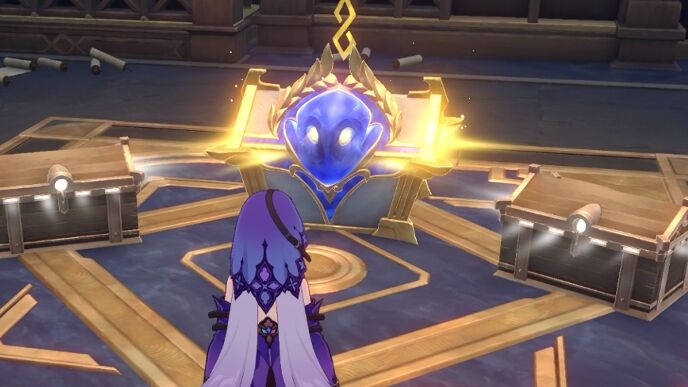
Similar to a previous step, go through the now unlocked room to the right until you reach a room with Treasure Chests. This time, it will be a Precious Treasure instead of a Bountiful Treasure. The two Basic Treasures are still present however.
Joyworm will appear again to tell you to meet them back at the beginning.
Speak With Joyworm
Talk to Joyworm, who is once again standing near the entrance of the building.
Solve the Puzzle in the Room (III)
| Puzzle III Walkthrough | |
|---|---|
| 1 | 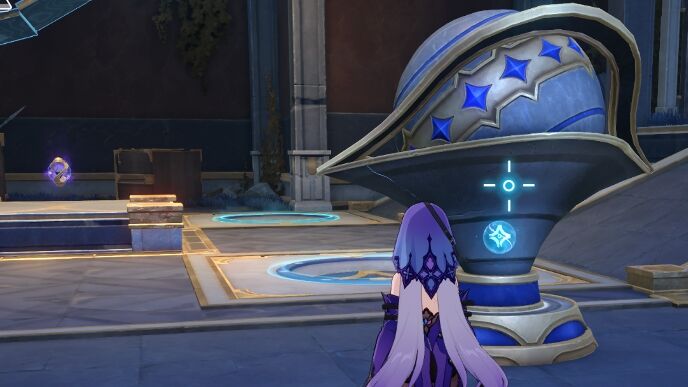 Break the base of the Ball Statue found near the lower right slot. Get ready to do Step 2 in quick succession. |
| 2 | 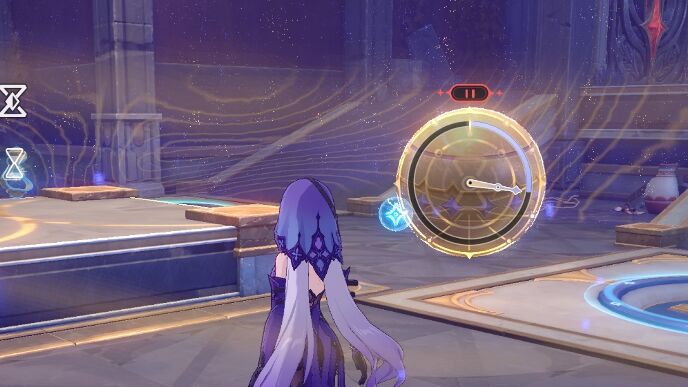 Break the Chrono Vessel once the first ball is just past the lower right slot. If it is near the upper right slot, you may need to rewind due to the third ball possibly colliding into it later on. |
| 3 | 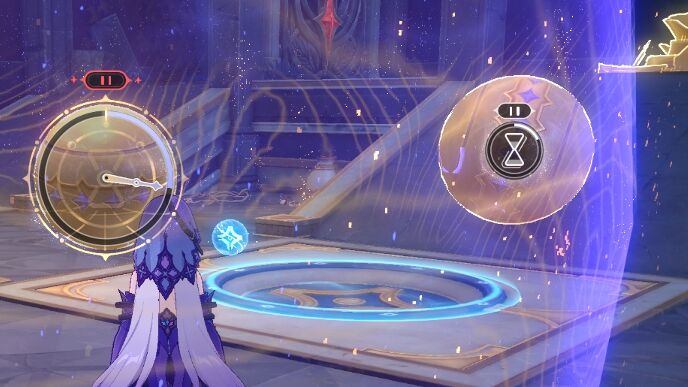 Break the base of the Ball Statue found up the ramp on the right side. This ball should be stopped due to the Time Stopped zone. |
| 4 |  Take the elevator that's on the left side of the room. Cross the unstable bridge to find the third Ball Statue needed for this puzzle. |
| 5 |  Break the base of the Ball Statue and take the elevator once again to go back down. |
| 6 | 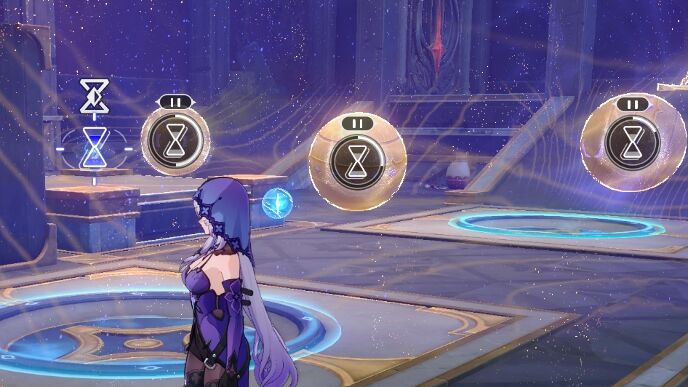 The third ball should be in the Time Stoppped zone as well. Restore the Chrono Vessel and break it once again once the third ball has rolled onto the upper left slot. |
| 7 | 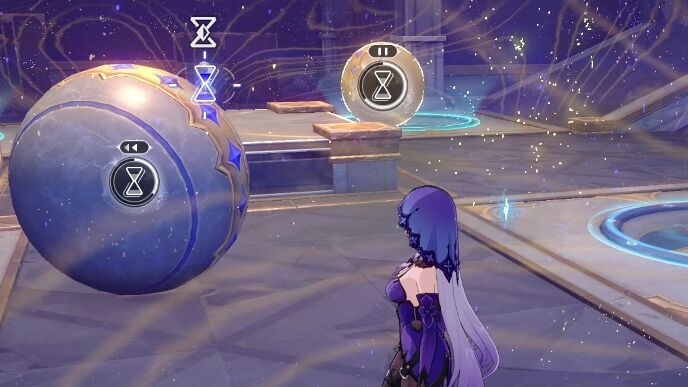 Use the Shrine of Prayers and rewind the ball from Step 3 until it is on the lower right slot. |
| 8 | 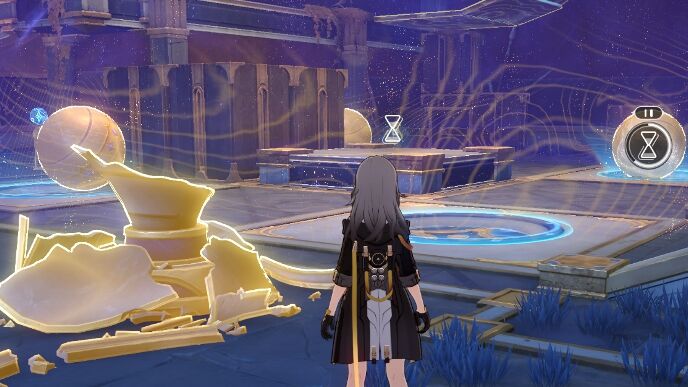 The puzzle should be completed with a ball on the upper left slot, a ball on the upper right slot, and a ball on the lower right slot. |
Enter the Unlocked Room (III)
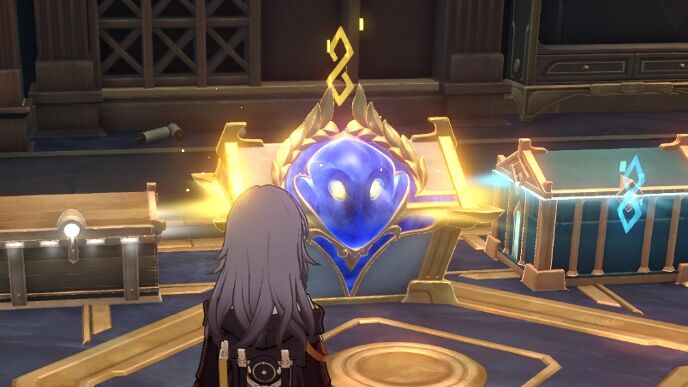
Once again, go through the unlocked room to the right until you reach a room with Treasure Chests. This time, it will be a Precious Treasure, a Bountiful Treasure, and a Basic Treasure.
Once all chests are opened, Joyworm will appear again for one last conversation before the mission ends.
Chirping Secret Treasure? Rewards
List of Mission Rewards
| Mission Rewards | ||
|---|---|---|
 Stellar Jade
x10 Stellar Jade
x10 |
 Credit
x5000 Credit
x5000 |
|
Unlock the Insect Companion's Return Achievement
The player will also obtain the Insect Companion's Return achievement upon completion of this mission. The achievement provides the player 5 Stellar Jades.
Honkai: Star Rail Related Guides

All Missions and Mission Types
All Amphoreus Mission Guides
| Amphoreus Mission Guides | As I've Written | Bartholos's Troubles | Chirping Secret |
|---|---|---|
| Chirping Secret Treasure? | Disquieting Dream | Golden Scapegoat |
| I Once Was In Arcadia | Love in the Time of Black Tide | Where Stone and Wind Stood Still |
| Whereto Shall We Go | ||
Comment
It's related to Bartholos in the room with the ball puzzle. Reset the frozen time first, when you can control the balls again. I'm not sure what trigger the appearance of Bartholos, but after being knocked out by the ball that rolls far across the room (Not the highest one), he appears and brought me to a secret treasure room.
Author
Chirping Secret Treasure? Mission Guide
improvement survey
03/2026
improving Game8's site?

Your answers will help us to improve our website.
Note: Please be sure not to enter any kind of personal information into your response.

We hope you continue to make use of Game8.
Premium Articles
Rankings
Gaming News
Popular Games

Genshin Impact Walkthrough & Guides Wiki

Honkai: Star Rail Walkthrough & Guides Wiki

Umamusume: Pretty Derby Walkthrough & Guides Wiki

Pokemon Pokopia Walkthrough & Guides Wiki

Resident Evil Requiem (RE9) Walkthrough & Guides Wiki

Monster Hunter Wilds Walkthrough & Guides Wiki

Wuthering Waves Walkthrough & Guides Wiki

Arknights: Endfield Walkthrough & Guides Wiki

Pokemon FireRed and LeafGreen (FRLG) Walkthrough & Guides Wiki

Pokemon TCG Pocket (PTCGP) Strategies & Guides Wiki
Recommended Games

Diablo 4: Vessel of Hatred Walkthrough & Guides Wiki

Fire Emblem Heroes (FEH) Walkthrough & Guides Wiki

Yu-Gi-Oh! Master Duel Walkthrough & Guides Wiki

Super Smash Bros. Ultimate Walkthrough & Guides Wiki

Pokemon Brilliant Diamond and Shining Pearl (BDSP) Walkthrough & Guides Wiki

Elden Ring Shadow of the Erdtree Walkthrough & Guides Wiki

Monster Hunter World Walkthrough & Guides Wiki

The Legend of Zelda: Tears of the Kingdom Walkthrough & Guides Wiki

Persona 3 Reload Walkthrough & Guides Wiki

Cyberpunk 2077: Ultimate Edition Walkthrough & Guides Wiki
All rights reserved
Copyright © 2024 HoYoverse, COGNOSPHERE. All Rights Reserved.
The copyrights of videos of games used in our content and other intellectual property rights belong to the provider of the game.
The contents we provide on this site were created personally by members of the Game8 editorial department.
We refuse the right to reuse or repost content taken without our permission such as data or images to other sites.


![Everwind Review [Early Access] | The Shaky First Step to A Very Long Journey](https://img.game8.co/4440226/ab079b1153298a042633dd1ef51e878e.png/thumb)

![Monster Hunter Stories 3 Review [First Impressions] | Simply Rejuvenating](https://img.game8.co/4438641/2a31b7702bd70e78ec8efd24661dacda.jpeg/thumb)


Use the entrance as the main path and read the instructions after collecting 10 nymphs. First, hit the ball on the slope, then the ball on the top. Return to the ground and use the power of Oronyx to guide the ball into the hole. After the dialog box appears as in the instructions, cancel the rewind. Then hit the ball on the ground and let the ball go through both holes.