This survey will take about 1 minute.
Your answers will help us to improve our website.
Honkai: Star Rail
The Adventurous Moles Quest Guide and Locations
★ Exclusive: Check out the State of Meta in 4.0!
♦ Latest: 4.1 Livestream Redeem Codes
♦ Phase 2: Sparkxie, Sparkle, Cerydra, Rappa
♦ Upcoming: Ashveil, Silver Wolf Lv.999, Evanescia
♦ Events: Cosmicon, Roll On!, Ding! Arcadia Fun-Time Clock-In Essentials
The Adventurous Moles is an Adventure Mission in Honkai: Star Rail. See all the Adventurous Mole pages and treasures locations, a complete walkthrough of the quest, and its rewards here!
List of Contents
The Adventurous Moles Information
| Mission Type | Adventure Mission |
|---|---|
| Location | Jarilo-VI, Boulder Town |
| Required Level | 24 |
| Client | Julian |
How to Unlock The Adventurous Moles
Quest Unlock Requirements
| How to Unlock | |
|---|---|
Finish Silent Galaxy Trailblaze Mission

To unlock The Adventurous Moles, you must complete Silent Galaxy. This quest is the last mission of the Trailblaze Mission Series, In The Sweltering Morning Sun!
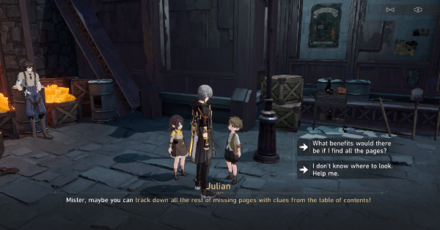
Speak to Julian in Boulder Town
| Map Location | World View |
|---|---|
 |
 |
Once you've defeated Cocolia and finished the Jarilo-VI Trailblaze Missions, a new quest marker will appear in Boulder Town. Seek out Julian beside the entrance to Natasha's Clinic and speak to him to trigger the Adventurous Moles quest.
The Adventurous Moles Page and Treasure Locations
| Page | Clue and Treasure Location |
|---|---|
| The Missing Miner's Lamp |  Great Mine, Lamp Puzzle |
| The Unexpected Parchment |  Backwater Pass, Chair Puzzle |
| The Crates Are the Keys |  Rivet Town, Crate Puzzle |
| Treasure Hunt on the Battlefield |  Silvermane Guard Restricted Zone, Gun Puzzle |
Click on a link to jump to a specific clue and treasure walkthrough section.
The Adventurous Moles Walkthrough
- Head to the Great Mine
- Find the Great Mine Page and Treasure
- Return to Julian
- Find the Backwater Pass Page and Treasure
- Find the Rivet Town Page and Treasure
- Find the Silvermane Guard Restricted Zone Page and Treasure
- Bring the Pages to Julian
- Speak to Nika
Head to the Great Mine
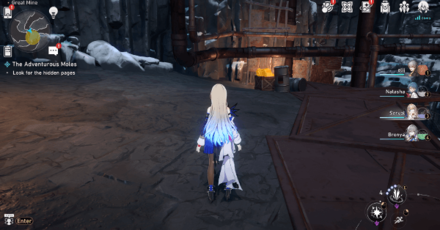
After speaking to Julian to get the quest, make your way to the Great Mine. There are a total of four pages, and the first page is in the Great Mine.
Find the Great Mine Page and Treasure
| Map Location | World View |
|---|---|
 |
 |
Once at the mines, go to the area marked by a yellow circle to begin your search. The missing page titled The Missing Miner's Lamp can be found on top of a barrel next to some Geomarrow crates.
Teleport to the Overlook space anchor to make the trek to the page location quicker.
Place the Lamp on the Section With No Lamp

To find the treasure in the Great Mine, pick up the Miner's Lamp when you arrive at the puzzle area. Then, place it on the only section of pipe that does not have a lamp yet to reveal the treasure chest.
▲ Back to Treasure Locations ▲
Return to Julian
Once you've collected the treasure, return to Julian in Boulder Town and discuss your findings. He will ask you to find the last 3 pages of the Adventurous Moles.
Find the Backwater Pass Page and Treasure
| Map Location | World View |
|---|---|
 |
 |
The next page can be found in Backwater Pass. The missing page titled The Unexpected Parchment can be found on a bench beside the open-air cafe in the southeast section of Backwater Pass.
Teleport to the Transport Hub space anchor to make the trek to the open-air cafe quicker.
Lay the Chair Flat on the Ground

To find the treasure, look for a chair stacked on top of one of the open-air cafe tables. Pick it up and choose the option to Lay It Flat on the Ground to make the treasure chest appear.
▲ Back to Treasure Locations ▲
Find the Rivet Town Page and Treasure
| Map Location | World View |
|---|---|
 |
 |
The next page can be found in Rivet Town. The missing page titled The Crates Are the Keys can be found on a table beside some stacked gray barrels in the Abandoned Market area of Rivet Town.
Teleport to the Abandoned Market space anchor and head towards the northwest corner of Rivet Town to find the table with the clue.
Stack the Shelves in the Same Manner
| 4 Box Shelf | 2 Box Shelf |
|---|---|
 Pick up the crate in the middle. |
 Place it on the top. |
To find the treasure, go to the shelf with 4 boxes and choose the option to pick up the crate in the middle. Bring the crate to the shelf with 2 boxes and choose the option to place it on the top. This will reveal the treasure chest that you can loot.
▲ Back to Treasure Locations ▲
Find the Silvermane Guard Restricted Zone Page and Treasure
| Map Location | World View |
|---|---|
 |
 |
The final page can be found in the Silvermane Guard Restricted Zone. The missing page titled Treasure Hunt on the Battlefield can be found stuck to one of the walls on the western side of the Restricted Zone, near the barricades with discarded guns.
Place 3 Guns on Each Gun Rack

To find the treasure, you will need to pick up the guns scattered on the ground and place them on the Gun Racks in the area. Make sure each Gun Rack only has 3 Guns in it. Once all 3 Gun Racks have 3 guns each, the treasure chest will appear.
▲ Back to Treasure Locations ▲
Bring the Pages to Julian

Once you have found all the pages, return to Julian in Boulder Town with the pages you've collected. Proceed with the dialogue and you will be asked to go to Nika in the Administrative District.
Speak to Nika

Bring the collected pages to Nika in the Administrative District. She will compile and publish the book, which marks the end of this Adventure Mission!
The Adventurous Moles Rewards
| Mission Rewards | ||
|---|---|---|
 Trailblaze EXP
x100 Trailblaze EXP
x100 |
 Stellar Jade
x30 Stellar Jade
x30 |
 Shield
x100 Shield
x100 |
 Sparse Aether
x6 Sparse Aether
x6 |
 Credit
x6000 Credit
x6000 |
|
Honkai: Star Rail Related Guides

All Missions and Mission Types
All Jarilo-VI Mission Guides
Comment
4  Anonymous over 2 years
So I got that the middle crate goes on top, that was simple to figure out, what I don’t get is how to get the option to put the one from the middle on the top. Game will only give me the option to put it back in the middle. How do I unlock the option to put the crate on the top shelf?
Author

The Adventurous Moles Quest Guide and Locations
Please participate in our site
improvement survey
03/2026
improvement survey
03/2026
Would you assist in
improving Game8's site?
improving Game8's site?

×
We are listening to our users' valuable opinions and discussing how to act on them.
The information collected through this survey will be used for the purpose of improving our services. In addition, the information will only be disclosed a part of a statistic in a format that will not allow identification of personal information.
Begin Survey
Not Now
×
Please rate each item regarding Game8.co's Advertisements.
Amount of Ads
Very Dissatisfied
Somewhat Dissatisfied
Fine
Somewhat Satisfied
Highly Satisfied
Placement of Ads
Timing of Ad Display
Ad Loading Speed
Safeness of Ads
Content of Ads
×
Please rate each item regarding Game8.co's Quality of Articles.
Amount of information
Very Dissatisfied
Somewhat Dissatisfied
Fine
Somewhat Satisfied
Highly Satisfied
Frequency of updates
Speed of new information
Accuracy of articles
Understandibility of articles
Readability of sentences
×
Please rate each item regarding Game8.co's Usability of the Site.
Ease of finding information
Very Dissatisfied
Somewhat Dissatisfied
Fine
Somewhat Satisfied
Highly Satisfied
Loading Speed
Use of Color
Font Size
Visibility of Images
Easy to Understand Layout
×
Please rate each item regarding Game8.co's Message Boards, Comments.
Ease of Writing
Very Dissatisfied
Somewhat Dissatisfied
Fine
Somewhat Satisfied
Highly Satisfied
Readability
Ease in Finding Information
Comment Quality
Comment Quantity
Admin Response
×
Please rate each item regarding Game8.co's Site's new design.
Please rate our site's new design
Very Dissatisfied
Somewhat Dissatisfied
Fine
Somewhat Satisfied
Highly Satisfied
Do you think that the website's design change makes the site easier to use?
Has the new design made it easier for you to find information on the site?
Has the new design improved the overall visual appeal of the site?
How would you rate your overall satisfaction with the new design of the site?
×
How likely are you to recommend Game8 to someone you know?
Very Unlikely
0
1
2
3
4
5
6
7
8
9
10
Very Likely
If you have other opinions regarding potential improvement to the website, please share them with us. We would appreciate your honest opinion.
Note: This is a free response section, so you can proceed without entering anything.
Note: Please be sure not to enter any kind of personal information into your response.
Note: Please be sure not to enter any kind of personal information into your response.
×
Thank You
×
Thank you for participating in our survey! Your answers will help us to improve the quality of our website and services.
We hope you continue to make use of Game8.
We hope you continue to make use of Game8.
Close
Premium Articles

Rankings
Gaming News


![Everwind Review [Early Access] | The Shaky First Step to A Very Long Journey](https://img.game8.co/4440226/ab079b1153298a042633dd1ef51e878e.png/thumb)

![Monster Hunter Stories 3 Review [First Impressions] | Simply Rejuvenating](https://img.game8.co/4438641/2a31b7702bd70e78ec8efd24661dacda.jpeg/thumb)
Popular Games

Genshin Impact Walkthrough & Guides Wiki
Honkai: Star Rail Walkthrough & Guides Wiki
Umamusume: Pretty Derby Walkthrough & Guides Wiki
Pokemon Pokopia Walkthrough & Guides Wiki
Resident Evil Requiem (RE9) Walkthrough & Guides Wiki
Monster Hunter Wilds Walkthrough & Guides Wiki
Wuthering Waves Walkthrough & Guides Wiki
Arknights: Endfield Walkthrough & Guides Wiki
Pokemon FireRed and LeafGreen (FRLG) Walkthrough & Guides Wiki
Pokemon TCG Pocket (PTCGP) Strategies & Guides Wiki


Recommended Games
Diablo 4: Vessel of Hatred Walkthrough & Guides Wiki
Fire Emblem Heroes (FEH) Walkthrough & Guides Wiki
Yu-Gi-Oh! Master Duel Walkthrough & Guides Wiki
Super Smash Bros. Ultimate Walkthrough & Guides Wiki
Pokemon Brilliant Diamond and Shining Pearl (BDSP) Walkthrough & Guides Wiki
Elden Ring Shadow of the Erdtree Walkthrough & Guides Wiki
Monster Hunter World Walkthrough & Guides Wiki
The Legend of Zelda: Tears of the Kingdom Walkthrough & Guides Wiki
Persona 3 Reload Walkthrough & Guides Wiki
Cyberpunk 2077: Ultimate Edition Walkthrough & Guides Wiki


All rights reserved
Copyright © 2024 HoYoverse, COGNOSPHERE. All Rights Reserved.
The copyrights of videos of games used in our content and other intellectual property rights belong to the provider of the game.
The contents we provide on this site were created personally by members of the Game8 editorial department.
We refuse the right to reuse or repost content taken without our permission such as data or images to other sites.
I came here for the Great Mine page as i cannot find a single puzzle area and I am still none the wiser - I have looked around the entire 'puzzle area' you highlighted and couldn't find a lamp, nor the lamps on the fence. I think I remember doing such a puzzle outside of the quest but I do not own this page. Frustrated that the guide references a non-existent yellow circle for part of that area's page and has not helped me at all.